
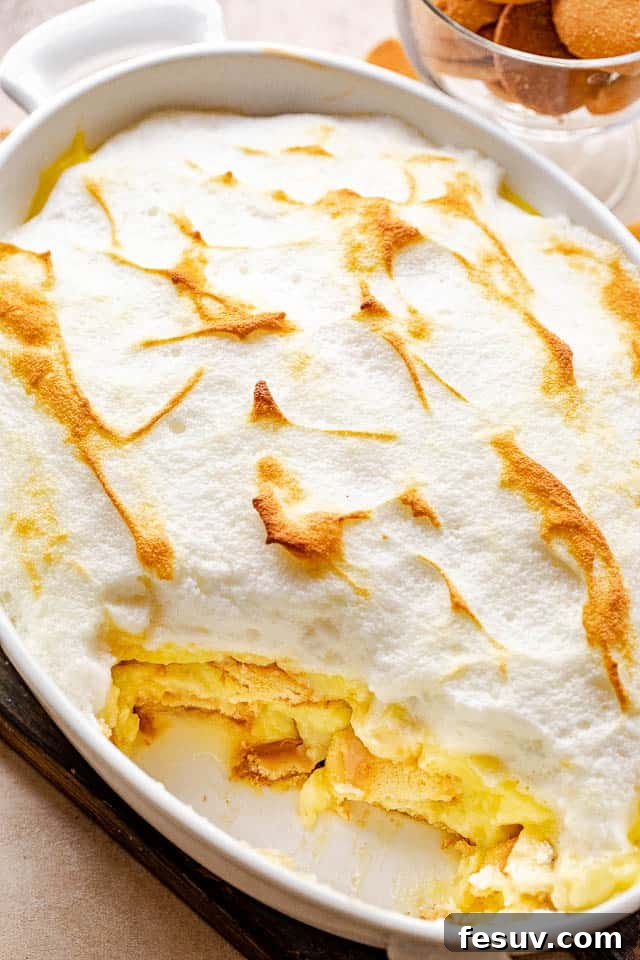
Homemade Banana Pudding: A Classic Southern Dessert from Scratch
There’s nothing quite like a luscious, creamy bowl of Homemade Banana Pudding to evoke feelings of warmth and comfort. This timeless Southern dessert, with its delightful layers of sweet, ripe banana slices, crisp vanilla wafers, and velvety smooth homemade vanilla pudding, is an absolute crowd-pleaser. Forget the boxed mixes; making banana pudding from scratch is surprisingly easy and yields a profoundly richer flavor and texture that simply can’t be beaten. It’s a simple, no-bake treat (unless you opt for the optional meringue topping) that requires just a handful of everyday ingredients and a little patience for chilling. Whether you’re preparing it for a festive gathering, a family meal, or simply to satisfy a craving for something sweet and comforting, this recipe promises to deliver pure, unadulterated joy in every spoon.
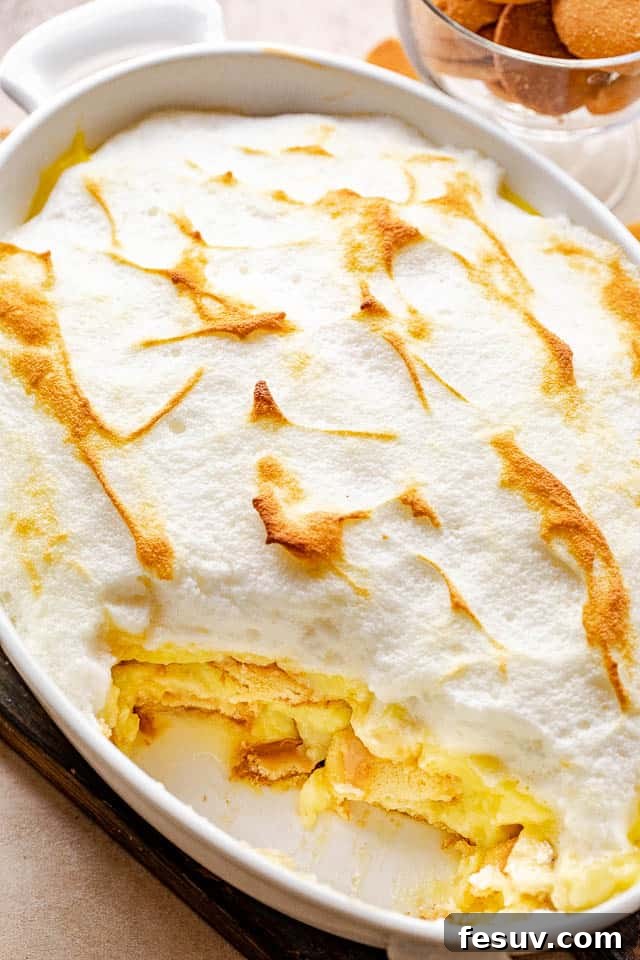
Why You’ll Love This Easy Homemade Banana Pudding Recipe
This isn’t just another dessert recipe; it’s a culinary experience that brings smiles and satisfaction. Here’s why this particular easy banana pudding recipe will quickly become a cherished favorite:
- Unrivaled Flavor: The homemade vanilla pudding provides a depth of flavor far superior to instant versions. It’s rich, subtly sweet, and forms the perfect creamy canvas for the fresh bananas and wafers.
- Simple Ingredients, Incredible Results: You don’t need fancy components. With basic pantry staples like sugar, flour, milk, eggs, vanilla, bananas, and vanilla wafers, you can create a dessert that tastes gourmet.
- No-Bake Convenience: While the pudding is cooked on the stovetop, the final assembly and chilling process require no oven, making it ideal for warmer months or when you need a stress-free dessert. (An optional meringue topping does require a brief bake, but it’s entirely up to you!)
- Comfort Food at Its Best: Banana pudding is quintessential Southern comfort food. Its sweet, indulgent profile and creamy texture make it perfect for any occasion, from casual weeknight desserts to special celebrations.
- Customizable: While perfect as is, this recipe offers a fantastic foundation for your creative touches. Add a meringue topping, whipped cream, or even a drizzle of caramel.
If you’re a true banana enthusiast and love this classic, you might also enjoy my Banana Pudding Cupcakes for a different take on the beloved flavors!
The Magic of Making Pudding From Scratch
The heart of an exceptional banana pudding lies in its custard. While instant pudding mixes offer convenience, crafting your pudding from scratch elevates this dessert to an entirely new level. Homemade pudding boasts a silky-smooth texture, a rich, genuine vanilla flavor, and a satisfying creaminess that boxed versions simply cannot replicate. It’s an investment of about 15 minutes of active cooking, but the payoff is immense. You have control over the sweetness and consistency, ensuring a pudding that is perfectly balanced and utterly delightful. This method guarantees a custard that lovingly coats each banana slice and softens the vanilla wafers to that irresistible melt-in-your-mouth perfection.
Essential Ingredients for Your Homemade Banana Pudding
Gathering your ingredients is the first step to creating this delightful dessert. Each component plays a crucial role in achieving the perfect balance of flavor and texture:
- Granulated Sugar: Provides the essential sweetness to our creamy pudding base.
- All-Purpose Flour: Acts as a thickening agent for the pudding, giving it that luxurious, smooth consistency.
- Salt: Just a pinch enhances all the other flavors, balancing the sweetness and adding depth.
- Milk: For the creamiest pudding, use 2% milk or whole milk. The higher fat content contributes significantly to the richness and mouthfeel.
- Large Eggs: These are vital for custard-like richness and serve as another thickening agent, contributing to the pudding’s velvety texture.
- Pure Vanilla Extract: Don’t skimp on quality here! A good pure vanilla extract makes a huge difference in the overall flavor profile of your pudding.
- Vanilla Wafers: The iconic crunchy base that softens beautifully as it soaks up the pudding and banana flavors. You’ll need enough to create two distinct layers.
- Bananas: The star of the show! You’ll need about 4 large bananas, sliced into uniform 1/4-inch pieces. Choose bananas that are ripe but still firm, with just a few brown speckles, to ensure maximum flavor without becoming mushy.
Step-by-Step Guide: Crafting Your Banana Pudding from Scratch
Making homemade banana pudding is a rewarding process. Follow these detailed steps for a perfectly creamy, layered dessert:
- Prepare the Dry Mixture: In a large, heavy-bottomed nonstick saucepan (or a good quality saucepan to prevent sticking), whisk together the granulated sugar, all-purpose flour, and salt. This ensures these dry ingredients are well combined before adding liquids, preventing lumps.
- Incorporate Milk: Gradually whisk in the milk until the mixture is smooth and free of lumps. Place the saucepan over medium heat.
- Cook the Pudding Base: Cook the mixture, stirring constantly with a whisk. Continue to stir and cook until the pudding thickens and begins to bubble gently. This active stirring is crucial to prevent the pudding from scorching on the bottom and to ensure even cooking.
- Reduce Heat and Continue Cooking: Once thickened and bubbly, reduce the heat to low and continue to stir and cook for an additional 2 minutes. This step allows the flour to cook out properly, preventing a starchy taste. Remove the saucepan from the heat and set it aside momentarily.
- Temper the Eggs: In a separate medium bowl, whisk the large eggs until well combined. To prevent the eggs from scrambling when added to the hot pudding base, you must temper them. Slowly pour about half a cup of the hot milk mixture into the whisked eggs, whisking continuously. This gradually raises the temperature of the eggs.
- Combine Mixtures: Now, slowly pour the entire warmed egg mixture back into the saucepan with the remaining milk mixture, whisking vigorously the whole time. This fully incorporates the eggs into the pudding base.
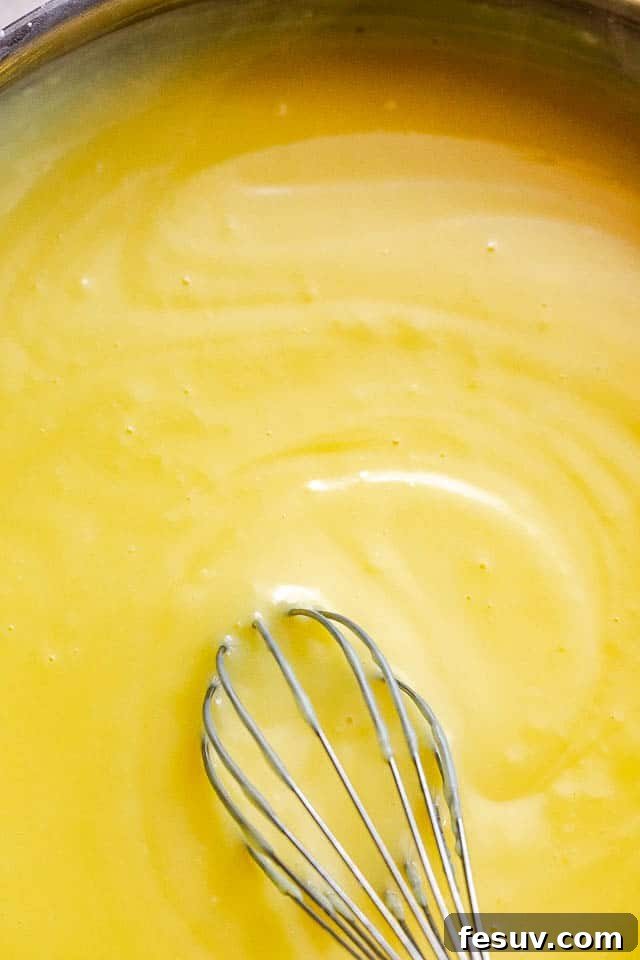
- Return to Heat: Place the saucepan back on the stovetop over medium heat. Bring the pudding mixture to a gentle boil, stirring and cooking with your whisk for another 2 minutes. The pudding should be noticeably thick and glossy.
- Add Vanilla and Cool: Remove the pudding from the heat. Whisk in the pure vanilla extract. Transfer the pudding to a clean bowl and let it cool for 15 minutes, stirring occasionally to prevent a skin from forming on top. This cooling period is important before layering to ensure it doesn’t melt the wafers or bananas immediately.
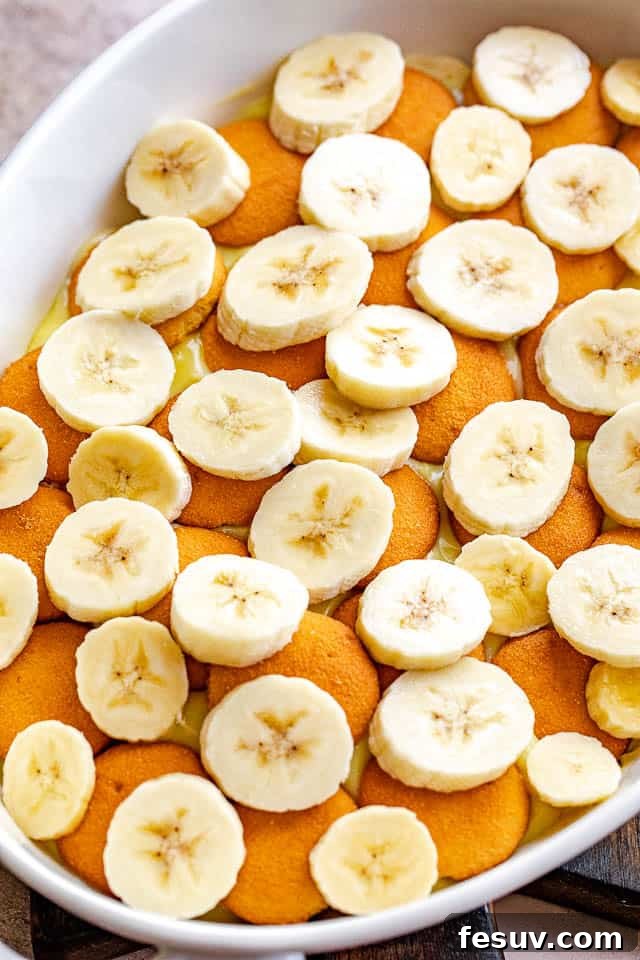
- Assemble the Dessert: Choose an 8-inch or 9-inch baking dish or a brownie pan. Arrange a single layer of vanilla wafers across the bottom of the dish. Next, evenly layer half of your thinly sliced bananas over the wafers. Carefully pour half of the warm pudding mixture over the bananas, spreading it gently to cover. Repeat these layers: another layer of vanilla wafers, the remaining sliced bananas, and finally, top with the rest of the pudding, ensuring it’s spread smoothly over the top.
- Chill for Perfection: Cover the baking dish tightly with plastic wrap, pressing the wrap gently onto the surface of the pudding. This prevents a skin from forming and keeps the bananas from browning excessively. Refrigerate the banana pudding for at least 6 hours, or ideally, overnight. Chilling allows the flavors to meld, the pudding to set, and the wafers to soften to that classic tender consistency.
- Serve and Enjoy: Once thoroughly chilled, your homemade banana pudding is ready to be served!
Pro Tips for the Best Banana Pudding
Achieving banana pudding perfection is all about a few key techniques and considerations:
- Temper Your Eggs Properly: The most crucial step! Slowly adding hot pudding to the whisked eggs while continuously stirring prevents the eggs from cooking and curdling. This process ensures a smooth, creamy custard.
- Constant Stirring is Key: When cooking the pudding on the stovetop, continuous stirring or whisking is essential. This prevents the mixture from sticking to the bottom of the pan and forming lumps, resulting in a silky-smooth pudding. Don’t walk away from the stove!
- Allow for Ample Chill Time: While 6 hours is the minimum, refrigerating your banana pudding overnight is highly recommended. This extended chilling period allows the pudding to fully set, the flavors to intensify, and the vanilla wafers to absorb moisture, transforming them into a delightful cake-like texture. The banana flavor will also become more pronounced.
- Choose the Right Bananas: Opt for ripe but firm bananas. They should have a few brown speckles on the peel, indicating sweetness and flavor development, but shouldn’t be overly soft or mushy. Overripe bananas can become too soft in the pudding and may brown faster.
- Even Banana Slices: Aim for consistent 1/4-inch slices for your bananas. This ensures they are evenly distributed and soften uniformly within the pudding.
Preventing Bananas from Browning in Your Pudding
Nobody wants brown, unappetizing bananas in their beautiful pudding. Here’s how to keep them looking fresh and vibrant:
- Optimal Banana Ripeness: As mentioned, using bananas that are ripe but not overly ripe is your first defense. They hold their structure and color better.
- A Citrus Bath: If you’re particularly concerned or making the pudding in advance, a quick dip in a mild acid can work wonders. Simply toss your sliced bananas in a very small amount of lemon juice (about a tablespoon for 4 bananas) before layering them. The acidity helps to slow down the oxidation process that causes browning. Be careful not to use too much, as it can affect the flavor.
- Cover the Surface: When chilling, pressing plastic wrap directly onto the surface of the pudding also helps to limit air exposure to the top layer of bananas, reducing browning.
Storing Leftover Banana Pudding
If you’re lucky enough to have any leftover banana pudding, proper storage will help maintain its deliciousness, though some changes are inevitable:
- Refrigeration: Store any leftover banana pudding in an airtight container in the refrigerator. It will stay fresh for 2-3 days.
- Anticipate Changes: Be aware that the longer your pudding sits in the refrigerator, the more the banana slices are likely to brown (even with precautions), and the vanilla wafers will become increasingly soft. While still tasty, the texture will evolve.
How to Freeze Banana Pudding for Later Enjoyment
While fresh is always best, banana pudding can be prepared in advance and frozen under certain conditions:
- Make-Ahead (Refrigeration): This dessert can be fully assembled and refrigerated for 1 to 2 days in advance, covered tightly, before serving.
- Freezing the Pudding Base: If you want to prepare the pudding ahead of time and freeze it for later use (without the bananas and wafers), allow the cooked pudding to cool completely. Then, transfer it to a freezer-safe, resealable bag or airtight container, removing as much air as possible. It can be stored for up to 3 months.
- Thawing and Assembling: When ready to use, thaw the pudding base in the refrigerator overnight. Once thawed, give it a good whisk to restore its smooth consistency. Then, proceed with assembling the banana pudding by layering with fresh banana slices and vanilla wafers, as per the recipe instructions.
- Freezing Assembled Pudding: While technically possible, freezing the fully assembled banana pudding is generally not recommended as the bananas can become mushy and discolored upon thawing, and the wafers can get excessively soggy. The texture will be significantly altered.
Homemade Banana Pudding Recipe
A classic, creamy dessert layered with sweet banana slices and crisp vanilla wafers. Easy to make from scratch!
Recipe Summary
Prep Time: 15 minutes
Cook Time: 15 minutes
Chill Time: 6 hours
Total Time: 6 hours 30 minutes
Servings: 10
Author: Katerina | Easy Weeknight Recipes
Ingredients
For the Pudding:
- 3/4 cup granulated sugar
- 1/4 cup all-purpose flour
- 1/4 teaspoon salt
- 3 cups milk (2% or higher for best results)
- 3 large eggs
- 2 teaspoons pure vanilla extract
- 8 ounces vanilla wafers, divided (about 2/3 of a standard box)
- 4 large bananas, cut into 1/4-inch slices
For the Meringue Topping (Optional):
- 4 egg whites
- Pinch of salt
- 1/4 cup granulated sugar
Instructions
- In a large, heavy-bottomed saucepan, combine sugar, flour, and salt. Whisk in the milk until smooth. Set the saucepan over medium heat.
- Cook, stirring constantly with a whisk, until the mixture is thickened and begins to bubble.
- Reduce the heat to low and continue to stir and cook for 2 more minutes. Remove from heat and set aside.
- In a separate bowl, whisk the eggs thoroughly. Gradually add about 1/2 cup of the hot milk mixture into the whisked eggs, whisking constantly to temper the eggs.
- Whisk the entire warmed egg mixture back into the milk mixture in the saucepan.
- Return the saucepan to the stovetop over medium heat. Bring the pudding to a gentle boil and cook, stirring with the whisk, for 2 more minutes until thick.
- Remove from heat, whisk in the vanilla extract, and set aside to cool for 15 minutes, stirring occasionally to prevent a skin from forming.
- Arrange a single layer of vanilla wafers in an 8-inch or 9-inch baking dish or brownie pan.
- Layer half of the sliced bananas over the wafers.
- Pour half of the pudding over the bananas, spreading evenly.
- Repeat the layers with another layer of cookies, the remaining banana slices, and finish by pouring the rest of the pudding over the top.
- If not adding meringue: Add plastic wrap over the top and press it gently onto the surface of the pudding. Refrigerate for 6 hours, or preferably overnight, before serving.
- Serve chilled and enjoy!
For the Meringue Topping (Optional):
- Preheat oven to 425˚F (220˚C).
- In a clean mixer’s bowl, beat the 4 egg whites with a pinch of salt until they form stiff peaks.
- Gradually beat in the 1/4 cup granulated sugar, continuing to beat until the meringue is glossy and holds its shape (it should not slide out if you tilt the bowl).
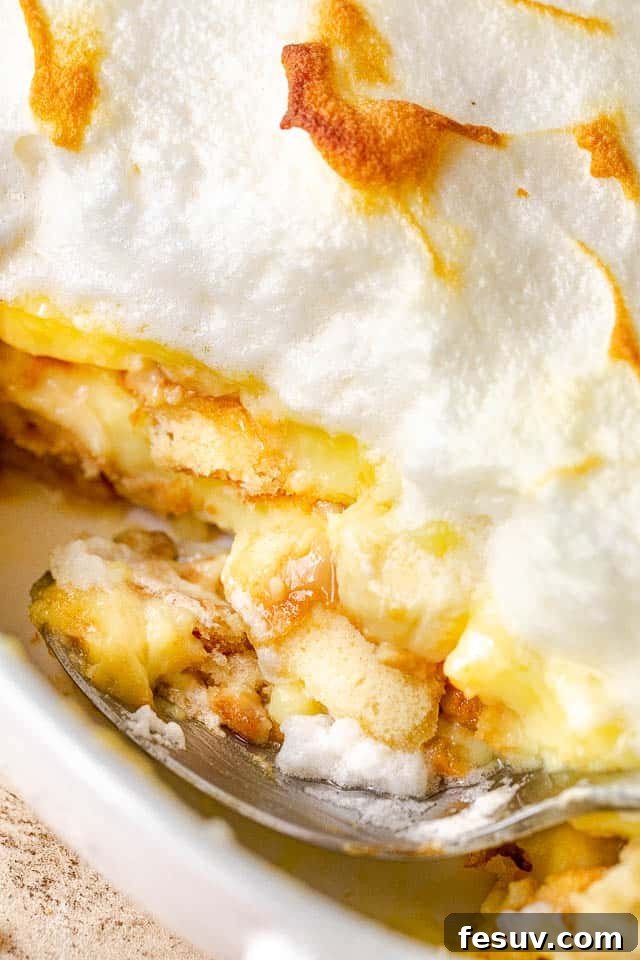
- Spread the meringue topping evenly over the assembled banana pudding.
- Bake for 5 minutes, or until the meringue begins to brown lightly on top. Allow to cool slightly before chilling.
Equipment
- Large Saucepan
- Whisk
- Mixing Bowls
- 8-inch or 9-inch Baking Dish
Nutrition Information
Calories: 282kcal | Carbohydrates: 48g | Protein: 6g | Fat: 8g | Saturated Fat: 3g | Cholesterol: 57mg | Sodium: 200mg | Potassium: 303mg | Fiber: 2g | Sugar: 32g | Vitamin A: 220IU | Vitamin C: 4mg | Calcium: 92mg | Iron: 1mg
Nutritional info is an estimate and provided as courtesy. Values may vary according to the ingredients and tools used. Please use your preferred nutritional calculator for more detailed info.
Variations and Customizations
While the classic homemade banana pudding is perfect on its own, you can always put your unique spin on it:
- Add Cream Cheese: For an extra rich and tangy pudding, beat 4 ounces of softened cream cheese with 1/4 cup of powdered sugar until smooth, then fold it into the cooled pudding mixture before layering.
- Chocolate Drizzle: A light drizzle of melted chocolate or chocolate syrup over the top can add a decadent touch.
- Toasted Coconut: Sprinkle some toasted coconut flakes on top for added texture and a tropical flavor twist.
- Individual Servings: Instead of a large baking dish, assemble the pudding in individual ramekins, glasses, or mason jars for elegant single servings. Adjust chilling time as needed.
- Different Cookies: While vanilla wafers are traditional, try experimenting with shortbread cookies, graham crackers, or even gingersnaps for a different flavor profile.
- Caramel Swirl: Swirl a bit of caramel sauce into the pudding layers or drizzle on top for a caramel banana pudding.
Serving Suggestions for Your Banana Pudding
This delightful dessert is best served chilled, straight from the refrigerator. For an extra touch:
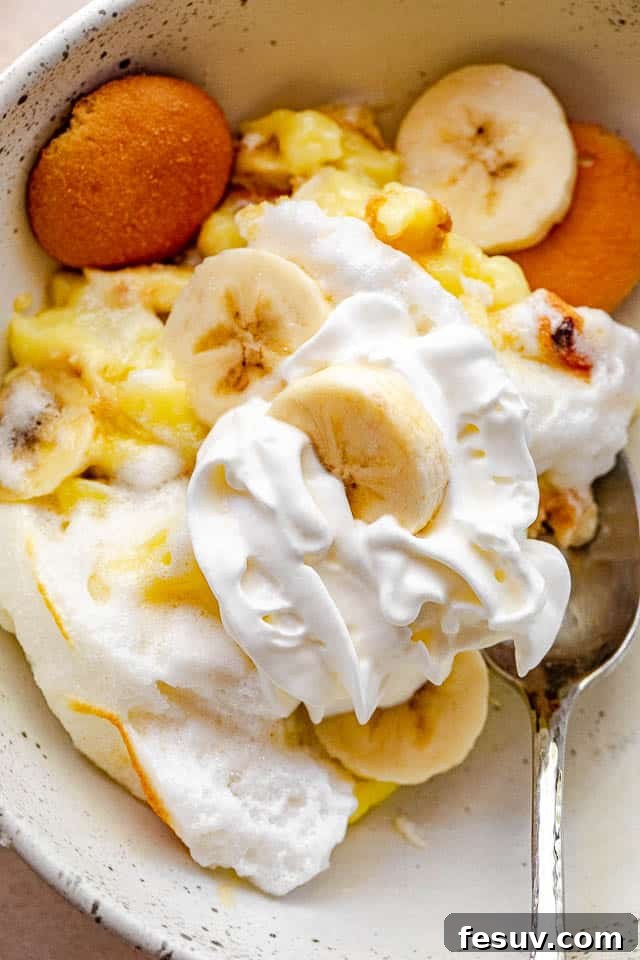
- Garnish: Top individual servings with a fresh vanilla wafer or a few extra banana slices just before serving. A sprig of mint can also add a pop of color.
- Whipped Cream: A dollop of freshly whipped cream can be a wonderful alternative or addition to the meringue topping.
- Coffee Pairing: Serve alongside a freshly brewed cup of coffee or a glass of iced tea for a true Southern experience.
Frequently Asked Questions About Banana Pudding
Got questions? We’ve got answers to ensure your banana pudding is always a success!
- Can I use skim milk? While you can, for the creamiest and most flavorful pudding, 2% or whole milk is highly recommended as the fat content contributes to the richness. Skim milk might result in a thinner, less luxurious pudding.
- How do I prevent lumps in my pudding? The key is to whisk your dry ingredients thoroughly first, then gradually add the milk while continuously whisking. Also, ensure constant stirring while the pudding cooks on the stovetop.
- My pudding isn’t thickening, what went wrong? This usually means it hasn’t cooked long enough or at a high enough temperature. Make sure you bring it to a gentle boil as instructed and continue stirring. The eggs and flour are your primary thickeners, and they need heat to activate.
- Can I make this dessert gluten-free? Yes! You would need to substitute the all-purpose flour with a gluten-free all-purpose flour blend (ensure it contains xanthan gum) and use gluten-free vanilla wafers.
- What kind of bananas are best? Look for yellow bananas with a few brown spots, indicating ripeness and sweetness. Avoid green bananas (not sweet enough) and overly brown or mushy bananas (they won’t hold their shape well).
A Timeless Treat: Enjoy Your Homemade Banana Pudding
There’s a reason why homemade banana pudding holds such a special place in the hearts of many – it’s a simple dessert that delivers profound satisfaction. The layers of soft, sweet banana, tender vanilla wafers, and rich, creamy pudding create a symphony of textures and flavors that is truly irresistible. This recipe offers an authentic taste of Southern tradition, made easy for your home kitchen. So go ahead, whip up a batch, gather your loved ones, and savor every spoonful of this comforting, delightful creation. It’s more than just a dessert; it’s an experience waiting to be shared and enjoyed.