
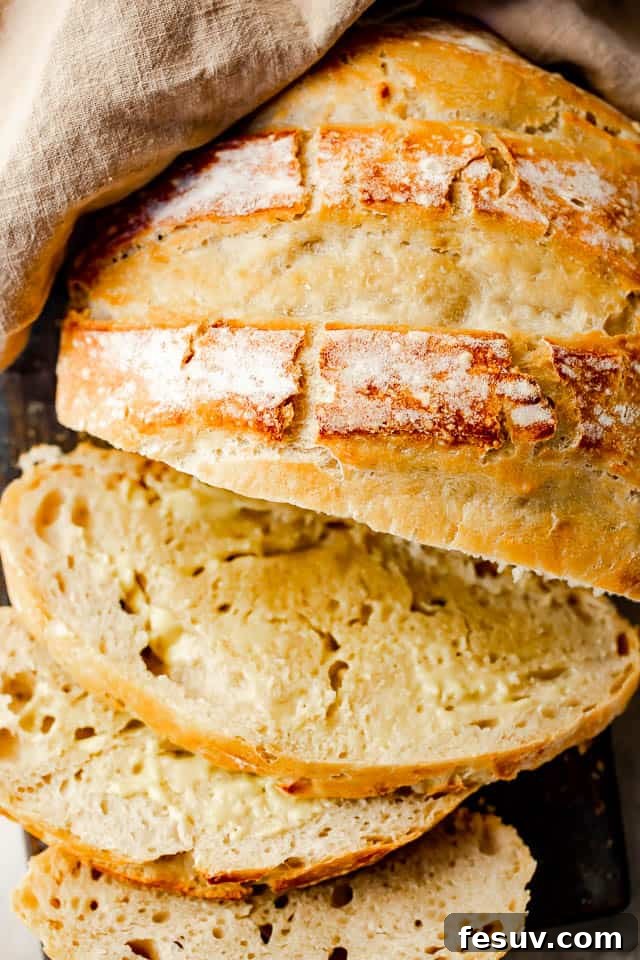
My No-Knead Dutch Oven Bread is the ultimate solution for the busy home baker! Imagine a warm, rustic artisan loaf with an irresistibly crispy, crackly crust and a deep, hearty flavor, all achieved without the arduous process of kneading. The truly remarkable aspect of this recipe? It’s arguably the simplest, most foolproof bread you will ever bake from scratch. Say goodbye to complex techniques and hello to effortless, bakery-quality bread right in your own kitchen.
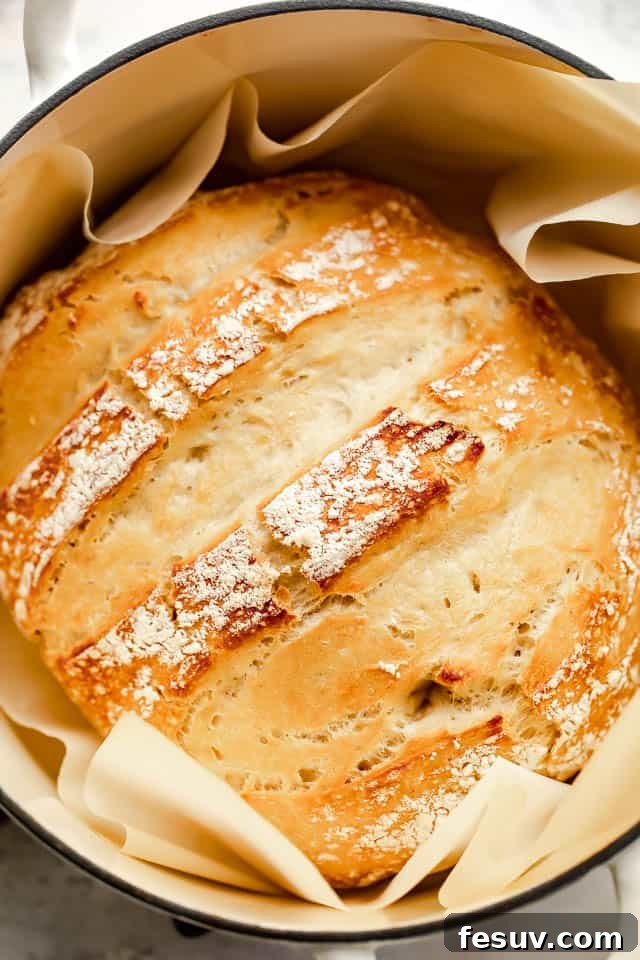
Effortless Artisan Bread: The Joy of No-Knead Baking
If you cherish the idea of homemade bread but often find yourself deterred by the time-consuming ritual of kneading, multiple rises, and precise timing, you’re not alone. Traditional bread-making often demands significant flexibility and dedicated “me-time.” However, this no-knead bread recipe revolutionizes the process, making it perfectly suited for even the busiest food enthusiasts.
The secret lies in a remarkably special technique: a high-hydration dough combined with a long, slow fermentation. This approach is not only incredibly simple but also exceptionally forgiving. Did you forget about your dough for a few hours? No problem! It can comfortably rest and develop flavor anywhere from 8 to 18 hours, and some experienced bakers even let it ferment for longer periods. This extended fermentation allows the gluten to develop naturally without any manual kneading, leading to a wonderfully chewy texture and complex flavor.
When it’s finally time to bake, the process is wonderfully straightforward. Simply transfer the “shaggy” dough onto a floured surface, gently shape it into a rustic round, and carefully place it into a preheated Dutch oven. The result is consistently a stunning, deeply flavored loaf with a professional-looking crust that will impress everyone. I sincerely hope you give this incredibly easy and rewarding method a try!
The Power of the Dutch Oven: Unlocking Perfect Bread Crust
A Dutch oven is a heavy-duty cooking pot, typically made from cast iron and often coated in enamel for easier maintenance and non-reactive cooking. Its defining features include thick walls and a snugly fitting, heavy lid, which together create a self-contained, high-heat environment. While Dutch ovens are incredibly versatile for a multitude of culinary creations, they truly work wonders for bread baking.
When you preheat the Dutch oven to a high temperature, it acts as a mini-oven within your main oven. Placing the dough into this scorching hot environment immediately kickstarts the formation of a beautiful, crisp crust. The heavy lid plays a crucial role by trapping the steam released from the baking dough. This trapped steam continuously circulates over the bread’s surface during the initial baking phase, preventing the crust from setting too quickly. This allows the loaf to achieve its maximum rise (often called “oven spring”) and develop a light, open crumb structure inside.
As the bread bakes, the exterior gradually firms up, transforming into that desirable crispy, crackly texture that characterizes true artisan bread. This unique combination of high initial heat and trapped steam is what makes Dutch oven baking unparalleled for producing a wonderfully crunchy, professional-quality loaf with minimal effort. Investing in a good Dutch oven is a game-changer for any home baker.
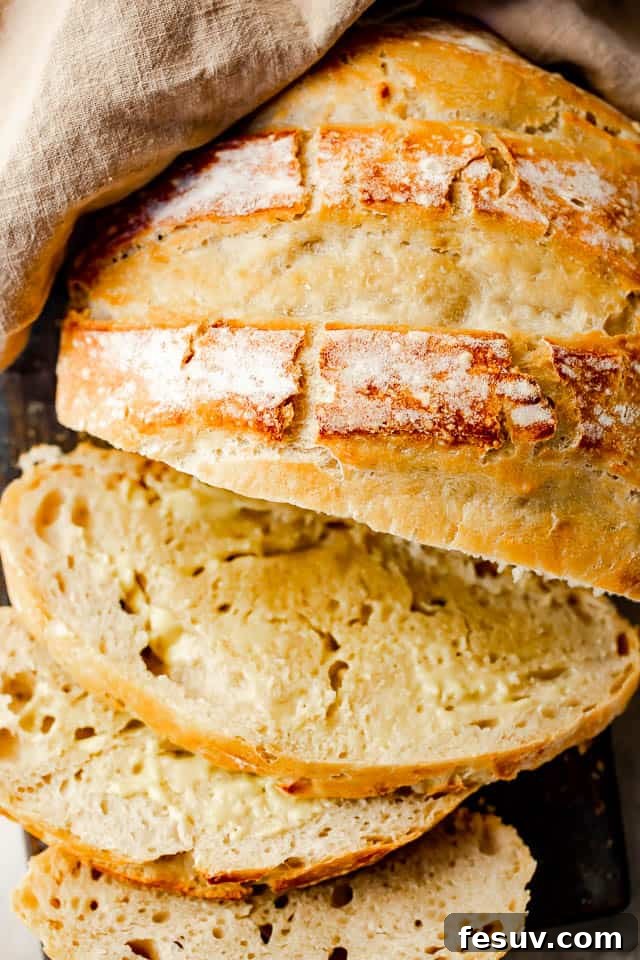
The Science Behind the Simplicity: How No-Knead Bread Works
The concept of “no-knead” bread might seem counterintuitive to those familiar with traditional baking, where extensive kneading is paramount for gluten development. However, the no-knead method leverages the power of time and hydration to achieve the same, if not superior, results with significantly less effort. Here’s a quick look at the science:
- High Hydration: This recipe uses a relatively high amount of water compared to flour, resulting in a very wet, “shaggy” dough. This abundance of water allows the flour to fully hydrate.
- Long Fermentation: Instead of mechanical kneading, the gluten in the flour develops naturally over an extended period. As the yeast consumes sugars and produces carbon dioxide, the gas bubbles expand the gluten network. The time allows these proteins to unravel and realign, forming strong, elastic strands without any physical manipulation. This slow process also contributes to a richer, more complex flavor profile as enzymes break down starches.
- Minimal Handling: Because the gluten structure is already developed through time, the dough requires minimal handling before baking. This gentle approach preserves the delicate air pockets created during the long rise, leading to a wonderfully open and airy crumb.
This ingenious combination means you can mix the dough in minutes and then largely forget about it until baking time, making it an ideal choice for busy schedules or anyone seeking to demystify the art of bread making.
Simple Staples, Spectacular Bread: The Essential Ingredients
One of the most appealing aspects of no-knead Dutch oven bread is its reliance on just a few basic pantry staples. This minimalist approach ensures that a hearty, delicious loaf is always within reach. You won’t need any special equipment or exotic ingredients, just these four fundamentals:
- All-Purpose Flour: You’ll need approximately 3 cups of your favorite all-purpose flour. While some recipes call for bread flour for higher protein content, all-purpose flour works beautifully here, yielding a satisfying texture. I do not recommend using gluten-free flour for this specific recipe, as gluten-free breads typically require a different set of ingredients and techniques to achieve elasticity and proper rise.
- Active Dry Yeast: A single teaspoon of active dry yeast is all it takes to kickstart the fermentation process. Ensure your yeast is fresh and active for the best rise. While instant yeast can also be used, active dry yeast is commonly available and perfectly suited for this long, slow rise method.
- Salt: Don’t underestimate the power of salt! A teaspoon of salt is absolutely essential for flavoring the bread and also plays a role in controlling yeast activity and strengthening the gluten structure. Trust me, I once accidentally omitted it, and the result was a rather bland loaf. It’s a small addition that makes a huge difference in taste.
- Room Temperature Water: The dough needs to be quite soft and “shaggy,” so you’ll require about 1 ½ cups of room temperature water, ideally around 75˚F (24˚C). Water temperature is important; water that’s too cold can inhibit yeast activity, while water that’s too hot can kill the yeast. Using room temperature water ensures a gentle and consistent fermentation.
Your Step-by-Step Guide to Baking No-Knead Dutch Oven Bread
Seriously, mixing this dough requires mere minutes of your time! And once the dough is prepared, its forgiving nature allows you to let it rest for an extended period, even overnight, before proceeding with shaping and baking. This flexibility is what truly makes this recipe a busy baker’s best friend.
Phase 1: Crafting the Dough
Making this dough is astonishingly simple. All you need to do is combine the ingredients in a bowl and give them a good stir!
- Combine Dry Ingredients: In a large mixing bowl, measure out the flour, yeast, and salt. Use a whisk to thoroughly combine these dry ingredients, ensuring an even distribution of yeast and salt throughout the flour.
- Introduce Water: Pour the room temperature water into the bowl with the dry ingredients. Using a sturdy wooden spoon or a specialized dough whisk mixer, stir the mixture until all the flour is hydrated and no dry spots remain. The dough will look “shaggy” and quite sticky – this is exactly what you want! If, after stirring, the dough appears excessively wet or liquidy, you can add a little more flour, up to half a cup, one tablespoon at a time, until it reaches a very soft but not runny consistency, more like a thick paste.
Phase 2: The Transformative Long Rise
Unlike traditional bread that often demands multiple short rises with intermediate punching down, no-knead bread thrives on a single, extended fermentation. This hands-off approach makes it incredibly convenient, much like an overnight casserole, without the need for constant attention.
To let the dough rise, cover the mixing bowl tightly with plastic wrap. Place the covered bowl in a cool spot in your kitchen. Allow it to rise undisturbed for a minimum of 8 hours, or until the dough has visibly doubled in size and the surface shows small bubbles. Note: For even deeper flavor development, you can prepare a larger batch of No-Knead Dough and refrigerate it overnight. Then, simply remove about 2 pounds of the chilled dough to proceed with this recipe, allowing it to come closer to room temperature for about 30-60 minutes before shaping.
Phase 3: Shaping and Baking Your Masterpiece
Working with no-knead dough might feel a little different due to its soft and sticky nature, but there’s no need to stress! This is a very forgiving recipe, and perfection in shaping is absolutely not required for a delicious outcome.
- Preheat Oven and Dutch Oven: About 30-45 minutes before you plan to bake, preheat your oven to 450˚F (230˚C). Place your empty Dutch oven with its lid on the center rack of the oven to preheat thoroughly for at least 30 minutes. This is crucial for achieving that characteristic crispy crust.
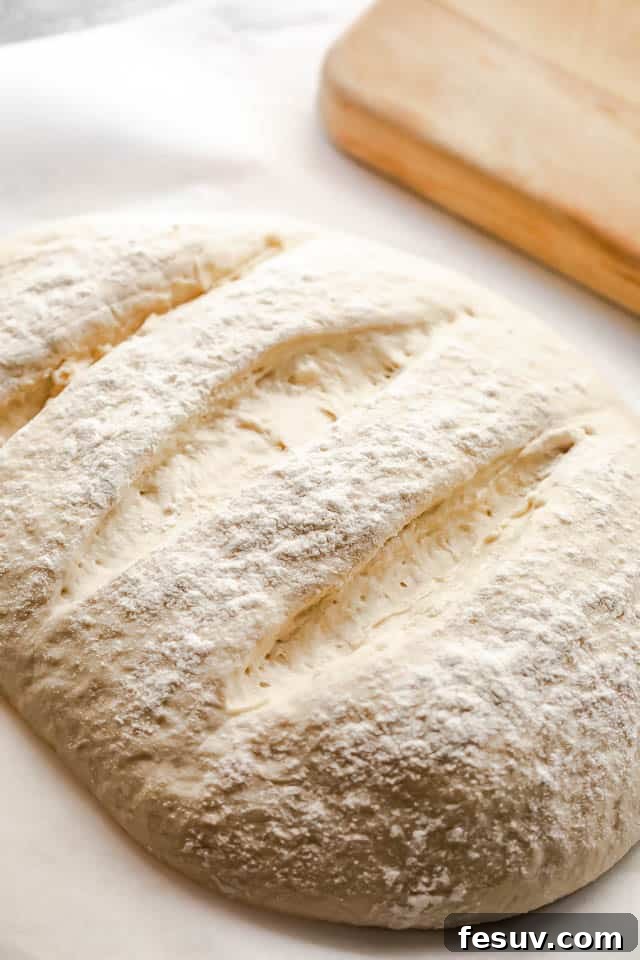
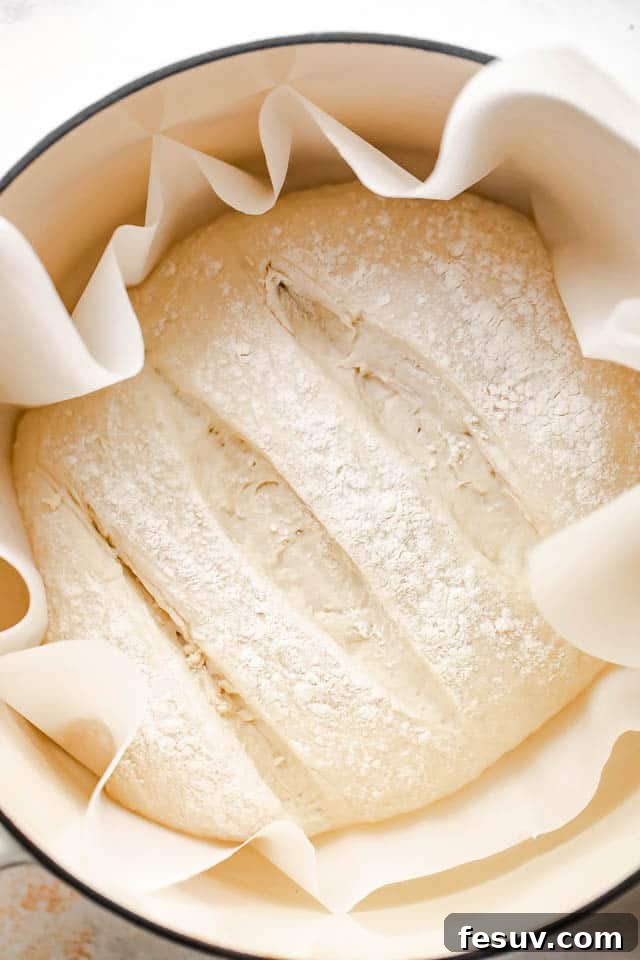
- Gentle Shaping: Lightly flour your hands and sprinkle a small amount of flour onto the surface of the risen dough in the bowl. Gently loosen the dough from the sides of the bowl and turn it out onto a generously floured surface or a large piece of parchment paper. With floured hands or a metal bench scraper, carefully gather the dough and gently tuck the edges underneath to form it into a round loaf. Avoid overworking or deflating the dough too much. Transfer the shaped loaf, still on the parchment paper, to a separate area.
- Score the Dough: Using a sharp knife or a bread lame, make a few shallow slashes (about ¼-inch deep) across the top of the loaf. These slashes allow the bread to expand predictably in the oven and add to its artisan appearance.
- Transfer to Hot Pot: Don your oven mitts and carefully remove the screaming hot Dutch oven from the oven. Place it on a heat-safe surface and lift off the lid. Holding onto the ends of the parchment paper (which acts as a sling), gently lower the bread into the hot Dutch oven. The parchment paper will prevent sticking and make removal easier.
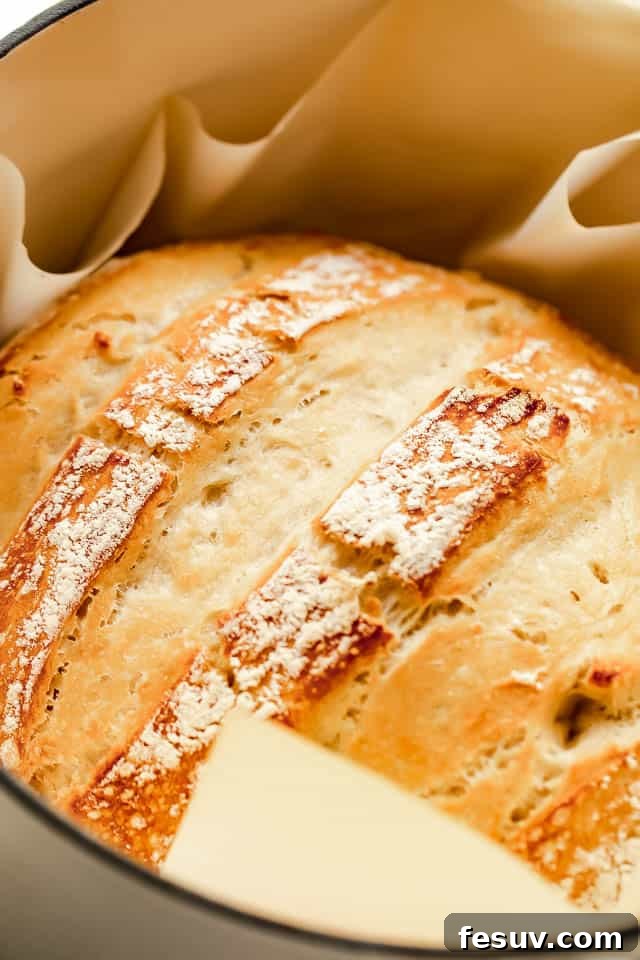
- Bake to Perfection: Securely place the lid back on the Dutch oven. Return the covered Dutch oven to the preheated oven and bake for 30 minutes. After 30 minutes, carefully remove the lid and continue baking for another 15-20 minutes, or until the crust is a deep golden brown and sounds hollow when tapped.
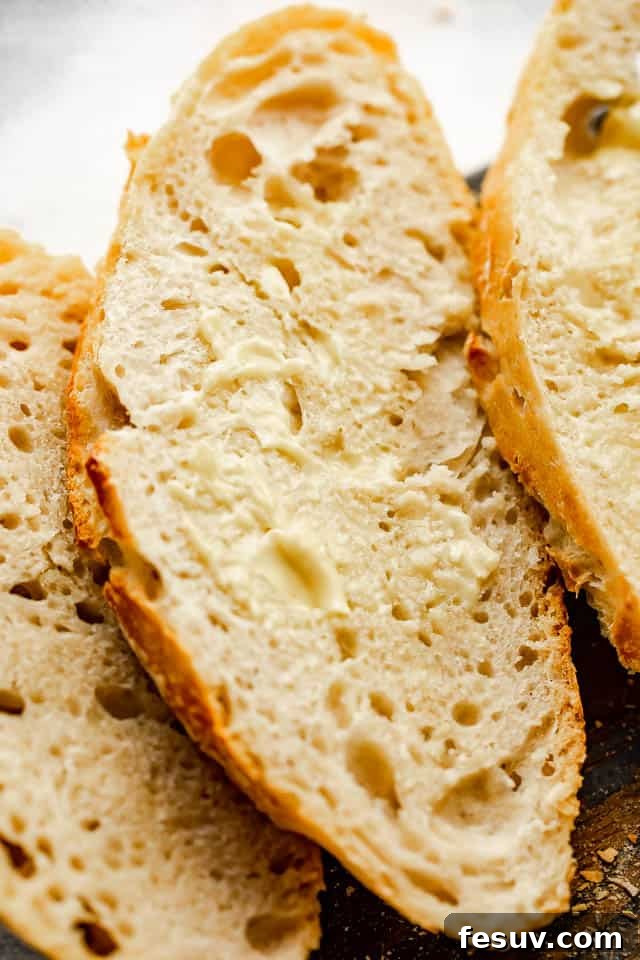
- Crucial Cooling: Remove the finished loaf from the Dutch oven (using the parchment paper sling again) and transfer it directly to a wire rack. It is absolutely essential to let the bread cool completely for at least 1-2 hours before slicing. This allows the internal structure to set and prevents a gummy texture. Once fully cooled, slice, serve, and enjoy your incredible homemade artisan bread!
Essential Tips for Baking the Best No-Knead Dutch Oven Bread
While this recipe is remarkably forgiving, a few extra pointers can elevate your baking experience and ensure a consistently perfect loaf every time:
- Embrace the Stickiness: No-knead dough is intentionally wet and sticky – sometimes described as “melted bubble gum!” Don’t be alarmed by this consistency. Instead of adding excessive flour, which can make the bread dense, rely on heavily floured hands and a bench scraper for easier handling and shaping. A bench scraper is truly your best friend for this type of dough, helping you gather and fold it without it sticking to everything.
- Patience with Cooling: This is perhaps the most critical tip! As mentioned in the baking instructions, resist the temptation to cut into your freshly baked loaf until it has cooled completely on a wire rack. Cutting into warm bread traps steam, resulting in a gummy texture, and you won’t get those beautiful, clean slices. The cooling process allows the internal starches to set, yielding a superior crumb.
- Experiment with Shape: While a round loaf is classic, you can easily adapt this recipe to other forms. To make a sandwich loaf, pour the dough out onto a piece of parchment paper, gently flatten it into a rectangle, and use the parchment to help you fold it into thirds (like a letter). Then, carefully transfer it into a greased standard loaf pan for baking. Adjust baking time if needed, typically around 45-55 minutes total.
- Add Flavor Variations: Feel free to customize your bread! Consider incorporating mix-ins during the initial dough mixing stage. Ideas include a handful of toasted seeds (sesame, poppy, sunflower), dried herbs (rosemary, thyme), a sprinkle of garlic powder, or even a cup of grated cheese for a savory twist. For a slightly sweeter bread, a tablespoon of honey or a handful of dried cranberries can be delightful.
- Bake on the Grill: If you prefer to keep your kitchen cool or simply love grilling, you can bake this bread on an outdoor grill! Preheat your grill to a high temperature, around 400˚F – 500˚F (200˚C – 260˚C). Place the Dutch oven with its lid on the grill grates and let it preheat. Once hot, carefully add the shaped dough, close the lid, and turn the heat down slightly to maintain a consistent baking temperature. Bake according to the recipe, monitoring closely to prevent burning, until done.
- The Role of Water Temperature: Aim for room temperature water (around 75°F / 24°C). Water that’s too cold can slow down or stall yeast activity, while water that’s too hot can kill the yeast. A simple way to check is if it feels neither hot nor cold to the touch.
Delightful Pairings: What to Serve with Your Artisan Bread
What can you do with a gorgeously crusty, flavorful loaf of homemade bread? The possibilities are endless! Its hearty flavor and satisfying texture make it an incredibly versatile accompaniment to a wide array of dishes. Here are some inspiring ideas to get you started, whether for a cozy meal or an elegant gathering:
- Comforting Soups and Stews: It’s almost a given, isn’t it? Freshly baked bread and a steaming bowl of soup are a match made in culinary heaven. The crusty exterior is perfect for soaking up rich broths. I particularly enjoy serving warm slices alongside a hearty bowl of my Italian Sausage Butternut Squash Soup, but it’s equally fantastic with classic tomato soup, creamy mushroom soup, or a robust beef stew.
- Savory Beef Dishes: Think beyond just noodles or rice! I often pair Beef Tips in Mushroom Gravy with this crusty bread. A slice of warm bread, especially if lightly toasted, is ideal for soaking up every last drop of that savory gravy. Add a simple green salad, and you have a wonderfully comforting and complete meal.
- Hearty One-Pot Meals: Many one-pot dishes, like my easy Smoked Sausage with Potatoes and Green Beans, are complete meals in themselves. However, because they tend to have a slightly liquidy component, they pair exceptionally well with freshly baked bread. The bread provides a delightful textural contrast and makes the meal even more filling and satisfying.
- Bruschetta and Appetizers: Slice your bread, toast it lightly, and top with fresh diced tomatoes, basil, garlic, and a drizzle of olive oil for classic bruschetta. Or, get creative with various toppings for an elegant appetizer spread.
- Sandwiches and Toast: Elevate your everyday sandwiches with slices of this homemade bread. It also makes for incredible toast, perfect for breakfast with butter and jam, or as a base for avocado toast.
- Cheese Boards: A rustic loaf of no-knead bread is a fantastic addition to any cheese board. Its neutral, hearty flavor complements a wide range of cheeses, fruits, and charcuterie.
Keeping Your Loaf Fresh: Storage Guidelines
Proper storage is key to extending the life and freshness of your homemade no-knead bread, preserving its delicious texture and flavor. Unlike store-bought bread, homemade loaves don’t contain preservatives, so they tend to dry out more quickly. Here’s how to store it best:
- Homemade no-knead bread stores optimally in a container that allows for a slight amount of air circulation, often described as “breathing,” while still protecting it from excessive exposure to air. This balance helps maintain its crispy crust without making the interior too soggy.
- Many bakers recommend storing your cooled bread in a simple paper bag, a dedicated linen bread bag, or a traditional ceramic bread box. These options help regulate moisture. Avoid airtight plastic bags for longer storage if you want to preserve the crust, as they can soften it.
- However you choose to store it, this bread is best kept at room temperature and should ideally be enjoyed within two days of baking for optimal freshness and texture.
Freezing Homemade Bread for Later Enjoyment
Yes, you absolutely can freeze homemade no-knead bread! Freezing is an excellent way to extend its shelf life and ensure you always have a delicious loaf on hand for unexpected guests or quick meals. Proper preparation before freezing is key to maintaining its quality:
- To freeze homemade no-knead bread, first ensure it has cooled completely to room temperature after baking. Freezing warm bread will lead to ice crystals and a mushy texture upon thawing.
- Once thoroughly cooled, wrap the entire loaf tightly in two layers of plastic wrap, ensuring no air gaps. For extra protection against freezer burn, add an additional layer of aluminum foil or place the wrapped loaf inside a freezer-safe bag.
- You can freeze the whole loaf, or slice it first and freeze individual slices for easier portioning. If freezing slices, place parchment paper between them to prevent sticking.
- Stored correctly, your homemade bread can be frozen for up to six months without significant loss of quality.
- When ready to enjoy, thaw the bread at room temperature. For a revitalized crust, you can briefly warm the thawed loaf in a preheated oven (around 350˚F/175˚C) for 10-15 minutes, or until warmed through and the crust crisps up again.
Print Recipe
No-Knead Dutch Oven Bread
Ingredients
- 3 cups all-purpose flour
- 1 teaspoon active dry yeast
- 1 teaspoon salt
- 1 ½ cups room temperature water, about 75˚F
Instructions
-
In a large mixing bowl, combine flour, yeast, and salt; whisk until well incorporated.
-
Using a wooden spoon or a dough whisk mixer, stir in the water; continue to stir until combined and dough is shaggy. If the dough is too wet, add a little more flour, a couple tablespoons at a time, and up to ½ cup more flour.
-
Cover with plastic wrap and let rise in a cool spot for 8 hours, or until doubled.
-
Preheat oven to 450˚F.
-
Place a Dutch oven and its lid on the center rack of the oven and heat it for 30 minutes.
-
In the meantime, turn dough out onto a floured surface.
-
Flour your hands and sprinkle a little bit of flour on top of the dough; shape the dough into a round loaf. If you have a metal scraper, use that to help shape the dough.
-
Transfer shaped loaf to a large piece of parchment paper.
-
Using a sharp knife, make a few slashes across the top of the loaf. Slashes should be about ¼-inch deep.
-
Put on your oven mitts and carefully remove the hot Dutch oven from the oven. Remove the lid. Be careful – it’s extremely hot.
-
Holding onto the ends of the parchment paper, lift up the bread and carefully lower it into the hot Dutch Oven.
-
Cover with the lid and bake for 30 minutes.
-
Remove the lid and continue to bake for 15 more minutes, or until golden brown on top.
-
Remove from oven; transfer bread loaf to a wire rack and let completely cool.
-
Cut and serve.
Equipment
-
Dutch Oven
Notes
Nutrition
Nutritional info is an estimate and provided as courtesy. Values may vary according to the ingredients and tools used. Please use your preferred nutritional calculator for more detailed info.
Craving More? Explore These Delicious Bread Recipes
If the satisfying experience of baking your own artisan loaf has ignited a passion for homemade bread, you’re in luck! There’s a whole world of delicious bread recipes waiting to be discovered. Whether you’re looking for quick options or unique flavor profiles, these hearty homemade bread recipes are sure to impress:
- Spinach and Feta No-Yeast Bread: A delightful savory bread that comes together quickly, perfect for a Mediterranean-inspired meal or a flavorful snack.
- Cheesy Garlic Pull-Apart Bread: An irresistible crowd-pleaser, this soft and cheesy garlic bread is perfect for sharing and incredibly easy to make.
- Easy Homemade Flatbread Recipe: Versatile and quick, this recipe offers a simple way to create soft, chewy flatbreads that are perfect for wraps, dips, or as a side with curries and stews.
Frequently Asked Questions About No-Knead Dutch Oven Bread
Here are answers to some common questions that new and experienced bakers often have about making no-knead bread:
- Can I use whole wheat flour?
You can certainly experiment with whole wheat flour, but it might change the texture and require adjustments. Whole wheat flour absorbs more water than all-purpose flour and can result in a denser loaf. For best results, start by replacing only a portion (e.g., 1 cup) of the all-purpose flour with whole wheat, and you might need to add a little more water to achieve the desired shaggy consistency.
- What if my dough doesn’t rise?
Several factors can affect dough rise. The most common culprits are inactive yeast, water that is too hot (killing the yeast) or too cold (slowing yeast activity), or a too-cold room temperature. Ensure your yeast is fresh, your water is lukewarm, and your rising spot isn’t too chilly. Even if it doesn’t double, a slight rise indicates some activity, and the bread will still likely be delicious.
- Can I make this bread faster?
The long, slow rise is essential for flavor development and gluten structure in no-knead bread. While you can shorten the rise time slightly (to perhaps 4-6 hours in a warmer spot), you’ll compromise on the depth of flavor and potentially the texture. For truly quick bread, consider a different recipe like a quick bread or a soda bread that doesn’t rely on yeast.
- Why is my crust not crispy?
A non-crispy crust usually points to insufficient heat during baking or not enough steam. Ensure your Dutch oven is thoroughly preheated for the full 30 minutes, and don’t peek too often during the initial covered bake, as this releases precious steam. Make sure your lid fits snugly.
- Do I really need a Dutch oven?
While a Dutch oven is highly recommended for achieving the signature crispy crust and excellent oven spring, you can approximate the results with a heavy, oven-safe pot with a tight-fitting lid, like a stainless steel stockpot. Alternatively, you can bake the bread on a baking stone and use a tray of hot water in the bottom of the oven to create steam, though results may vary.