

Welcome to your new favorite recipe for Homemade Crescent Rolls! These incredibly soft, impossibly buttery, and wonderfully fluffy dinner rolls are surprisingly simple to master, making them a staple for your holiday gatherings and weeknight meals alike. Crafted with wholesome, everyday ingredients, this beloved side dish promises to fill your home with an irresistible aroma and your table with pure comfort. Forget store-bought; once you taste these from-scratch butterhorn rolls, there’s no going back!
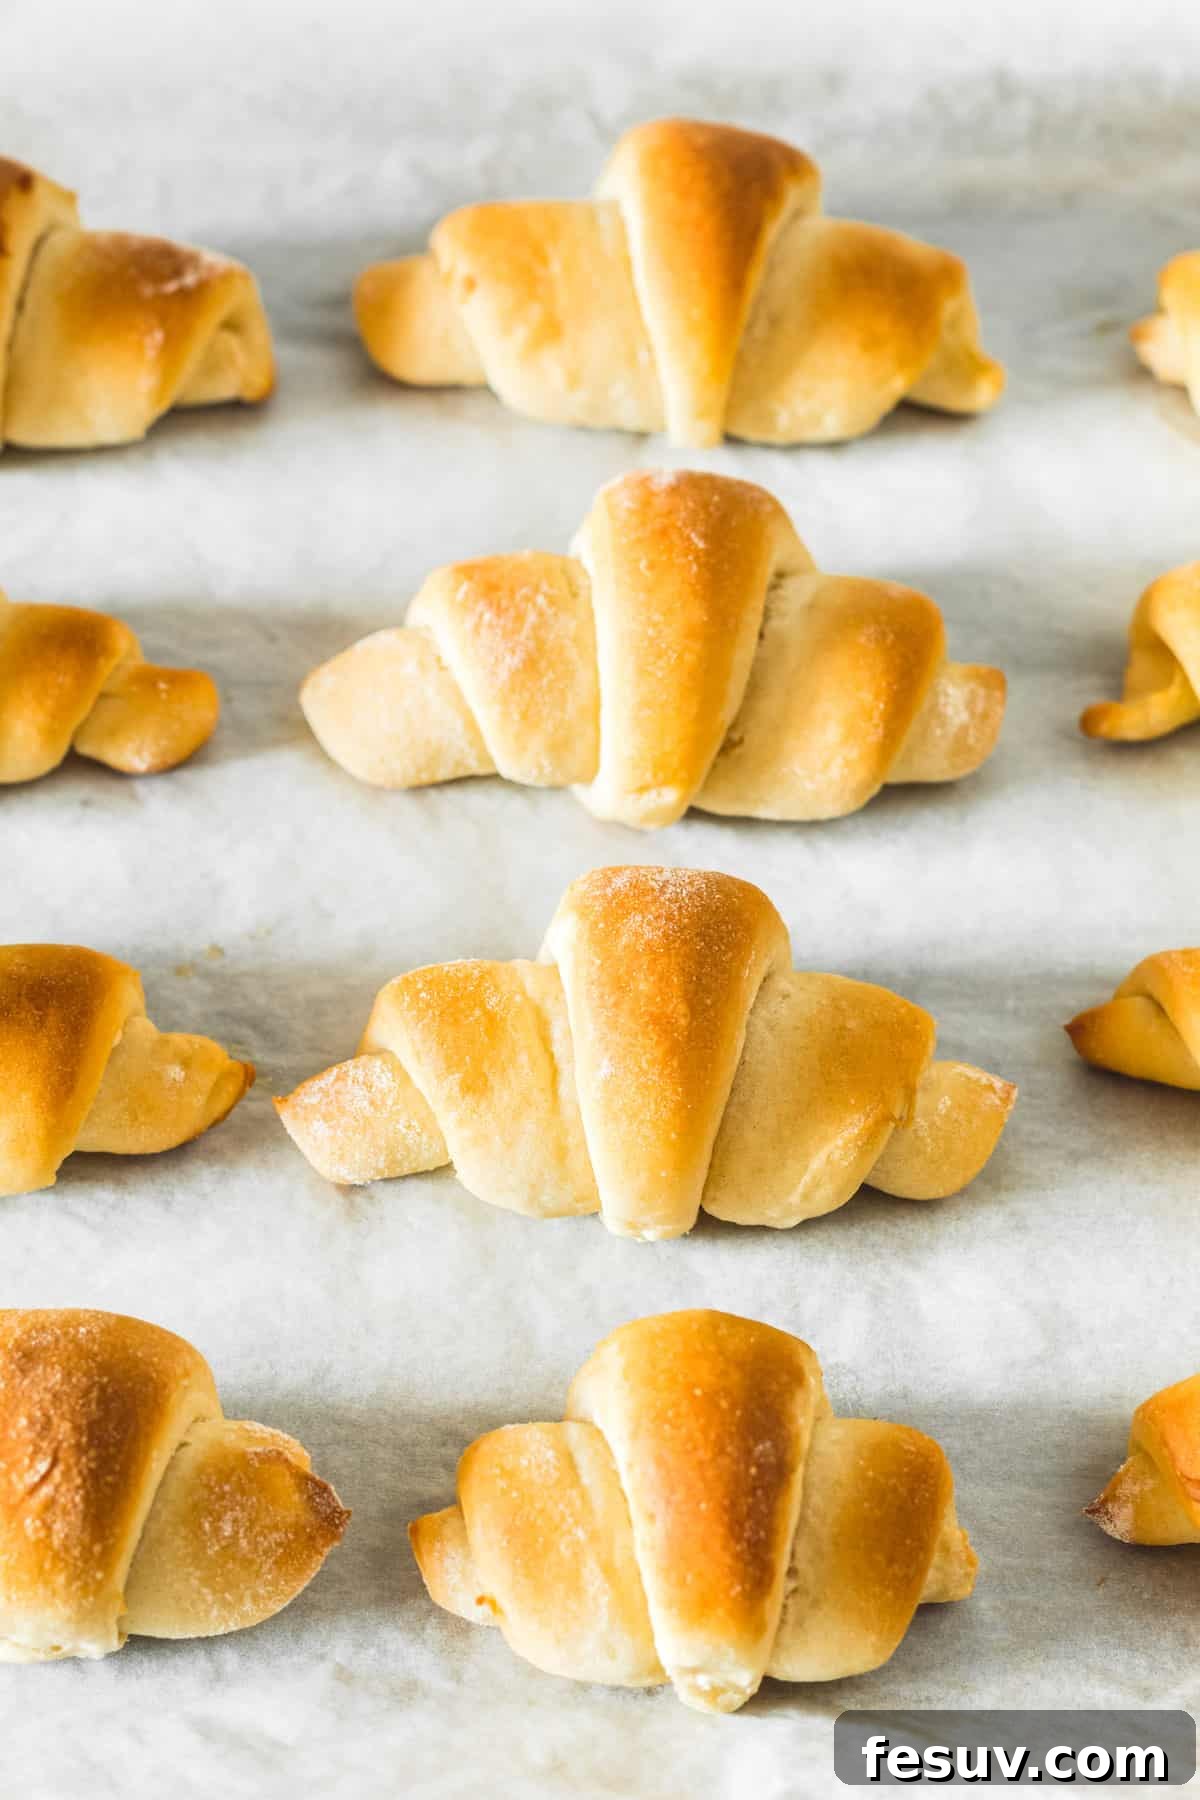
Effortlessly Delicious: Crafting Buttery Dinner Rolls from Scratch
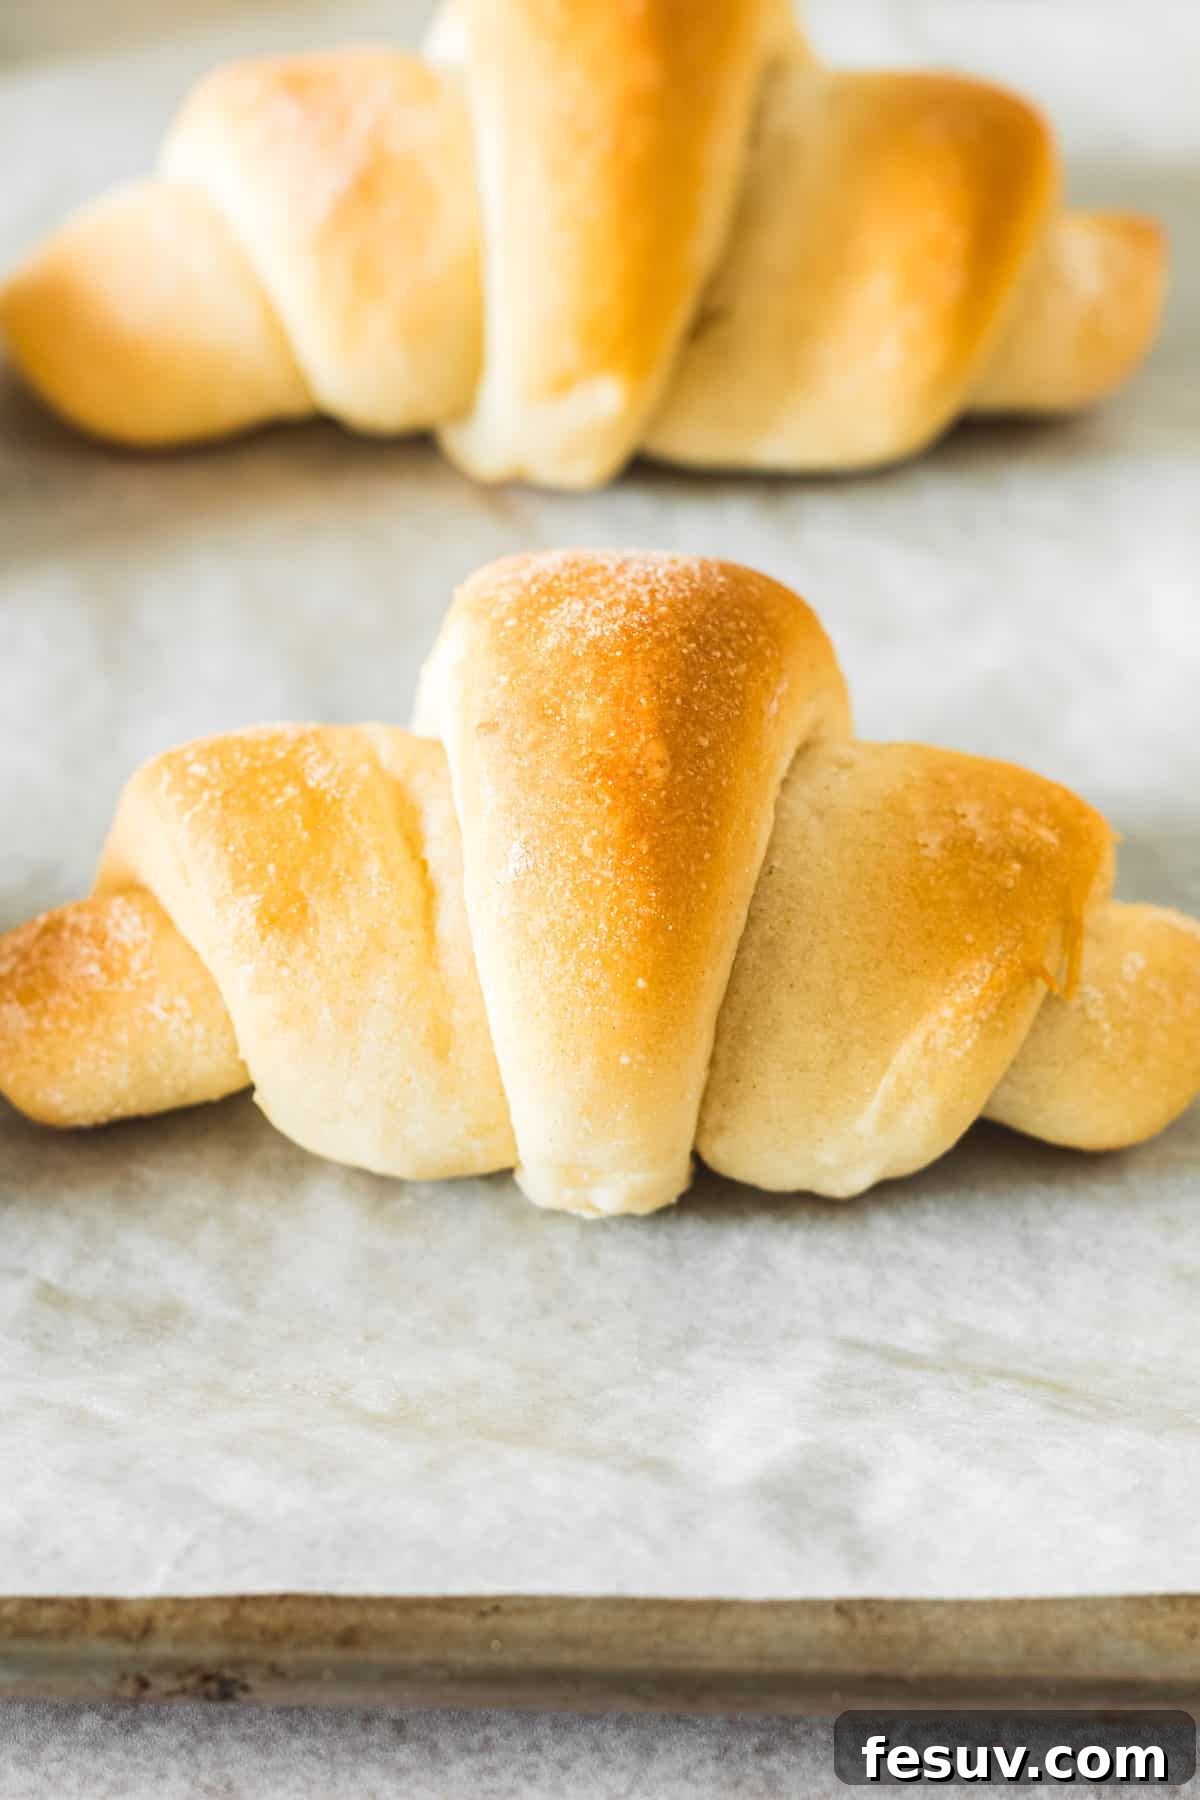
Whether you know them as butterhorn rolls, Amish butterhorns, or simply crescent rolls, one thing is certain: these are the kind of dinner rolls that disappear from the basket in minutes. Across various regions, different names might be used, but the essence remains the same – a tender, sweet, and rich yeast roll that perfectly complements any meal. Making these delectable rolls from scratch is a rewarding experience, requiring only common pantry staples and a little patience for the dough to work its magic. The process is straightforward, yielding a flaky, flavorful result without demanding advanced baking expertise.
The beauty of this recipe lies in its simplicity. You’ll prepare a soft, pliable dough, allow it ample time to rise, shape it into characteristic crescents, give it a final proof, and then bake it to golden perfection. The result is a batch of rolls so enticing, they might just steal the show from your main course. They are an absolute family favorite, guaranteed to bring smiles and satisfied sighs around your dinner table.
Crescent Rolls vs. Croissants: Unpacking the Delicious Differences
It’s a common question: are butterhorn rolls or crescent rolls the same as the iconic French croissant? While both pastries share a visually similar crescent shape and a delightful buttery richness, they are fundamentally different in their preparation and resulting texture. The key distinction lies in the method of incorporating butter into the dough and how that affects their unique layers and rise.
Our homemade crescent rolls are made with melted butter directly mixed into the dough, creating a soft, tender crumb with a delicate flakiness. The dough is kneaded to develop gluten, resulting in a bread-like texture that is light and airy. In contrast, classic French croissants are crafted through a meticulous process called lamination. This involves repeatedly folding and rolling a yeast dough with layers of chilled butter, creating dozens of paper-thin, distinct layers. When baked, these butter layers create steam, separating the dough into its characteristic crisp, airy, and ultra-flaky structure. So, while both are utterly addictive and boast a glorious butter flavor, they offer distinctly different textural experiences—our crescent rolls being wonderfully soft and tender, and croissants renowned for their crisp, shatteringly flaky exterior.
Essential Ingredients for Your Perfect Crescent Rolls
One of the beauties of this crescent roll recipe is its reliance on everyday ingredients you likely already have in your kitchen. It’s the generous amount of butter and the specific method that elevate these humble components into something truly extraordinary. Let’s break down each key ingredient and its role in creating these scrumptious rolls:
- Active Dry Yeast: This is the leavening agent that makes our rolls rise, giving them their light and fluffy texture. Active dry yeast needs to be proofed in warm liquid to ensure it’s alive and ready to work.
- Water: Lukewarm water is crucial for activating the yeast. If the water is too hot, it will kill the yeast; too cold, and the yeast won’t activate properly. Aim for a temperature similar to your body temperature.
- Milk: Warm milk adds richness and tenderness to the dough. Whole milk provides the most luxurious flavor and texture, but reduced-fat or even non-dairy milk can be used, though it might slightly alter the final texture. Like water, ensure it’s warm but not hot.
- Granulated Sugar: A touch of sugar does more than just sweeten the dough; it also acts as food for the yeast, helping it to activate and produce carbon dioxide, which creates the rise. It also contributes to the beautiful golden-brown crust.
- Large Egg: The egg adds richness, helps bind the ingredients, and contributes to the rolls’ soft texture and golden color. For optimal results, ensure your egg is at room temperature so it incorporates smoothly into the dough without shocking the other ingredients. Lightly beat it before adding.
- Salt: Salt is vital for balancing the flavors and controlling the yeast’s activity. Don’t skip it!
- All-Purpose Flour: This forms the structure of our rolls. All-purpose wheat flour is ideal for this recipe, providing the right balance of gluten development for a tender, yet resilient dough.
- Unsalted Butter: The star of the show! A generous amount of unsalted butter lends an incredible richness, flavor, and tenderness to these rolls. Using unsalted butter allows you to control the overall salt content in the recipe. We do not recommend dairy-free butter for the best authentic flavor and texture.
Step-by-Step Guide: Crafting Your Perfect Homemade Crescent Rolls
Making these glorious crescent rolls involves a few key stages, with the most crucial being the rising times. The first rise, a slow fermentation in the refrigerator, takes approximately 5 hours or even overnight. This extended cold rise develops incredible flavor and a superior texture, so be sure to plan your baking schedule accordingly.
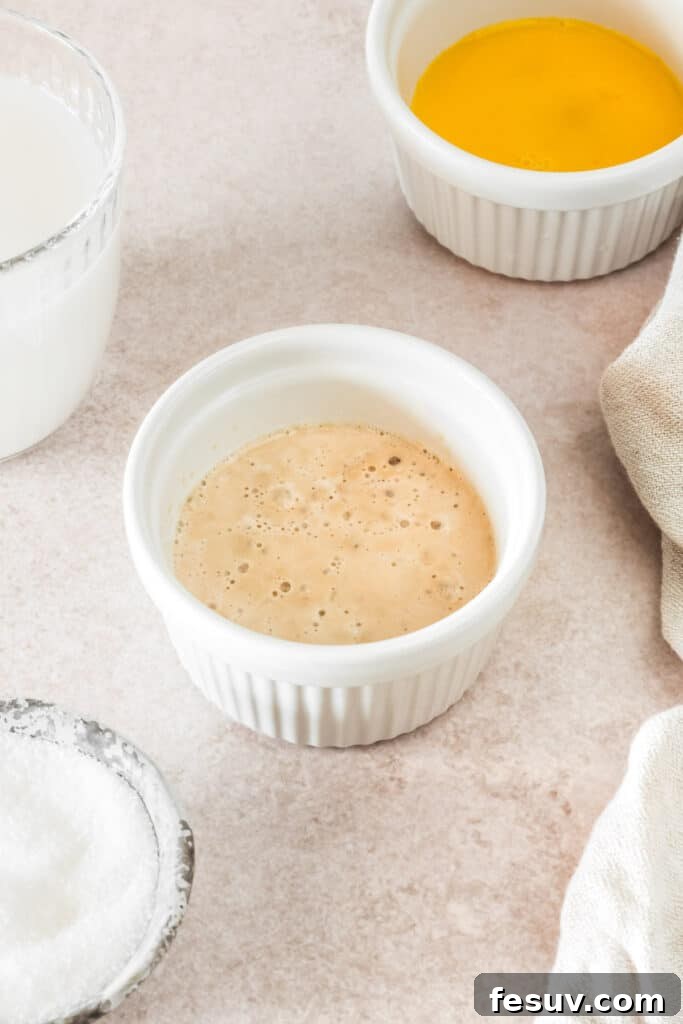
- Activate the Yeast (Proofing): Begin by ensuring your yeast is active. In a large mixing bowl, combine the active dry yeast with the warm water. Let this mixture sit undisturbed for about five minutes. You’ll know the yeast is alive and well when it becomes creamy and begins to bubble gently on the surface. This step is vital for a good rise!
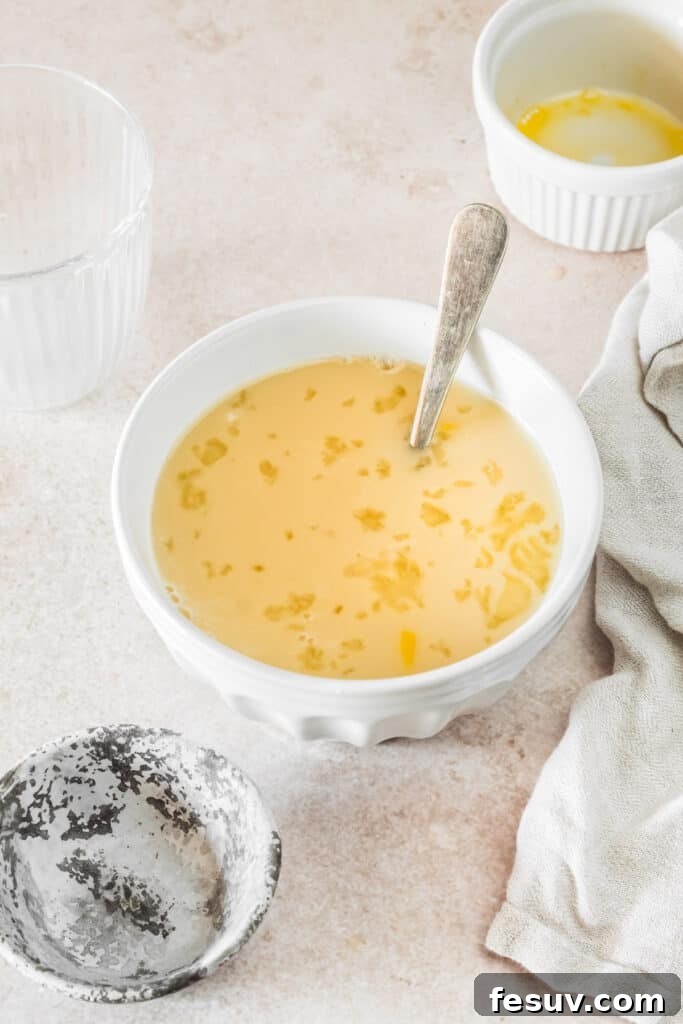
- Combine Wet Ingredients: Once the yeast is visibly activated, add the warm milk, granulated sugar, and the lightly beaten, room-temperature egg to the bowl. Stir everything together until well combined.
- First Flour Addition: Now, incorporate the salt and two and a half cups of the all-purpose flour. Stir thoroughly until you have a very soft, almost batter-like dough. It will be quite loose at this stage.
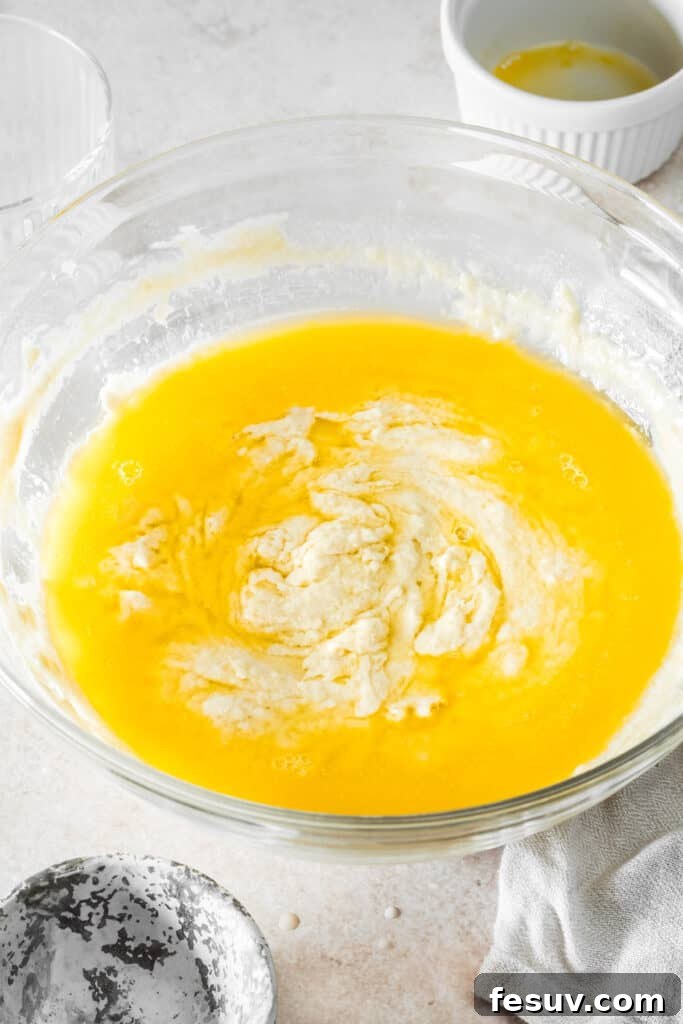
- Introduce Butter and Remaining Flour: Pour ¾ cup of the melted unsalted butter into the mixture (reserving the remaining 3 tablespoons for brushing later). Add the remaining two and a half cups of flour. Mix the dough thoroughly using your hands or a sturdy large spoon until a sticky, smooth dough forms. It’s important for the dough to be sticky, not dry. If it feels excessively wet and unmanageable, you may add an additional ¼ to ½ cup of flour, but resist the urge to add too much, as a slightly sticky dough is key to tender rolls.
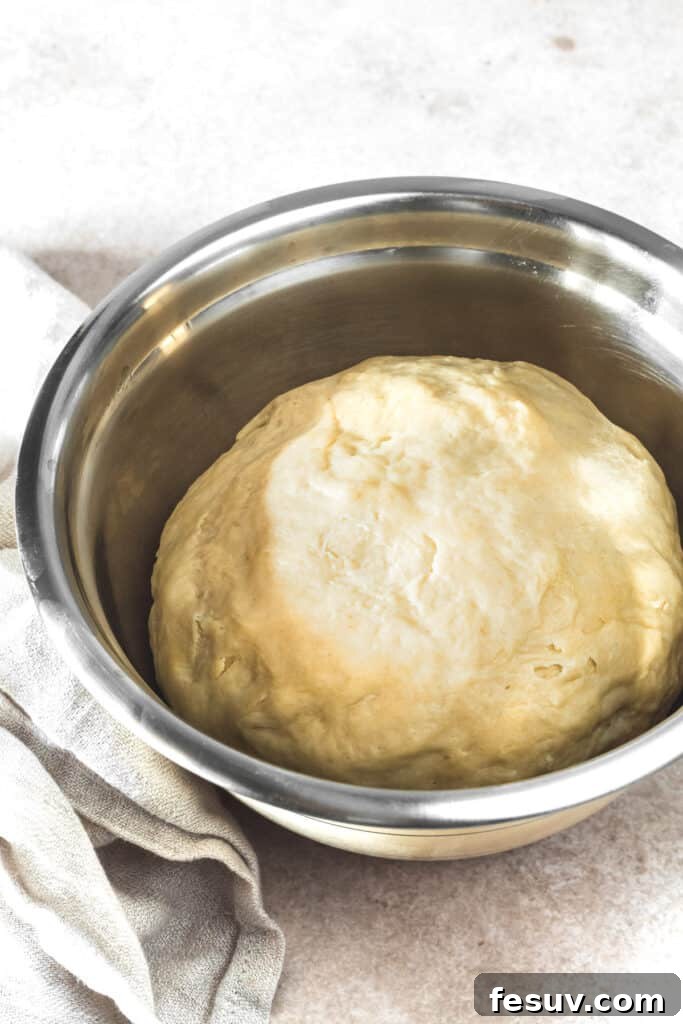
- The First (Slow) Rise: Transfer your sticky dough to a clean, lightly greased bowl. Cover the bowl tightly with plastic wrap and place it in the refrigerator for its first rise. This slow fermentation in the cold environment is essential for developing deep flavors and a wonderfully tender texture. Allow it to rise for at least 5 hours, or ideally, leave it overnight for maximum flavor development.
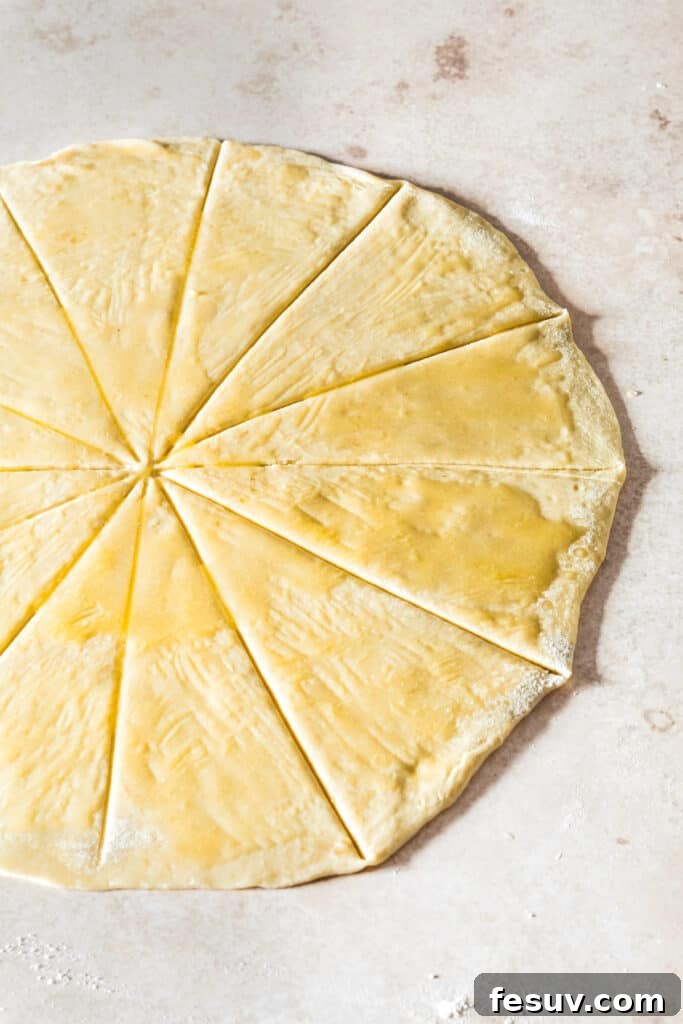
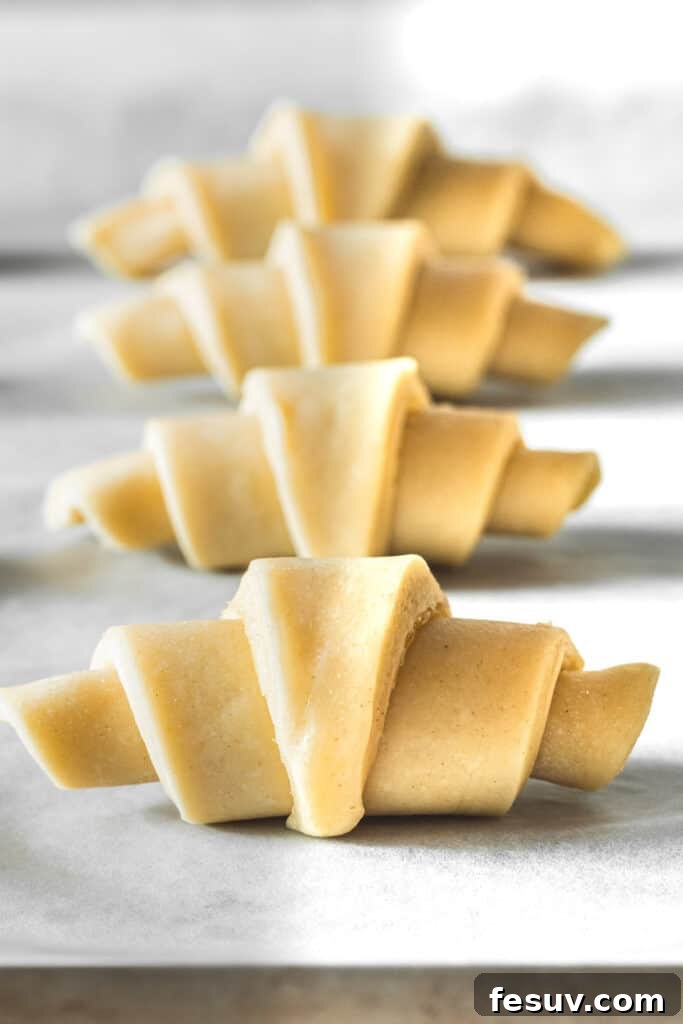
- Shape the Rolls: After the dough has completed its first rise, remove it from the refrigerator and gently punch it down to release the air. Divide the dough into three equal portions. On a lightly floured surface, roll out one portion into a circular shape, roughly 12 inches in diameter. Using a pizza cutter or a sharp knife, cut this circle into twelve wedges, much like slicing a pizza. Lightly brush the surface of each wedge with a small amount of the reserved melted butter. Starting from the wide end of each wedge, roll it up tightly towards the point to form the classic crescent shape. Repeat with the remaining dough portions.
- The Second Rise: Arrange the shaped crescent rolls on lightly greased baking sheets (or sheets lined with parchment paper), making sure the pointed end is tucked underneath to prevent unraveling during baking. Cover the baking sheets with a clean kitchen towel or plastic wrap and place them in a warm spot. Allow the rolls to rise for approximately 1 hour, or until they have roughly doubled in size. This final proof ensures a light and airy texture.
- Bake to Golden Perfection: Once the rolls have sufficiently risen, preheat your oven to 350°F (175°C). Bake the rolls for 12 to 15 minutes, or until their tops turn a beautiful golden-brown. Keep an eye on them, as oven temperatures can vary.
- Serve and Savor: Remove the golden-brown rolls from the oven. For an extra touch of decadence, you can brush them with a little more melted butter while they’re still warm. Allow them to cool slightly on wire racks before serving them warm. These rolls are best enjoyed fresh out of the oven!
Expert Tips for Unforgettable Crescent Rolls
Achieving bakery-quality crescent rolls at home is entirely within reach with a few helpful pointers. Drawing from years of baking experience, these tips will guide you to master this classic yeast roll recipe, ensuring your butterhorns are always a triumph:
- Temperature Matters: For the softest, flakiest rolls, always ensure your ingredients are at the right temperature. Lukewarm water and milk are essential for activating the yeast without killing it. Room temperature egg ensures it incorporates smoothly into the dough. Even melted butter should not be scorching hot when added. Cold ingredients can shock the yeast and hinder the rise, leading to denser rolls.
- Embrace the Slow Rise: The refrigerator rise is non-negotiable for superior flavor and texture. This slow, cold fermentation allows the yeast to work gradually, developing complex flavors and a more tender crumb. Don’t rush this step—at least five hours, or preferably overnight, will yield the best results. Patience is a virtue in baking!
- Don’t Over-Flour: The dough for these crescent rolls is meant to be soft and slightly sticky. Adding too much flour can lead to dense, dry rolls. Resist the temptation to continually add flour if the dough feels a bit tacky; a lightly floured surface for shaping is usually enough.
- Warmth for the Second Rise: After shaping, the rolls need a warm, draft-free environment for their final rise. This encourages the yeast to rapidly produce gas, making the rolls light and airy. A slightly warm oven (turned off!), a sunny spot, or simply a warm kitchen counter covered with a towel works perfectly.
- The Butter Brush Finish: For an extra layer of decadence and a beautiful sheen, lightly brush the freshly baked, still-warm rolls with a small amount of melted butter just after they come out of the oven. This enhances their buttery flavor and makes them even more irresistible.
- Serving Warmth: Butterhorn rolls are truly at their peak when warm. If they’ve been sitting for a while, a quick reheat is highly recommended. Three to five minutes in a 350°F (175°C) oven will bring them back to their tender, warm glory.
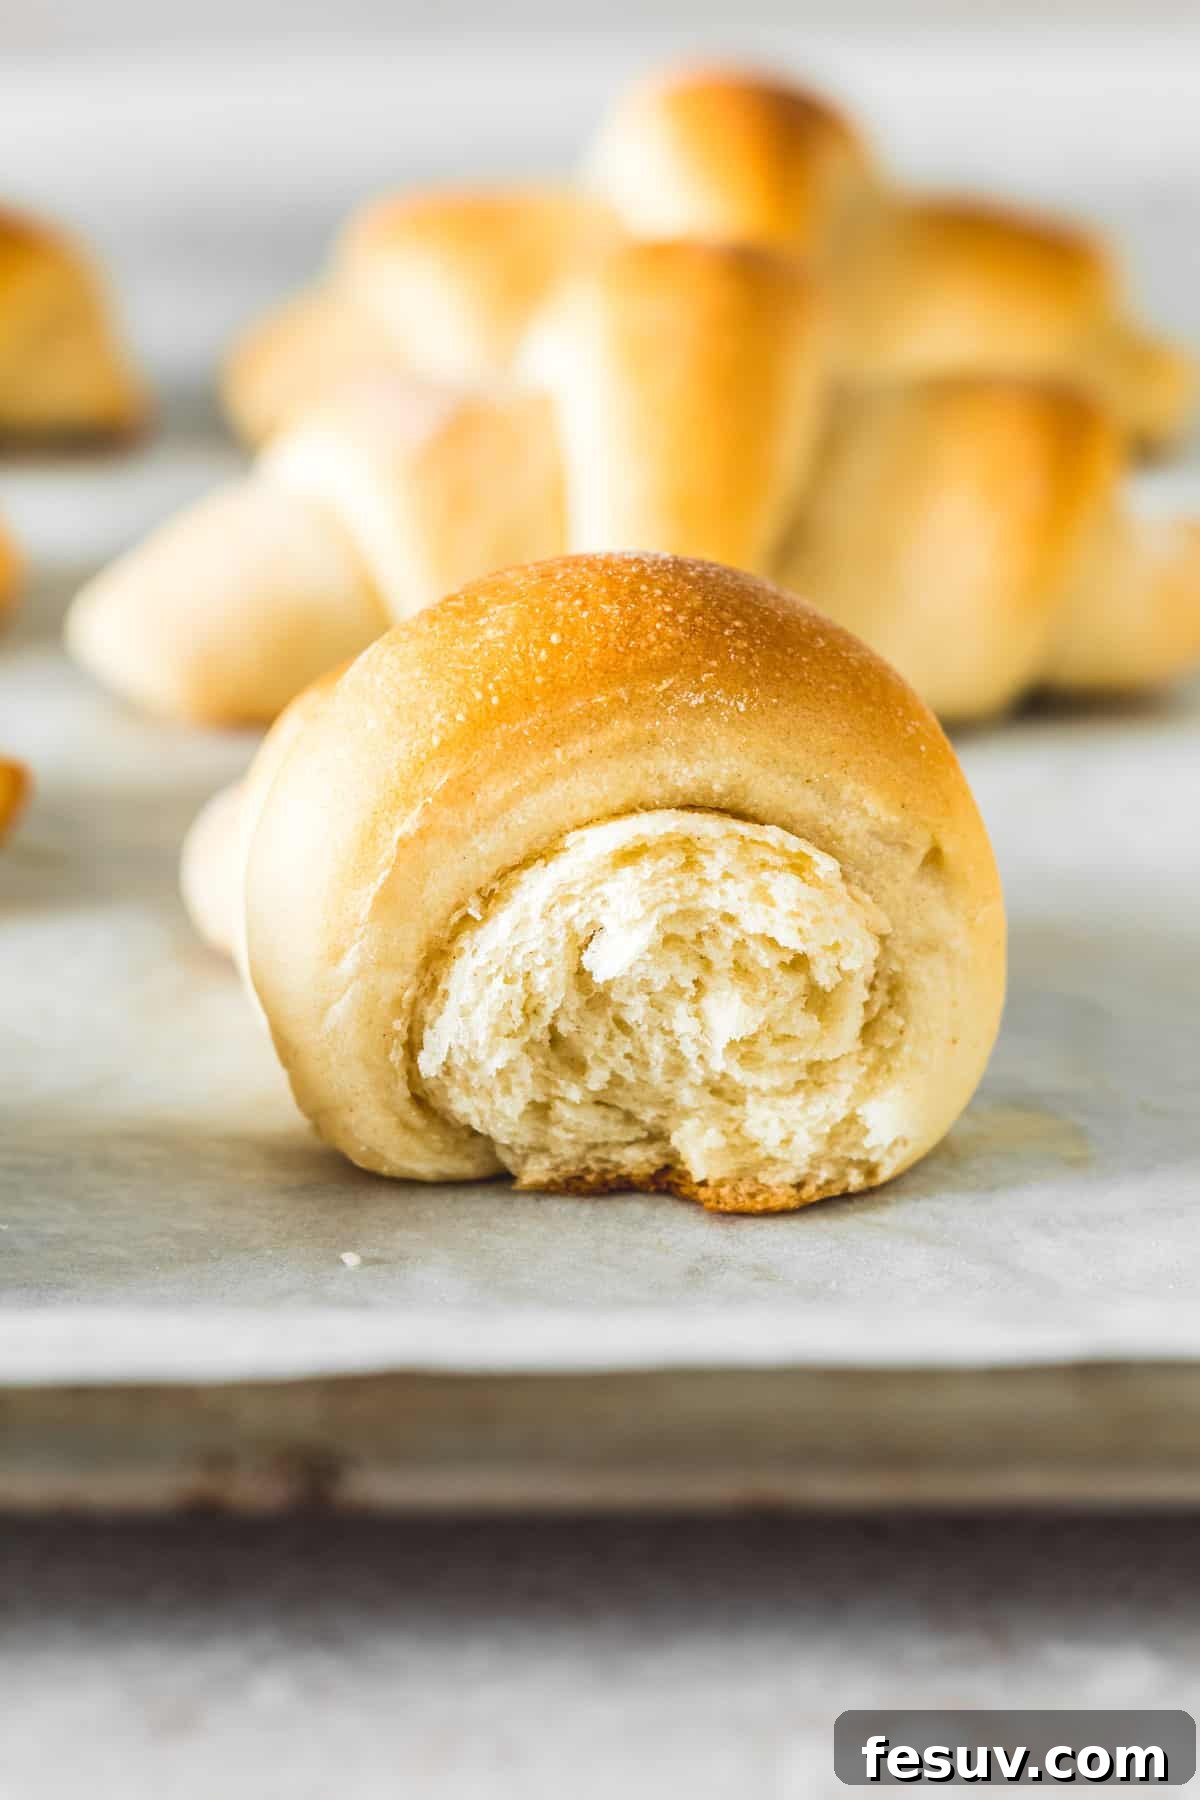
Perfect Pairings: Elevating Your Meals with Crescent Rolls
These versatile butterhorn rolls are truly a year-round sensation, pairing beautifully with virtually any main course. Their soft texture and subtly sweet, buttery flavor make them an ideal accompaniment, whether you’re whipping up a comforting meatloaf for a casual dinner, serving a light chicken salad for lunch, or orchestrating a grand traditional holiday feast. You simply can’t go wrong with a basket of these warm, inviting rolls. Here are some of my top holiday and everyday recipe recommendations to serve alongside your homemade crescent rolls:
- Thanksgiving or Christmas Turkey: Crescent rolls are an absolute must-have for your holiday turkey dinner. Their tender crumb is perfect for soaking up rich gravies, and they make for fantastic leftover turkey sandwiches the next day. If a full turkey isn’t on the menu, try a simple yet succulent Roast Turkey Breast – it’s just as delicious and much easier to prepare.
- Glazed Ham: The sweet and savory notes of these rolls beautifully complement a holiday ham. Imagine the exquisite combination with a sticky, caramelized Christmas Ham with Brown Sugar Glaze. The contrast is truly irresistible and will have your guests asking for seconds.
- Elevated Casseroles: For a side dish that truly shines, consider serving these rolls with a hearty casserole. Our turbo-charged Green Bean Casserole, studded with crispy bacon and tender Brussels sprouts, is a festive favorite that reaches new heights of deliciousness when paired with a warm, buttery roll to sop up every drop of its creamy sauce.
- Soups and Stews: For a cozy weeknight dinner, there’s nothing better than dipping a soft crescent roll into a rich, steaming bowl of soup or stew. Their texture makes them ideal for soaking up flavorful broths and sauces.
- Everyday Family Dinners: Don’t reserve these rolls just for special occasions! They are a fantastic addition to simple meals like roasted chicken, pasta dishes, or even a simple salad, instantly elevating the dining experience.
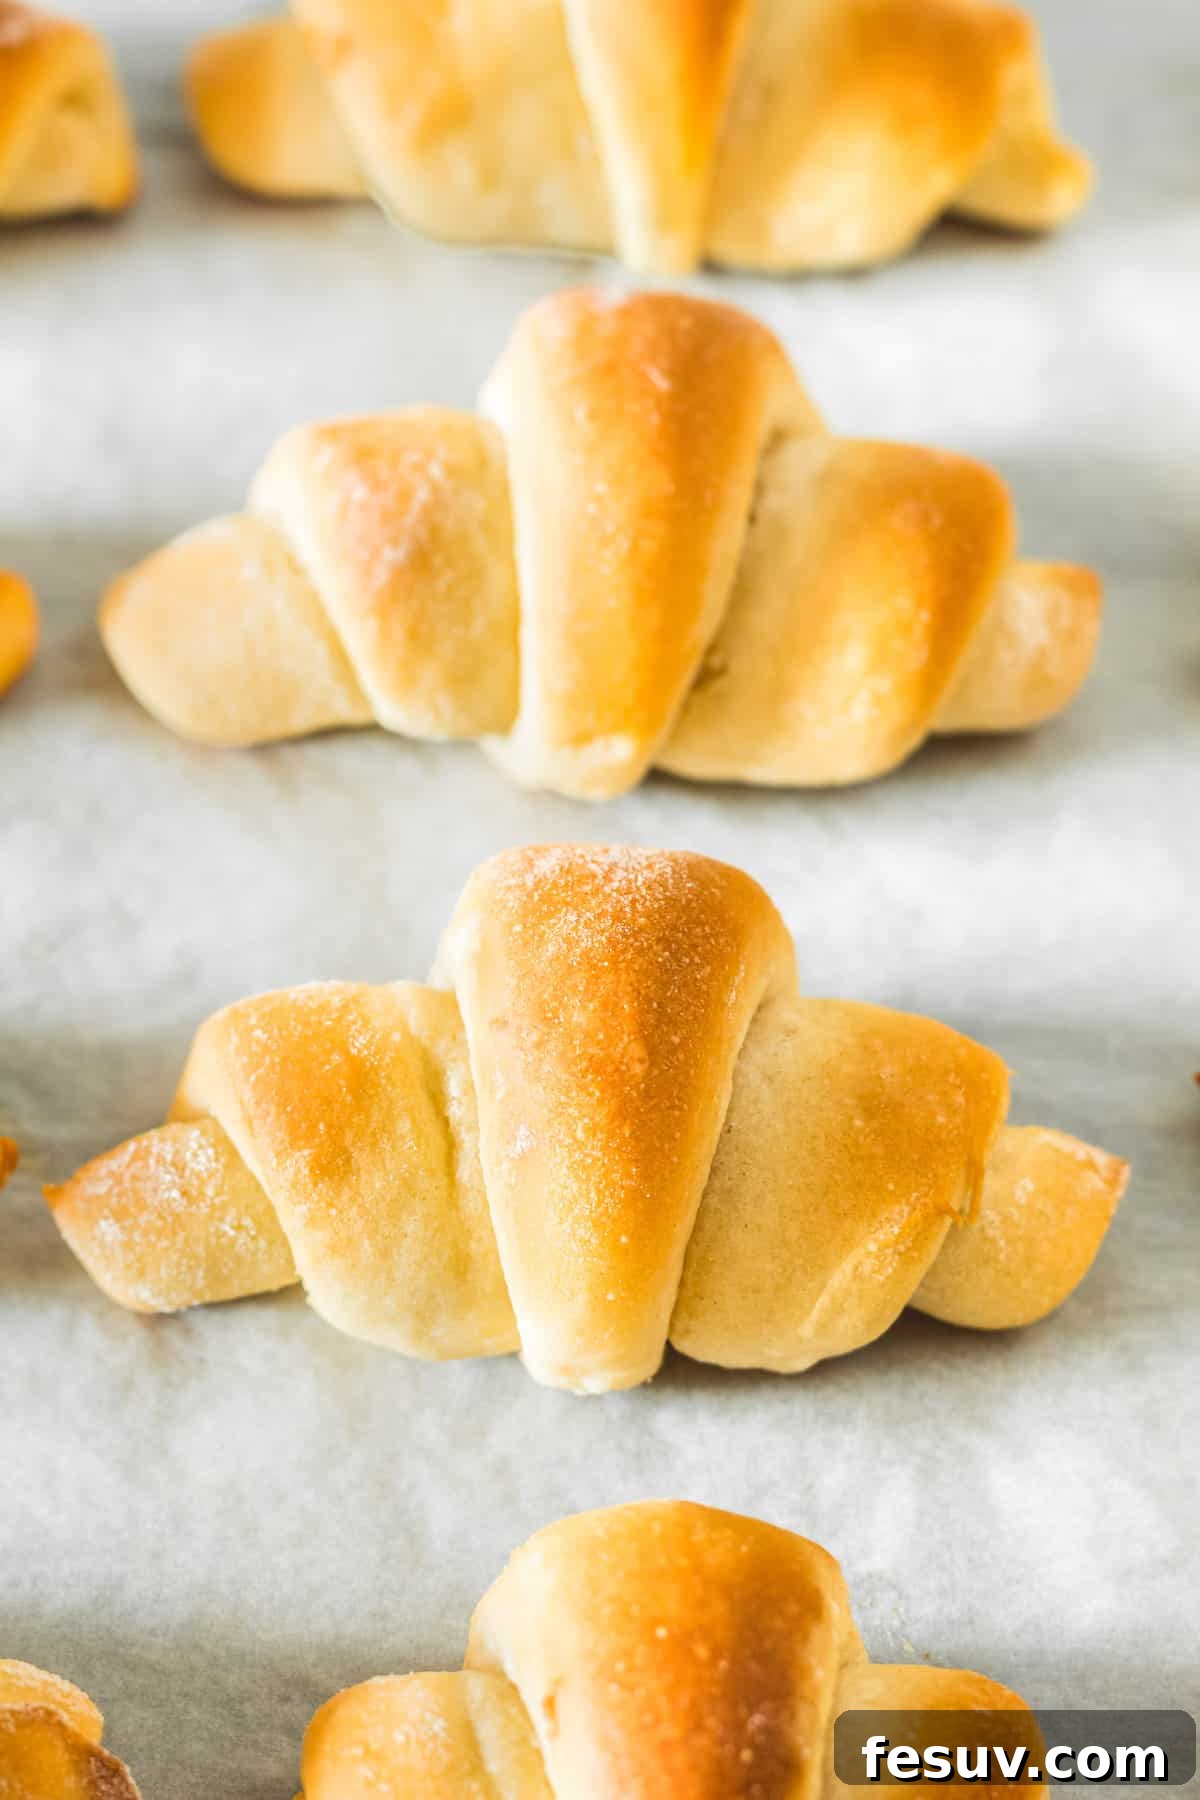
Storing and Enjoying Leftover Crescent Rolls
If you’re lucky enough to have any leftover crescent rolls (a rare occurrence in most households!), proper storage is key to preserving their freshness and deliciousness. You have several excellent options, depending on how long you wish to keep them. Always store them in airtight containers or heavy-duty food storage bags to prevent them from drying out.
- Room Temperature: For immediate enjoyment, crescent rolls will stay wonderfully fresh and soft at room temperature for one to two days. Keep them covered to maintain their tenderness.
- Refrigerator: If you need to extend their life a bit longer, storing them in the refrigerator is a great option. When refrigerated in an airtight container, they will remain fresh for four to five days. Reheat gently before serving for the best experience.
- Freezer: For long-term storage, the freezer is your best friend. Properly frozen crescent rolls can be kept for up to three months without compromising their quality. This makes them an excellent candidate for meal prepping or having a stash of homemade goodness ready at a moment’s notice.
Make-Ahead Mastery: Freezing and Baking Fresh
One of the most appealing aspects of this crescent roll recipe is its make-ahead potential. You can prepare and freeze these buttery rolls in advance, allowing you to bake them fresh on the day you plan to serve them, significantly reducing stress, especially during busy holidays. Here’s how to do it:
- Prepare and Shape: Follow the recipe instructions as written to mix the dough, allow it to complete its first refrigerator rise, and then shape the rolls into their distinctive crescents. Arrange the shaped, unbaked rolls on a baking sheet, ensuring they don’t touch each other.
- Flash Freeze: Place the baking sheet with the shaped rolls into the freezer for approximately an hour, or until the rolls are completely frozen solid. This “flash freezing” prevents them from sticking together when transferred to a storage bag.
- Store for Later: Once solid, transfer the frozen rolls into freezer-safe bags or airtight containers. Label them with the date. They will keep beautifully in a standard freezer for up to four weeks. If you have a deep freezer, they can maintain their quality for an even longer period.
- Bake from Frozen: When you’re ready to bake, take the frozen rolls directly from the freezer and arrange them on a lightly greased baking sheet (or one lined with parchment paper). Cover them loosely and allow them to rise in a warm place until they have doubled in size. This process will typically take about 1 hour, possibly slightly longer as they thaw and proof.
- Bake and Enjoy: Once risen, preheat your oven to 350°F (175°C) and bake the rolls for 12 to 15 minutes, or until they are puffed, golden-brown, and smell absolutely divine. Serve them warm and revel in the fresh-baked aroma and taste, even though most of the work was done days or weeks ago!
Homemade Crescent Rolls (Butterhorn Rolls)
by Katerina | Easy Weeknight Recipes
These ultimate homemade crescent rolls are incredibly soft, buttery, and easy to make from scratch. Using simple ingredients, this beloved side dish is perfect for any occasion, from holiday feasts to everyday dinners.
Ingredients
- 2 ¼ teaspoons active dry yeast
- ¼ cup warm water (about body temperature)
- 1 cup warm milk (whole milk recommended)
- ½ cup granulated sugar
- 1 large egg, beaten to break up the yolks, at room temperature
- 1 teaspoon salt
- 5 cups all-purpose flour
- ¾ cup unsalted butter + 3 tablespoons, melted (¾ cup for dough, 3 tablespoons for brushing)
Instructions
- In a large bowl, dissolve the yeast into the warm water and let it sit for about 5 minutes until creamy and bubbly.
- Add the warm milk, granulated sugar, and beaten room-temperature egg to the yeast mixture. Stir to combine.
- Stir in the salt and 2.5 cups of the all-purpose flour until well incorporated, forming a soft, almost batter-like dough.
- Pour in ¾ cup of the melted unsalted butter. Add the remaining 2.5 cups of flour. Mix the dough well with your hands or a large spoon until it forms a sticky, smooth dough. If the dough is too wet to handle, you can add an additional ¼ to ½ cup of flour, but remember it should remain sticky, not dry.
- Transfer the dough to a large clean, lightly greased bowl. Cover tightly with plastic wrap and refrigerate for at least 5 hours, or ideally overnight, for a slow rise that develops flavor.
- Once risen, remove the dough from the refrigerator and gently punch it down. Divide the dough into 3 equal portions.
- On a lightly floured surface, roll each portion into a 12-inch circle. Brush the surface of each circle with 1 tablespoon of the reserved melted butter. Cut each circle into 12 wedges (pizza-style).
- Starting at the wide end, roll each wedge of dough up tightly towards the pointed end to form a crescent roll. Place the rolls on lightly greased or parchment-lined baking sheets, with the pointed ends tucked underneath.
- Cover the baking sheets and let the rolls rise in a warm, draft-free place for 1 hour, or until they have roughly doubled in size.
- While the rolls are rising, preheat your oven to 350°F (175°C).
- Bake the rolls for 12 to 15 minutes, or until their tops are beautifully golden brown.
- Remove the rolls from the oven. For an extra buttery touch, you may lightly brush them with any remaining melted butter. Cool slightly on wire racks before serving warm.
Nutrition Information (Estimate per roll)
Calories: 121kcal | Carbohydrates: 16g | Protein: 2g | Fat: 5g | Saturated Fat: 3g | Polyunsaturated Fat: 1g | Monounsaturated Fat: 1g | Trans Fat: 1g | Cholesterol: 17mg | Sodium: 70mg | Potassium: 31mg | Fiber: 1g | Sugar: 3g | Vitamin A: 159IU | Calcium: 12mg | Iron: 1mg
Nutritional information is an estimate provided as a courtesy. Values may vary based on ingredients and tools used. Please use your preferred nutritional calculator for more detailed information.
More Irresistible Side Dishes for Your Holiday Table
Complementing your festive meals with a variety of delicious side dishes can truly elevate the dining experience. While your homemade crescent rolls will undoubtedly be a star, here are a few more easy-to-make, crowd-pleasing side dishes that are perfect for holiday gatherings or any special occasion:
- Creamy Sweet Potato Casserole: A delightful blend of sweet potatoes, warm spices, and a crunchy pecan topping. This dish offers a wonderful contrast to savory main courses and is a beloved classic.
- Perfect Homemade Cranberry Sauce: Forget the canned variety! This vibrant, tangy, and subtly sweet cranberry sauce is incredibly easy to make from scratch and adds a fresh burst of flavor to your holiday spread.
- The Best Green Bean Casserole: An elevated take on a timeless favorite, this green bean casserole features crisp-tender green beans baked in a rich, creamy sauce, often topped with crispy fried onions for an irresistible texture.
- Roasted Brussels Sprouts with Balsamic Glaze: Simple yet elegant, roasting Brussels sprouts brings out their natural sweetness. A drizzle of balsamic glaze adds a touch of sophistication.
- Garlic Mashed Potatoes: Creamy, dreamy mashed potatoes infused with roasted garlic are a universal comfort food that pairs flawlessly with almost anything.
Creating a memorable meal is all about the details, and these side dishes, alongside your incredible homemade crescent rolls, are sure to make any gathering special. Enjoy the process of baking and the joy of sharing these delicious creations with your loved ones!