

Indulge in the heartwarming tradition of Eastern European cuisine with this irresistible **Homemade Pierogi Recipe**. Featuring a rich, creamy potato and cheese filling, crowned with sweet caramelized onions and savory crispy bacon, these delectable dumplings are far more than just a meal—they are a celebration of comfort and flavor. Perfect as a delightful appetizer, a satisfying side dish, or a light yet savory dinner, these classic pierogi ruskie promise to transport your taste buds straight to the heart of Poland. Forget store-bought; crafting these from scratch is a rewarding experience that yields unparalleled taste and texture, ensuring every bite is a testament to homemade goodness.

Discover the Joy of Authentic Pierogi Ruskie: A Cheesy Potato Delight
Pierogi hold a special place in the culinary hearts of Eastern and Central Europe, extending their delicious reach across the globe. These delightful dumplings are more than just food; they’re a cultural staple, often gracing festive tables, especially during holidays like Christmas and Easter. While you might encounter a wide array of pierogi variations, including sweet dessert styles filled with fruit, our focus today is on mastering the timeless classic: savory **Pierogi Ruskie**. This specific type boasts a wonderfully comforting filling of mashed potatoes and cheese, a combination that has stood the test of time.
Crafting homemade pierogi, much like many traditional dumpling recipes, is an art that requires a little patience and love. However, the effort is undeniably worth it, resulting in tender dough pockets bursting with flavorful filling. A fantastic bonus? Pierogi freeze exceptionally well! This makes them an ideal candidate for a weekend cooking project where you can double or triple the batch, stocking your freezer with future quick meals. Enlist a few helpers, set up an assembly line, and prepare to create a batch of these glorious **potato and cheese pierogi** that will impress everyone at your table.

Essential Ingredients for Your Perfect Homemade Pierogi
Before you embark on your pierogi-making adventure, ensure your pantry and refrigerator are well-stocked. Gathering all your components beforehand makes the process much smoother and more enjoyable. Below is a detailed list of what you’ll need for the dough, the delicious potato-cheese filling, and that irresistible savory topping. Remember to consult the full recipe card at the bottom of this post for precise measurements and detailed nutritional information.
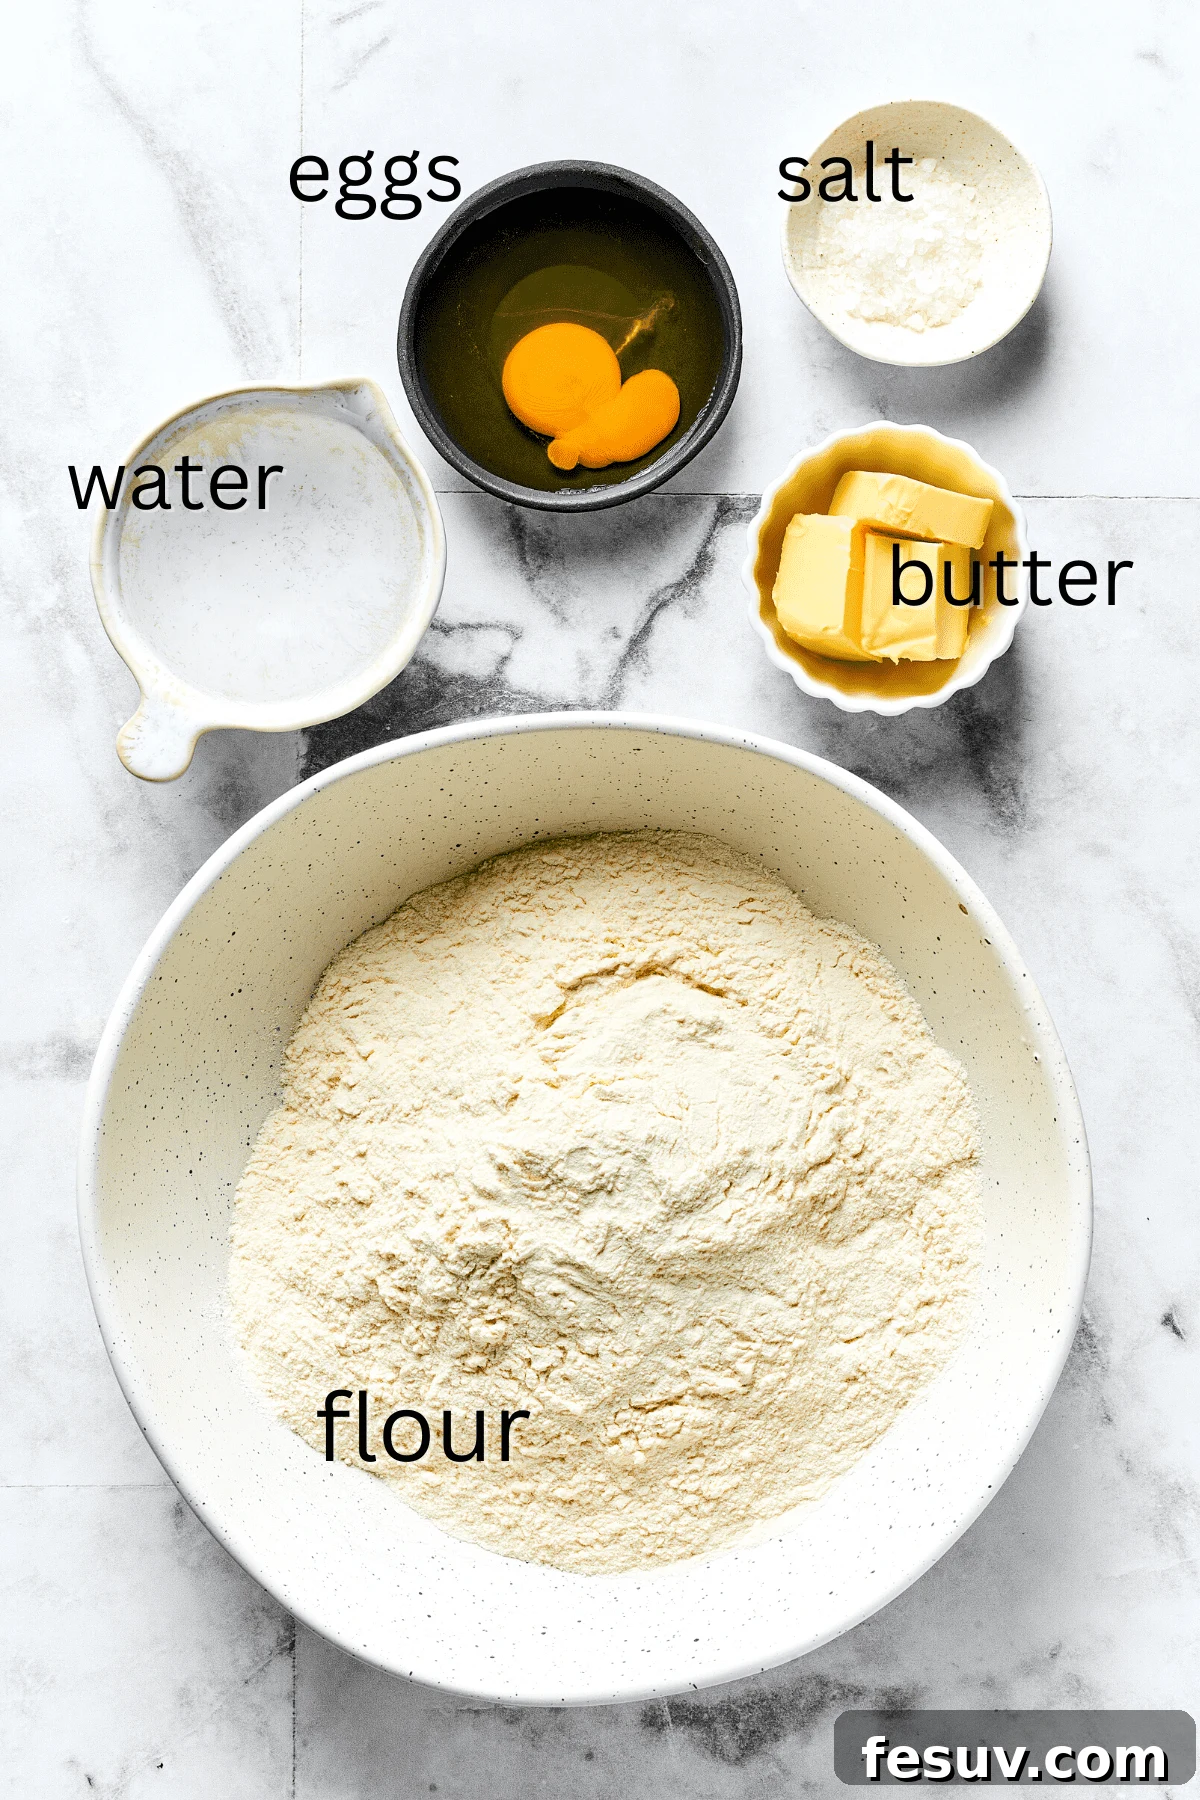
For the Tender Pierogi Dough
- All-Purpose Flour: The foundation of our pierogi, regular all-purpose flour provides the perfect balance of structure and tenderness.
- Salt: A pinch of salt is crucial for seasoning the dough, enhancing the overall flavor of your pierogi.
- Unsalted Butter: Incorporating unsalted butter adds richness and pliability to the dough, making it wonderfully soft and easy to work with.
- Warm Water: Lukewarm water (not hot!) helps activate the flour and butter, creating a cohesive, smooth dough.
- Large Egg: One large egg acts as a binder, contributing to the dough’s elasticity and ensuring it holds together beautifully during rolling and cooking.
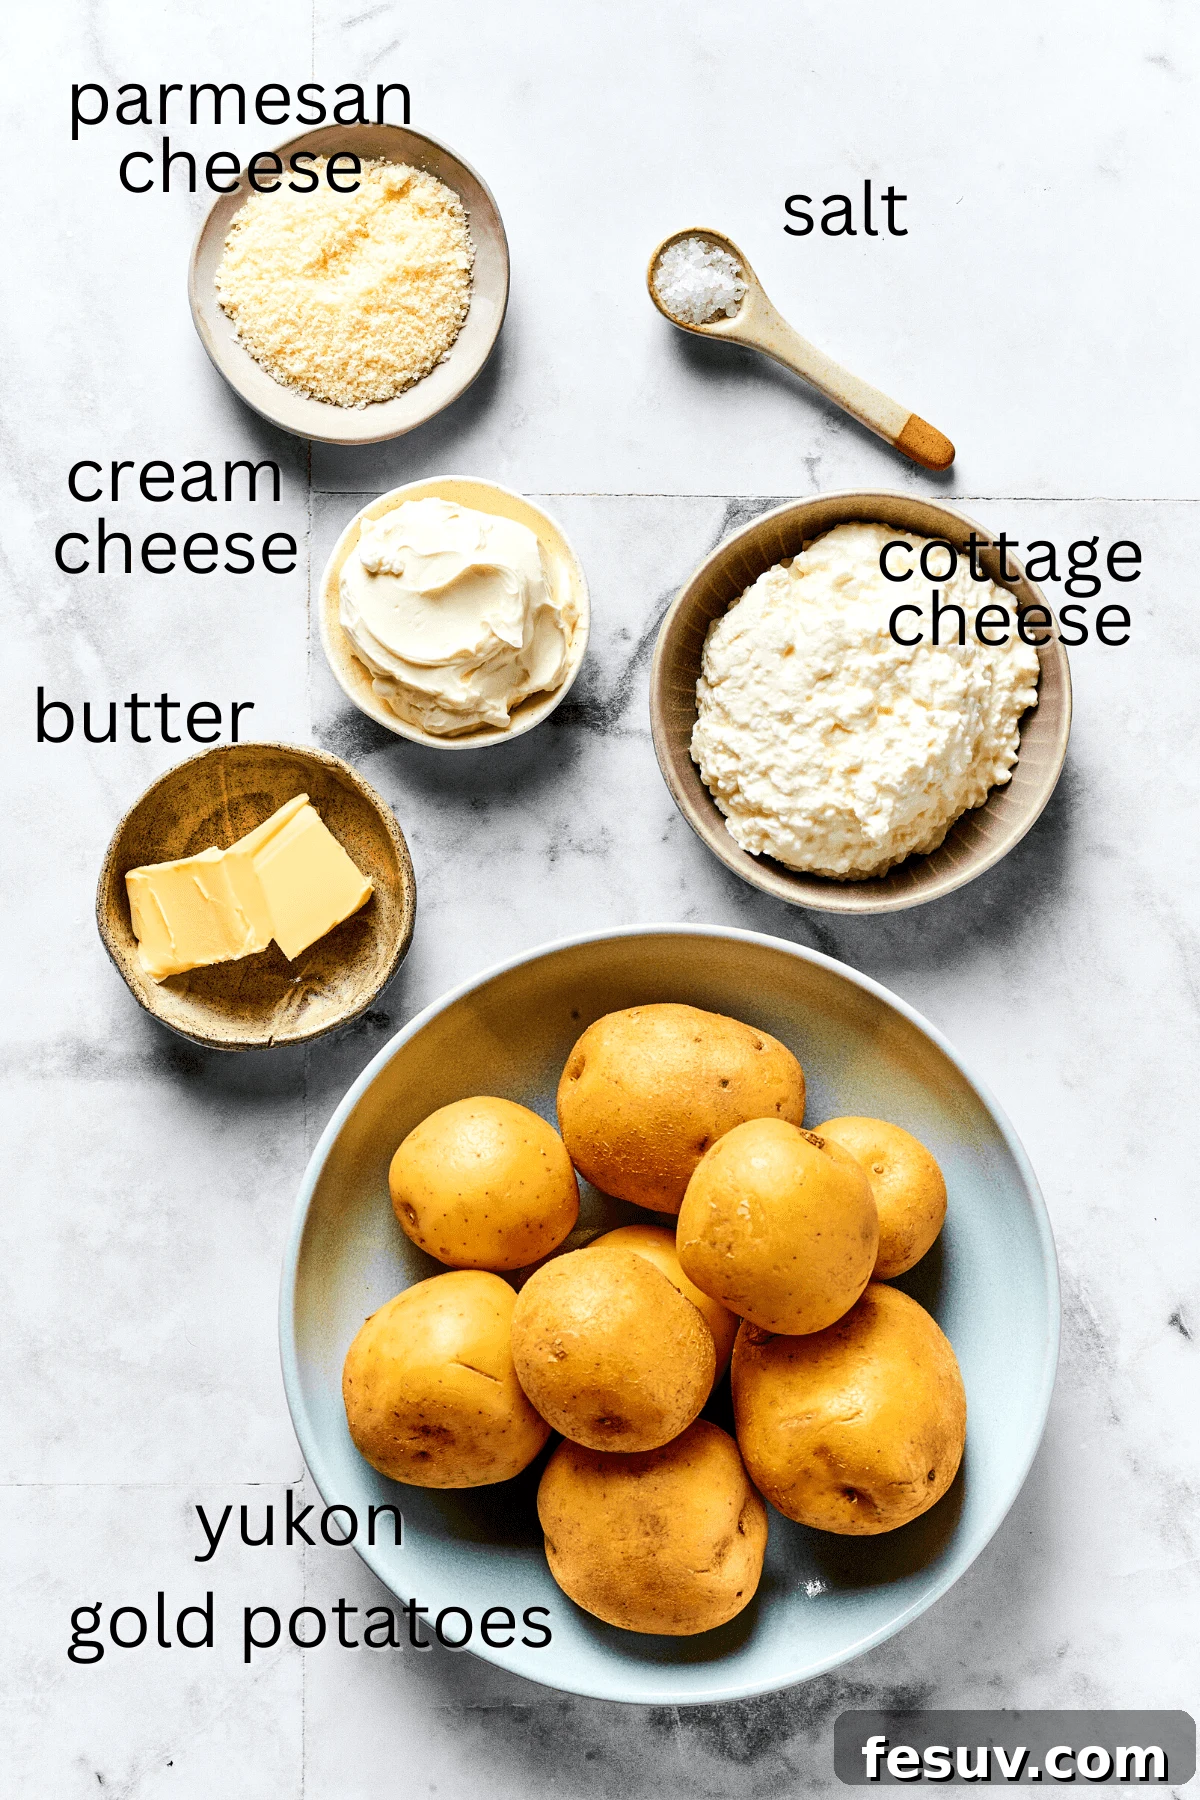
For the Creamy Potato-Cheese Filling
- Potatoes: For the best texture and flavor, we recommend **Yukon Gold potatoes**, known for their naturally buttery flavor and creamy consistency when mashed. Russet potatoes or other starchy mashing varieties will also yield excellent results.
- Sea Salt: Essential for seasoning the potato filling. You can use regular salt if sea salt isn’t available.
- Unsalted Butter: Adds luxurious richness and a smooth texture to the mashed potato filling. If using salted butter, simply reduce the amount of added sea salt to taste.
- A Trio of Cheeses: Our secret to an irresistibly cheesy and creamy filling lies in a harmonious blend of:
- Cream Cheese: For a silky-smooth texture and a hint of tang.
- Cottage Cheese: Adds a unique texture and subtle savory depth, typical in traditional Pierogi Ruskie.
- Parmesan Cheese: Contributes a sharp, umami-rich flavor that perfectly complements the potatoes.
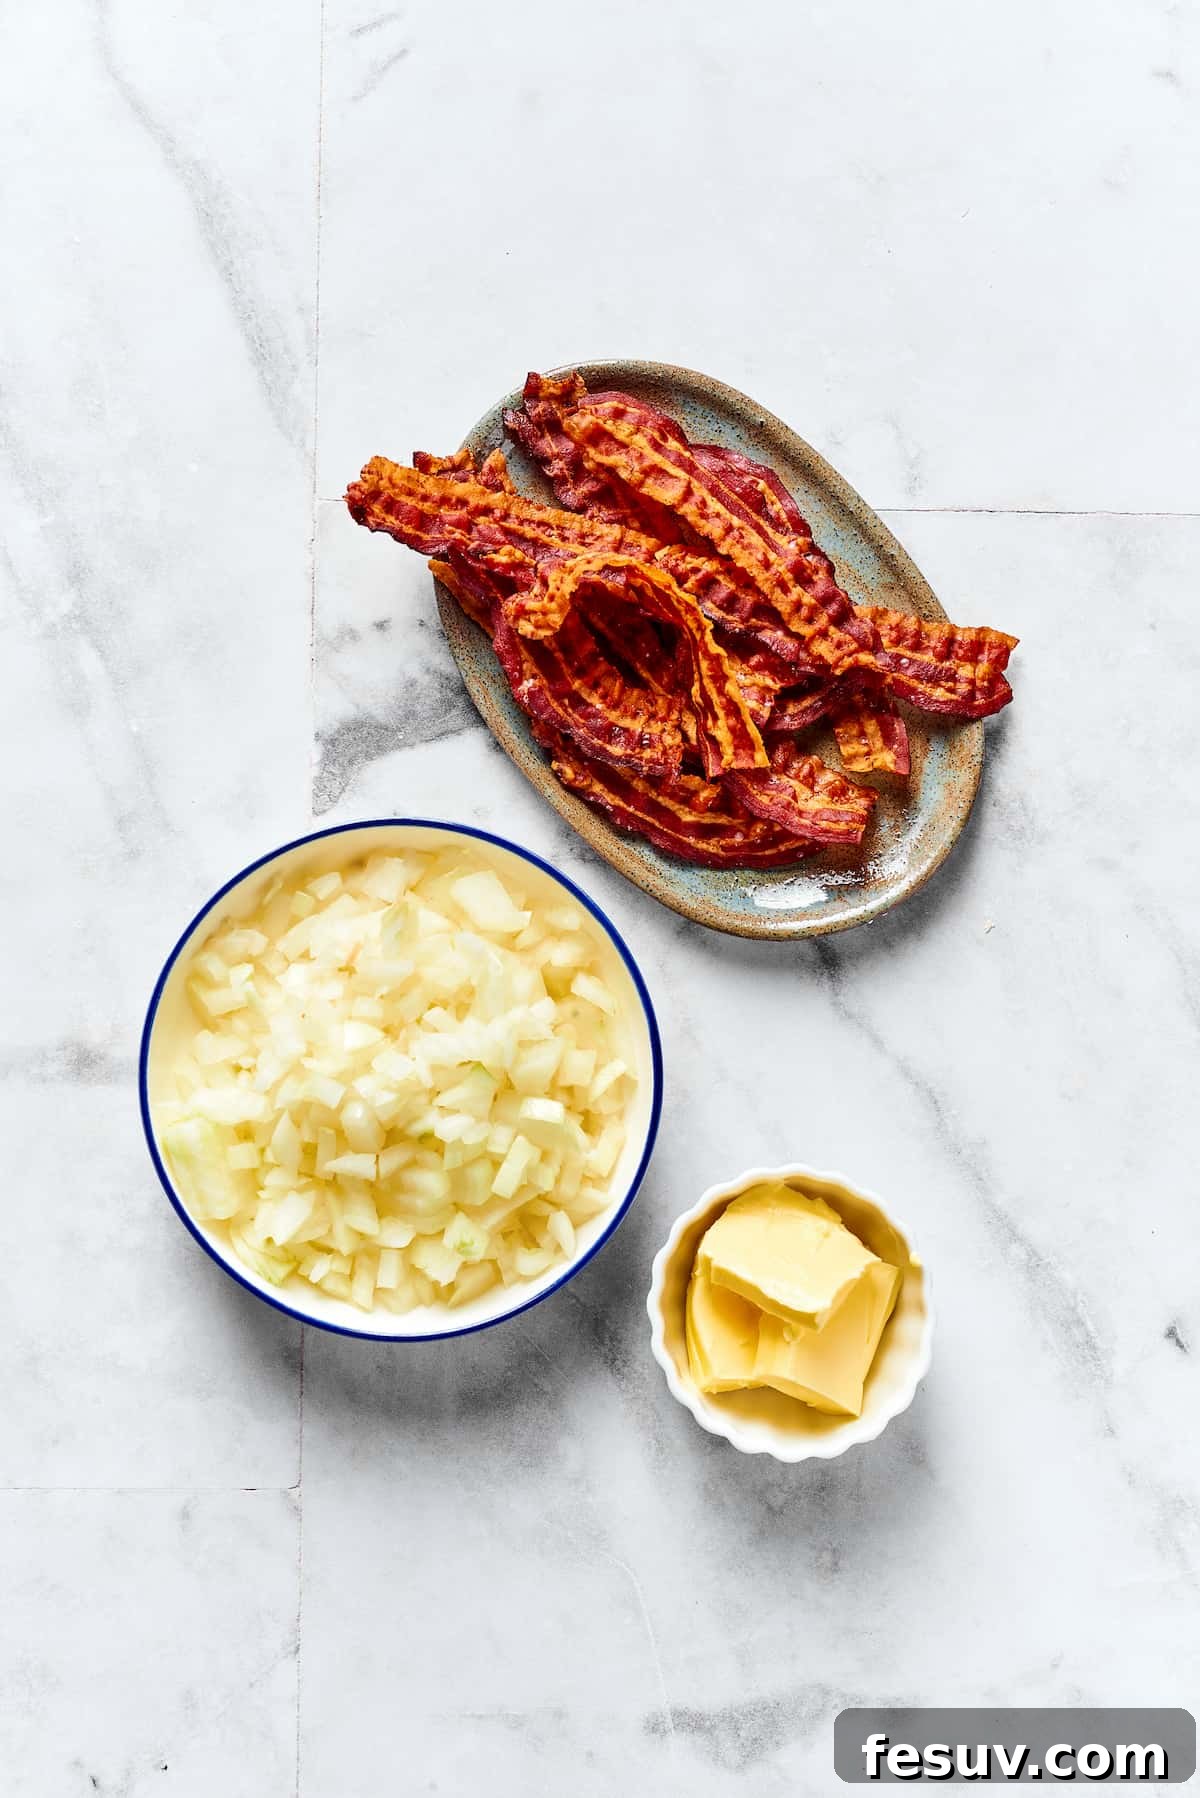
For the Irresistible Topping
- Bacon: Crisply cooked and crumbled into small, savory bits, bacon adds a delightful crunch and smoky flavor that pairs perfectly with pierogi.
- Unsalted Butter: Used to sauté the onions, it creates a rich, golden base for the topping.
- Onions: Two yellow onions, finely chopped and caramelized, lend a wonderful sweetness and depth to the topping. White onions can be substituted if preferred.
- Fresh Parsley: Freshly chopped parsley provides a vibrant pop of color and a fresh, herbaceous note to finish the dish.
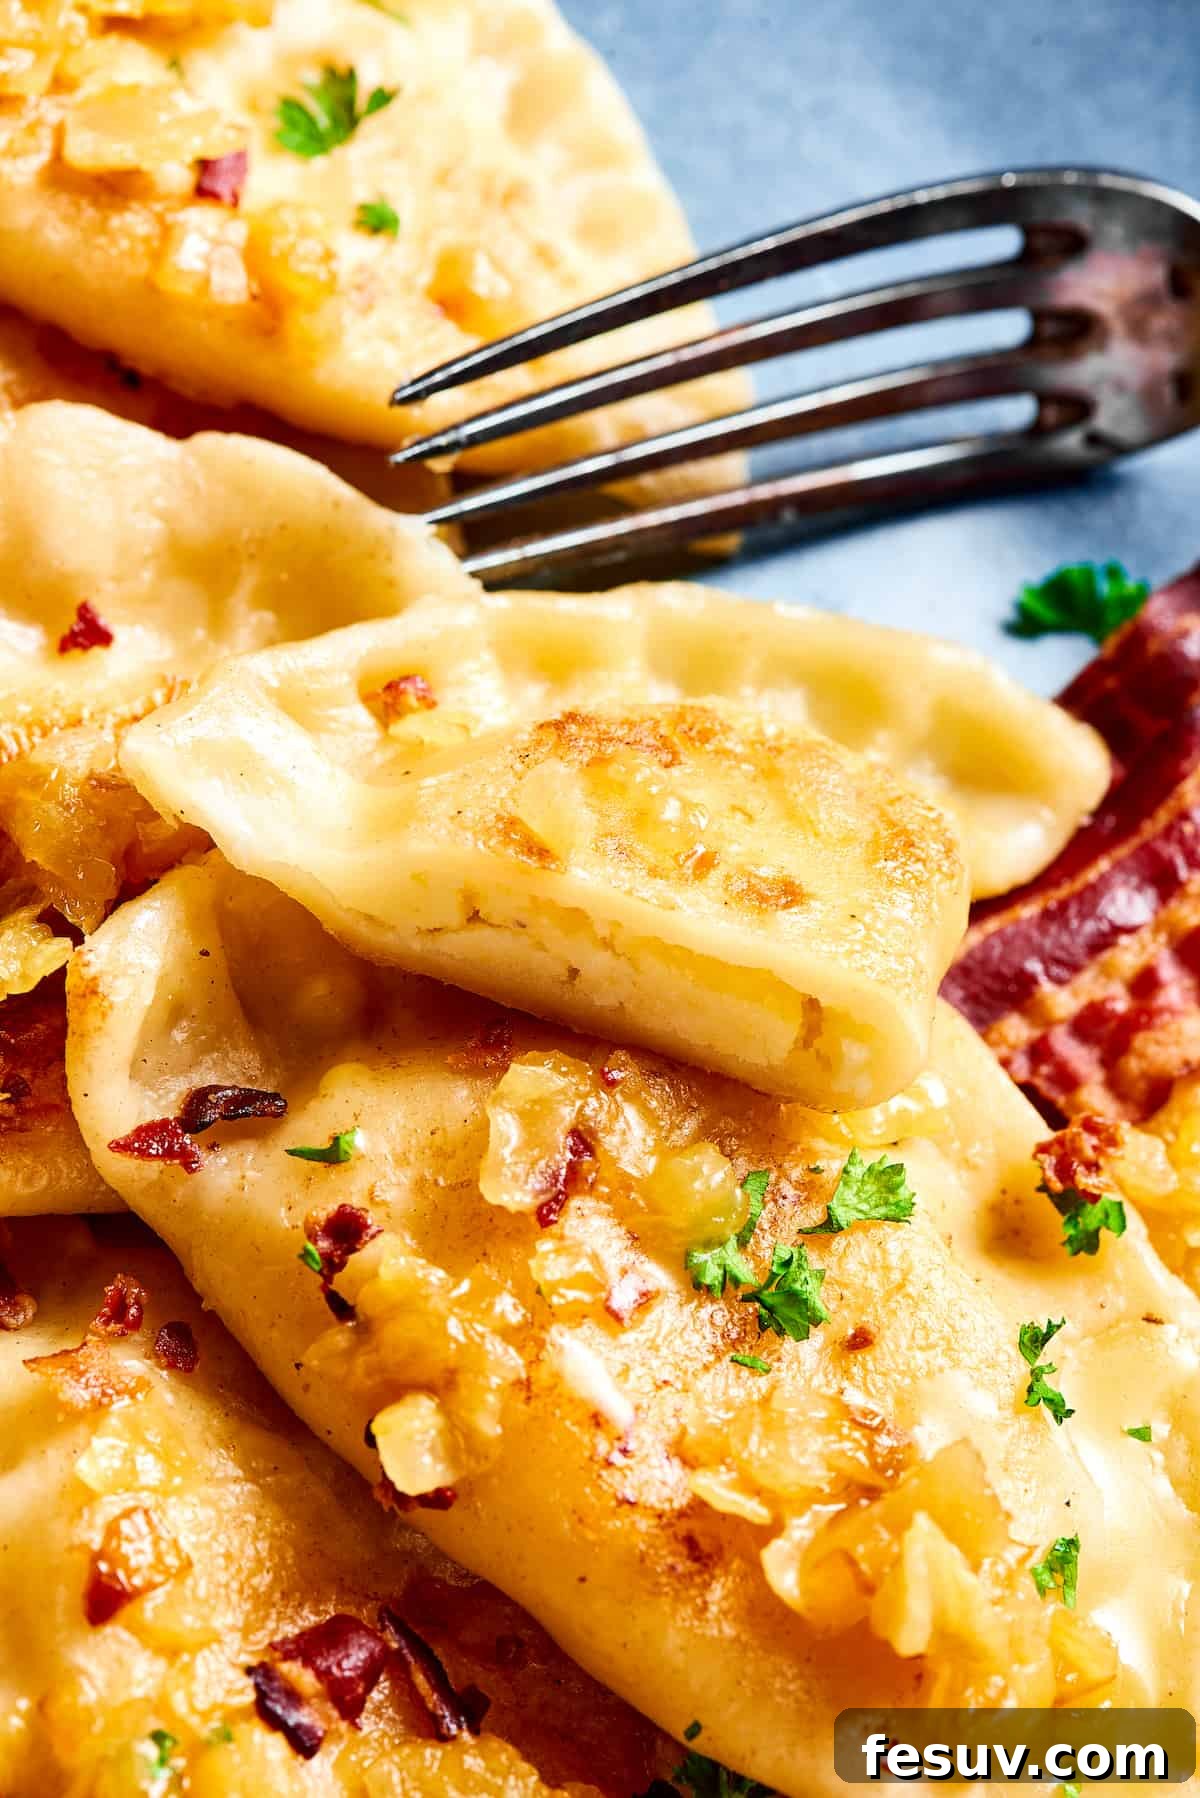
Your Step-by-Step Guide to Crafting Perfect Homemade Pierogi!
Now that we have all our ingredients assembled, it’s time for the most enjoyable part: bringing these delicious pierogi to life in your kitchen. This section will guide you through each stage, from preparing the luscious filling and kneading the tender dough to shaping, cooking, and topping your homemade dumplings. Follow these detailed instructions for a truly authentic and satisfying pierogi experience.
Preparing the Creamy Potato and Cheese Filling
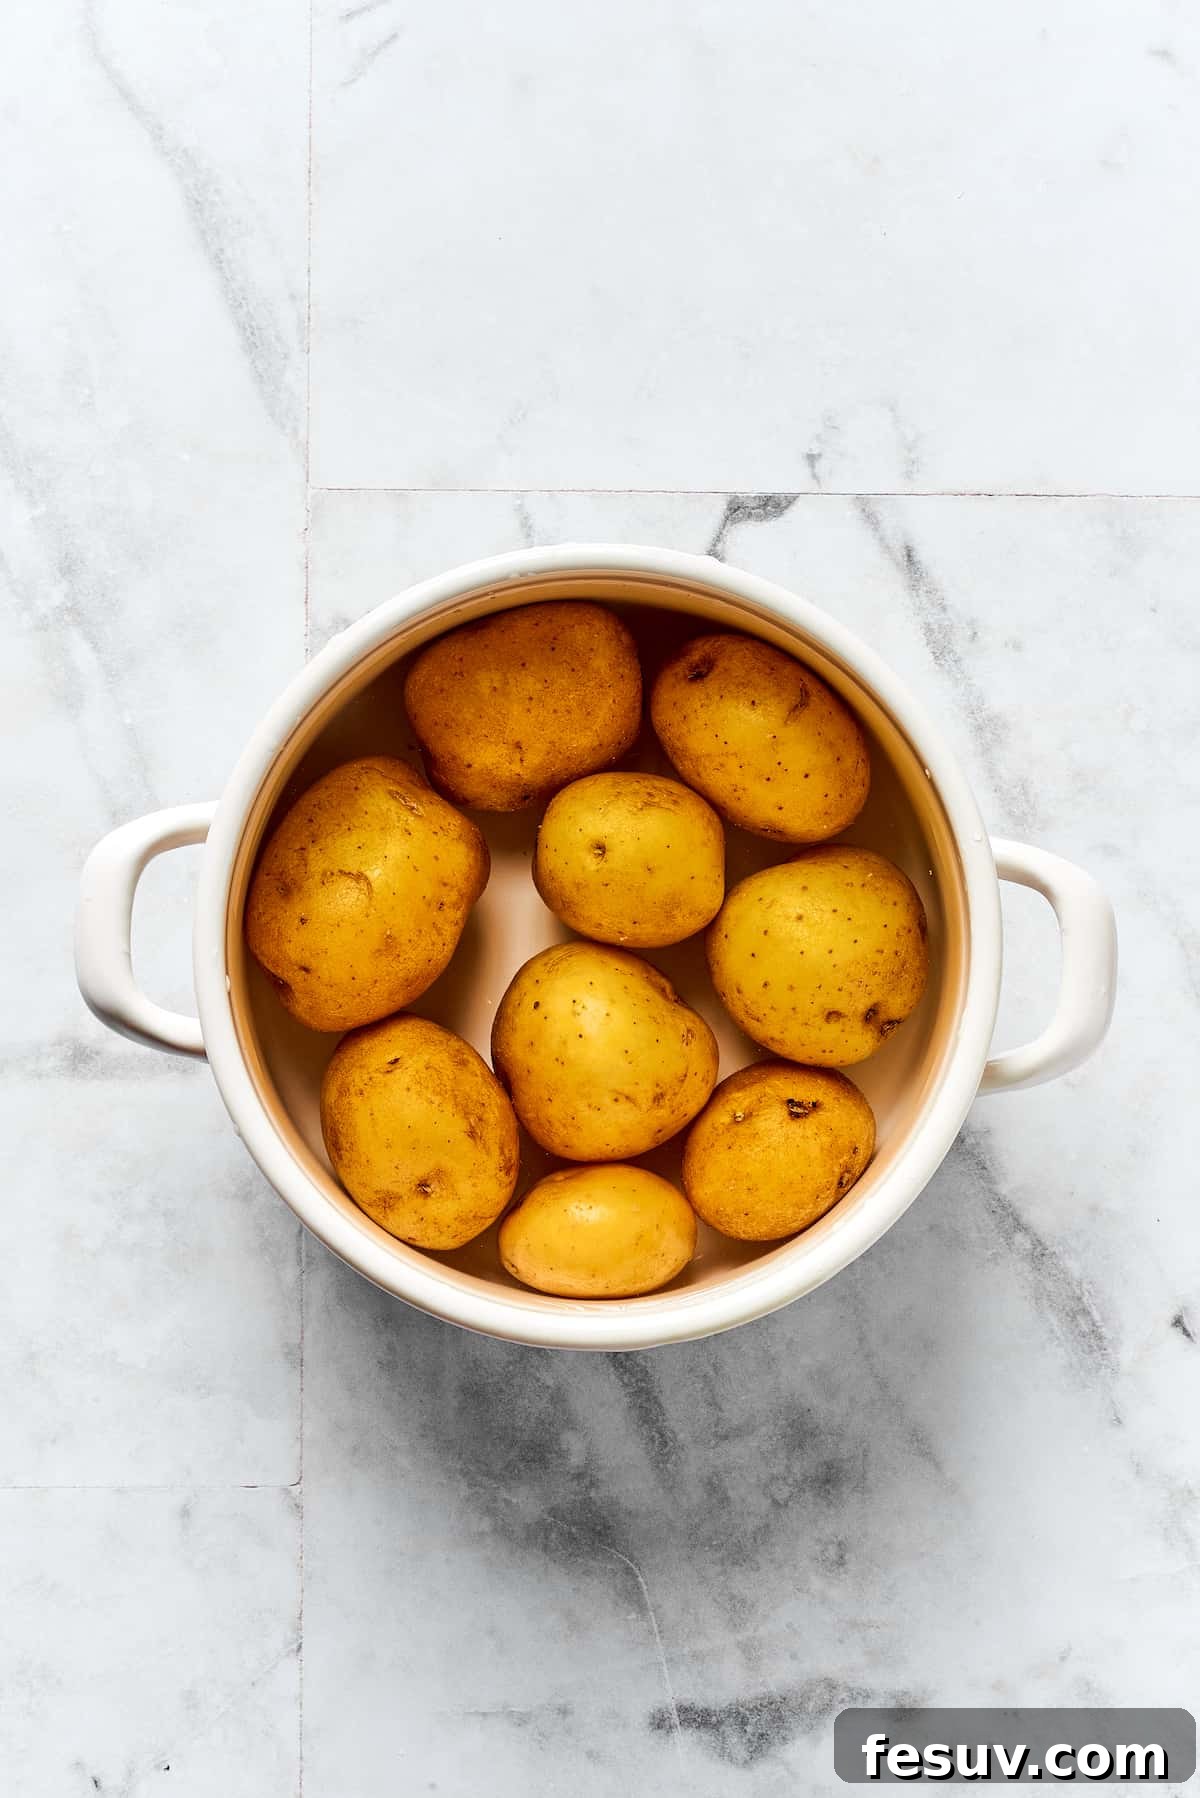
- Cook the Potatoes: Begin by thoroughly washing your potatoes. Place them in a medium-sized pot, ensuring they are fully covered with cold water. Bring the water to a rolling boil over medium-high heat. Once boiling, reduce the heat slightly, cover the pot with a lid (leaving it ajar to allow some steam to escape), and let the potatoes simmer until they are fork-tender. This usually takes about 20-25 minutes, depending on the size of your potatoes.
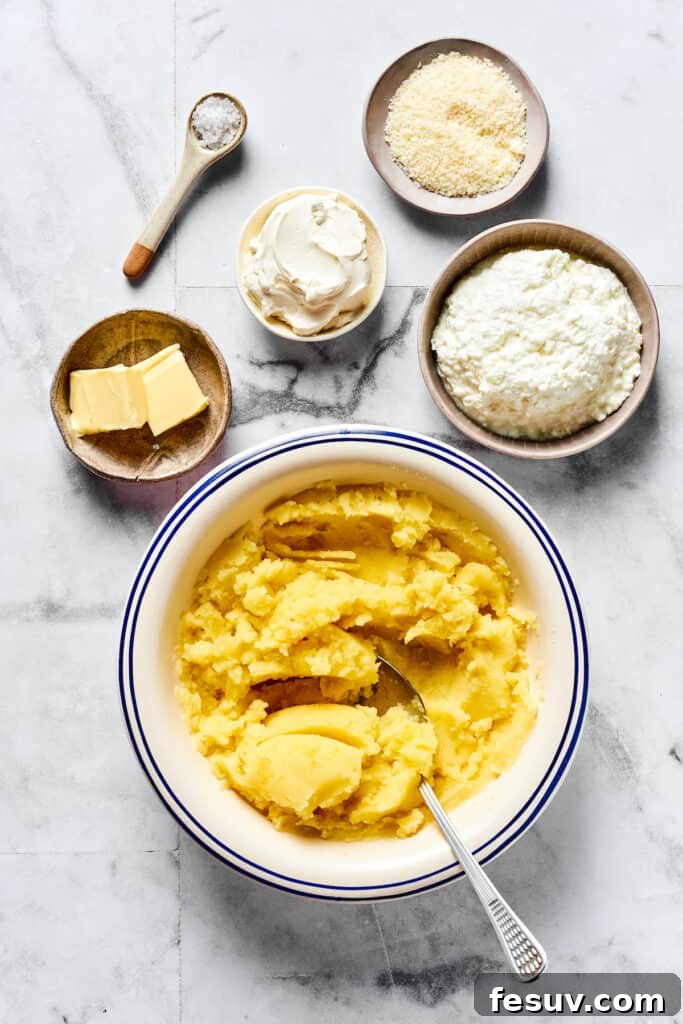
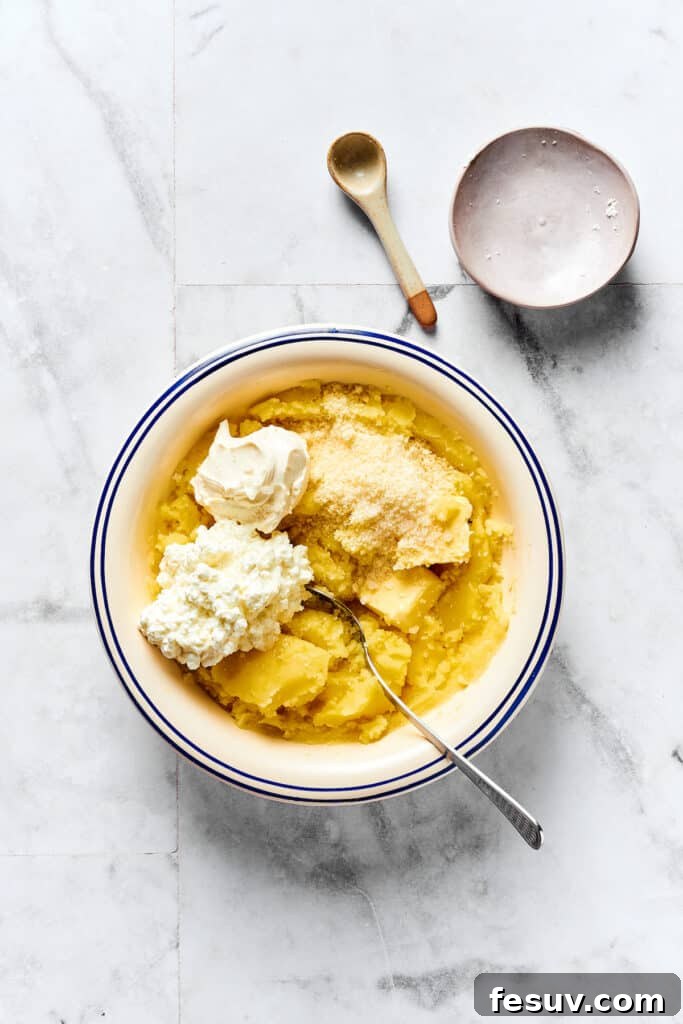
- Create the Flavorful Filling: Once the potatoes are perfectly tender, drain them thoroughly. Return the hot potatoes to the pot or transfer them to a large mixing bowl. Using a sturdy potato masher, mash the potatoes until they are completely smooth and free of any lumps. Next, add the cottage cheese, cream cheese, grated Parmesan cheese, unsalted butter, and sea salt to the mashed potatoes. Mix all the ingredients together vigorously until well combined and the filling is smooth and creamy. Taste and adjust seasoning if necessary. Set this delectable filling aside to cool slightly while you prepare the pierogi dough.
Crafting and Shaping the Perfect Pierogi
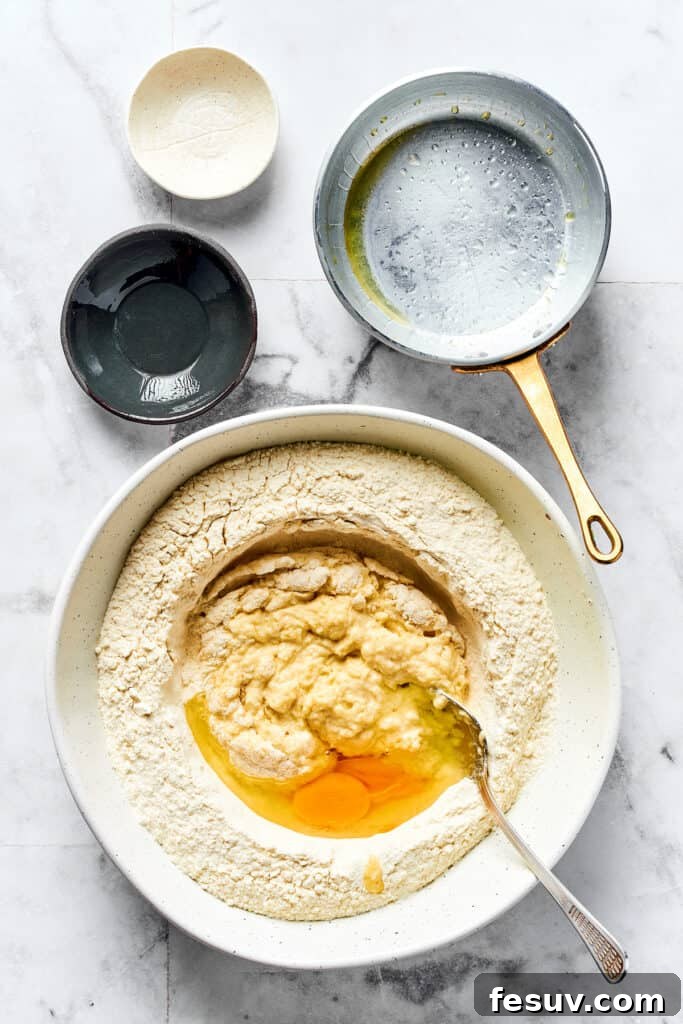
- Prepare the Dough: In a large mixing bowl, whisk together the all-purpose flour and salt until thoroughly combined. In a separate small pot or microwave-safe bowl, gently warm the water and unsalted butter until the butter is completely melted. Be careful not to let the mixture get too hot, just warm enough to melt the butter. Pour the warm butter mixture into the flour mixture, stirring initially with a spoon until a shaggy dough forms. Then, crack in the large egg and continue mixing. Now, either knead the dough by hand on a lightly floured surface for about 5 minutes until it’s smooth and elastic, or use a stand mixer with a dough hook attachment on medium speed for the same duration.
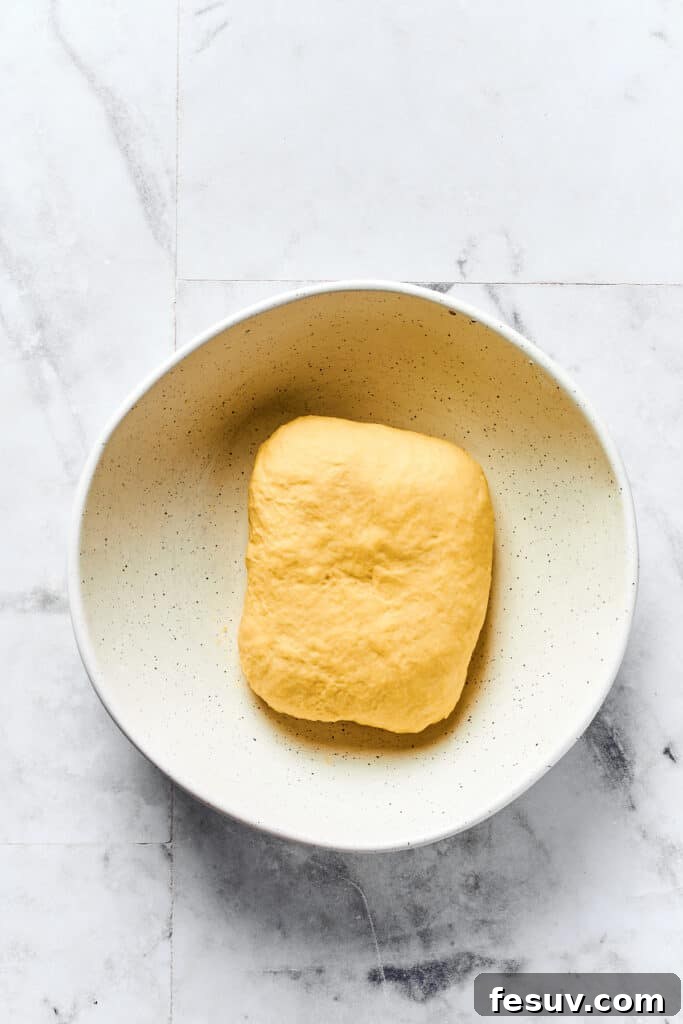
- Rest the Dough for Perfection: Once kneaded, shape the dough into a ball. Cover the bowl containing the dough with a clean kitchen towel or plastic wrap. Allow the dough to rest at room temperature for approximately 40 minutes. This resting period is crucial as it allows the gluten to relax, making the dough much easier to roll out thinly and preventing it from shrinking back.
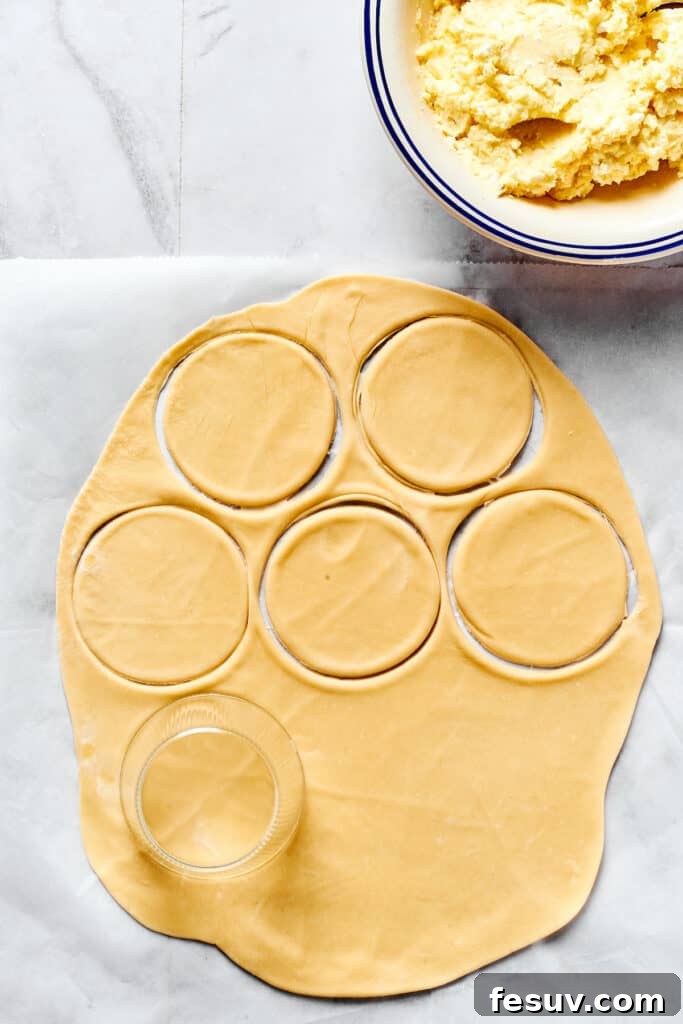
- Roll and Cut the Dough: Once rested, divide the dough in half. Keep one half covered with plastic wrap to prevent it from drying out. Lightly flour your work surface and rolling pin. Roll out the first half of the dough very thinly, aiming for a thickness of about 1/8 inch. Use a dedicated pierogi cutter or a simple drinking glass (approximately 2.5-3 inches in diameter) to cut out neat rounds from the rolled dough. Gather any dough scraps, re-knead them gently, and cover them to rest for a few minutes before rolling again.
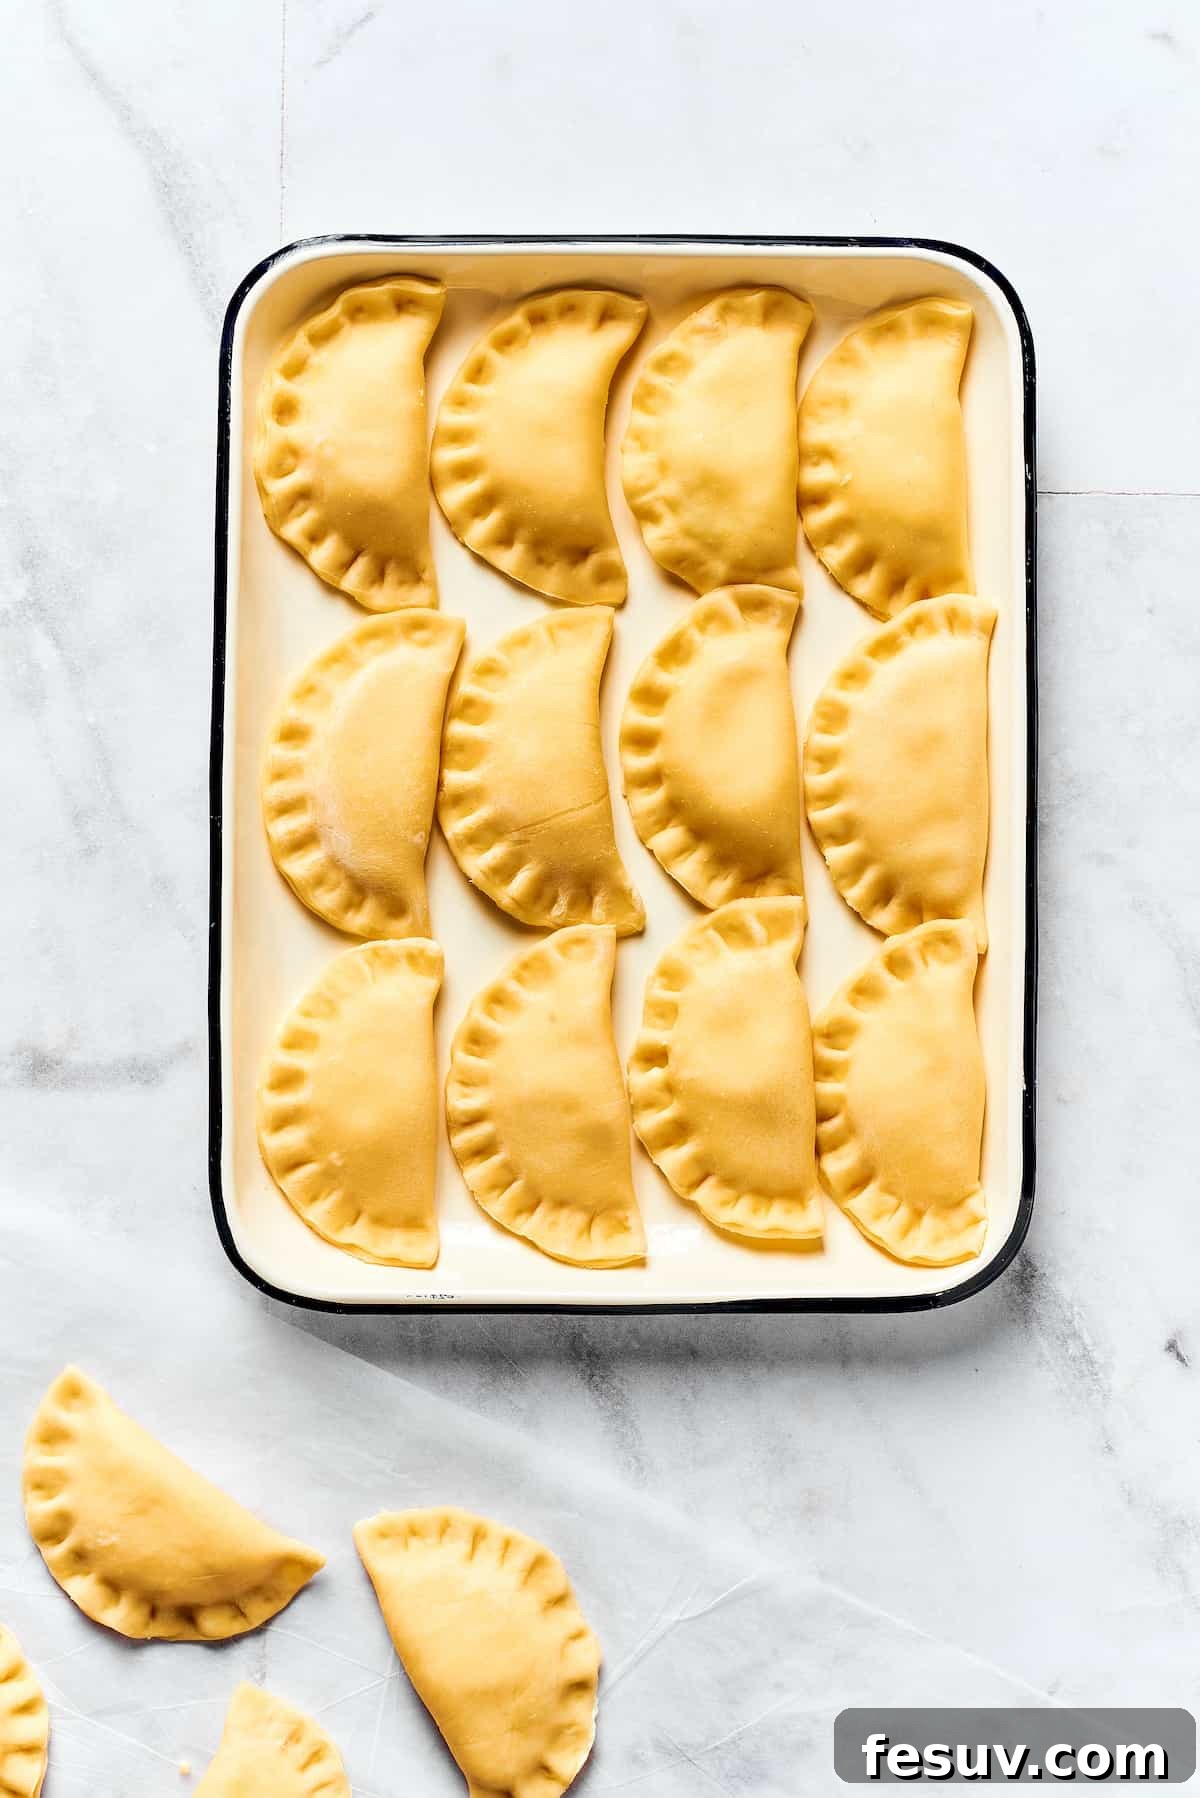
- Fill and Seal Each Pierogi: Take one dough round and spoon a generous tablespoon of the potato-cheese filling onto its center. Lightly moisten the edges of the dough round with a little water using your fingertip or a pastry brush. Carefully fold the dough in half, creating a crescent shape, ensuring the filling is fully enclosed. Gently press the edges together with your fingers to seal them securely. For a classic crimped edge, you can use a fork to press down along the sealed seam.
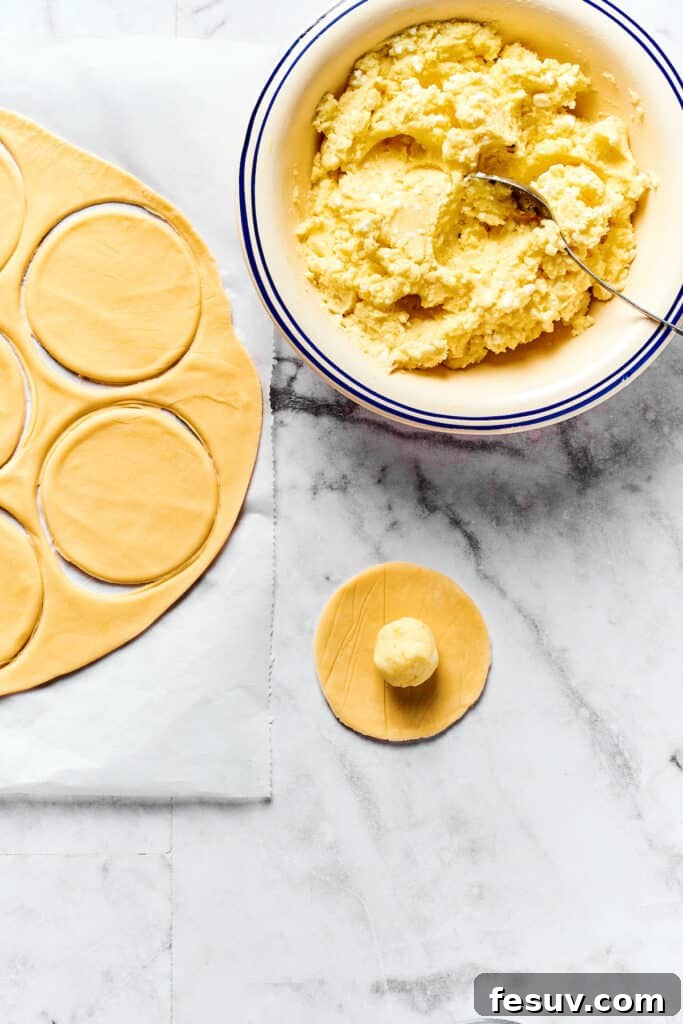
- Complete the Batch: Place each sealed pierogi onto a baking sheet lined with parchment paper. Lightly cover the pierogi with a clean kitchen towel to prevent them from drying out. Continue the process of rolling, cutting, filling, and sealing with the remaining dough and filling until all ingredients are used. This assembly line approach is perfect for efficiency, especially if you have a helper!
Cooking Your Homemade Pierogi to Perfection
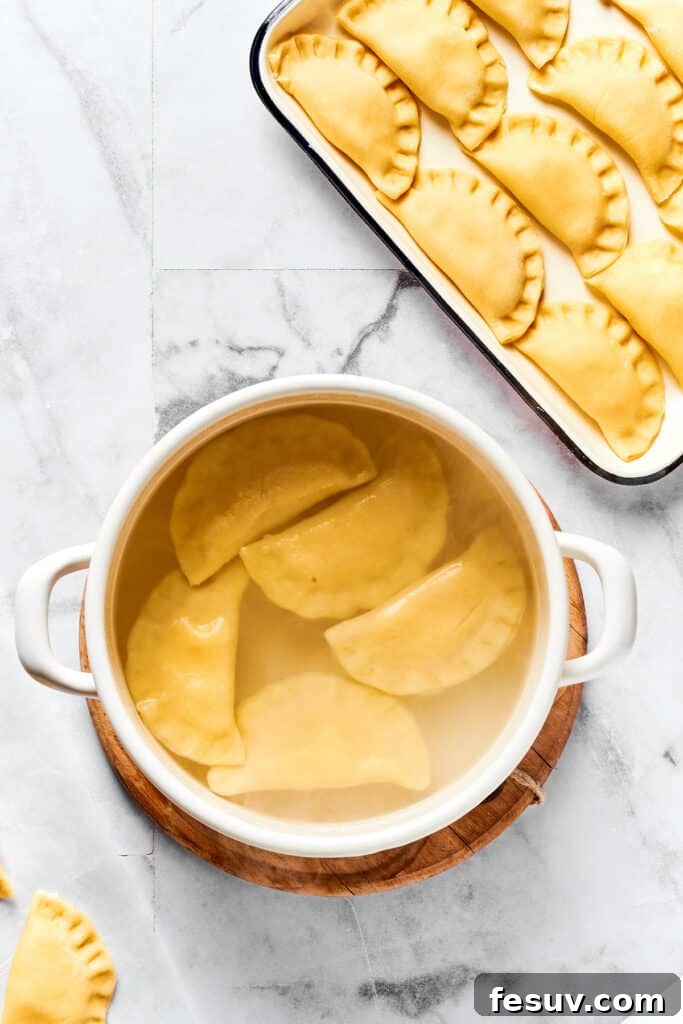
- Boil the Pierogies: Bring a large pot of generously salted water to a rolling boil. Carefully add the pierogi to the boiling water in a single, even layer, making sure not to overcrowd the pot. Cook them for approximately 2 minutes, or until they gracefully float to the surface. Once floating, continue cooking for an additional 1-2 minutes to ensure the dough is fully cooked through. Use a slotted spoon to gently remove the cooked pierogi from the water and transfer them to a plate. Continue boiling the remaining pierogi in batches, allowing enough space in the pot for them to cook evenly.
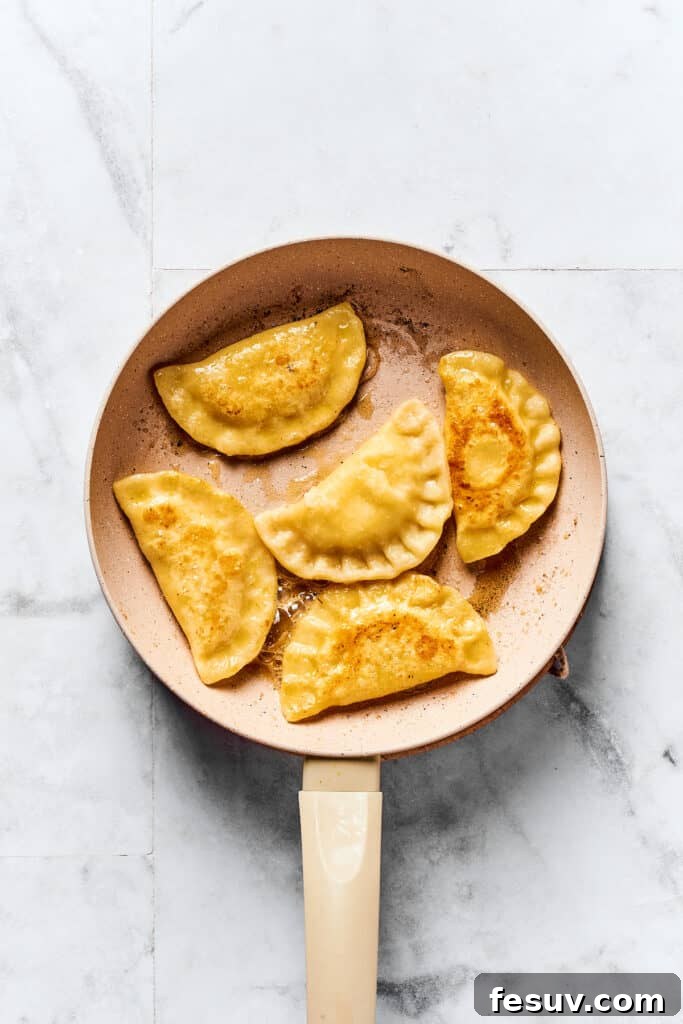
- Fry for Golden Perfection: Once all the pierogi have been boiled and drained, it’s time to add that extra layer of flavor and texture. Heat a few tablespoons of unsalted butter in a large skillet over medium heat until it’s melted and slightly sizzling. Carefully add the boiled pierogi to the skillet in a single layer. Fry them for about 1-2 minutes per side, or until they achieve a beautiful golden-brown color and a slightly crispy exterior. Remove the fried pierogi and set aside.
Crafting the Savory Bacon and Onion Topping
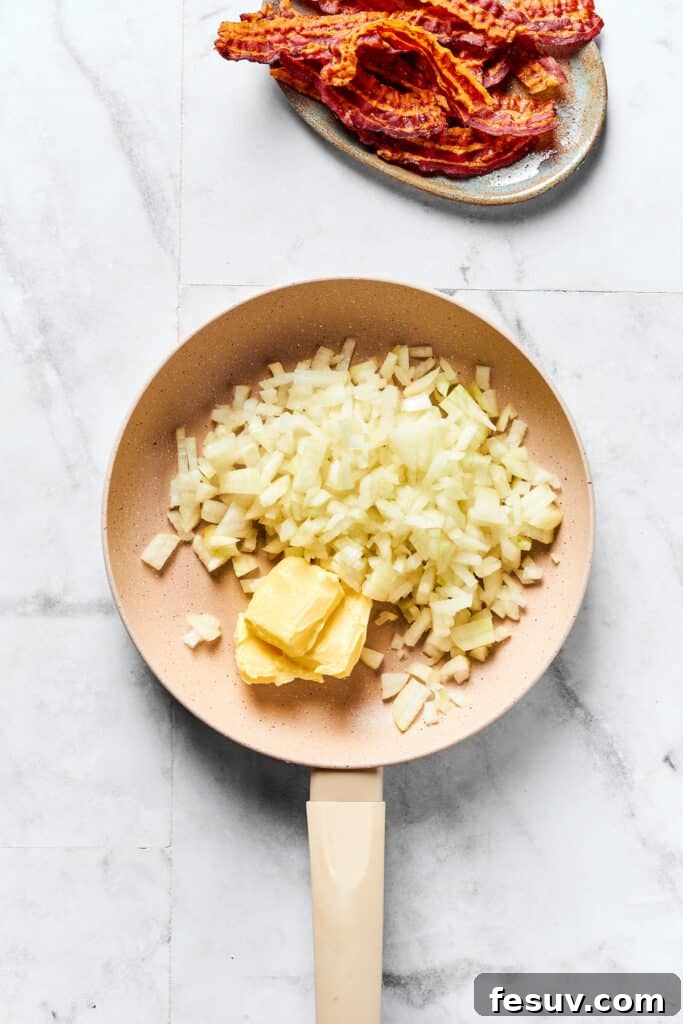
- Prepare the Crispy Bacon: In a large skillet, cook the sliced bacon over medium heat until it is wonderfully crispy. Once cooked, transfer the bacon to a plate lined with paper towels to drain excess fat. Once cooled slightly, crush the crispy bacon into small, savory bits.
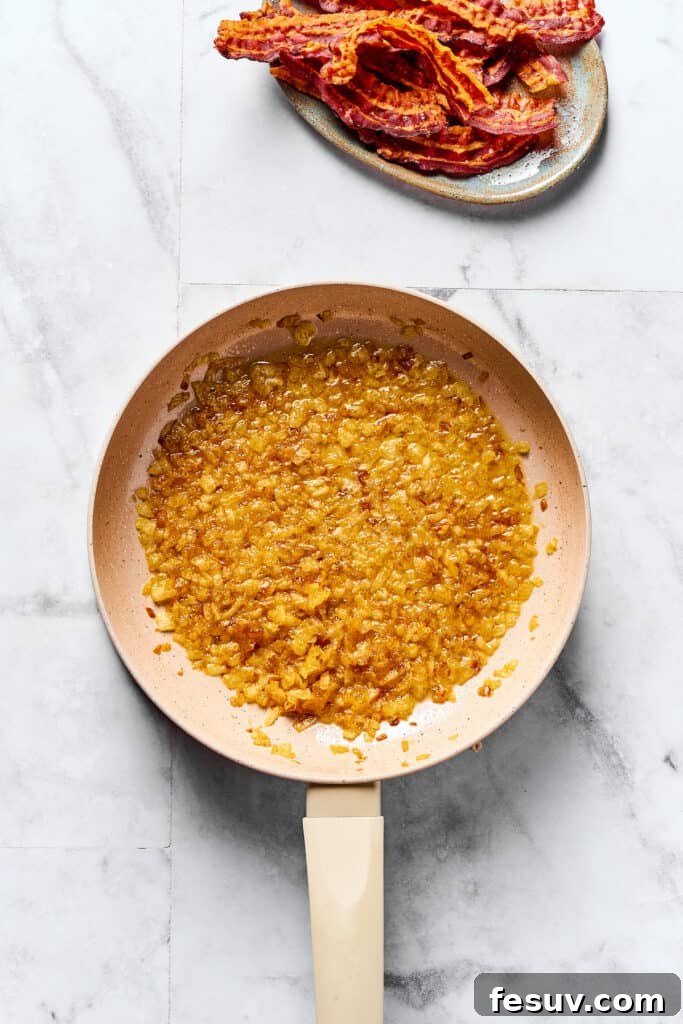
- Caramelize the Onions: Carefully wipe the skillet clean of any bacon grease, then return it to medium heat. Add the unsalted butter and the chopped yellow onions to the skillet. Season with a pinch of salt and pepper. Cook the onions for about 10-12 minutes, stirring occasionally, until they become beautifully caramelized and lightly golden-brown. This process brings out their natural sweetness, creating a perfect balance for the savory pierogi.
Serving Your Delicious Homemade Pierogi
- To serve, arrange the warm, golden-fried pierogi on a beautiful serving platter. Generously top them with the fragrant caramelized onions and the irresistible crispy bacon crumbles. For a fresh touch and a vibrant splash of color, garnish with freshly chopped parsley, if desired. Serve immediately and prepare for rave reviews! These **classic cheese and potato pierogi** are best enjoyed fresh off the skillet.

Do You Have to Boil Pierogies Before Frying Them? The Great Debate!
This is a common question among pierogi enthusiasts, and the answer, especially for homemade varieties, is a resounding yes! While many recipes might suggest skipping the boiling step, particularly when using store-bought pierogi, it’s important to understand why. Most commercially available pierogi are already pre-cooked or partially cooked, which allows you to go straight to frying or baking them at home. They’ve already undergone the initial hydration and softening process.
However, when you’re crafting these **made-from-scratch pierogi**, the boiling step is absolutely crucial. Boiling the raw dough first allows it to absorb moisture, tenderizing it and developing that characteristic soft, chewy dumpling texture that pierogi are famous for. Without this step, your pierogi dough would remain raw and tough, no matter how long you fry it. The subsequent frying after boiling is what gives them that beautiful golden crust and extra layer of flavor without compromising the tender interior. So, for truly authentic and delicious homemade pierogi, don’t skip the boil!

Pro Tips for Perfect Homemade Pierogi
Making pierogi from scratch can seem daunting, but with a few expert tips, you’ll be rolling, filling, and sealing like a seasoned pro. Here are some invaluable pointers to ensure your **homemade pierogi ruskie** turn out perfectly every time:
- Chill the Filling for Easier Handling: For a smoother and less messy assembly process, consider making your potato-cheese filling the day before. Once prepared, transfer it to an airtight container and refrigerate overnight. A chilled filling is firmer and much easier to portion and place onto the dough rounds, making the shaping process more efficient and preventing any sticky situations.
- Prevent the Dough from Drying Out: The pierogi dough needs to remain moist and pliable for best results. Always keep any portion of the dough you’re not actively working with tightly covered with plastic wrap or a damp, clean kitchen towel. If the dough dries out, it becomes difficult to roll and more prone to cracking or tearing when you try to seal the pierogi, which can lead to the filling escaping during cooking.
- Utilize a Pasta Machine for Uniformity: While rolling the dough by hand with a rolling pin is perfectly acceptable and traditional, a pasta machine can be a game-changer for achieving consistently thin and even sheets of dough. This not only speeds up the process but also ensures uniformity in thickness, which is key to perfectly cooked pierogi with a tender bite. Start with the widest setting and gradually decrease it until you reach your desired thinness.
- Don’t Overfill: Resist the urge to add too much filling to each dough round. A tablespoon is usually sufficient. Overfilling can make sealing difficult and increases the likelihood of pierogi bursting open during boiling.
- Proper Sealing is Key: Ensure the edges of your pierogi are firmly sealed. A good seal prevents the filling from leaking into the boiling water, keeping your pierogi intact and flavorful. Pressing firmly with your fingers and then crimping with a fork provides a double layer of security.

Delightful Pairings: What to Serve with Pierogies
While these **homemade pierogi** are absolutely divine on their own, especially with their luscious butter, caramelized onion, and crispy bacon topping, they also make a fantastic component of a larger, more elaborate meal. If you’re looking to elevate your pierogi experience or serve them as part of a festive spread, here are some exquisite serving suggestions to perfectly complete your culinary masterpiece:
- Elegant Fish Dishes: The mild and savory nature of pierogi makes them an excellent companion to a variety of fish dishes. Their comforting profile beautifully balances lighter mains. Consider serving them alongside these Maple Mustard Salmon Fillets for a sophisticated yet comforting meal that will be adored by the entire family.
- Crisp, Refreshing Salads: To cut through the richness of the pierogi and add a refreshing element to your meal, a vibrant salad is an ideal choice. A crisp, cool salad provides a wonderful textural contrast. This creamy Cucumber Salad with Sour Cream Dressing, with its tangy notes, pairs exceptionally well with warm, buttery pierogi, creating a harmonious and balanced plate.
- Hearty Pork Entrees: For a truly indulgent and satisfying dinner, especially on a chilly evening, pair your pierogi with a robust pork dish. Imagine spooning the rich, earthy mushroom gravy from these succulent Instant Pot Pork Chops generously over your potato and cheese pierogi. The combination is pure comfort food bliss, making for a truly memorable meal.
- Sour Cream or Greek Yogurt: A dollop of cool sour cream or plain Greek yogurt is a traditional and refreshing accompaniment to pierogi. Its tanginess provides a lovely counterpoint to the rich filling and savory toppings.
- Fresh Dill: A sprinkle of fresh dill adds a burst of herbaceous flavor and bright color, enhancing the authentic Eastern European feel of the dish.

Storing and Reheating Your Delicious Pierogi
One of the best things about making a large batch of homemade pierogi is the joy of having leftovers! Properly storing and reheating your pierogi ensures you can enjoy their deliciousness for days to come.
- Refrigeration: Any leftover cooked pierogi (boiled and/or fried) can be stored in an airtight container. Place them in a single layer if possible, or separate layers with parchment paper to prevent sticking. They will keep beautifully in the refrigerator for up to 3-4 days. For optimal freshness, consider storing the toppings (bacon and onions) separately and adding them when reheating.
- Reheating: To reheat, you have a few options:
- Skillet: This is the best method for restoring a crispy exterior. Heat a knob of butter or a drizzle of oil in a non-stick skillet over medium heat. Add the refrigerated pierogi and cook for 2-3 minutes per side until heated through and golden-brown.
- Oven: Preheat your oven to 350°F (175°C). Spread the pierogi in a single layer on a baking sheet. Bake for 10-15 minutes, flipping halfway, until warmed through. This method is great for larger batches.
- Microwave: For a quick reheat, place pierogi on a microwave-safe plate and cover loosely. Microwave on high for 1-2 minutes, or until hot. Note that this method won’t yield crispy pierogi.
Can I Freeze Homemade Pierogi? Absolutely!
Freezing homemade pierogi is an excellent way to prepare meals ahead of time and enjoy this comforting dish whenever a craving strikes. Pierogi freeze exceptionally well, whether cooked or uncooked.
- Freezing Cooked Pierogi (Boiled and/or Fried): If you’ve already boiled and/or fried your pierogi, you can freeze them for later enjoyment. First, ensure they are completely cooled. Then, spread the pierogi in a single layer on an oiled baking sheet (or one lined with parchment paper). Place the baking sheet in the freezer until the pierogi are frozen solid, typically 1-2 hours. This step prevents them from sticking together. Once frozen solid, transfer the pierogi to freezer bags or airtight containers. Label with the date and store in your freezer for up to 3 months. When ready to eat, you can reheat them directly from frozen in a skillet with butter until hot and golden.
- Freezing Uncooked Pierogi: You can also freeze pierogi after they have been shaped but before boiling. This is often preferred if you want them to taste as fresh as possible when cooked. Place the raw, shaped pierogi in a single layer on a parchment-lined baking sheet and freeze until solid. Once frozen, transfer them to freezer bags, removing as much air as possible. Label with the date and store for up to 3 months. When ready to cook, boil them directly from frozen (they may need a minute or two longer to cook through), then fry as desired.

Homemade Pierogi Recipe
Ingredients
For the Potato Filling:
- 1 ½ pounds Yukon Gold potatoes
- ½ cup cottage cheese
- 3 tablespoons Parmesan cheese
- 2 tablespoons cream cheese
- 2 tablespoons unsalted butter
- 1 teaspoons sea salt
For the Pierogi Dough:
- 4 cups all-purpose flour
- 1 ½ teaspoons salt
- ⅔ cup warm water
- 3 tablespoons unsalted butter,, plus more for frying
- 1 large egg,, lightly beaten
For the Topping:
- 4 ounces bacon slices,, cooked and crumbled
- 4 tablespoons unsalted butter
- 2 yellow onions,, chopped
- fresh parsley,, chopped
Instructions
Make the Potato Filling
-
Place the potatoes in a medium pot, and cover with water. Bring to a boil over medium heat. Cover, leaving the lid slightly ajar, and cook until the potatoes are tender, about 25 minutes.
-
Once the potatoes are cooked, use a potato masher to mash the potatoes until smooth and free from lumps.
-
To the mashed potatoes, add the cottage cheese, Parmesan cheese, cream cheese, butter, and salt. Mix together and set aside.
Make the Pierogi
-
Meanwhile, line a large baking sheet with parchment paper, and set aside.
-
In a medium bowl, stir together the flour and salt.
-
Warm the water and butter in a small pot until the butter is melted, about 4 minutes.
-
Add the butter mixture to the flour mixture. Stir with a spoon until roughly combined. Add the egg and knead by hand, or with a stand mixer for 5 minutes.
-
Cover the dough and let it rest for 40 minutes.
-
Divide the dough in half. On a lightly-floured surface, roll out one half of the dough thinly. Cut out rounds with a pierogi cutter or a drinking glass.
-
Place about 1 tablespoon of the potato filling on the center of each round. Brush the edges with water, and fold in half to enclose the filling. Seal the edges by pressing down with your finger.
-
Place the sealed pierogi on the prepared baking sheet, and cover lightly with a clean kitchen towel.
-
Repeat the rolling, cutting, filling, and sealing steps with the remaining dough.
Cook the Pierogi
-
Bring a large pot of salted water to a boil. Add the pierogi to the pot in an even layer, and let them cook for about 2 minutes, or until they start to float. Do not overcrowd the pot.
-
Once the pierogi start to float, cook them for another 1 to 2 minutes. Then, use a slotted spoon to remove them to a plate. Continue cooking the pierogi and setting them aside.
-
When all the pierogi are cooked, heat some butter in a large skillet. Fry the cooked, drained pierogi in the butter for a minute on each side, and then set them aside.
Make the Topping
-
To make the topping, cook the sliced bacon in a large skillet over medium heat, until crisp. Drain well, and then crush into small pieces.
-
Carefully wipe the skillet clean, and then set on the heat. Add the butter and chopped onion. Sprinkle with salt and pepper, and cook for 10 to 12 minutes, stirring occasionally, until lightly golden.
Serve the Pierogi
-
Serve the pierogi hot, on a serving platter, topped with caramelized onions and crispy bacon. Garnish with chopped parsley if desired.
Nutrition
Nutritional info is an estimate and provided as courtesy. Values may vary according to the ingredients and tools used. Please use your preferred nutritional calculator for more detailed info.
Did you make a recipe? Leave a rating
More Delightful Dinner Ideas to Explore
If you loved making these homemade pierogi and are looking for more comforting and festive meal inspiration, check out these other delicious recipes. Expand your culinary repertoire with these fantastic dinner ideas:
- The Best Cheese Manicotti: Indulge in layers of rich cheese and pasta, baked to golden perfection. A classic Italian comfort food that’s always a crowd-pleaser.
- Crispy Air Fryer Chicken Tempura Recipe: Enjoy perfectly crispy chicken tempura with minimal oil, thanks to your air fryer. A lighter take on a beloved classic.
- Quick & Easy Instant Pot Chicken Burritos: Whip up flavorful and tender chicken burritos in a fraction of the time with your Instant Pot. Perfect for busy weeknights!