
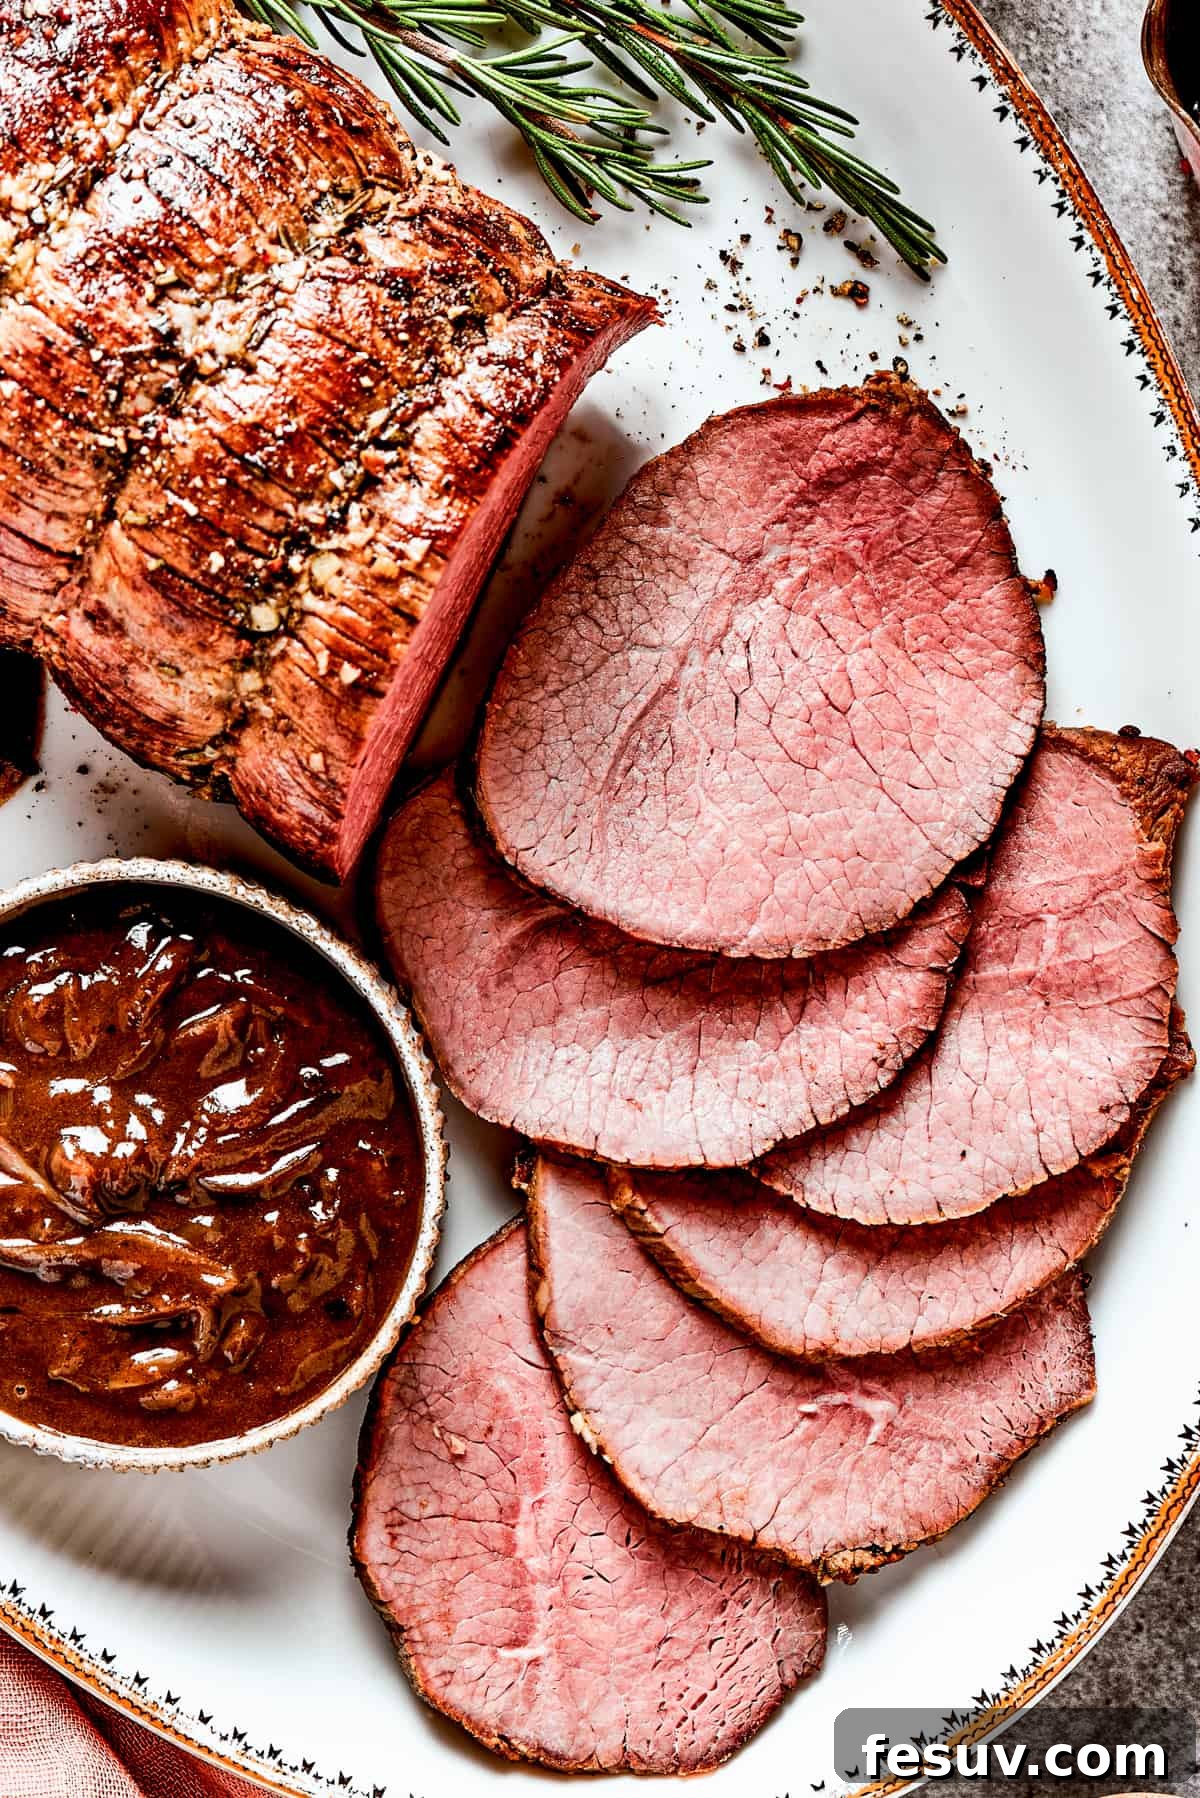
Prepare to impress with this incredible Top Round Roast recipe, designed to deliver a remarkably juicy, tender, and intensely flavorful meal. Ideal for special occasions, holiday feasts, or simply elevating your Sunday dinner, this roast is a true showstopper. Paired perfectly with a rich, savory caramelized onion brown gravy, it demands little more than a side of creamy mashed potatoes to complete a truly memorable dining experience. Discover how easy it is to achieve gourmet results right in your own kitchen with this comprehensive guide.
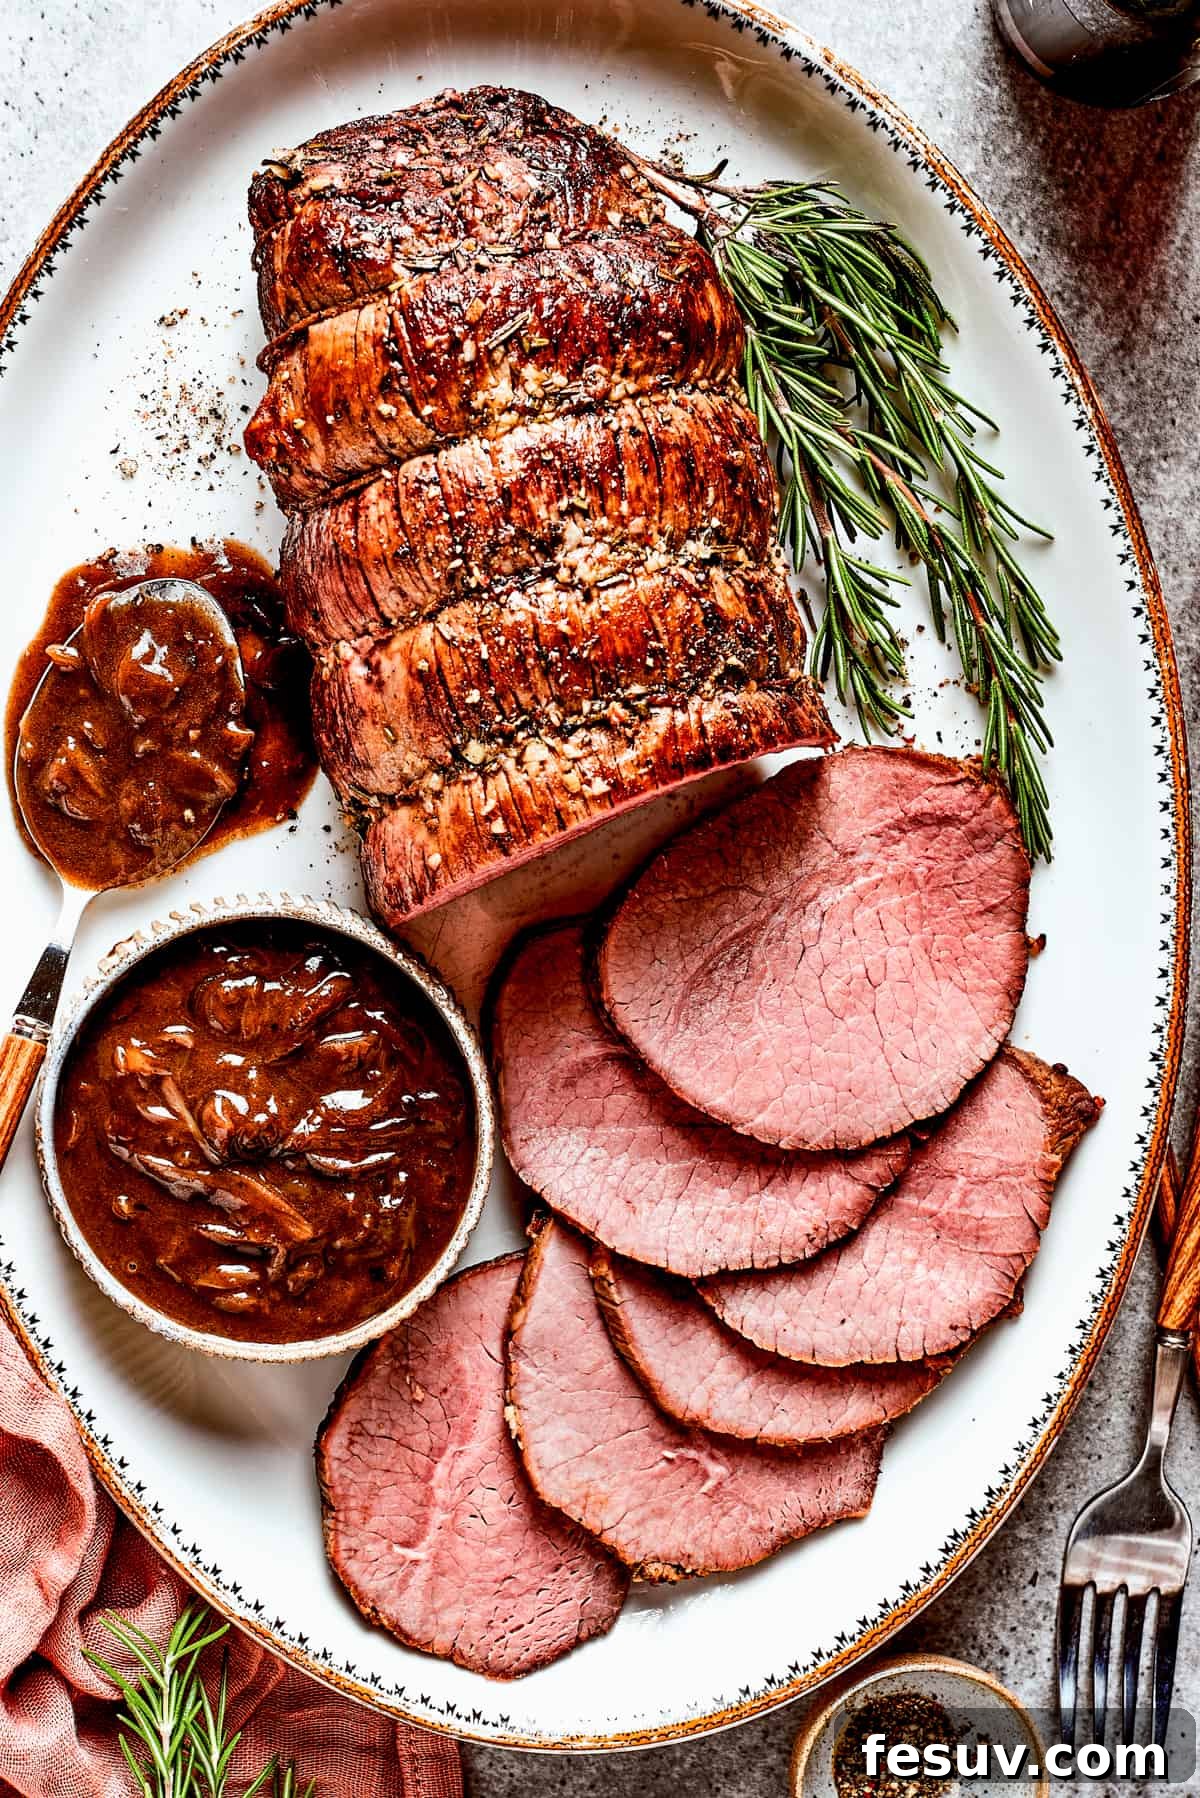
What is Top Round Roast?
Understanding your cut of meat is the first step to culinary success. Top round roast, often recognized interchangeably with “London Broil” (though London Broil refers more to a cooking method than a specific cut), is a lean and economical cut of beef sourced from the inner thigh of the cow’s hind leg. This area is heavily muscled, meaning the meat is naturally leaner and less marbled with fat compared to cuts like chuck roast or ribeye. While its inherent leanness can sometimes make it challenging to keep moist, this recipe masterfully transforms it into a succulent and tender centerpiece through strategic searing and slow roasting.
The top round’s robust beef flavor makes it an excellent choice for oven roasting, especially when combined with aromatic herbs and a deeply flavored gravy. Choosing a top round roast is a smart move for those who appreciate a healthier beef option without compromising on taste. It’s often more budget-friendly than prime cuts, making it an accessible luxury for home cooks looking to prepare a show-stopping meal. With the right techniques – precise seasoning, a thorough sear, a low and slow roasting temperature, and a crucial resting period – you’ll unlock the full potential of this versatile and delicious cut, ensuring every slice is tender and flavorful.
Why This Top Round Roast Recipe is a Must-Try
This Top Round Roast recipe isn’t just another meal; it’s an experience waiting to happen. Here’s why it consistently earns rave reviews and becomes a staple in so many kitchens:
- Surprisingly Simple to Master: Don’t let its elegant appearance fool you. This recipe is incredibly straightforward, perfect for home cooks of all skill levels. With basic steps like seasoning generously, a quick sear, and slow roasting, you’ll achieve professional-level results without complicated techniques or specialized equipment. If you can handle a few common kitchen tasks, you can confidently prepare this magnificent roast. It’s designed for clarity and ease, making gourmet cooking approachable.
- Guaranteed to Impress: Whether you’re hosting a grand holiday dinner, celebrating a special occasion, or simply want to elevate a family meal, this top round roast delivers. Its golden-brown crust, tender interior, and rich aroma make for a stunning presentation that will undoubtedly earn you compliments from your guests. It’s the ideal centerpiece that looks like you spent hours slaving away, even though it’s remarkably fuss-free and enjoyable to make.
- Bursting with Flavor: Despite using a leaner cut of beef, this recipe focuses on maximizing flavor at every stage. A simple yet powerful combination of fresh garlic and aromatic rosemary penetrates the meat during the slow roasting process, infusing every slice with incredible depth and herbaceous notes. The initial sear locks in the natural beefy taste and creates a delicious outer crust, culminating in a symphony of flavors that is both comforting and sophisticated.
- An Affordable Gourmet Experience: Top round is a more budget-friendly cut of beef compared to its pricier counterparts, yet it yields a dish that tastes undeniably gourmet. This recipe allows you to enjoy a luxurious, restaurant-quality meal without breaking the bank, making it a smart choice for feeding a crowd or simply enjoying a decadent dinner more often. It proves that you don’t need to splurge on prime cuts to enjoy an exceptional roast.
- Versatile and Adaptable: While perfect for formal settings, its simplicity also makes it suitable for weeknight meal prepping. The leftovers are fantastic, easily repurposed into delicious sandwiches, vibrant salads, or re-imagined into entirely new dishes like beef ragu, ensuring no delicious morsel goes to waste and extending the enjoyment of your culinary creation.
Essential Ingredients for a Succulent Top Round Roast
Crafting the perfect top round roast requires a few key ingredients, each playing a vital role in developing its deep flavor and tender texture. Here’s what you’ll need to gather:
- Beef Top Round Roast: Naturally, the star of our dish! Opt for a high-quality top round roast, typically a lean cut from the hind leg of the cow. Look for a piece that is uniform in shape, which helps ensure even cooking. This cut is known for its robust beefy flavor, which truly shines through with proper preparation. A 3-4 pound roast is ideal for feeding 6-8 people.
- Fresh Rosemary: This aromatic herb adds a woody, slightly piney note that complements beef beautifully. While fresh rosemary is highly recommended for its potent fragrance and flavor, fresh thyme makes an excellent alternative if you prefer, or a combination of both for added complexity. Dried herbs can be used in a pinch, but reduce the quantity as their flavor is more concentrated.
- Garlic: Minced fresh garlic cloves are crucial for creating the flavorful herb paste that coats the roast. Garlic infuses the meat with a savory depth that is indispensable for a lean cut. Freshly minced garlic yields the best and most pungent results, far superior to pre-minced options.
- Olive Oil: Used generously for both searing the roast to create a beautiful crust and for forming the aromatic herb paste. A good quality extra virgin olive oil not only aids in cooking but also enhances the overall flavor profile of the meat.
- Kosher Salt & Freshly Ground Black Pepper: Generous seasoning is paramount for this lean cut. These basic seasonings draw out the meat’s natural flavors, tenderize the surface slightly, and help create a delicious crust during searing. Do not underestimate the impact of proper seasoning.
For the Irresistible Caramelized Onion Gravy:
- Unsalted Butter: The rich foundation for our decadent gravy, butter helps to beautifully caramelize the onions and adds a luxurious, velvety mouthfeel to the finished sauce. Using unsalted butter allows you to control the overall saltiness.
- Yellow Onions: Thinly sliced yellow onions are the heart of this gravy. They are slow-cooked to a beautiful golden caramelization, providing a sweet, savory, and incredibly deep umami flavor base that elevates the entire dish.
- Beef Broth: This forms the primary liquid base of the gravy. It’s used to deglaze the pan after the roast has been seared, capturing all the delicious browned bits (fond) from the bottom of the pan, which are packed with concentrated beef flavor. High-quality beef broth will yield the best results, but a good vegetable or chicken broth can be substituted if necessary.
- Dry Red Wine: A splash of dry red wine, such as Merlot, Cabernet Sauvignon, or Pinot Noir, adds acidity, complexity, and subtle fruity notes, deepening the gravy’s flavor profile significantly. You can use a dedicated dry cooking wine or simply your favorite drinking wine. For an alcohol-free alternative, simply use an equal amount of additional beef broth.
- Cornstarch: A crucial thickening agent for achieving a smooth, glossy gravy consistency. Mixed with a small amount of cold water to form a slurry, it ensures a lump-free sauce that clings perfectly to each slice of roast.
Step-by-Step Guide to Cooking the Perfect Top Round Roast
Follow these detailed steps to achieve a perfectly cooked, tender, and flavorful top round roast that will be the highlight of any meal:
- Bring Roast to Room Temperature: For the most even cooking and optimal tenderness, remove your top round roast from the refrigerator 1 to 2 hours before you plan to start cooking. This crucial step allows the meat to relax and prevents the exterior from overcooking while the interior remains cold, ensuring a uniform doneness throughout.
- Preheat Your Oven: Set your oven to a precise 250°F (120°C). A low and slow roasting temperature is paramount for tenderizing this lean cut of beef, allowing it to cook gently without drying out.
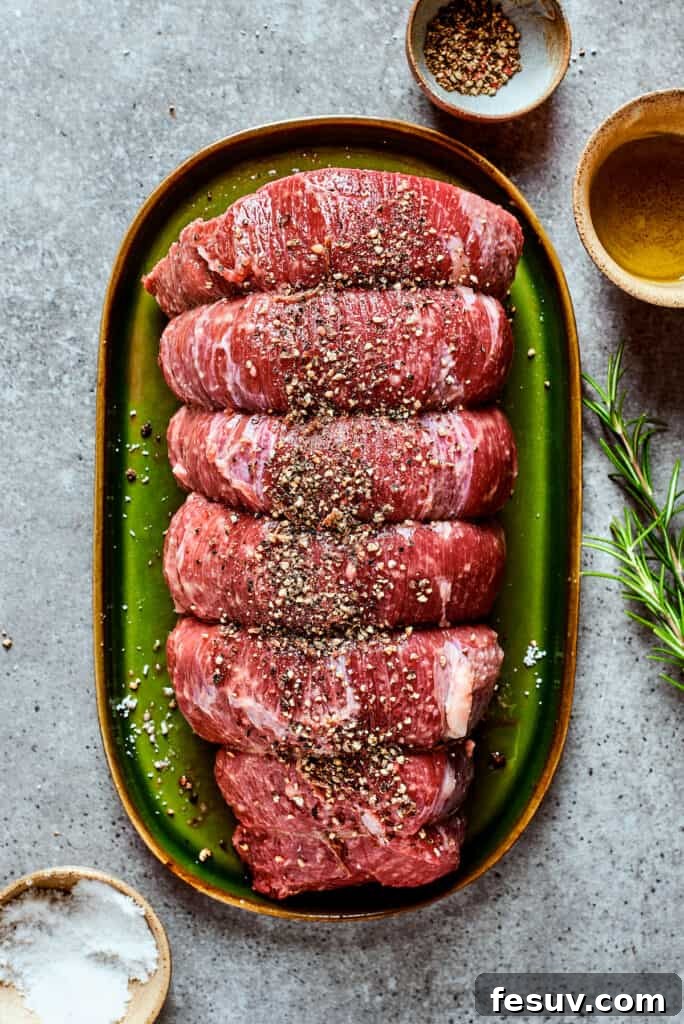
- Prepare the Roast for Searing: Begin by thoroughly patting the entire surface of the beef roast dry with paper towels. Removing excess moisture is absolutely crucial for achieving a beautiful, crispy, and flavorful sear. Once dry, generously season all sides of the roast with kosher salt and freshly ground black pepper. Don’t be shy – this lean cut needs ample seasoning.
- Tie the Roast (Optional, but Recommended): If your roast is unevenly shaped, consider tying it with kitchen twine at 1-2 inch intervals. This helps the roast maintain a uniform shape, ensuring consistent cooking and a more appealing presentation on your serving platter.
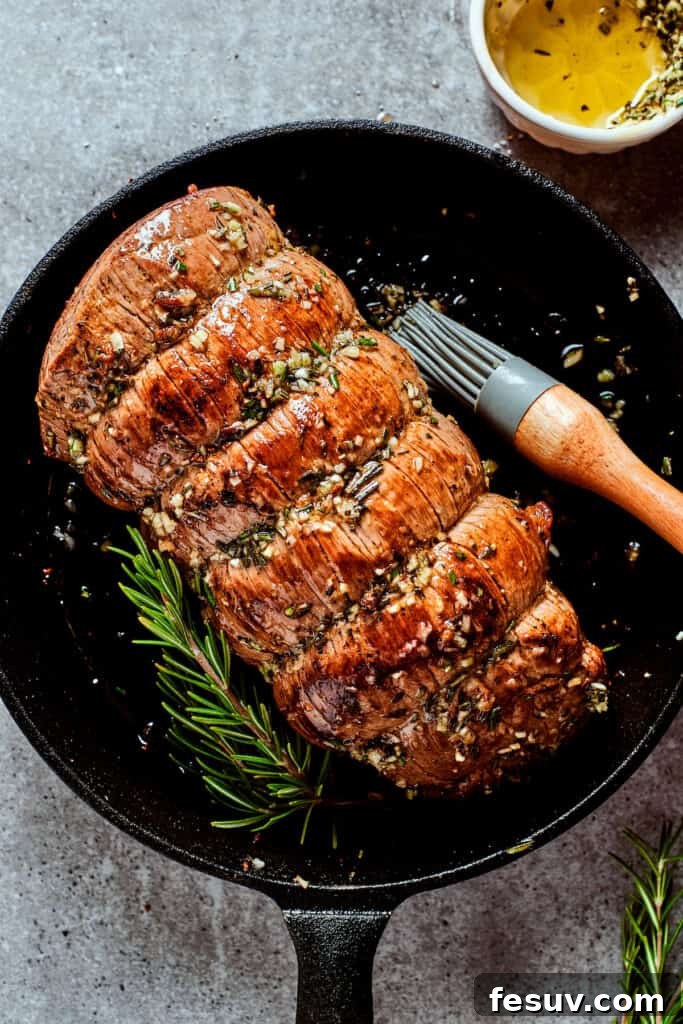
- Create the Aromatic Herb Paste: In a small mixing bowl, combine the minced fresh rosemary and garlic. Add 2 tablespoons of olive oil and stir well until a fragrant, thick paste forms. This mixture will be rubbed onto the roast to infuse it with incredible flavor during the roasting process.
- Sear for a Golden Crust: Heat the remaining 2 tablespoons of olive oil in a heavy-bottomed skillet or Dutch oven (cast iron works wonderfully due to its even heat distribution) over medium-high heat until it begins to shimmer. Carefully place the seasoned roast into the hot skillet and sear it on all sides until it develops a deep, golden-brown crust. This typically takes about 6 minutes in total, turning every minute or so. Searing is vital for locking in flavor and creating an appealing exterior.
- Apply the Herb Paste: Once the roast is beautifully seared and browned, remove the skillet from the heat. Generously coat the entire browned roast with the prepared rosemary and garlic paste, ensuring an even layer over all surfaces. This adds another layer of flavor that will penetrate the meat as it roasts.
- Slow Roast to Perfection: Place the skillet, with the roast still in it, into your preheated 250°F (120°C) oven. Roast uncovered for approximately 20 to 25 minutes per pound. For a 4-pound roast, this will typically be between 80 to 100 minutes. The most accurate way to determine doneness is by using an instant-read meat thermometer inserted into the thickest part of the roast, avoiding any bone or large pockets of fat. Refer to our cooking temperature guidelines below for your preferred level of doneness.
- Crucial Resting Period: Once the roast reaches your desired internal temperature, remove it from the oven immediately. Transfer it to a clean cutting board and loosely tent it with aluminum foil. Allow the roast to rest undisturbed for a minimum of 15 to 20 minutes. This resting period is absolutely essential; it allows the muscle fibers to relax and the internal juices to redistribute evenly throughout the meat, resulting in a significantly juicier and more tender roast. Do not skip this step!
Crafting the Rich Caramelized Onion Gravy
No roast is complete without a luscious, flavorful gravy! This caramelized onion gravy is the perfect accompaniment, built right in the same pan, capturing all the delicious fond and drippings left from the roast, enhancing its depth of flavor.
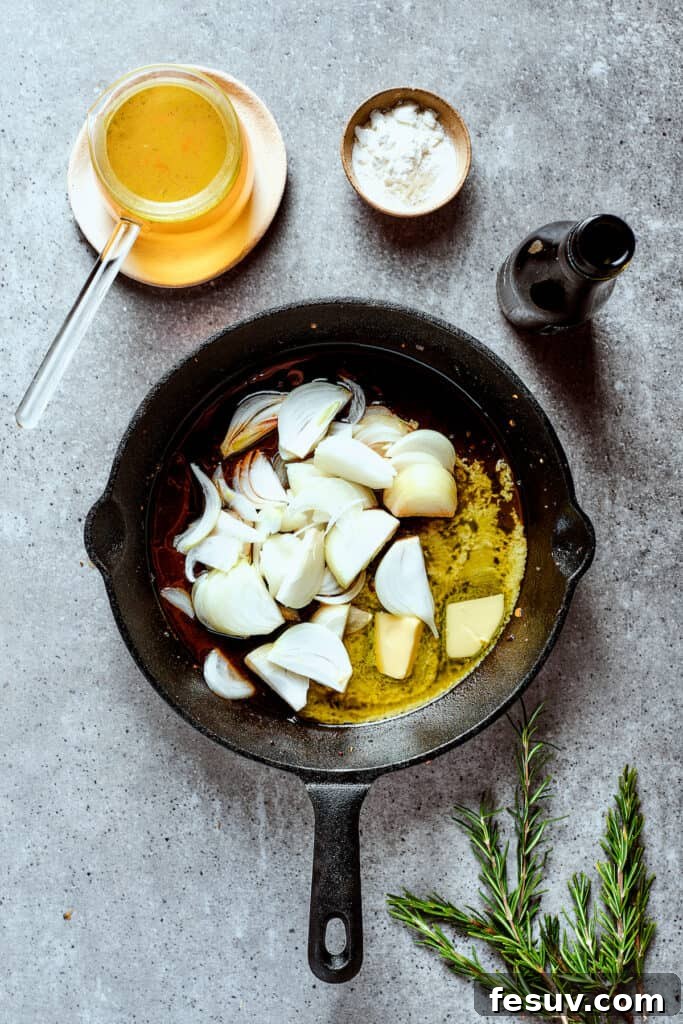
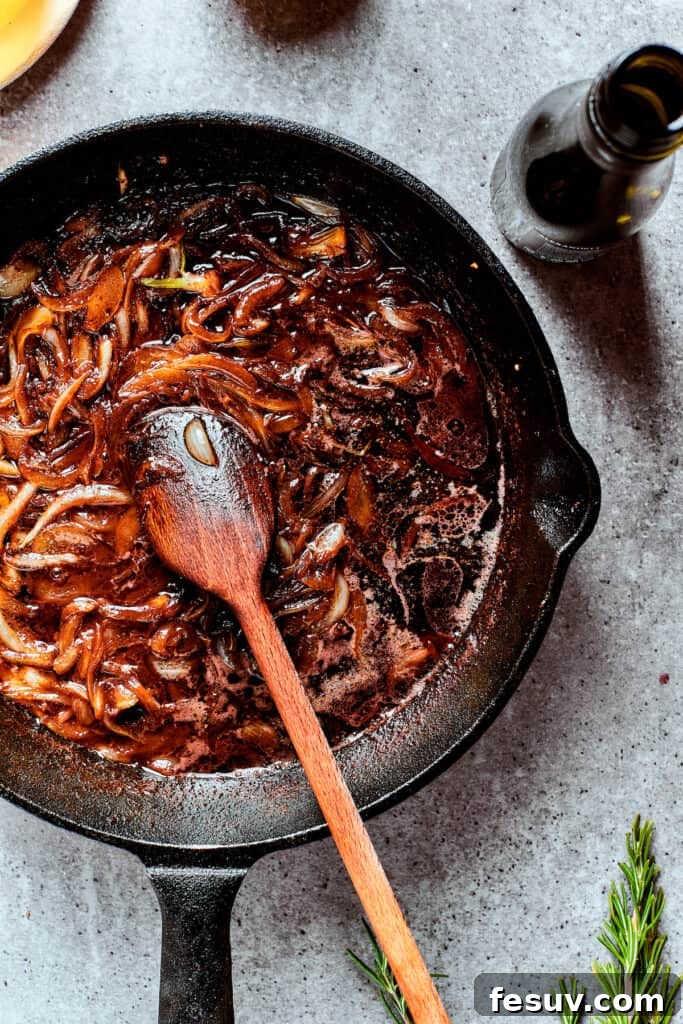
- Caramelize the Onions: While your roast is resting (don’t forget this crucial step!), return the same skillet (still containing any beef drippings from searing) to medium heat. Add the 2 tablespoons of unsalted butter and let it melt. Add the thinly sliced yellow onions and cook, stirring occasionally, for about 8-12 minutes, or until the onions become deeply caramelized and wonderfully tender. This slow cooking extracts their natural sweetness and creates a rich, complex flavor base for your gravy.
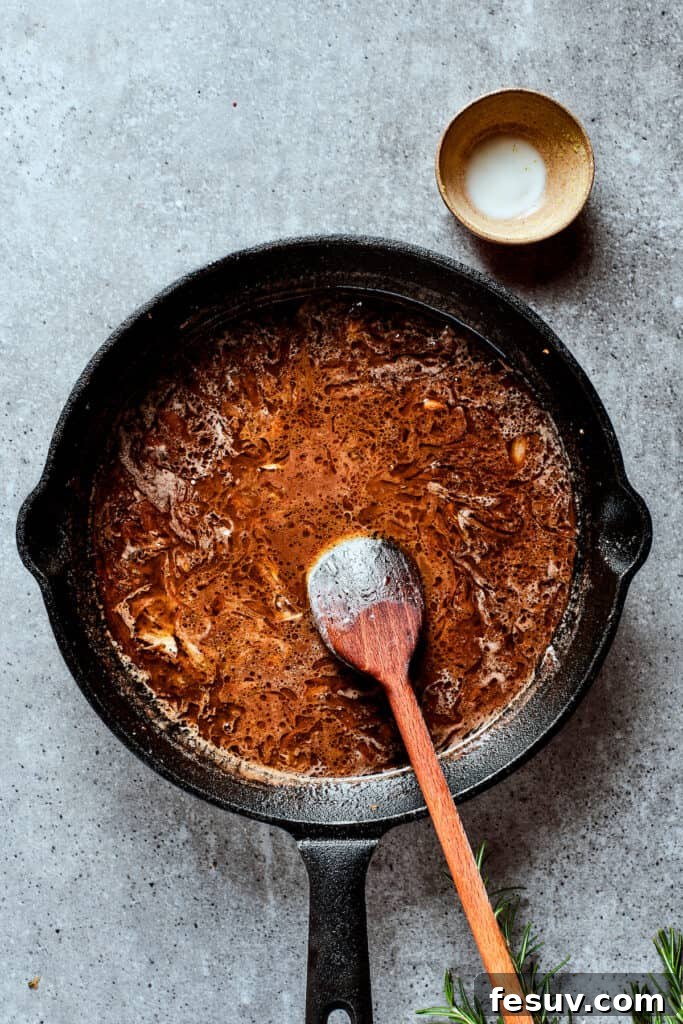
- Deglaze and Add Liquids: Pour in the beef broth and dry red wine. Immediately use a wooden spoon or spatula to scrape up any browned bits (fond) from the bottom of the pan. These bits are packed with concentrated beef flavor and are essential for a robust, delicious gravy. Bring the mixture to a gentle simmer, allowing the liquids to reduce slightly and the alcohol to cook off.
- Thicken the Gravy: In a small separate bowl, whisk together the 1 tablespoon of cornstarch with 1 tablespoon of cold water until a smooth slurry forms. Gradually pour this cornstarch slurry into the simmering gravy, whisking continuously to prevent lumps. Continue to simmer for another 2-3 minutes, stirring, until the gravy visibly thickens to your desired consistency. Taste the gravy and adjust seasonings (salt and pepper) if necessary.
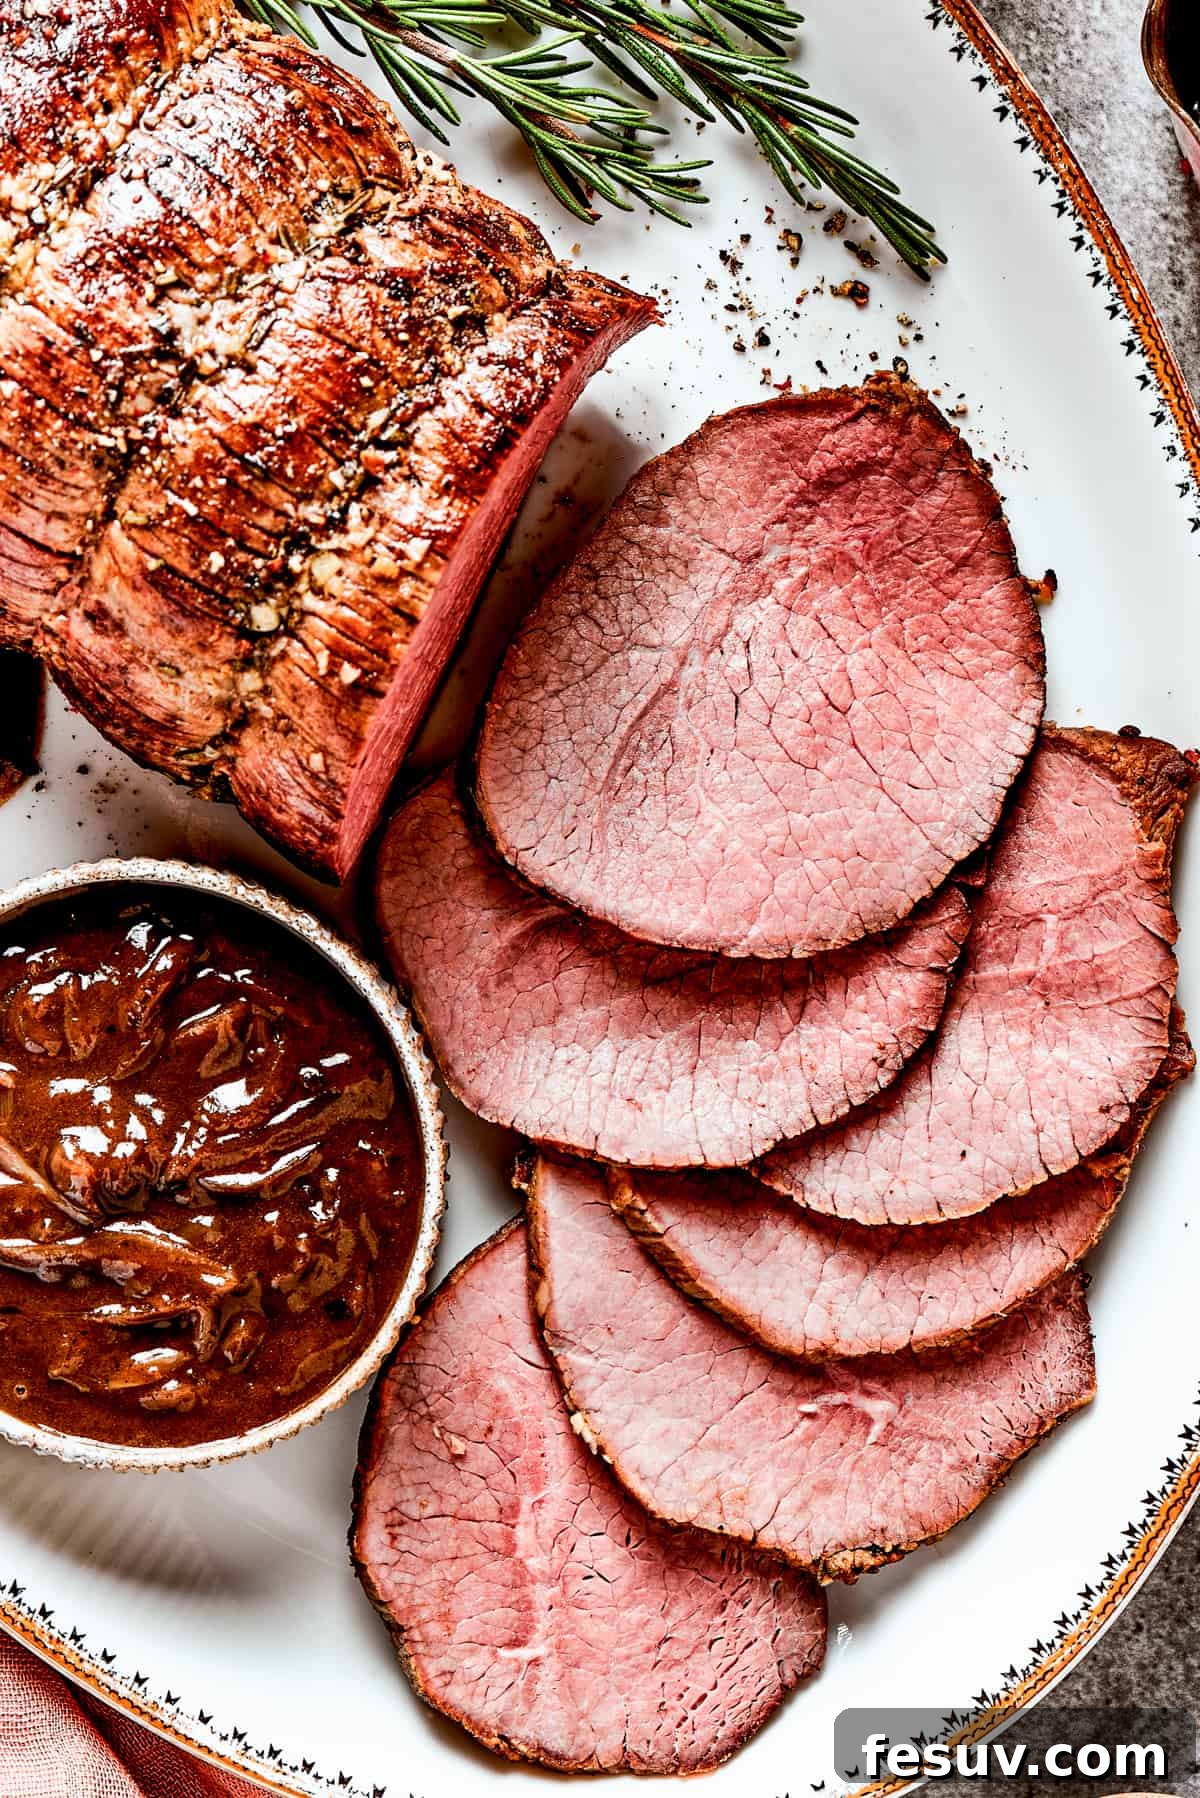
- Slice and Serve: Once your roast has fully rested, remove the kitchen twine (if used). Using a sharp carving knife, slice the roast beef thinly against the grain. This crucial technique shortens the muscle fibers, ensuring each slice is incredibly tender and easy to chew. Arrange the slices attractively on a warm platter and generously ladle the warm, rich caramelized onion gravy over the top, or serve it on the side for guests to add as they please.
Achieving Your Desired Doneness: A Temperature Guide
The internal temperature is your most reliable indicator for perfectly cooked roast beef. While general cooking times per pound are provided in the instructions, variations in roast shape, thickness, and oven calibration mean an instant-read meat thermometer is an indispensable tool for guaranteeing success. Insert the thermometer into the thickest part of the roast, ensuring it doesn’t touch any bone or large pockets of fat, for the most accurate reading. Remember that the temperature will rise by approximately 5-10 degrees Fahrenheit during the resting period, a phenomenon known as carryover cooking.
- Rare: For a cool red center, aim to remove the roast from the oven when it reaches 115°F (46°C). The meat will be very tender and juicy, with a vibrant red hue.
- Medium Rare: For a warm red center, target 125°F (52°C) before resting. This is often the preferred doneness for many beef enthusiasts, offering optimal tenderness, juiciness, and rich flavor.
- Medium: If you prefer a warm pink center, remove the roast at 135°F (57°C). The meat will be slightly firmer to the touch but still wonderfully tender and moist.
- Medium Well: For a roast with a slightly pink center, cook to 145°F (63°C). The meat will be firm, with minimal pinkness remaining.
- Well Done: For a roast with no pinkness whatsoever, cook until it reaches 155°F (68°C). Be mindful that cooking past this temperature can make top round tough and dry due to its low fat content, so monitor closely.
Always factor in the resting time, as the internal temperature will continue to rise a few degrees after it’s removed from the oven. This carryover cooking is important for achieving the final desired doneness and ensuring maximum juiciness.
Expert Tips for a Flawless Top Round Roast
Elevate your top round roast from good to unforgettable with these invaluable tips and tricks, ensuring a tender, flavorful, and perfectly cooked result every time:
- Understand Your Cut: Top Round vs. Chuck Roast: It’s crucial to distinguish between these two popular cuts. Top round, sourced from the hind leg, is very lean with minimal marbling. Chuck roast, from the shoulder, is fattier and contains more connective tissue, making it ideal for pot roasts that benefit from long, moist cooking methods like braising. Our recipe is specifically tailored for the lean top round, focusing on low-temperature roasting and strategic searing to maintain moisture and tenderness.
- Start with Room Temperature Meat: This tip cannot be overstated. Removing the roast from the refrigerator 1 to 2 hours before cooking allows the meat to come closer to room temperature. This simple step ensures that the roast cooks more evenly from edge to center, preventing a cold, undercooked interior and an overcooked exterior.
- Season Aggressively and Thoroughly: Given the leanness of a top round cut, it relies heavily on generous seasoning to build flavor. Don’t be shy with the kosher salt and freshly ground black pepper. These seasonings penetrate the meat, enhancing its natural taste. Rubbing the herb and garlic paste all over the surface is also key to infusing every bite with delicious aromatics.
- The Power of the Sear: Searing the roast before slow roasting is a non-negotiable step for flavor. This high-heat, quick cook creates a beautiful, flavorful crust (the Maillard reaction) on the exterior of the meat. It locks in juices and adds an incredible depth of flavor that a roast cooked only in the oven would miss. Ensure your skillet is hot enough to achieve a deep brown color, not just a pale sear.
- Embrace the Rest: Patience is a virtue, especially after cooking a roast. Allowing your top round to rest for 15 to 20 minutes (loosely tented with foil) after it comes out of the oven is critical. During cooking, the muscle fibers contract, pushing juices to the center. Resting allows these juices to redistribute throughout the entire roast, resulting in a significantly juicier and more tender final product. Slicing too soon will cause those precious juices to run out onto your cutting board.
- Slice Against the Grain for Tenderness: This is arguably the most important carving tip for any lean cut of beef, especially top round. Before carving, identify the direction of the muscle fibers (the “grain”) and slice perpendicularly to them. This shortens the fibers, making the meat much easier to chew and creating a noticeably more tender mouthfeel.
- Use a Reliable Meat Thermometer: Guessing doneness is a recipe for disappointment. An instant-read thermometer is your best friend in the kitchen, guaranteeing your roast is cooked exactly to your preference every time. It eliminates guesswork and ensures food safety.
- Don’t Overcook: Because top round is lean, it can become tough and dry if overcooked. Monitor the internal temperature closely and remove it promptly when it reaches your desired doneness, remembering the carryover cooking during resting.
- Tie for Even Cooking: If your roast is irregularly shaped, tying it with kitchen twine helps it cook more evenly, as thicker and thinner parts cook at the same rate. This also makes for a more attractive presentation.
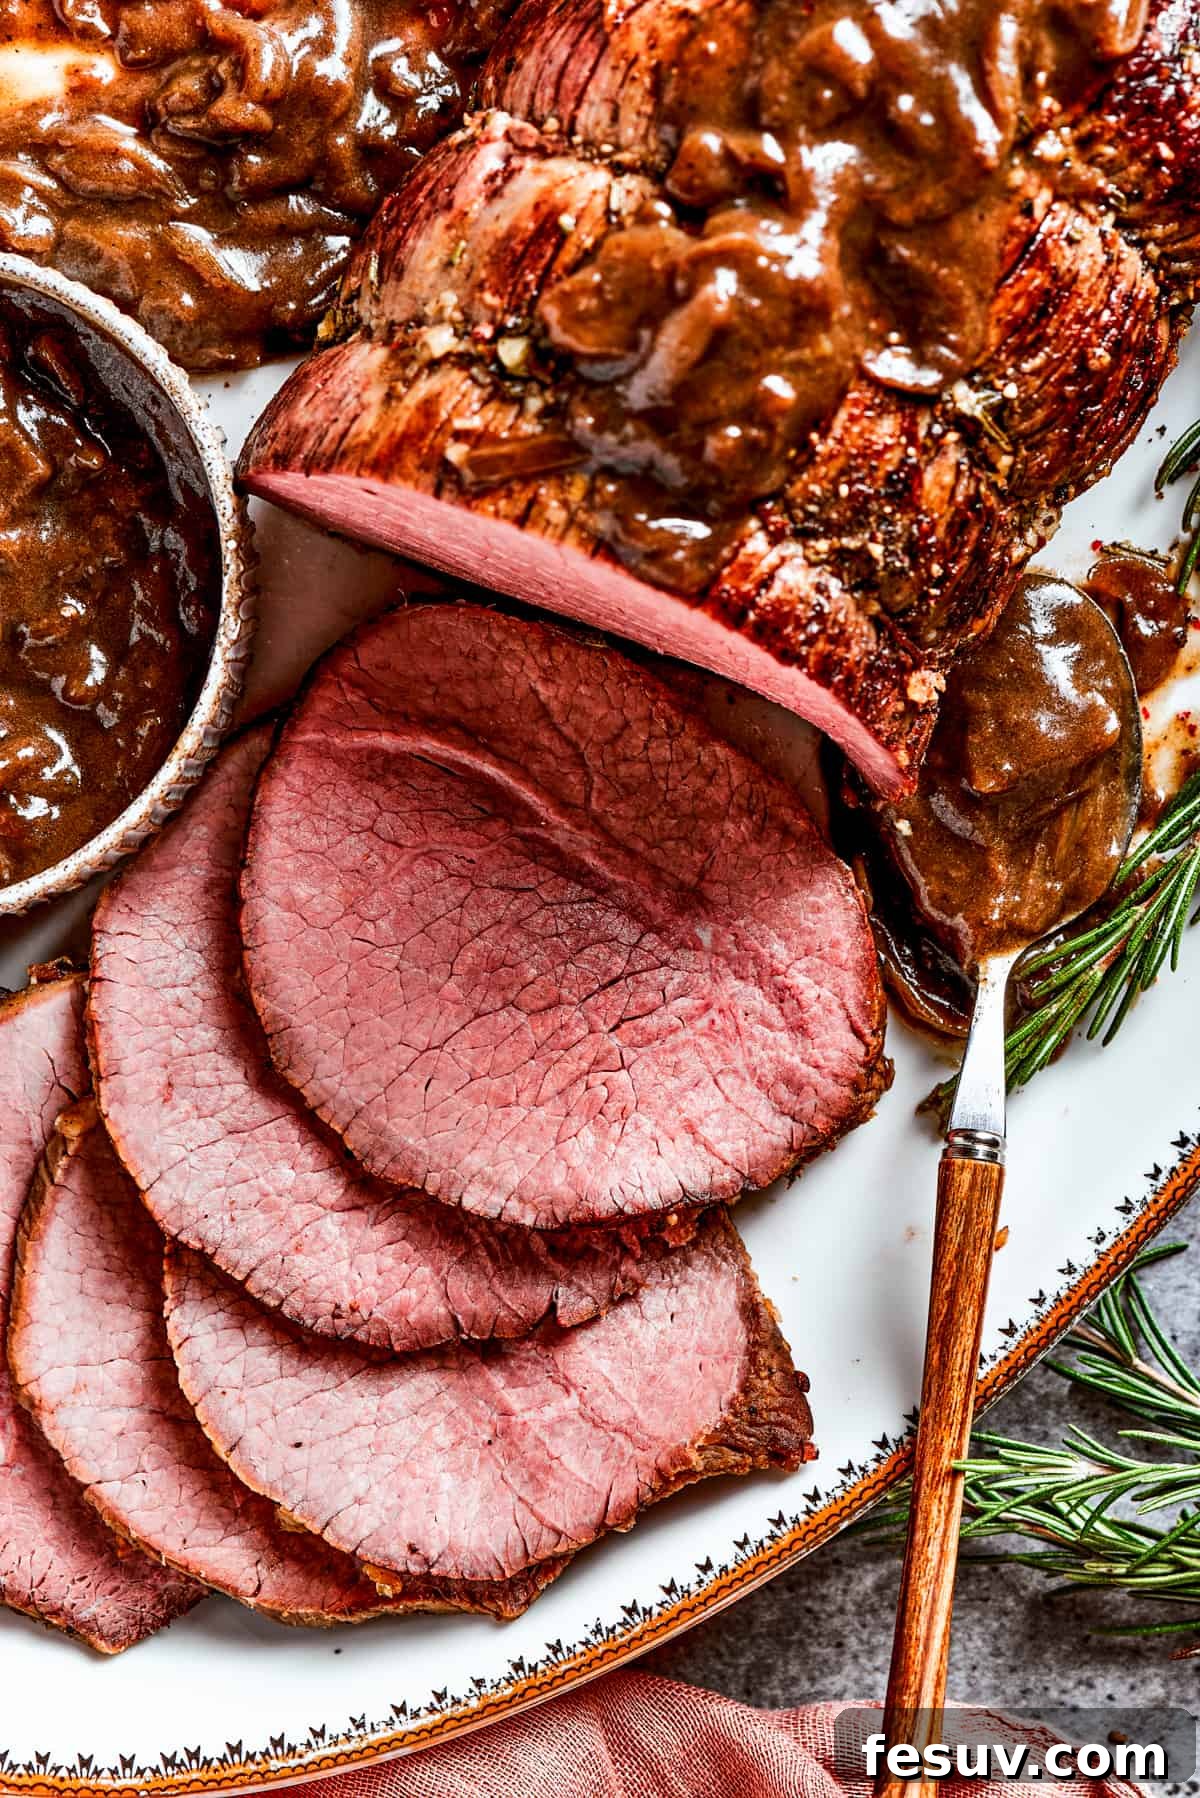
Delectable Serving Suggestions for Your Top Round Roast
A magnificent top round roast deserves equally impressive side dishes to complete your meal. Here are some perfect accompaniments to complete your feast, whether for a casual family dinner or a grand holiday spread:
- Creamy Potato Classics:
- Mashed Potatoes: The ultimate comfort food pairing, classic creamy mashed potatoes are ideal for soaking up every drop of that rich caramelized onion gravy. They are a timeless and satisfying choice.
- Baked Mashed Potatoes: For a slightly different twist with added texture and flavor, try these flavorful baked mashed potatoes, offering a delightful contrast to the tender beef.
- Potatoes au Gratin: Indulgent and wonderfully cheesy, potatoes au gratin add a layer of decadence, featuring thinly sliced potatoes baked in a rich cream sauce until bubbly and golden.
- Seasonal Vegetable Sides:
- Roasted Vegetables: A simple yet elegant choice, a medley of easy oven-roasted vegetables (think carrots, parsnips, Brussels sprouts, asparagus, or bell peppers) adds vibrant color, essential nutrients, and earthy flavors that complement the roast beautifully.
- Garlic Butter Green Beans: Quick, fresh, and bursting with flavor, sautéed green beans with garlic butter offer a crisp, bright contrast to the richness of the beef.
- Green Bean Casserole: For a more hearty and traditional option, especially during holidays, a savory stovetop green bean casserole is always a crowd-pleaser and offers comforting textures.
- Cauliflower Gratin: A delicious low-carb alternative to potato dishes, this cheesy cauliflower gratin provides similar comfort and creamy texture with a lighter touch.
- Other Delicious Options:
- Dinner Rolls or Crusty Bread: Perfect for serving alongside to sop up any remaining gravy or juices from the plate.
- Yorkshire Puddings: A traditional British pairing for roast beef, these light, airy, and savory puddings are a fantastic and authentic addition to your meal.
- Fresh Green Salad: A simple green salad with a light vinaigrette dressing can offer a refreshing and palate-cleansing counterpoint to the richness of the roast and gravy.
Storing and Reheating Leftovers: Maximize Your Delicious Meal
One of the great joys of preparing a roast is the delicious leftovers! Proper storage and reheating techniques are essential to ensure you can enjoy your perfectly cooked top round roast for days to come, maintaining its flavor and tenderness.
- Refrigeration: Allow any leftover roast to cool completely to room temperature (within two hours) before storing. To prevent drying out and maintain freshness, tightly wrap individual slices or larger pieces in plastic wrap, then place them in an airtight container. Properly stored, leftover roast beef can be kept in the refrigerator for up to 3-4 days.
- Freezing: For longer storage, slices of cooked top round roast freeze beautifully. For best results, arrange individual slices in a single layer on a baking sheet and freeze until solid (this prevents them from sticking together). Once frozen, transfer the slices to a freezer-safe bag or an airtight container, ensuring to remove as much air as possible to prevent freezer burn. Frozen roast beef can be stored for up to 2-3 months. Thaw overnight in the refrigerator before reheating.
- Reheating Method 1 (Microwave): For a quick and convenient reheat, place individual slices of roast beef on a microwave-safe plate. To keep the meat moist and prevent it from drying out, add a tablespoon or two of leftover gravy or beef broth over the slices. Cover loosely with a damp paper towel or microwave-safe lid and microwave on medium power in 30-second intervals until warmed through. Be cautious not to overheat, as this can quickly dry out lean meat.
- Reheating Method 2 (Stovetop): For a slightly crispier edge and to retain tenderness, reheat slices in a skillet over medium-low heat. Add a small amount of butter, beef broth, or a touch of water to the pan. Cover the skillet to trap steam and warm the meat gently until heated through, flipping once if desired. This method is great for maintaining a juicy texture.
- Reheating Method 3 (Oven – for larger portions): If reheating a larger piece of roast or several slices, preheat your oven to 300°F (150°C). Place the roast in an oven-safe dish with a splash of beef broth. Cover tightly with aluminum foil to lock in moisture and warm in the oven until heated through, typically 15-20 minutes depending on the thickness of the meat.
Explore More Irresistible Beef Recipes
If you’ve enjoyed this succulent top round roast, you’ll love exploring these other delicious beef recipes perfect for any occasion:
- Mulligan Stew
- Instant Pot Short Ribs
- Salisbury Steak with Mushroom Gravy
- Baked Mostaccioli
- Prime Rib
Top Round Roast Recipe Card
By Katerina | Easy Weeknight Recipes
Make a juicy beef roast that’s fall-apart tender and full of flavor with this easy Top Round Roast recipe, perfect for any special occasion.
- Prep Time:
- 15 minutes
- Cook Time:
- 1 hour 40 minutes
- Resting Time:
- 20 minutes
- Total Time:
- 2 hours 30 minutes
- Servings:
- 8 servings
Ingredients
For the Roast:
- 4 pounds beef top round roast, at room temperature
- 3 teaspoons kosher salt
- 1 teaspoon freshly ground black pepper
- 4 tablespoons olive oil
- 4 cloves garlic, minced
- 1 teaspoon chopped fresh rosemary
For the Gravy:
- 2 tablespoons unsalted butter
- 2 medium yellow onions, thinly sliced
- 1 cup beef broth
- ½ cup dry red wine
- 1 tablespoon cornstarch
Instructions
- Remove the roast from the fridge 1 to 2 hours before you want to start cooking. Room-temperature beef will cook more evenly, inside and out.
- Preheat the oven to 250°F (120°C).
- Pat the top round roast dry with paper towels.
- Tie the roast with kitchen twine and season it generously with salt and pepper on all sides.
- Heat 2 tablespoons olive oil in a cast iron skillet or Dutch oven set over medium-high heat. Sear the roast on all sides until browned. This will take roughly 6 minutes.
- Meanwhile, combine the rosemary and garlic in a small mixing bowl; add 2 tablespoons of olive oil and stir until a paste forms.
- Once the roast is browned, remove it from the heat and coat it with the prepared mixture of rosemary and garlic all over the entire surface.
- Place the skillet with the roast in the preheated oven. Roast it uncovered for about 20 to 25 minutes per pound – it will take about 80 to 100 minutes for a 4-pound roast – or until the internal temperature reaches your desired level of doneness. Use a meat thermometer to check the temperature. (See detailed temperature guidelines in the main article and notes).
- Once the roast is cooked, remove it from the oven, transfer it to a cutting board, and loosely tent it with aluminum foil. Let it rest for about 15 to 20 minutes. This resting period allows the juices to redistribute throughout the meat, making it juicier.
- While the roast is resting, prepare the gravy. In the same skillet or roasting pan used for searing, melt the butter over medium heat. Add the thinly sliced onions and cook until they are caramelized and tender, stirring occasionally, for about 10 minutes.
- Pour in the beef broth and wine, stirring to scrape up any browned bits from the bottom of the pan.
- In a small bowl, whisk together the cornstarch with a tablespoon of cold water to create a slurry. Stir the slurry into the onion mixture and simmer for a few minutes until the gravy thickens. Remove from heat.
- Slice the roast beef thinly against the grain for maximum tenderness. Serve it with the onion gravy.
Equipment
- Measuring Cups and Spoons
- Large Cast Iron Skillet
- Mixing Bowls
- Whisk
- Instant Read Meat Thermometer
Notes on Top Round Roast
- Top Round Roast vs Chuck Roast: Top round roast is cut from the rear leg and is leaner than chuck roast, which is cut from the shoulder and contains more fat. Supermarkets frequently mislabel top round as London Broil, which is actually a cooking technique for tough cuts of beef, not a specific cut itself.
- Room Temperature Meat: Take the beef out of the refrigerator 1 to 2 hours before cooking. Room temperature meat cooks more evenly.
- Generous Seasoning: Since a top round cut has less marbling, it benefits significantly from thorough seasoning.
- The Importance of Searing: This step adds a delicious crust and enhances flavor to the exterior. Sear until nicely browned.
- Essential Resting Period: After cooking, let the roast rest for 15 to 20 minutes. This allows juices to redistribute, ensuring a juicier and more tender meat.
- Slice Against the Grain: Always carve against the grain to break down meat fibers, leading to a more tender bite.
Temperature Guidelines for Roast Beef:
- Rare: 115°F (46°C)
- Medium Rare: 125°F (52°C)
- Medium: 135°F (57°C)
- Medium Well: 145°F (63°C)
- Well Done: 155°F (68°C)
Nutrition Information (Estimated)
Please note: Nutritional information is an estimate and provided as a courtesy. Values may vary according to the specific ingredients, brands, and tools used. For detailed and precise information, please consult your preferred nutritional calculator.
- Calories: 437 kcal
- Carbohydrates: 5g
- Protein: 51g
- Fat: 21g
- Saturated Fat: 7g
- Polyunsaturated Fat: 1g
- Monounsaturated Fat: 11g
- Trans Fat: 0.1g
- Cholesterol: 148mg
- Sodium: 1113mg
- Potassium: 840mg
- Fiber: 1g
- Sugar: 1g
- Vitamin A: 90IU
- Vitamin C: 3mg
- Calcium: 57mg
- Iron: 5mg