
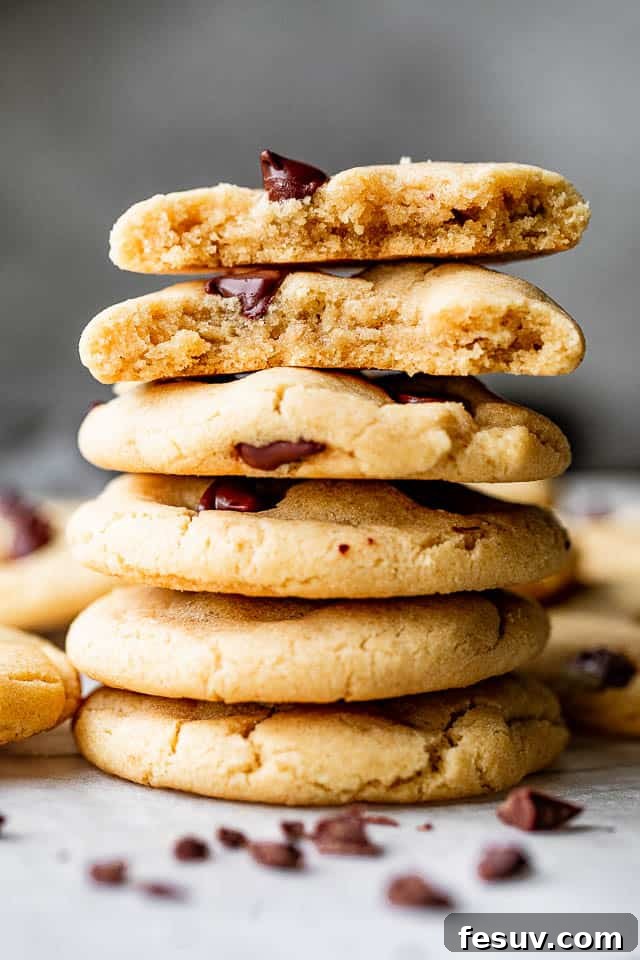
Welcome to the ultimate guide for baking the most irresistible, rich, thick, and wonderfully Chewy Chocolate Chip Cookies you’ve ever tasted! This isn’t just a recipe; it’s a promise of pure, unadulterated cookie perfection. Each bite delivers that coveted balance of buttery tenderness, gooey chocolate pockets, and just the right amount of sweetness. Designed for simplicity and guaranteed success, these cookies are a no-fuss delight that consistently turn out amazing, making them an instant classic in any home.
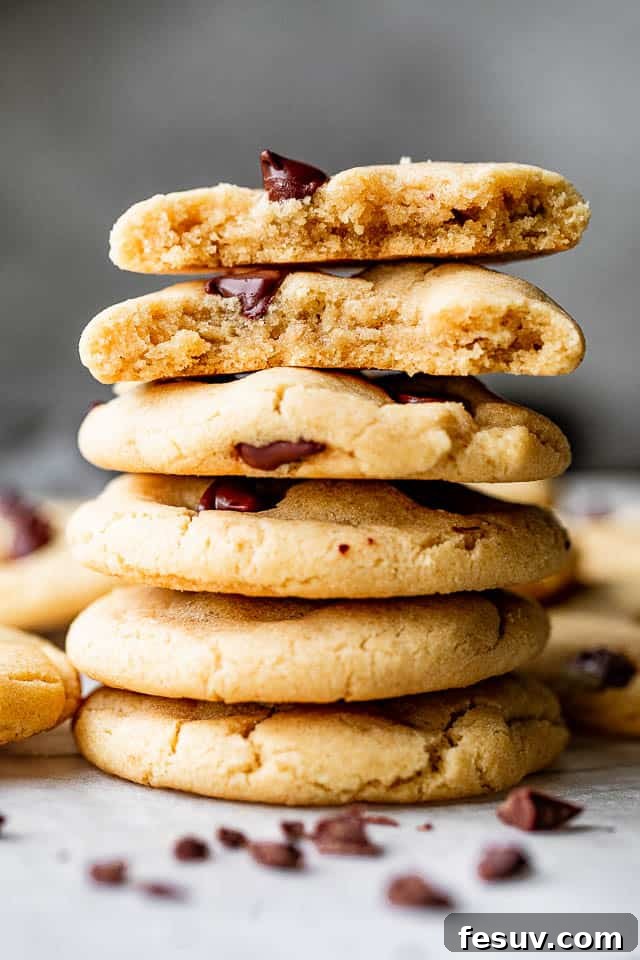
In a world full of cookie options, the classic chocolate chip cookie stands supreme, holding a special place in the hearts of many. Whether your preferred method involves opening a package or perfecting a family heirloom recipe, the quest for the “best” chocolate chip cookie is a universal pursuit. I am confident that this particular recipe will not only end your search but also become your go-to standard for heavenly homemade treats. It’s incredibly quick, remarkably easy, and utterly addictive, promising a batch of cookies that are superior in taste and texture every single time.
Imagine the aroma of warm vanilla and melting chocolate filling your kitchen, a scent that signals pure comfort. Then, envision biting into a cookie that offers a satisfying crispness around the edges, yielding effortlessly to an incredibly soft, gooey, and decadent center, brimming with pockets of warm, melted chocolate. This isn’t just a dream; it’s the reality this recipe delivers. Prepare to be enchanted by the simple magic of baking, and get ready to create the perfect chocolate chip cookies that will delight everyone who tries them.
Why These Chewy Chocolate Chip Cookies Will Become Your Favorite
Beyond simply satisfying a sweet craving, baking these cookies offers an experience that is deeply rewarding and incredibly delicious. Here are the compelling reasons why this particular recipe for homemade chewy chocolate chip cookies is destined to become a beloved staple in your kitchen repertoire:
- A Heartwarming Journey Back to Nostalgia: The scent of chocolate chip cookies baking is more than just an aroma; it’s a powerful trigger for treasured memories. It evokes images of childhood kitchens, comforting moments, and simpler times. These chewy chocolate chip cookies are crafted to deliver a taste that is deeply familiar and profoundly comforting, transporting you back to those cherished moments with every single bite. They truly taste like a sweet hug, reminding you of the best homemade treats from your past.
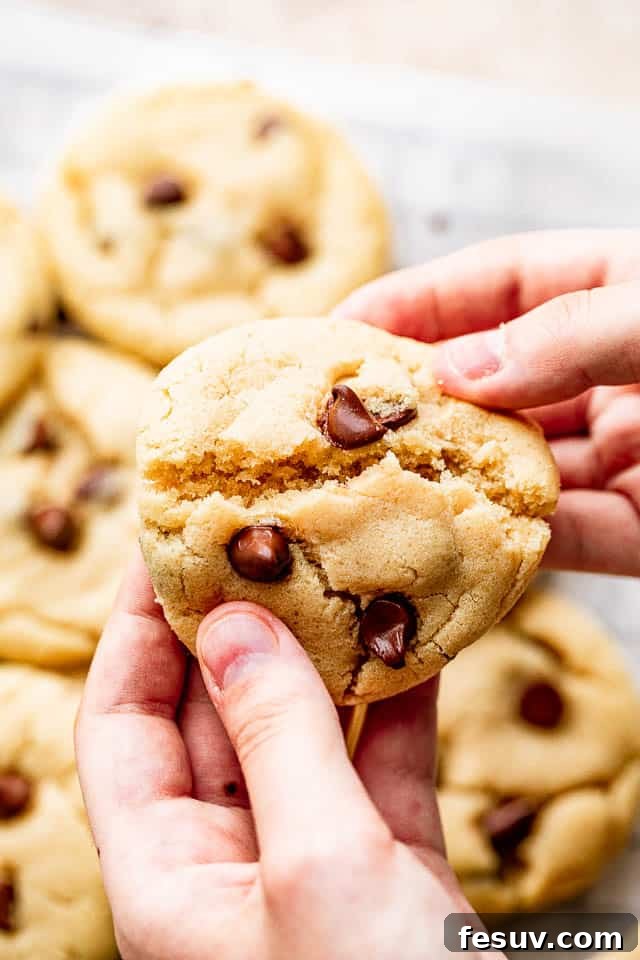
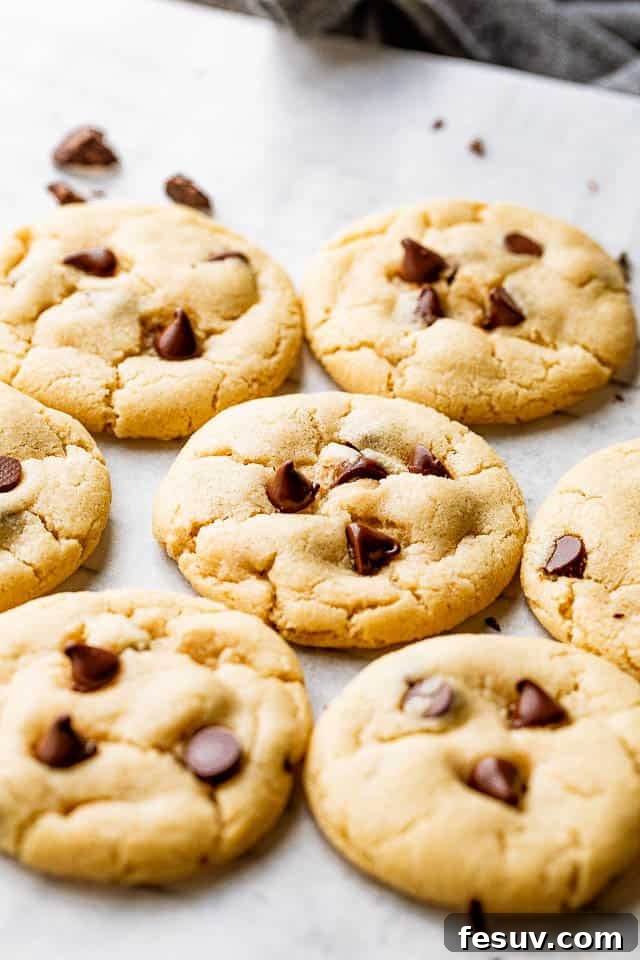
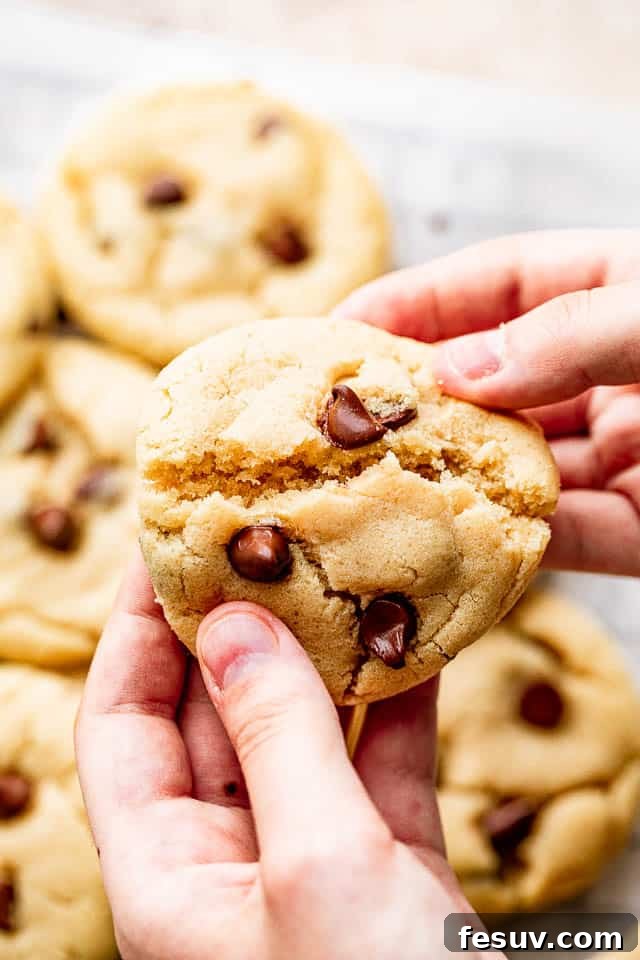
- The Art of Perfect Texture Achieved: Many bakers know the frustration of a chocolate chip cookie that misses the mark – either too cakey and dry from excessive flour, or too thin and crispy from an imbalance of ingredients. This recipe is a testament to precision, meticulously developed to conquer these common pitfalls. It achieves an exquisite textural harmony: beautifully golden, slightly crisp edges that gracefully give way to an incredibly soft, moist, and delightfully chewy interior. We’ve fine-tuned the flour-to-fat-to-sugar ratio to eliminate guesswork, ensuring that your cookies consistently emerge from the oven with that ideal, coveted texture. Say goodbye to cookie disappointments and hello to consistent perfection!
- Remarkably Simple and User-Friendly: Despite the gourmet results, you’ll be pleasantly surprised by the sheer ease of this recipe. Baking doesn’t have to be an intimidating ordeal; it should be an enjoyable and rewarding process. This guide breaks down each step into straightforward, actionable instructions, making it incredibly accessible for bakers of all skill levels. With common kitchen ingredients and a clear methodology, you’ll find yourself effortlessly whipping up a batch of these delectable soft chewy chocolate chip cookies, proving that extraordinary homemade treats are well within anyone’s reach.
- A Guaranteed Crowd-Pleaser for Any Occasion: Prepare to be showered with compliments! These cookies are not just delicious; they are universally adored. Their rich flavor, irresistible chewiness, and classic appeal make them the perfect treat for any event, from casual family desserts to festive gatherings, potlucks, or simply as a comforting snack. They disappear quickly, leaving behind happy smiles and requests for the recipe.
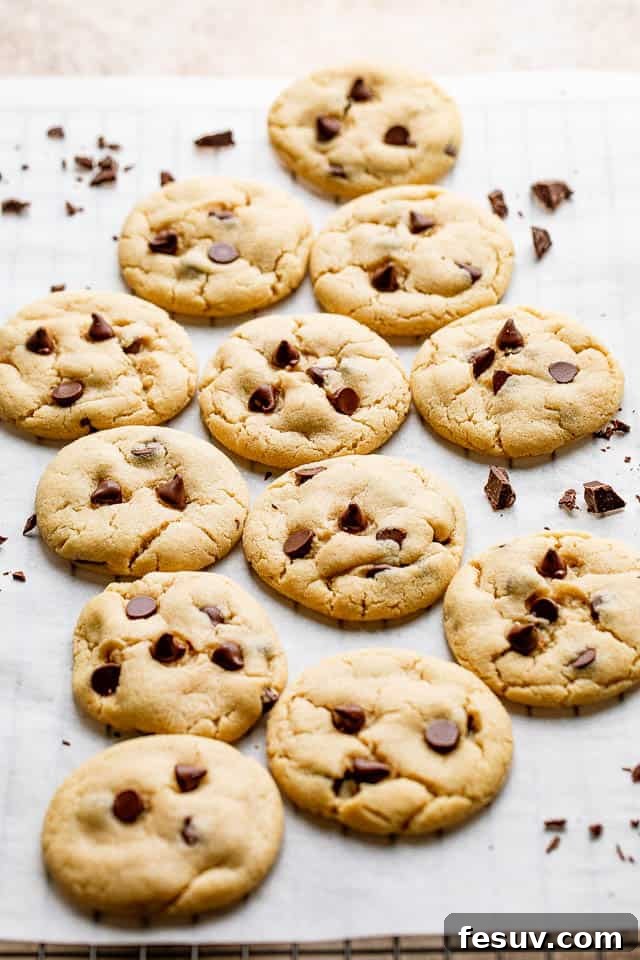
Essential Ingredients for The Best Chewy Chocolate Chip Cookies
The secret to exceptional chewy chocolate chip cookies lies in understanding the purpose of each ingredient. Quality matters, and the right combination ensures that perfect texture and flavor. Here’s a detailed breakdown of what you’ll need to create these heavenly bites:
- Unsalted Butter: Always start with unsalted butter, softened to room temperature. This crucial first step allows you precise control over the overall saltiness of your cookies. Softened butter (it should be pliable, like mayonnaise, but not melted or greasy) creams beautifully with sugar, incorporating air that contributes to the cookie’s light, tender crumb and even spreading. Cold butter won’t blend properly, while melted butter can lead to flat, overly thin cookies.
- Sugars: Light Brown Sugar & Granulated Sugar: This powerful combination is fundamental to achieving the signature taste and texture of these perfect chocolate chip cookies.
- Light Brown Sugar: The true hero for chewiness! Brown sugar contains molasses, which is not only responsible for its distinct caramel-like flavor but also for its moisture-retaining properties. This added moisture is key to keeping the cookies soft and delightfully chewy. Ensure it is firmly packed when measuring to get the correct amount.
- Granulated Sugar: This provides sweetness and helps to create those desirable slightly crisp edges that contrast beautifully with the soft interior. It also contributes to the cookie’s golden-brown color during baking.
- Salt: A non-negotiable ingredient that often goes unappreciated. Salt is vital for balancing the intense sweetness of the sugars and chocolate, enhancing all the other flavors, and preventing the cookies from tasting bland or overly sugary. Use a good quality fine sea salt for the best results.
- Pure Vanilla Extract: Opt for pure vanilla extract over imitation for a significant difference in flavor. Vanilla adds a warm, aromatic depth that rounds out the sweetness and elevates the entire cookie experience. It’s an essential flavor enhancer for classic homemade chocolate chip cookies.
- Egg Yolk: Here’s a little secret weapon for ultimate richness and chewiness! This recipe calls for just one large egg yolk, discarding the white (or saving it for another recipe). Egg yolks are rich in fat and emulsifiers, which contribute to a tender texture and a deeper, more luxurious flavor without adding excess water, which can make cookies cakey or greasy. The yolk binds the ingredients, ensuring a cohesive and perfectly structured cookie.
- All-Purpose Flour: The backbone of your cookie structure. Accurate measurement of flour is critical; too much will lead to dry, dense, and tough cookies, while too little can result in excessive spreading and a greasy texture. Always use the “spoon and level” method: spoon flour into your measuring cup until it overflows, then level off the top with a straight edge without compacting the flour.
- Baking Soda: This leavening agent plays a vital role in achieving the characteristic rise and slightly crinkled tops of these cookies. It reacts with the acidic components of the brown sugar (molasses) to produce carbon dioxide gas, which helps the cookies expand and spread just enough, contributing to their soft and chewy texture.
- Semi-Sweet Chocolate Chips: The defining ingredient! Semi-sweet chocolate chips offer a balanced flavor that pairs perfectly with the sweet dough. Feel free to customize your cookies by using different types of chocolate: milk chocolate chips for a sweeter treat, dark chocolate chunks for a more intense cocoa hit, or even a mix of several varieties for complex flavor. High-quality chocolate makes a discernible difference in how beautifully they melt and taste. You can find excellent options like these semi-sweet chocolate chips for your pantry.
How to Bake the Best Chewy Chocolate Chip Cookies: A Detailed Step-by-Step Guide
Prepare yourself for a truly delightful baking experience! This recipe for thick and chewy chocolate chip cookies is not only incredibly easy to follow but also consistently delivers spectacular results. Each step is designed to guide you toward bakery-quality perfection right in your own kitchen. For precise measurements and a full printable version, please refer to the recipe card located further down the page.
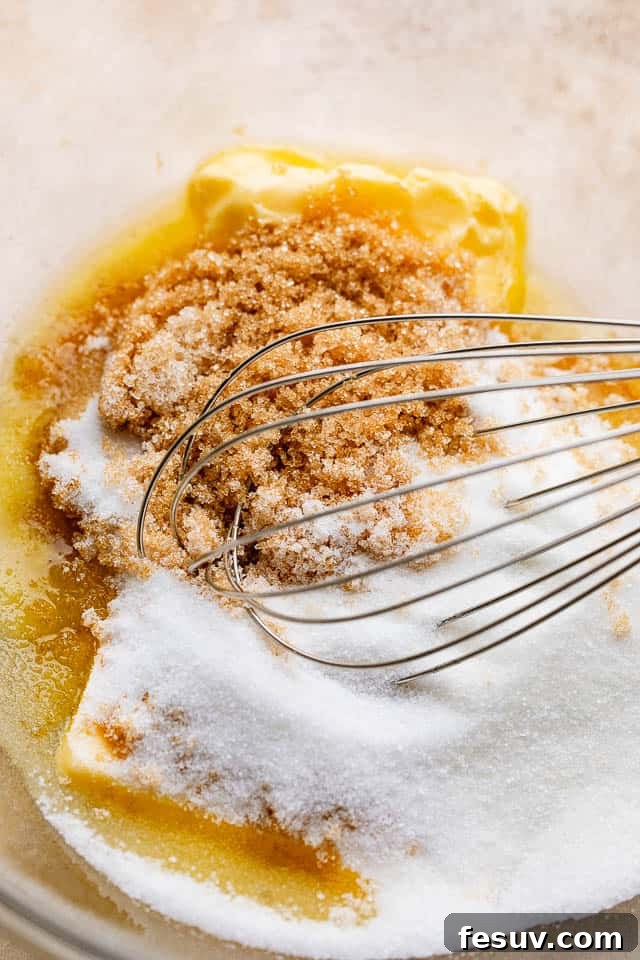
- Soften the Butter Perfectly: Place your unsalted butter in a large, microwave-safe bowl. To achieve the ideal consistency (soft and pliable like room-temperature mayonnaise, but not melted), microwave it in very short bursts, typically 5-10 seconds at a time. This prevents it from turning into liquid, which would negatively impact the cookie’s texture. Alternatively, allow the butter to naturally soften on your kitchen counter for about an hour; this slow softening method often yields the best results for creaming.
- Cream Sugars and Flavorings: Add the light brown sugar, granulated sugar, salt, and pure vanilla extract to the softened butter. Using a sturdy whisk or an electric mixer (either a handheld mixer or a stand mixer fitted with the paddle attachment), beat these ingredients together until the mixture becomes beautifully light in color, smooth, and fluffy. This process is called creaming and is vital for incorporating air, which contributes to the cookies’ light and tender crumb.
- Incorporate the Egg Yolk: Gently whisk or beat in the single large egg yolk until it is fully incorporated into the butter-sugar mixture and the dough appears uniform. The egg yolk adds richness, chewiness, and helps bind the ingredients without adding excess moisture that could lead to cakiness.
- Combine Dry Ingredients: In a separate, small bowl, whisk together the all-purpose flour and baking soda to ensure they are well distributed. Then, gradually add this dry mixture to your wet ingredients. Mix on low speed or stir by hand until the flour is just combined and no visible streaks of dry flour remain. Be very careful not to overmix at this stage; overmixing develops gluten, which can result in tough, dense cookies.
- Fold in the Chocolate Chips: With a spatula or large spoon, gently fold in your semi-sweet chocolate chips. Continue to stir until the chocolate chips are evenly distributed throughout the dough, ensuring every cookie gets a generous amount of chocolate goodness.
- Crucial Chilling Step: Cover the bowl of chocolate chip cookie dough tightly with plastic wrap and refrigerate it for a minimum of 20 to 30 minutes. This chilling period is not optional; it is paramount for developing flavor, preventing the cookies from spreading too much during baking, and achieving that signature thick, chewy texture. For an even more intense flavor profile, you can chill the dough for up to 24 hours.
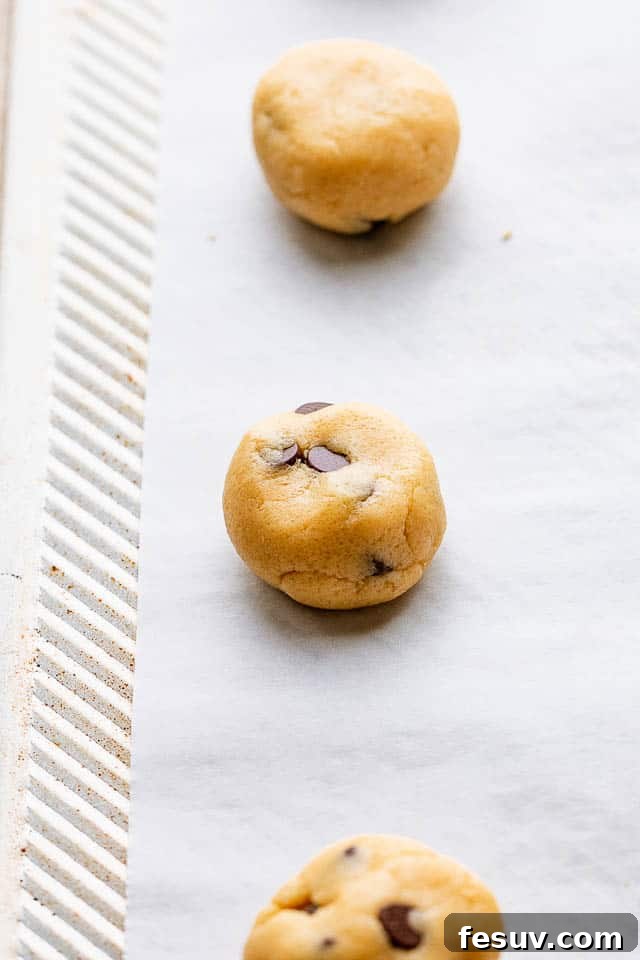
- Preheat Oven and Form Cookies: While your dough is chilling, preheat your oven to 325˚F (160˚C). Line a baking sheet with parchment paper; this prevents sticking and makes for easy cleanup. Once the dough is chilled, remove it from the fridge. Pinch off portions, roughly 1.5-2 tablespoons each, and roll them into 12 uniform balls. For an extra aesthetic touch, you can press a few additional chocolate chips onto the tops of the dough balls just before baking.
- Bake to Perfection: Arrange the dough balls on your prepared baking sheet, ensuring adequate space (at least 2 inches) between each to allow for proper spreading. Bake for 9 to 11 minutes. The cookies are ready when their edges are lightly golden brown, but their centers still appear slightly soft, puffed, and even a bit underbaked. Remember, slight underbaking is the key to achieving a wonderfully soft and gooey interior; overbaking will result in drier, crispier cookies.
- Cool and Savor: Once removed from the oven, let the cookies cool on the hot baking sheet for an additional 3 minutes. This crucial resting time allows them to set up and firm slightly without breaking. Then, carefully transfer them to a wire cooling rack to cool completely. While it’s tempting to dig in immediately, allowing them to cool improves their final texture and allows the melted chocolate to solidify just enough. Enjoy them warm or at room temperature!
Expert Tips for the Most Divine Chocolate Chip Cookies Ever
Turning a good cookie recipe into an exceptional one often comes down to mastering a few key techniques and understanding the nuances of baking. Implement these expert tips to ensure your chewy chocolate chip cookies are nothing short of divine, every single time:
- The Non-Negotiable Step: Chill Your Dough! This cannot be overstated enough. If there’s one tip to take away for achieving truly thick and chewy chocolate chip cookies, it’s this: do not ever skip refrigerating your cookie dough! Chilling the dough for at least 20-30 minutes, and ideally longer (up to 24-48 hours), is transformative. Here’s why it’s so critical:
- Prevents Excessive Spreading: Cold butter melts slower in the oven, allowing the cookie to set before it spreads too much, resulting in a thicker, chewier cookie.
- Intensifies Flavor: The resting period allows the flour to fully hydrate and the flavors to meld and deepen. The sugars caramelize slightly, leading to a richer, more complex taste.
- Optimizes Texture: Chilling helps create that perfect balance of crisp edges and a wonderfully soft, gooey, and dense center.
- Easier Handling: Chilled dough is firmer and less sticky, making it much easier to roll into uniform balls.
Skipping this step often leads to flat, greasy, and disappointing cookies. Patience truly is a virtue in this instance!
- Embrace Chocolate Diversity: While classic semi-sweet chocolate chips are undeniably delicious, don’t be afraid to experiment with your chocolate choices. The quality and type of chocolate significantly impact the final flavor and texture.
- Varieties: Try dark chocolate chunks for a sophisticated, intense cocoa flavor, or milk chocolate chips for a sweeter, creamier profile. White chocolate chips can add a different kind of sweetness and visual appeal.
- Texture: Chocolate chunks often create larger, more dramatic pools of melted chocolate throughout the cookie than standard chips.
- Mix and Match: For an exciting twist, combine different types of chips – half semi-sweet and half peanut butter chips, or semi-sweet with a handful of chopped walnuts or pecans for added crunch and flavor. Always choose high-quality chocolate for superior melting and taste.
- Master the Art of Underbaking: This is the ultimate secret to achieving that coveted gooey, chewy center. Your cookies are perfectly done when their edges are set and a beautiful golden brown, but the centers still look slightly soft, puffy, and even a little underbaked. They will continue to cook and set from the residual heat of the baking sheet after they are removed from the oven – this phenomenon is known as “carry-over cooking.” If your cookies look completely firm and deeply browned in the oven, they are likely overbaked, which will result in a dry, crispy texture rather than the desired soft and chewy one. When in doubt, err on the side of taking them out a minute early for maximum gooey deliciousness!
- Measure Flour with Precision: Incorrect flour measurement is a common culprit for cookie failures. Always “spoon and level” your flour: gently spoon the flour into your measuring cup until it overflows, then use a straight edge (like a knife or the back of a spoon) to level it off. Never scoop flour directly from the bag, as this compacts it and can lead to using significantly more flour than intended, resulting in dry, dense cookies.
- All Ingredients at Room Temperature: While softened butter is highlighted, ensuring your egg yolk is also at room temperature is beneficial. Room temperature ingredients emulsify (mix smoothly) more effectively, creating a homogenous, silky dough that bakes more evenly.
- Don’t Crowd Your Baking Sheet: Give your cookie dough balls ample space to spread! Arrange them at least 2 inches apart on the baking sheet. Overcrowding can lead to uneven baking and cookies that merge into one another.
- Parchment Paper is a Baker’s Best Friend: Always line your baking sheets with parchment paper. It ensures consistent heat distribution for even baking, prevents sticking (making removal effortless), and drastically simplifies cleanup.
- A Pinch of Flaky Sea Salt (Optional but Recommended): For an extra gourmet touch, sprinkle a tiny pinch of flaky sea salt (like Maldon) over your cookies immediately after they come out of the oven. The coarse salt crystals provide a delightful textural contrast and brilliantly enhance the rich chocolate flavor, creating a truly elevated sweet and salty experience.
Storing and Freezing Your Perfect Chewy Chocolate Chip Cookies
Once you’ve successfully baked a batch of these glorious chewy chocolate chip cookies, the next step is ensuring they stay fresh and delicious for as long as possible. Of course, the real challenge is resisting the urge to devour them all immediately!
- Storing Baked Cookies for Optimal Freshness: To preserve their incredibly soft and chewy texture, it’s essential to store your baked chocolate chip cookies properly. Once they have cooled completely, transfer them to an airtight container. Keep this container at room temperature, and your cookies will remain wonderfully fresh and delicious for about 3 to 4 days. A common trick to keep them extra moist is to place a half-slice of plain bread inside the container with the cookies; the bread will absorb moisture, helping to keep the cookies soft. For an extra treat, a quick 10-15 second warm-up in the microwave will bring them back to their initial warm, gooey, straight-from-the-oven glory.
- Freezing Baked Cookies for Long-Term Enjoyment: If you’ve baked a generous batch or simply want to have treats ready for future cravings, these cookies freeze exceptionally well. Allow the baked cookies to cool down completely to room temperature. Then, arrange them in a single layer on a baking sheet and place them in the freezer for about an hour until they are firm. Once firm, transfer the frozen cookies to an airtight, freezer-safe container or a heavy-duty freezer bag. They will maintain their quality in the freezer for up to 3 months. When you’re ready to enjoy, simply thaw them at room temperature for an hour or so, or gently reheat them in a low oven for a few minutes until warmed through.
- Freezing Cookie Dough for Anytime Baking: This is a fantastic strategy for meal prepping and ensures you always have fresh, homemade cookies just minutes away.
- Portion and Freeze Individual Balls: Form your cookie dough into individual balls, exactly as you would if you were going to bake them immediately. Place these dough balls onto a parchment-lined baking sheet, ensuring they don’t touch, and freeze them until they are solid (this usually takes 1-2 hours).
- Store Properly: Once the dough balls are frozen solid, transfer them to an airtight, freezer-safe container or a zip-top freezer bag. To prevent them from sticking together, you can layer them with small pieces of wax paper or parchment paper. This allows you to grab just a few at a time. The frozen cookie dough can be stored in the freezer for up to 3 months.
- Baking from Frozen: When a cookie craving strikes, simply place the frozen dough balls onto a parchment-lined baking sheet. For the most even baking, it’s best to let them sit at room temperature for about 20-30 minutes before baking to allow them to thaw slightly. Then, bake them according to the original recipe instructions. If you need them sooner and bake them directly from frozen, you might need to add an extra 2-5 minutes to the total baking time. Keep a close eye on them; they are done when the edges are golden, and the centers still look soft. Having pre-portioned, frozen cookie dough is a true lifesaver for unexpected guests, a busy weeknight treat, or when you desire the wholesome goodness of homemade chewy chocolate chip cookies without the initial mixing effort.
Frequently Asked Questions About Chewy Chocolate Chip Cookies
Light brown sugar is a critical component for creating truly chewy chocolate chip cookies. Its magic lies in its molasses content, which is naturally hygroscopic – meaning it attracts and retains moisture. This molasses not only imparts a rich, caramel-like flavor that granulated sugar alone cannot provide, but more importantly, it directly contributes to the cookie’s moist, soft, and distinctly chewy texture. The moisture from the molasses helps keep the cookies tender and prevents them from drying out, ensuring that satisfying chew.
The decision to use only one large egg yolk (and omit the egg white) is a deliberate strategy for perfecting the texture and richness of these chocolate chip cookies. Egg yolks are rich in fat and natural emulsifiers, which are key to producing a wonderfully tender, melt-in-your-mouth texture and a more profound, buttery flavor. Egg whites, while providing structure, contain significant amounts of protein and water. These can lead to a drier, cakier, or even slightly greasy cookie. By isolating the yolk, we maximize tenderness and a decadent richness, enhancing the cookie’s chewiness without any unwanted dryness or grease.
Absolutely! Freezing chocolate chip cookie dough is a brilliant way to prepare ahead and ensure you always have fresh-baked treats on hand. To do this effectively, first form your dough into individual, uniform balls, just as you would before baking. Place these dough balls on a parchment-lined baking sheet and freeze them until they are completely solid. Once frozen, transfer the solid dough balls to an airtight, freezer-safe container or a heavy-duty zip-top bag. To prevent sticking and make it easy to grab individual cookies, separate layers of dough with wax paper or parchment paper. This method allows your dough to stay fresh and ready to bake for up to 3 months, making impromptu baking sessions a breeze.
Yes, you can certainly bake frozen cookie dough directly! When you’re ready to enjoy, simply place the frozen dough balls onto a parchment-lined baking sheet. For the best and most even baking results, I recommend allowing them to come to room temperature first by covering them with a warm tea towel for about 20-30 minutes. Then, bake them according to the original recipe instructions. If you’re pressed for time and need to bake them straight from frozen, expect to add an extra 2-5 minutes to the total baking time. Keep a close eye on them; they are done when the edges are golden, and the centers still appear slightly soft. Having frozen cookie dough ready to go in your freezer is incredibly convenient for unexpected guests, a quick dessert for the kids, or when you crave a wholesome homemade sweet treat without all the initial mixing.
Baking soda serves as a crucial chemical leavening agent in these chewy chocolate chip cookies. It reacts with the acidic components, primarily the molasses in the brown sugar, to produce carbon dioxide gas. This gas creates small bubbles throughout the dough, which are responsible for the cookie’s slight rise, tender interior, and the characteristic crinkled tops. Furthermore, baking soda helps the cookies spread properly during baking, ensuring they achieve that perfect thick and chewy consistency rather than staying as dense, unyielding mounds.
Overmixing the cookie dough after incorporating the flour is a common pitfall that can lead to tough, dense, and less tender cookies. Flour contains gluten, a protein that develops elasticity and strength when agitated with liquid. The more you mix the dough once the flour is added, the more gluten develops, resulting in a rubbery, chewy texture (not the good kind of chewy!). For optimal results, mix the flour and baking soda into the wet ingredients only until they are just combined and no dry streaks of flour are visible. A light hand and minimal mixing will ensure your cookies remain wonderfully soft and delicate.
More Irresistible Cookie Recipes to Explore
If you’ve thoroughly enjoyed baking and devouring these sensational chewy chocolate chip cookies and are now eager to expand your baking adventures, here are a few more easy and absolutely delicious cookie recipes that are sure to become new favorites in your kitchen:
- Bright & Zesty Lemon Cookies: A burst of sunshine in every bite!
- Decadent Red Velvet Crinkle Cookies: Rich, festive, and beautifully cracked.
- Classic Homemade Butter Cookies: Simple, elegant, and melt-in-your-mouth delicious.
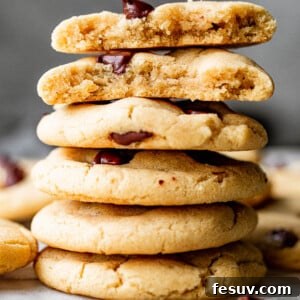
Chewy Chocolate Chip Cookies
You’ll absolutely adore these rich, thick, and wonderfully chewy chocolate chip cookies! They deliver the perfect harmony of buttery flavor, gooey texture, and sweet indulgence. This straightforward, unfussy recipe guarantees perfect results every single time, making it an instant classic.
Ingredients
- ⅓ cup (5 tablespoons) unsalted butter, softened
- ⅓ cup light brown sugar, packed
- ¼ cup granulated sugar
- ½ teaspoon fine sea salt
- 1 teaspoon pure vanilla extract
- 1 large egg yolk
- ¾ cup all-purpose flour
- ½ teaspoon baking soda
- ⅓ cup semi-sweet chocolate chips
Instructions
- Soften Butter: Place unsalted butter in a large microwave-safe bowl. Microwave in 5-10 second intervals to soften it to a creamy consistency, but do not melt it completely. Alternatively, let it sit at room temperature for about an hour.
- Cream Sugars: Whisk together the softened butter, light brown sugar, granulated sugar, salt, and vanilla extract until smooth, creamy, and pale in color.
- Add Egg Yolk: Whisk in the large egg yolk until fully incorporated into the mixture.
- Combine Dry Ingredients: In a separate small bowl, whisk together the all-purpose flour and baking soda. Gradually add this dry mixture to the wet ingredients, mixing until just combined and no dry streaks of flour remain. Avoid overmixing.
- Fold in Chocolate Chips: Gently stir in the semi-sweet chocolate chips until they are evenly distributed throughout the dough.
- Chill Dough: Cover the bowl with plastic wrap and refrigerate the cookie dough for 20 to 30 minutes. This step is crucial for thick, chewy cookies.
- Preheat Oven & Form: Preheat your oven to 325˚F (160˚C). Line a baking sheet with parchment paper. Remove the chilled dough from the fridge. Pinch off dough and roll into 12 uniform balls. For aesthetics, you can press a few extra chocolate chips on top of each dough ball.
- Bake: Transfer the dough balls to the prepared cookie sheet, spacing them evenly. Bake for 9 to 11 minutes, or until the edges are light golden brown but the centers still look slightly soft and underbaked.
- Cool: Allow the cookies to cool on the baking sheet for 3 minutes before transferring them to a wire cooling rack to cool completely. Enjoy warm or at room temperature!
Nutrition Facts (per serving)
Nutritional information is an estimate and provided as a courtesy. Values may vary according to the ingredients and tools used. Please use your preferred nutritional calculator for more detailed info.
- Calories: 150 kcal
- Carbohydrates: 19 g
- Protein: 1 g
- Fat: 8 g
- Saturated Fat: 5 g
- Cholesterol: 31 mg
- Sodium: 193 mg
- Potassium: 45 mg
- Fiber: 1 g
- Sugar: 12 g
- Vitamin A: 186 IU
- Calcium: 13 mg
- Iron: 1 mg
Did you make this delicious recipe? We’d love to hear from you! Leave a rating and comment below to share your experience!