
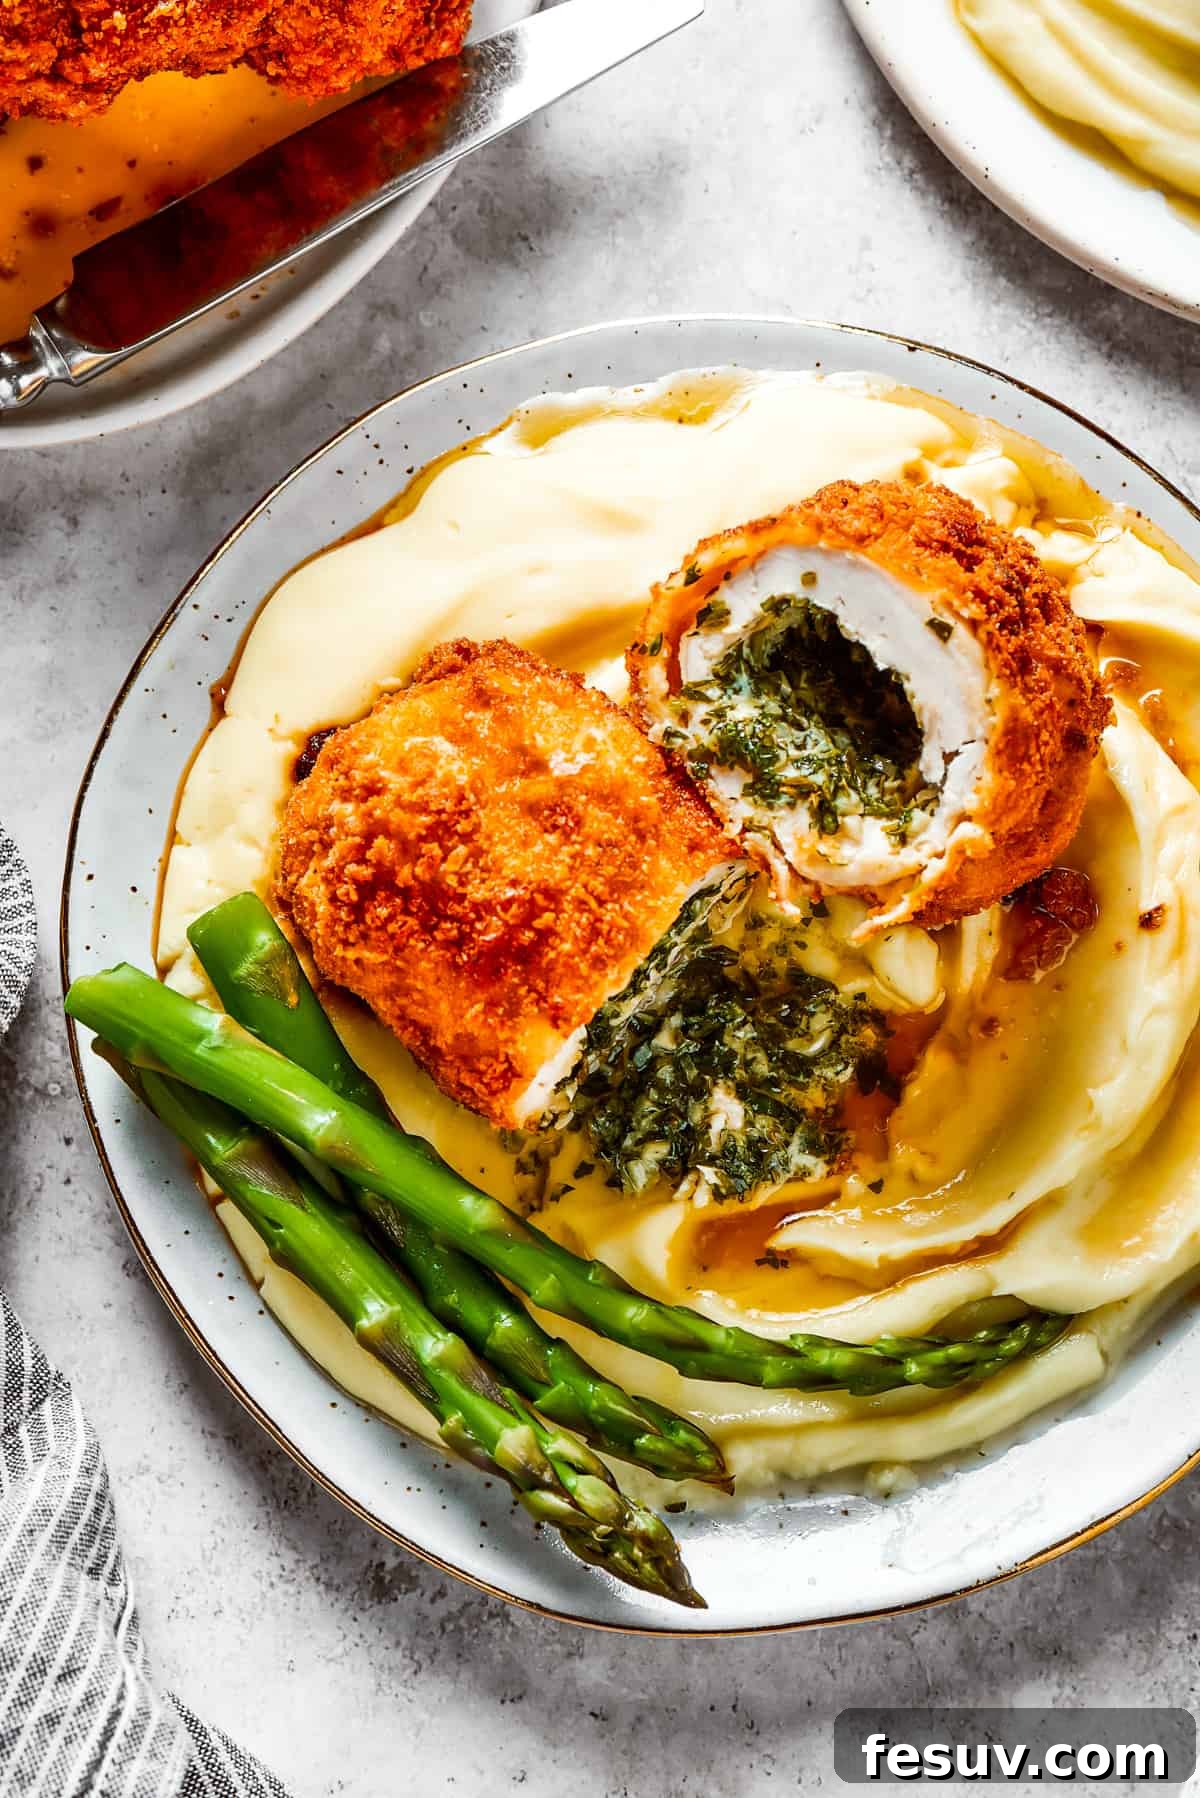
Mastering Chicken Kiev: The Ultimate Crispy Garlic-Herb Butter Delight
Few dishes rival the allure of a perfectly prepared Chicken Kiev: a tender, juicy chicken breast generously stuffed with rich, melting herb butter, all encased in a golden, irresistibly crispy breadcrumb coating. This iconic Eastern European classic is not just a meal; it’s a celebration of flavors and textures, promising a gourmet experience that is both surprisingly achievable at home and utterly delicious. Whether you’re planning a festive dinner or simply craving an elevated weeknight treat, this easy-to-follow Chicken Kiev recipe is your ticket to a truly memorable culinary adventure.
Why This Chicken Kiev Recipe Is a Must-Try
Chicken Kiev holds a special place in the hearts of food lovers, and for good reason. It’s a dish that masterfully balances simplicity with sophistication, delivering an unforgettable dining experience. Here’s why this recipe will quickly become a favorite in your kitchen:
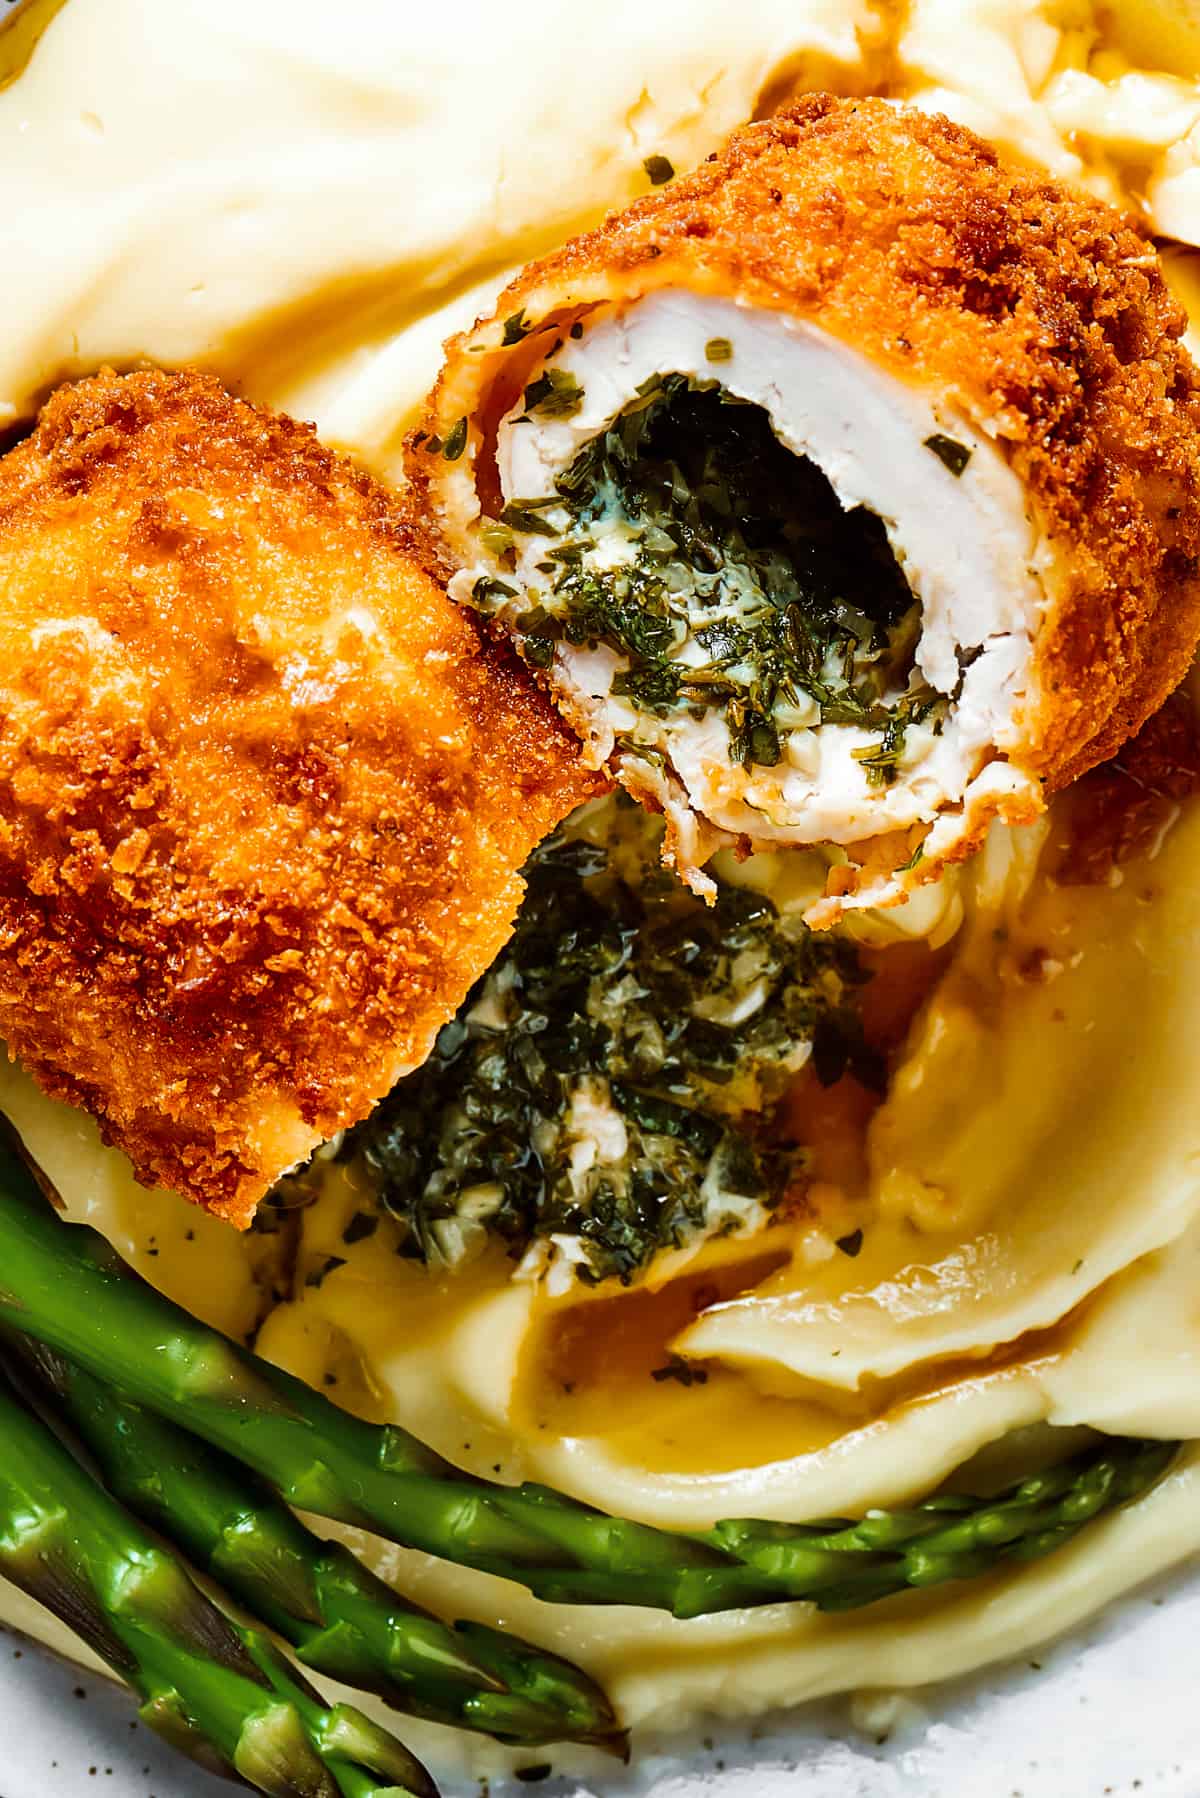
- Unparalleled Rich and Flavorful Taste: Each bite of Chicken Kiev is a symphony of flavors. The crispy exterior gives way to succulent chicken, and then, the star of the show – a burst of aromatic, molten garlic-herb butter. This exquisite combination creates a deep, satisfying taste that is truly irresistible.
- A Timeless Culinary Classic: With a history spanning over a century, Chicken Kiev has cemented its status as a timeless dish. Its enduring popularity across generations and diverse cultures speaks volumes about its universal appeal and comforting familiarity. It’s a classic for a reason, and this recipe honors its rich legacy.
- Surprisingly Easy to Make: Despite its gourmet appearance and complex layers of flavor and texture, preparing Chicken Kiev at home is more manageable than you might imagine. While it does involve a few strategic chilling steps to ensure perfect results, the process is straightforward and incredibly rewarding for both beginner cooks and seasoned culinary enthusiasts. The effort is minimal compared to the impressive outcome.
- Perfect for Any Occasion: Whether you’re hosting a dinner party, planning a romantic meal, or simply want to elevate a family dinner, Chicken Kiev fits the bill. It looks impressive on a plate, making it ideal for special occasions, yet its comforting nature also makes it suitable for a lavish weeknight meal.
Chicken Cordon Bleu vs. Chicken Kiev: Understanding the Difference
Often confused due to their similar presentation, Chicken Cordon Bleu and Chicken Kiev are distinct dishes, each with its own unique charm. Both feature chicken breasts expertly pounded thin and rolled in a crisp breadcrumb coating, but their core identity lies in their fillings.
Chicken Cordon Bleu typically boasts a savory filling of ham and cheese, often Swiss or Gruyère, which melts into a creamy, salty delight. This combination delivers a rich, hearty flavor profile that is distinctively European, often associated with French or Swiss cuisine.
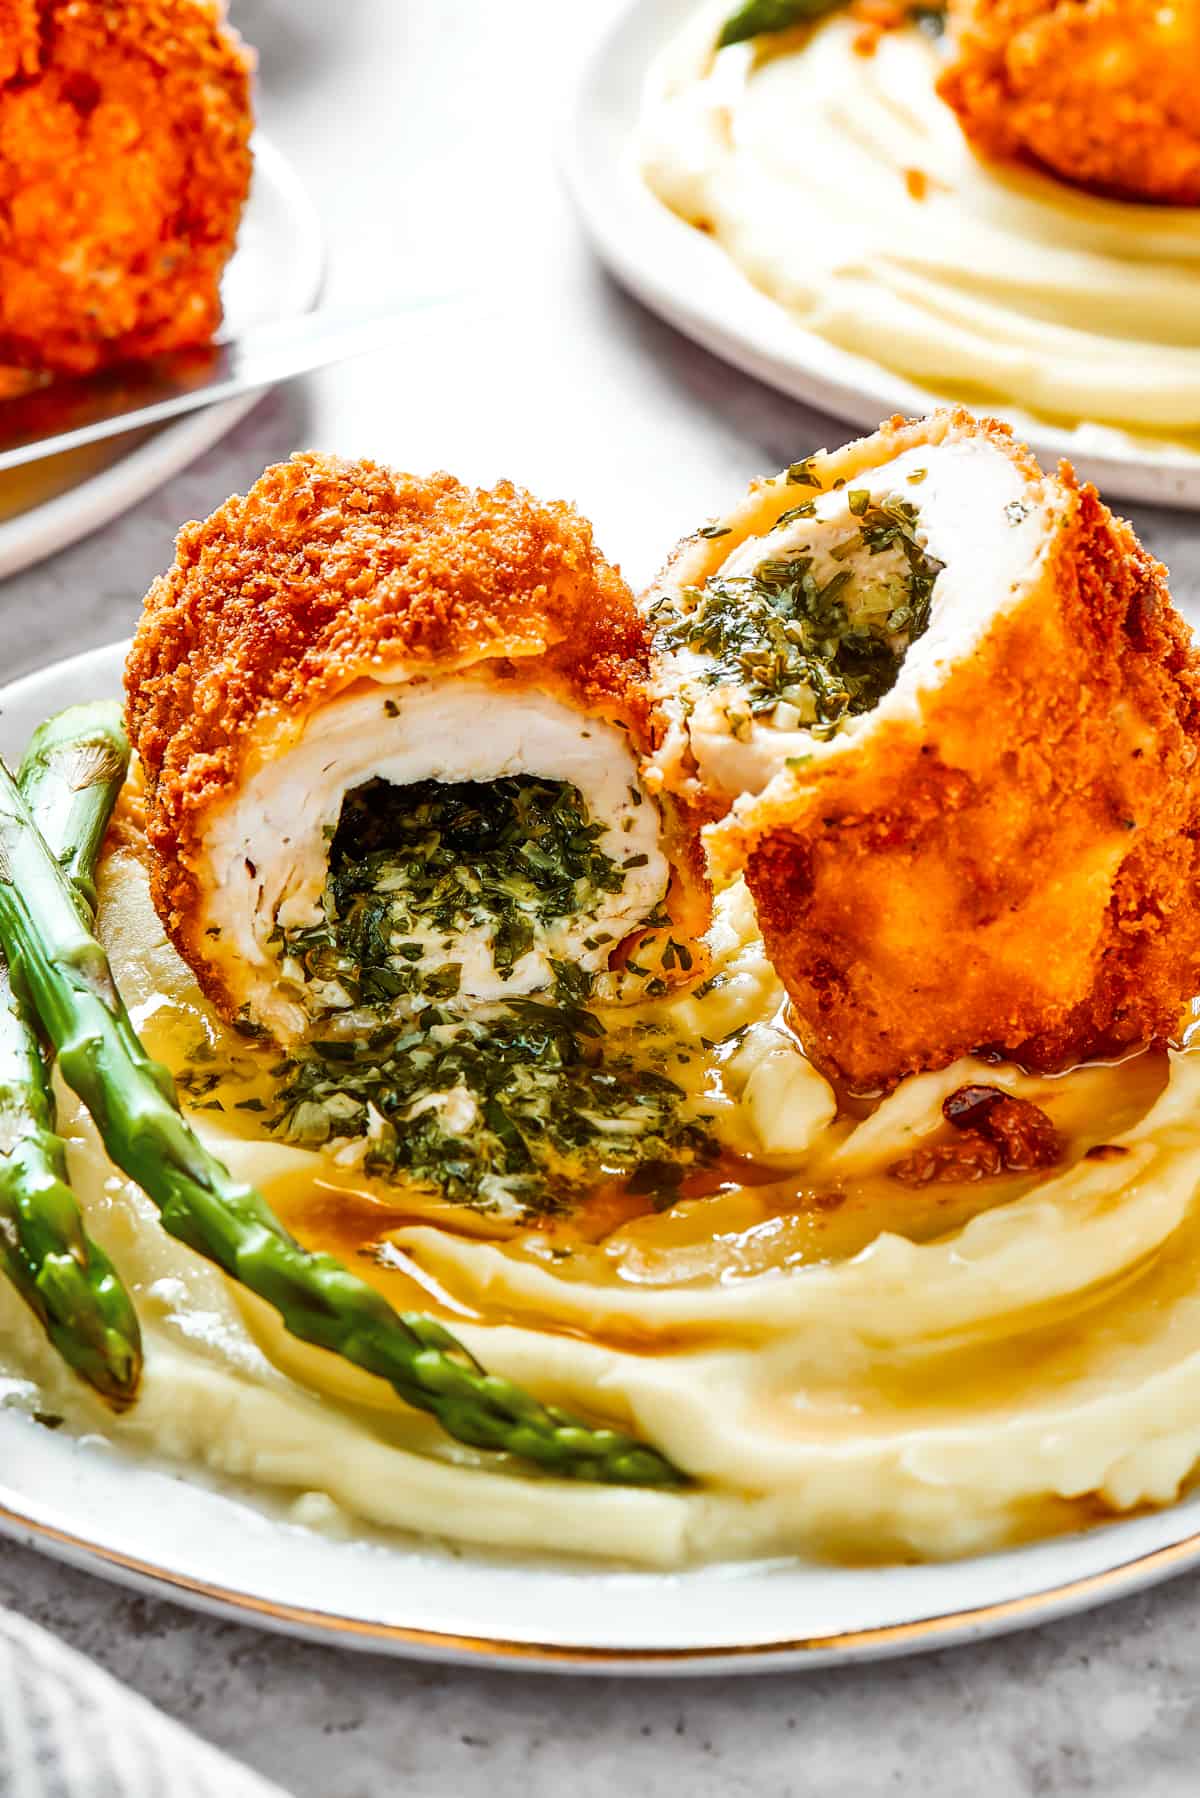
In contrast, Chicken Kiev is defined by its decadent garlic-butter filling. This “compound butter,” infused with fresh herbs like parsley and thyme, is the heart and soul of the dish. As the chicken cooks, the butter melts, basting the meat from the inside out, making it exceptionally juicy, tender, and infused with an aromatic garlic and herb essence. It’s this luscious buttery core that gives Chicken Kiev its signature appeal and makes it stand out from its Cordon Bleu cousin.
A Brief History of Chicken Kiev
The origins of Chicken Kiev are shrouded in a bit of culinary mystery and debate, but its story is as rich as its flavor. While its name suggests a Ukrainian heritage, many food historians believe the dish may have actually originated in France or Russia. One popular theory suggests it was created in the early 20th century in a French culinary school, later brought to Russia by a chef who had trained there. Another claims it was developed in the Moscow Merchants’ Club in the 19th century and then popularized in Kiev, Ukraine, by the 1900s, where it earned its famous name.
Regardless of its exact birthplace, Chicken Kiev gained immense popularity in the mid-20th century, particularly in Europe and America, becoming a staple in upscale restaurants and a beloved dish at dinner parties. Its elegant presentation and bursting flavor made it a symbol of sophisticated dining. Today, it remains a cherished classic, a testament to its enduring appeal and delicious simplicity.
The Essential Ingredients You’ll Need
Crafting homemade Chicken Kiev requires two main sets of ingredients: those for the vibrant garlic-herb butter and those for the perfectly breaded chicken. The beauty of this recipe lies in the quality and freshness of these components. Gather these simple yet impactful items, and you’ll be well on your way to a culinary masterpiece.
For The Compound Butter:
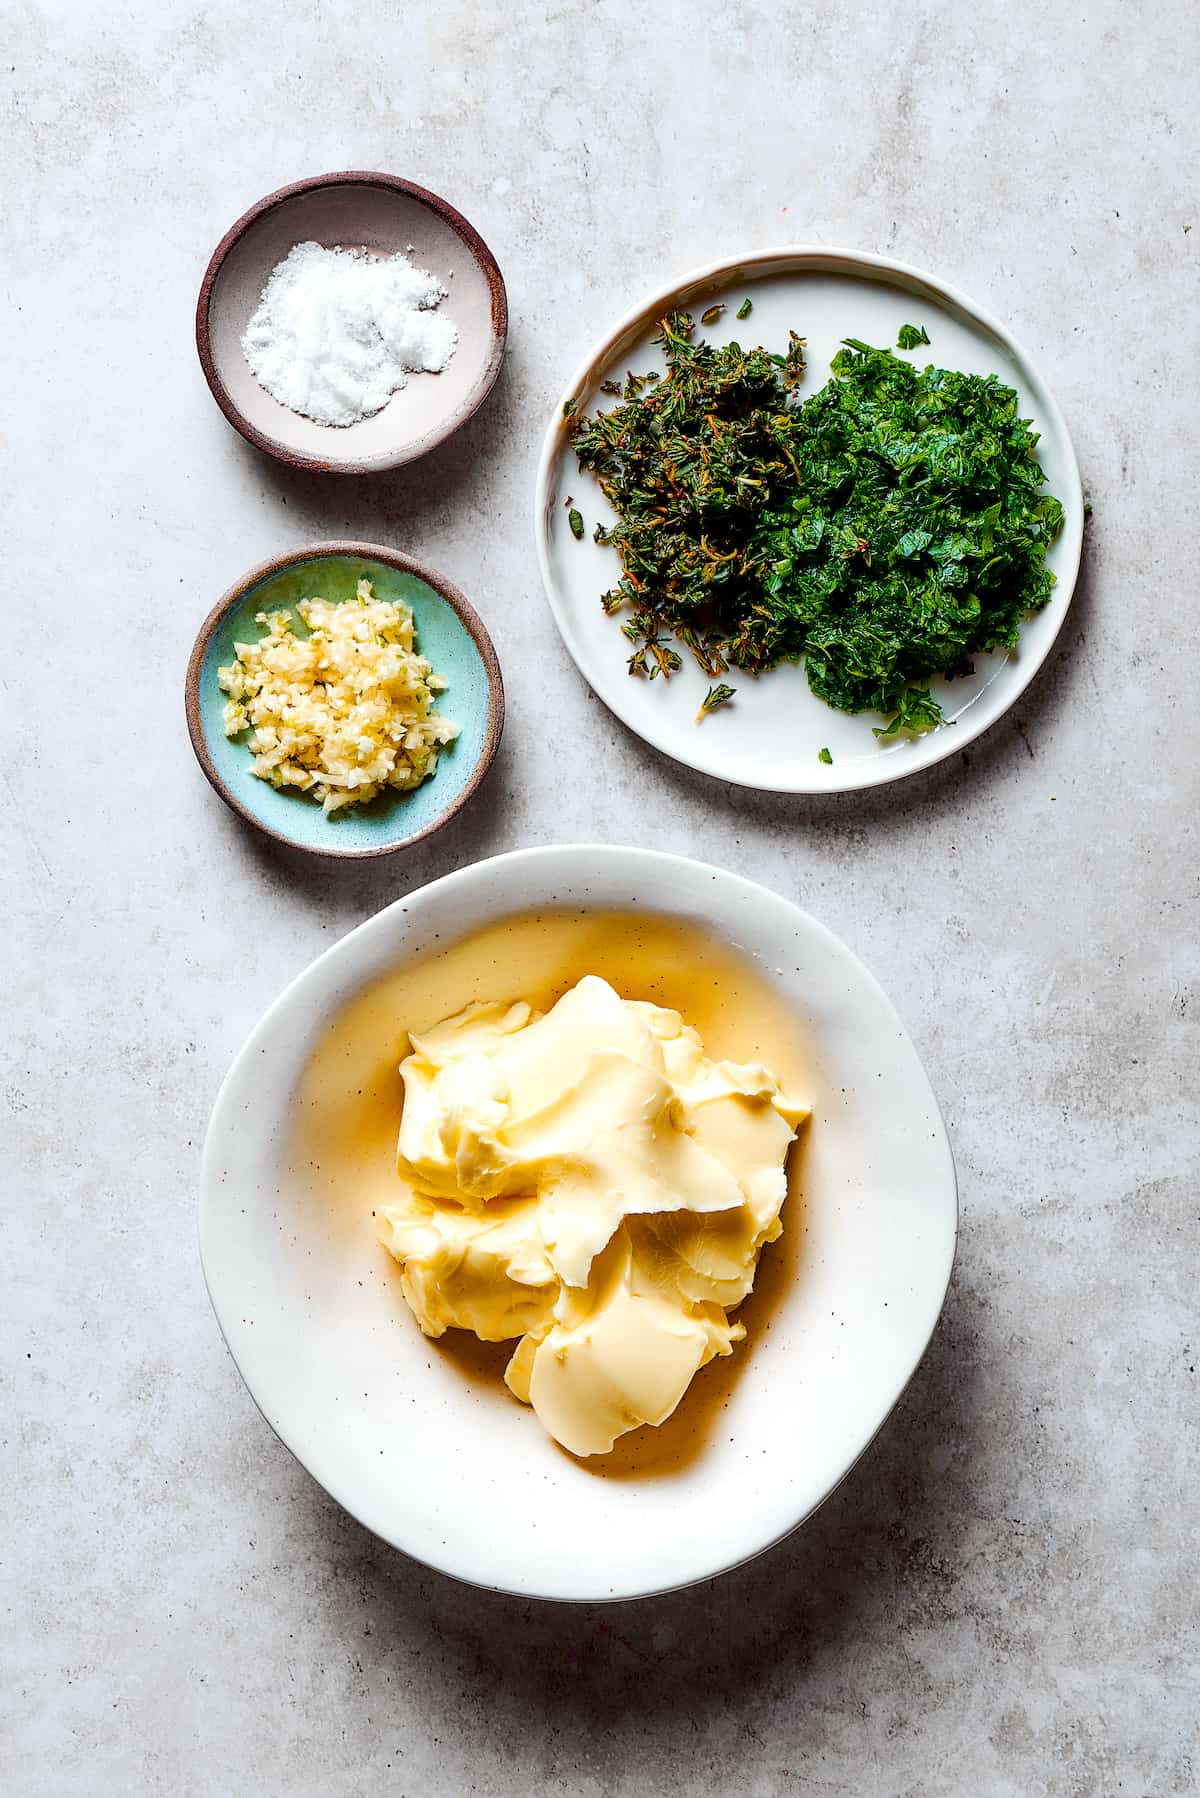
- Unsalted Butter: Start with good quality unsalted butter. Remember to set it out ahead of time, allowing it to soften to room temperature for easy mixing. This is crucial for achieving a smooth, well-combined herb butter.
- Garlic: Fresh garlic cloves are non-negotiable for that authentic, pungent flavor. Mince them finely or use a garlic press for the best results. The more fresh, the more flavorful!
- Fresh Herbs: A generous hand with chopped fresh parsley and thyme will infuse your butter with bright, earthy notes. These herbs are classic pairings with chicken and garlic, creating a harmonious blend.
- Salt: To taste, enhancing all the other wonderful flavors in the butter.
For The Chicken:
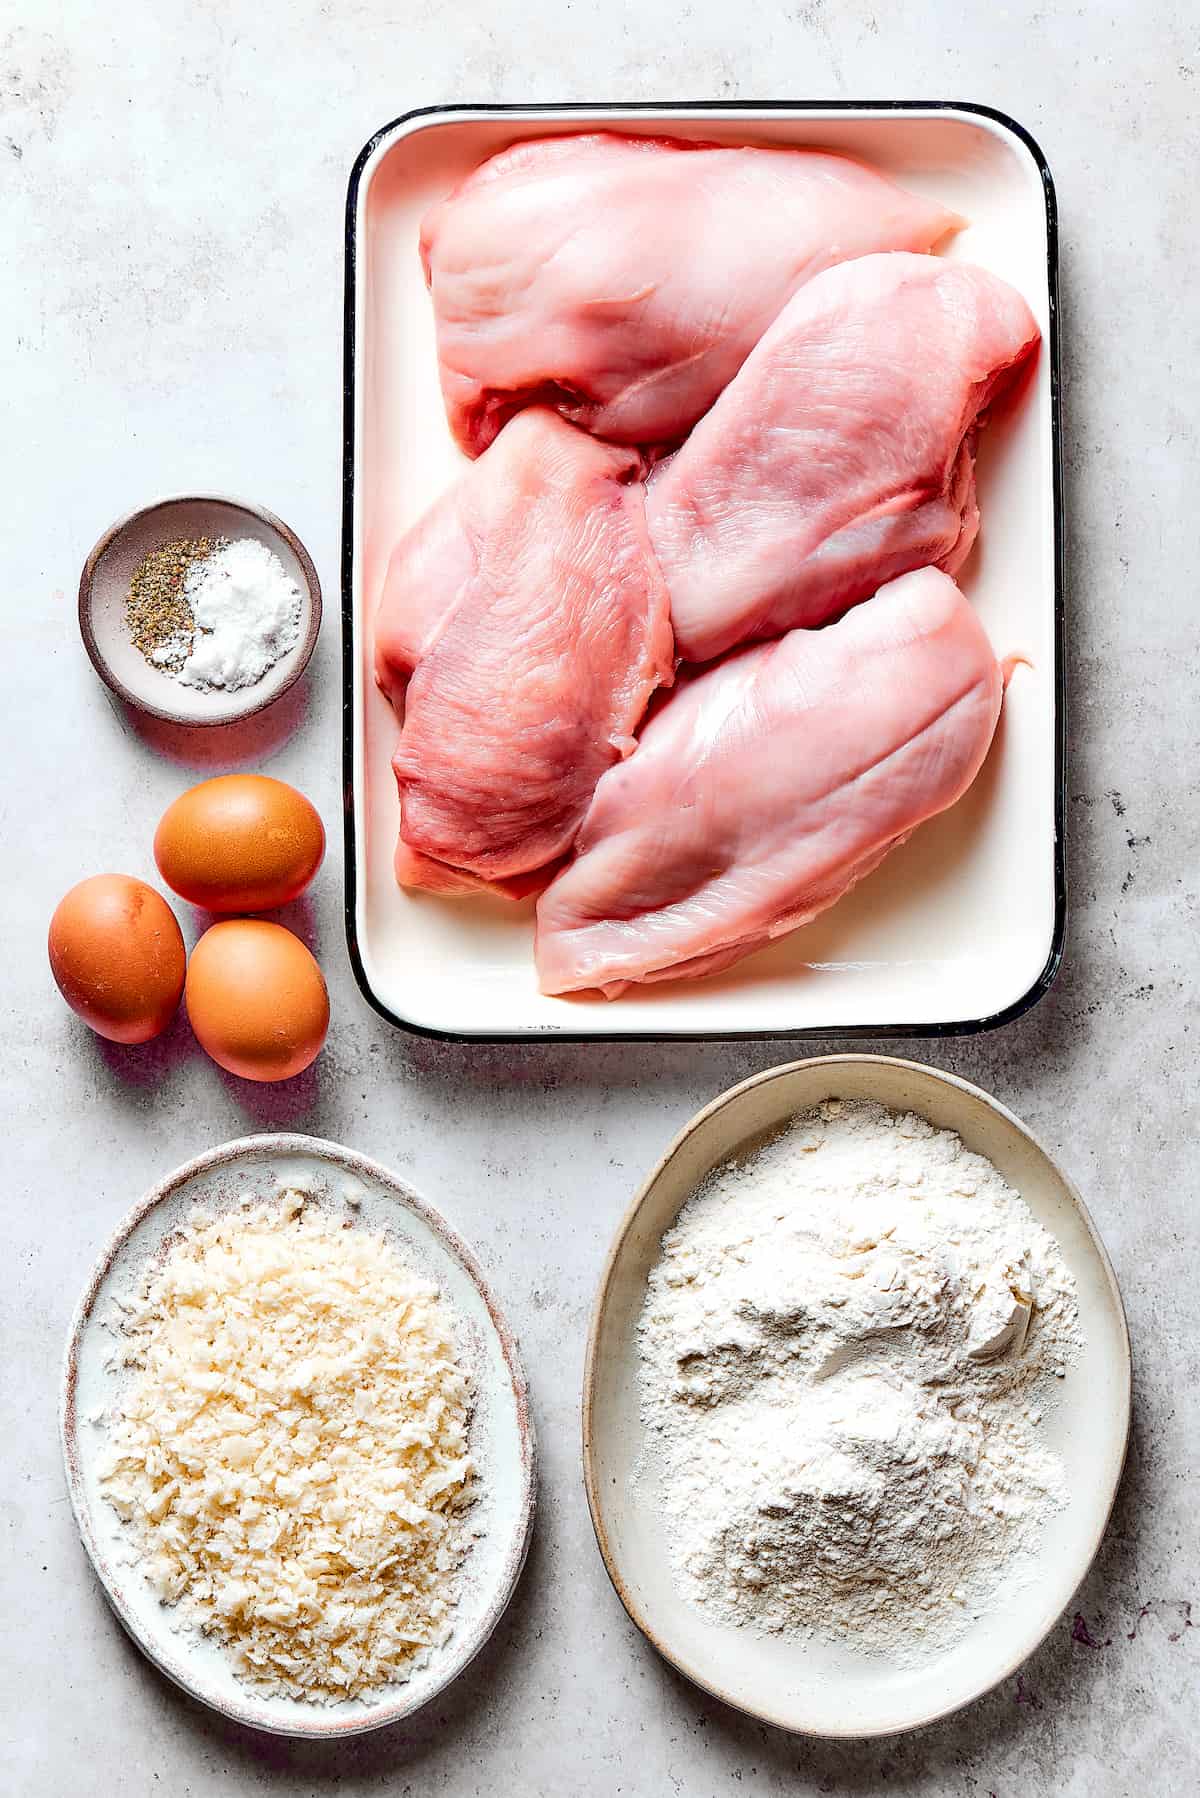
- Chicken Breasts: This recipe specifically calls for boneless, skinless chicken breasts. Opt for larger, thicker breasts as they are easier to butterfly and pound thin without tearing, providing ample space for the butter filling.
- Seasonings: Simple salt and freshly ground black pepper are all you need to season the chicken before stuffing, allowing the rich butter filling to shine.
For The Breading:
- All-Purpose Flour: Forms the initial coating, helping the egg wash adhere evenly to the chicken.
- Eggs: Lightly beaten eggs act as the binding agent, creating a sticky surface for the breadcrumbs.
- Breadcrumbs: The key to that signature crispy exterior. While any plain breadcrumbs work well, Panko crumbs are highly recommended for their extra-crispy texture, delivering that satisfying crunch.
- Vegetable Oil: For frying the chicken to a beautiful golden brown. Choose a neutral-flavored oil with a high smoke point.
How to Make Chicken Kiev: A Step-by-Step Guide
Making Chicken Kiev is a rewarding culinary project that involves several distinct stages. Patience, especially with the chilling times, is key to preventing butter leaks and achieving that perfect shape and texture. Be sure to read through the entire recipe a couple of times to properly budget your time and ensure a smooth cooking experience.
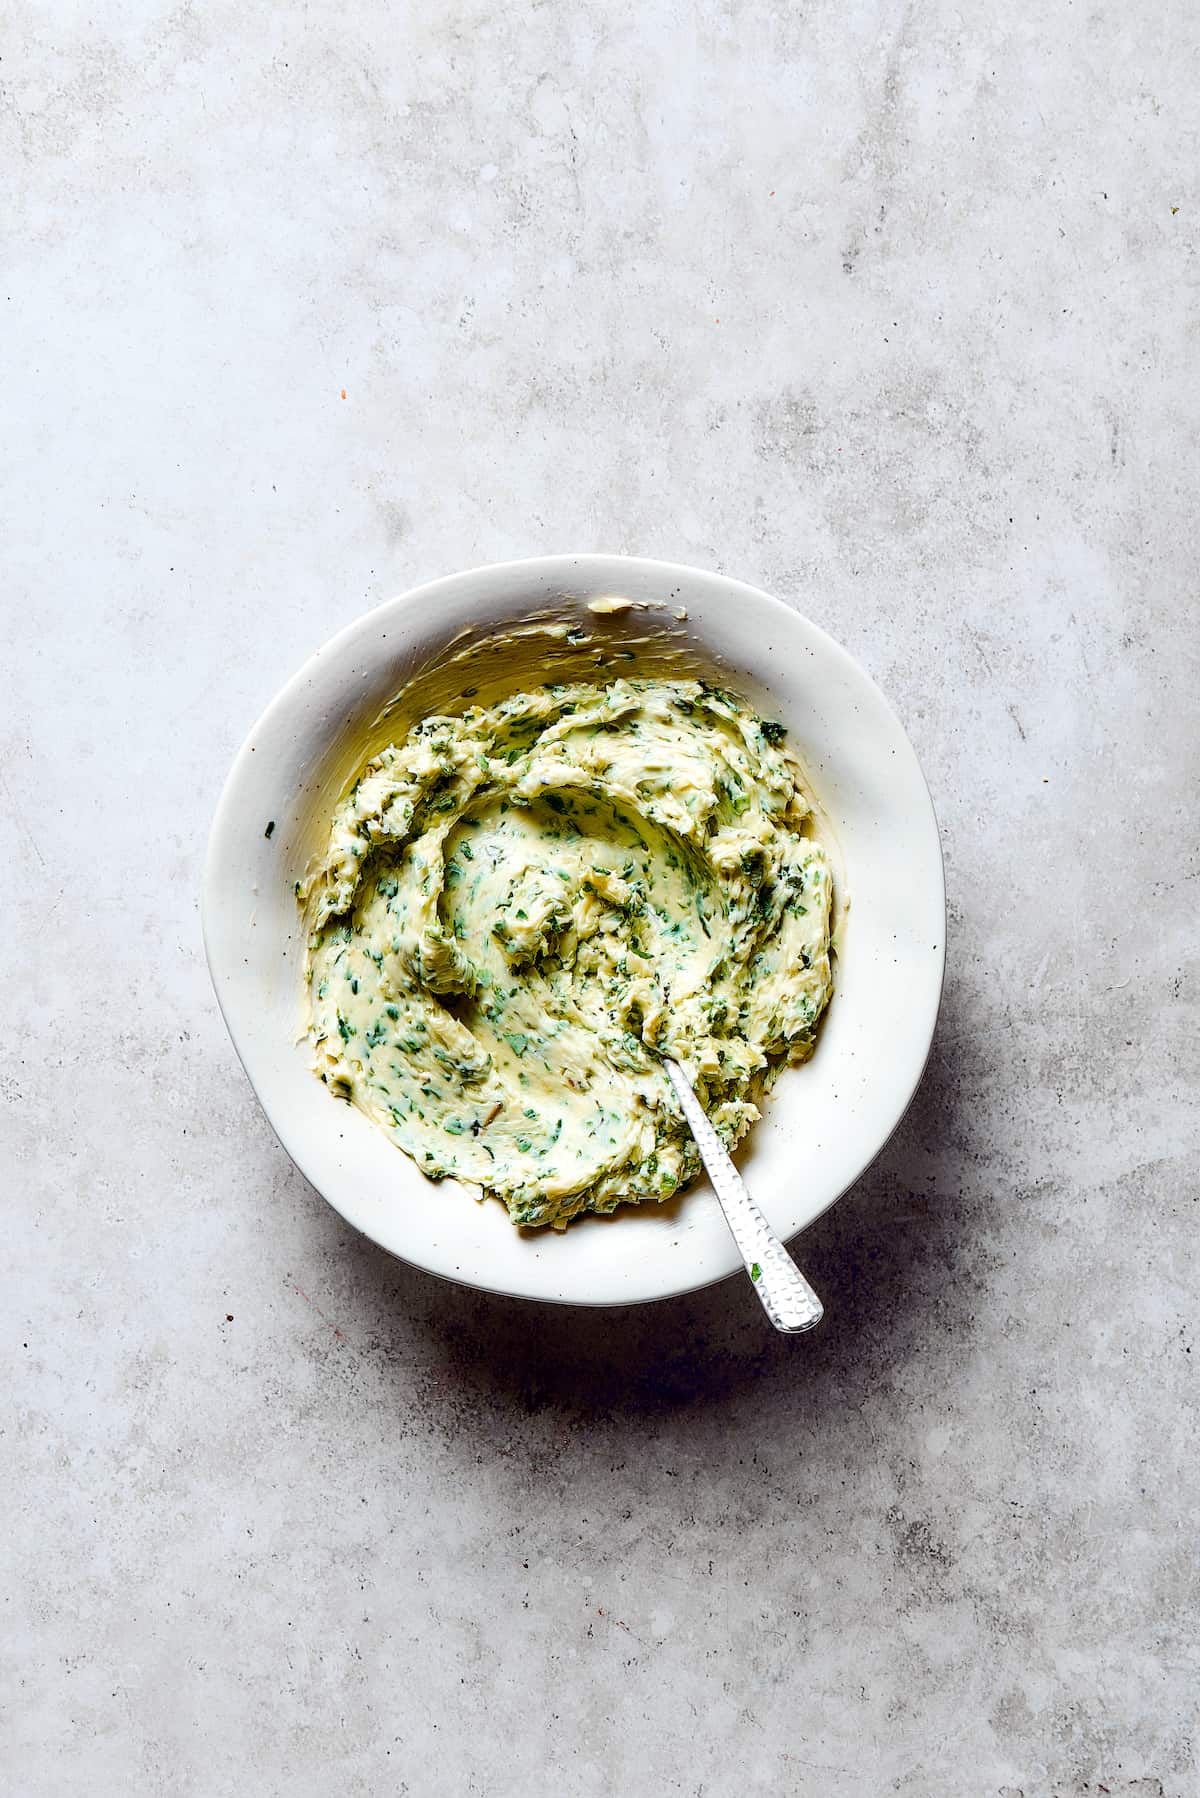

- Prepare the Garlic Herb Butter: In a small bowl, combine the softened butter, minced fresh garlic, chopped fresh parsley, fresh thyme, and a pinch of salt. Mix thoroughly with a fork until all ingredients are well blended and the butter is evenly seasoned. This creates your flavorful compound butter.
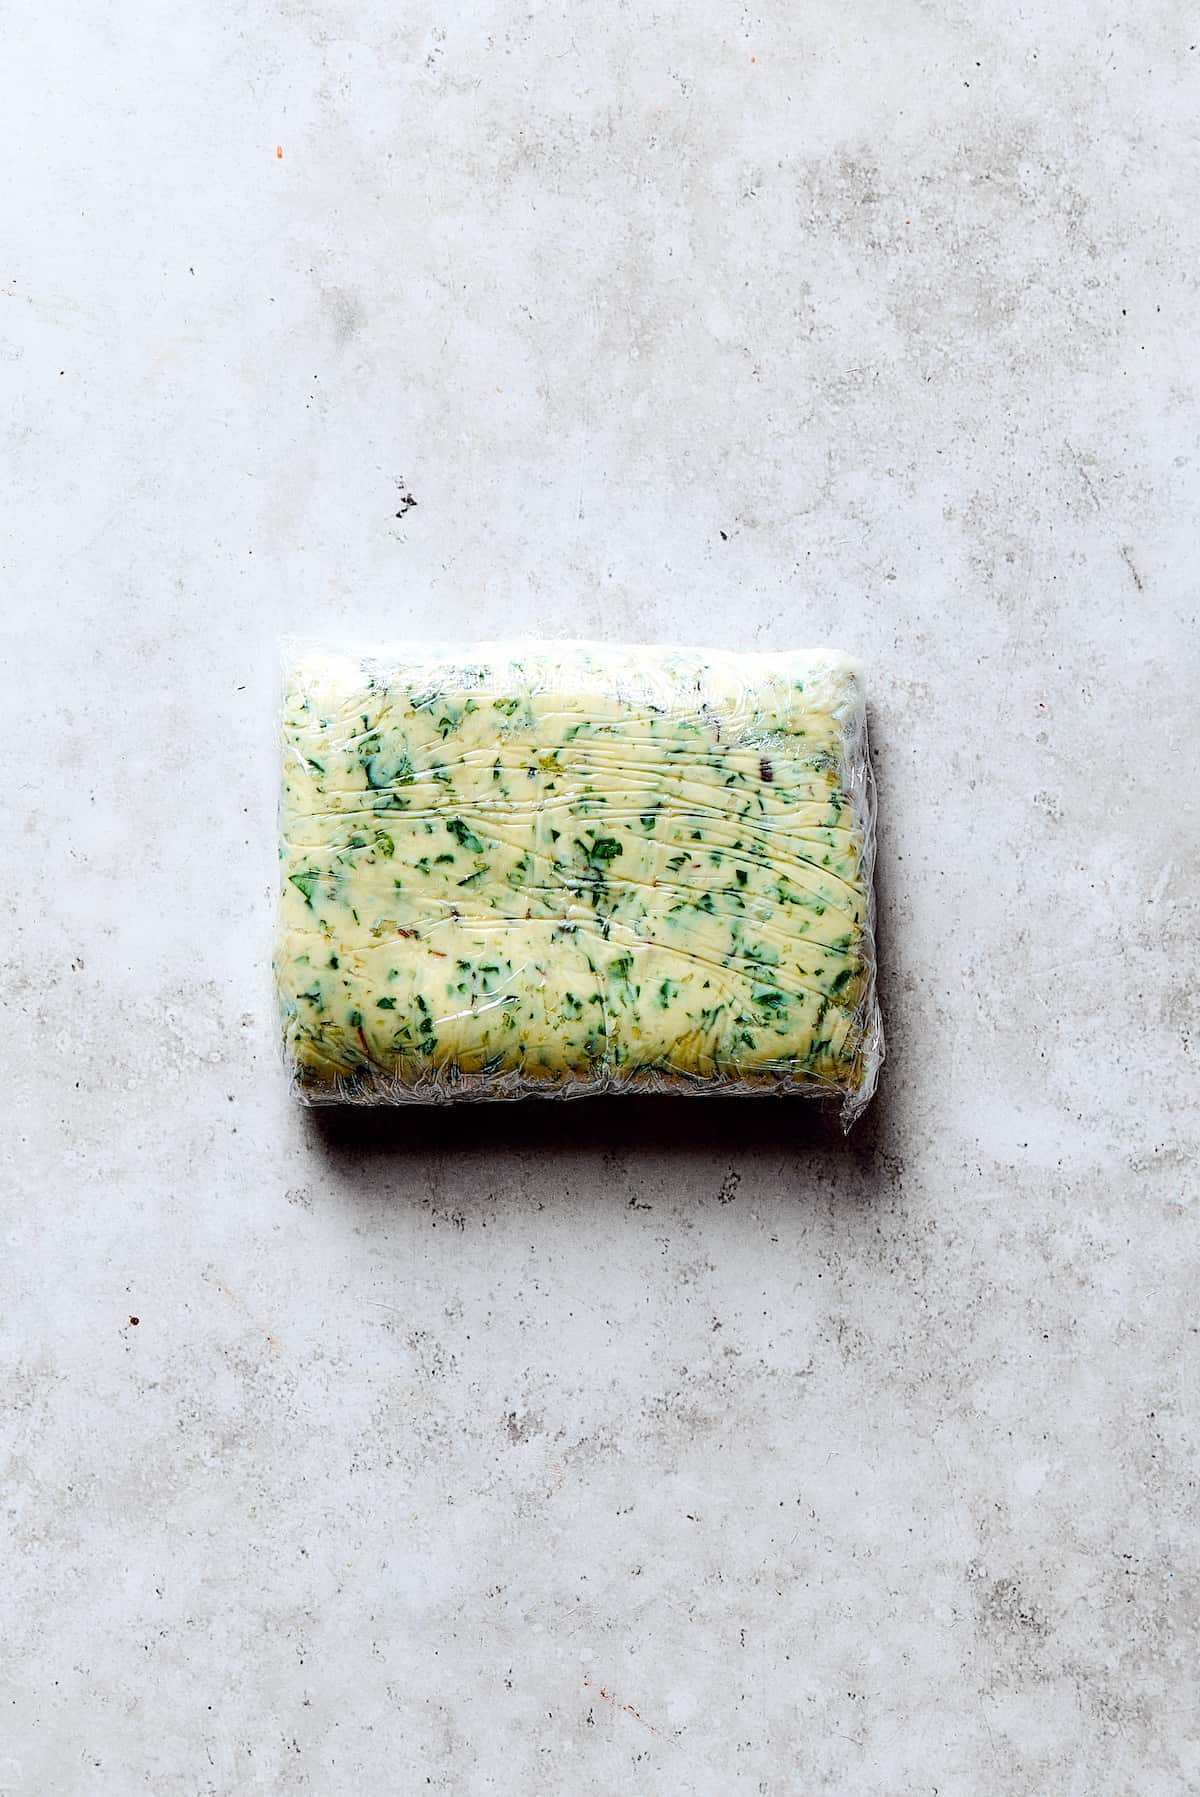
- Chill the Butter: Scoop the butter mixture onto a piece of plastic wrap. Roll and shape it into a tight log, approximately 4-5 inches long. Place this butter log in the freezer for 30 to 40 minutes, or until it is firm enough to slice easily without crumbling.
- Butterfly the Chicken Breasts: Take each boneless, skinless chicken breast and place it on your work surface. Using a sharp knife, slice horizontally through the thickest part of the breast, being careful not to cut all the way through. Open the chicken breast like a book, spreading it out flat to create a larger surface area.
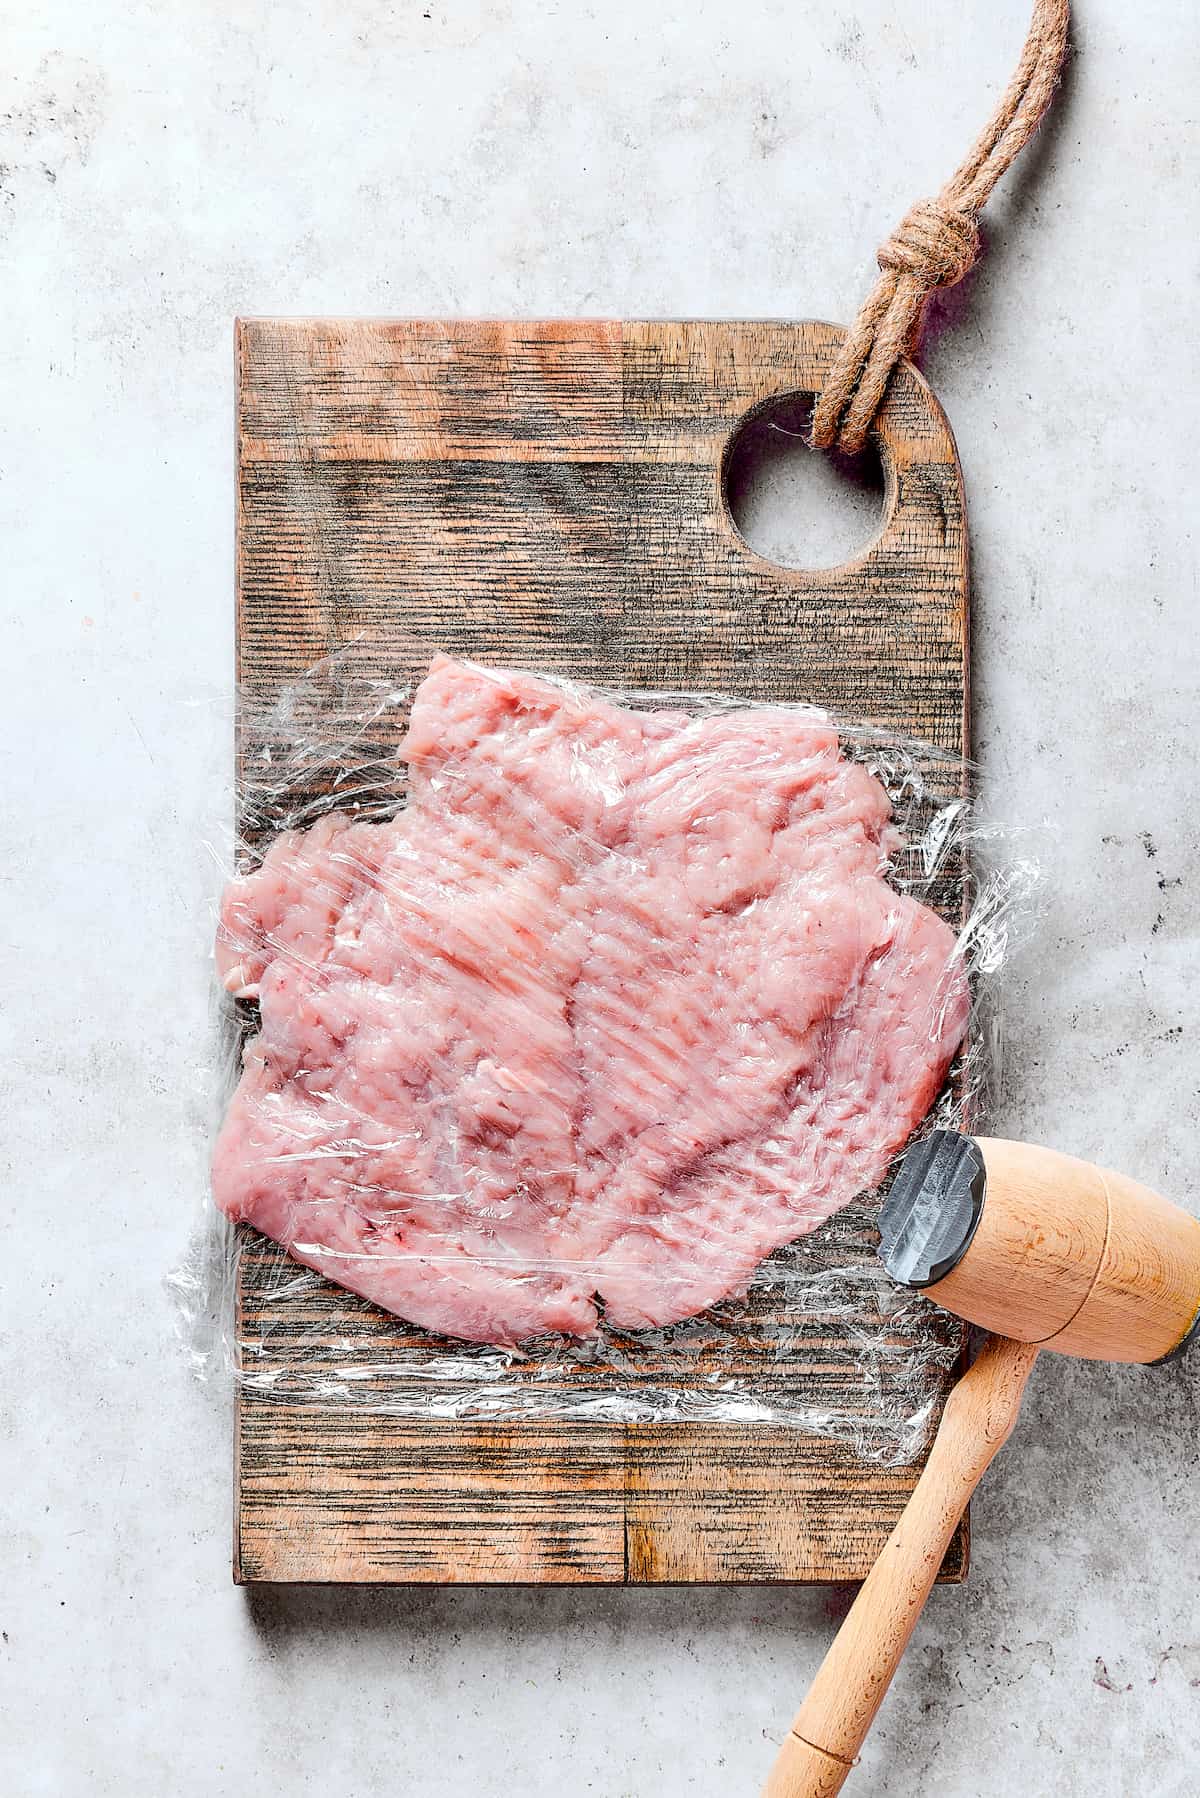
- Pound the Chicken: Place each butterflied chicken breast between two sheets of parchment paper or plastic wrap. Using a meat mallet or the flat side of a heavy pan, gently but firmly pound the chicken to an even thickness of about ¼ to ½ inch. This ensures even cooking and makes rolling easier. Season both sides of the pounded chicken generously with salt and pepper.
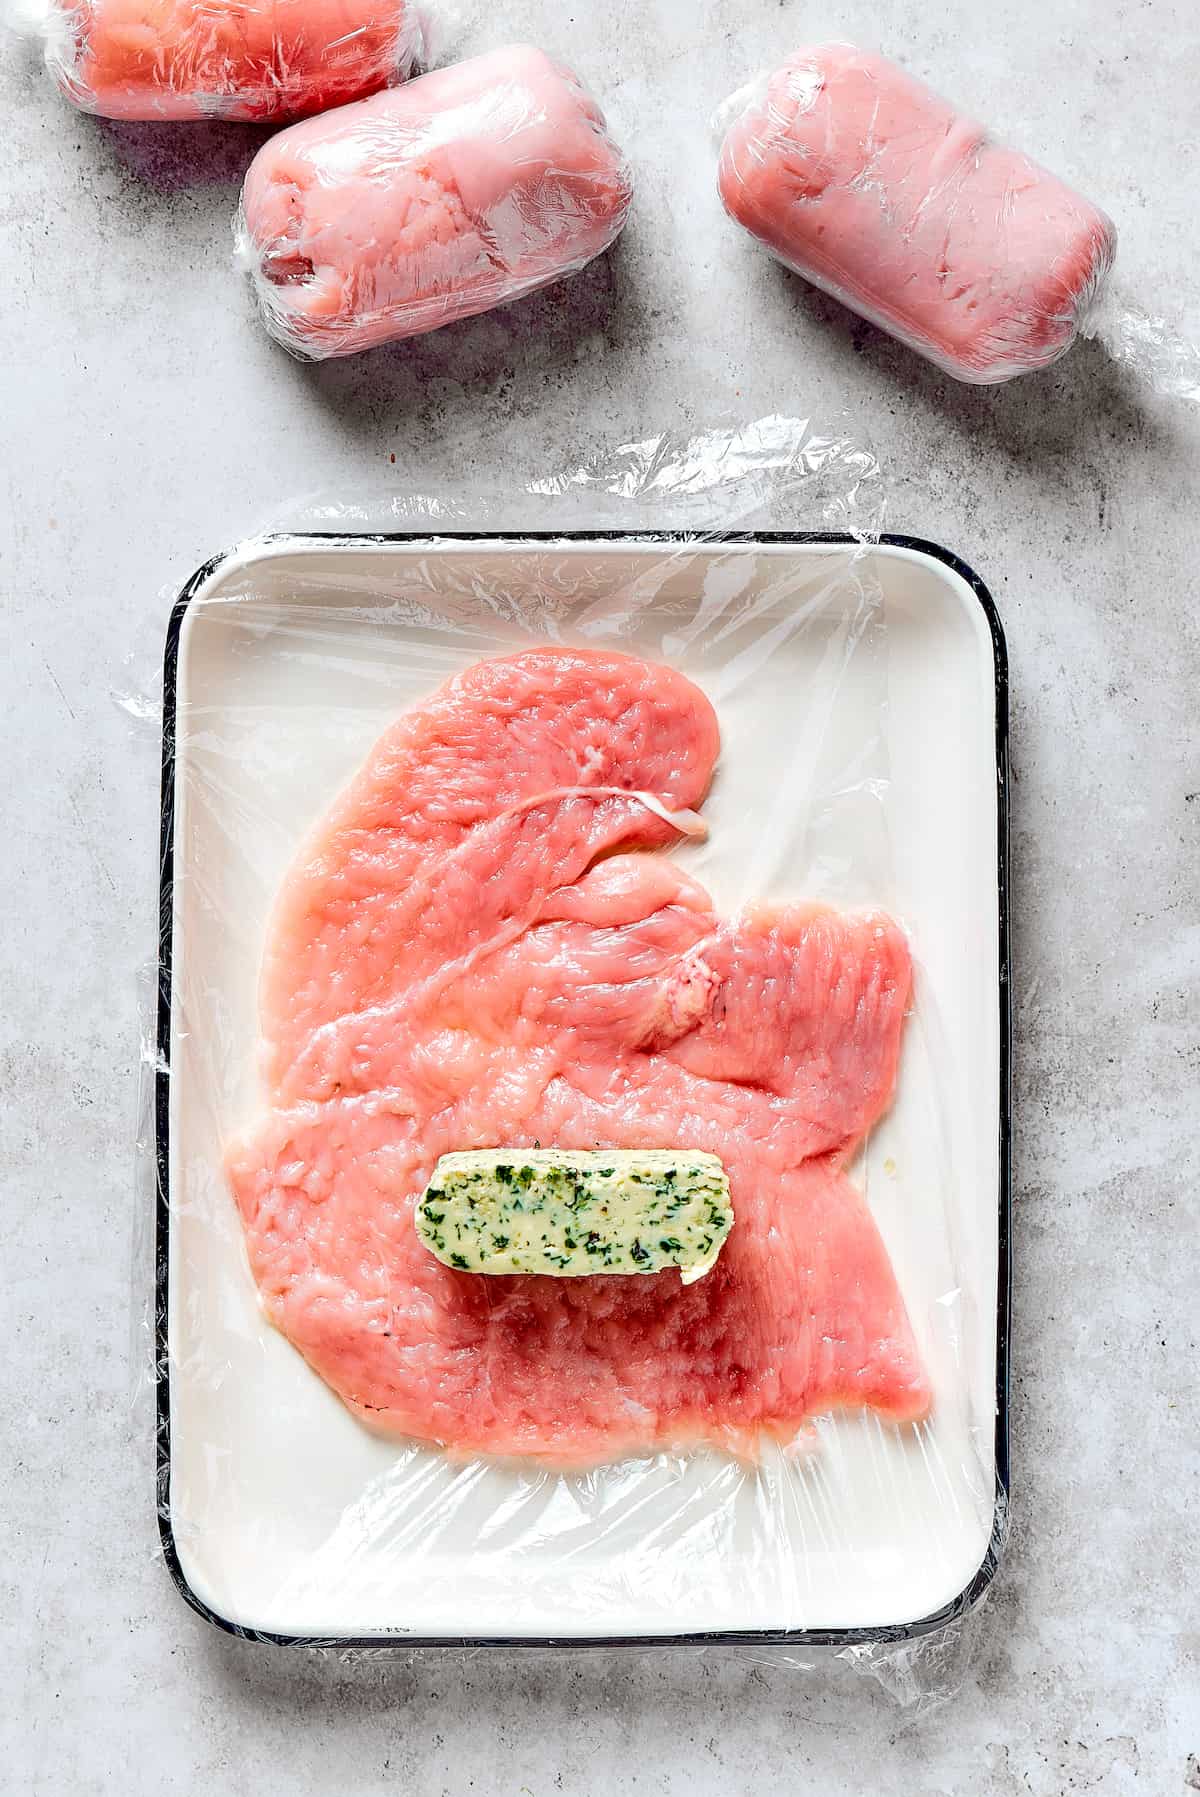
- Assemble the Chicken Kiev: Once the butter log is firm, carefully slice it into four equal pieces. Place one piece of the frozen garlic butter in the center of each pounded chicken breast. Carefully fold the chicken breast over the butter, then gather and tuck in the sides, working to completely enclose the butter. Shape it into a compact, round ball or a neat log, ensuring there are no visible “seams” or openings.
- Freeze the Chicken Rolls: To prevent the butter from leaking during cooking, it’s crucial to freeze the assembled chicken. Wrap each chicken roll tightly in plastic wrap, twisting the ends to create a secure package. Place the wrapped chicken pieces in the freezer for about 1 hour, or until the outer layers of the chicken have firmed up and the “seams” are frozen together. This step is vital for success!
- Prepare the Breading Station: While the chicken is chilling, set up your breading station. You’ll need three shallow bowls. In the first, combine the all-purpose flour with ½ teaspoon of salt. In the second, whisk the beaten eggs. In the third, place your breadcrumbs (Panko for extra crispiness!).
- Bread the Chicken: Remove the chicken pieces from the freezer and unwrap them, discarding the plastic. One by one, roll each chicken piece thoroughly in the seasoned flour, ensuring it’s completely coated. Next, dip it into the beaten egg, allowing any excess to drip off. Finally, roll it generously in the breadcrumbs, pressing gently to make sure the crumbs adhere firmly and completely cover the chicken, leaving no gaps.
- Preheat Oven and Oil: Preheat your oven to 400°F (200°C). In a large saucepan or Dutch oven, heat about 2 cups of vegetable oil (or enough to partially submerge the chicken) to 350°F (175°C). Use a kitchen thermometer to ensure accurate oil temperature.
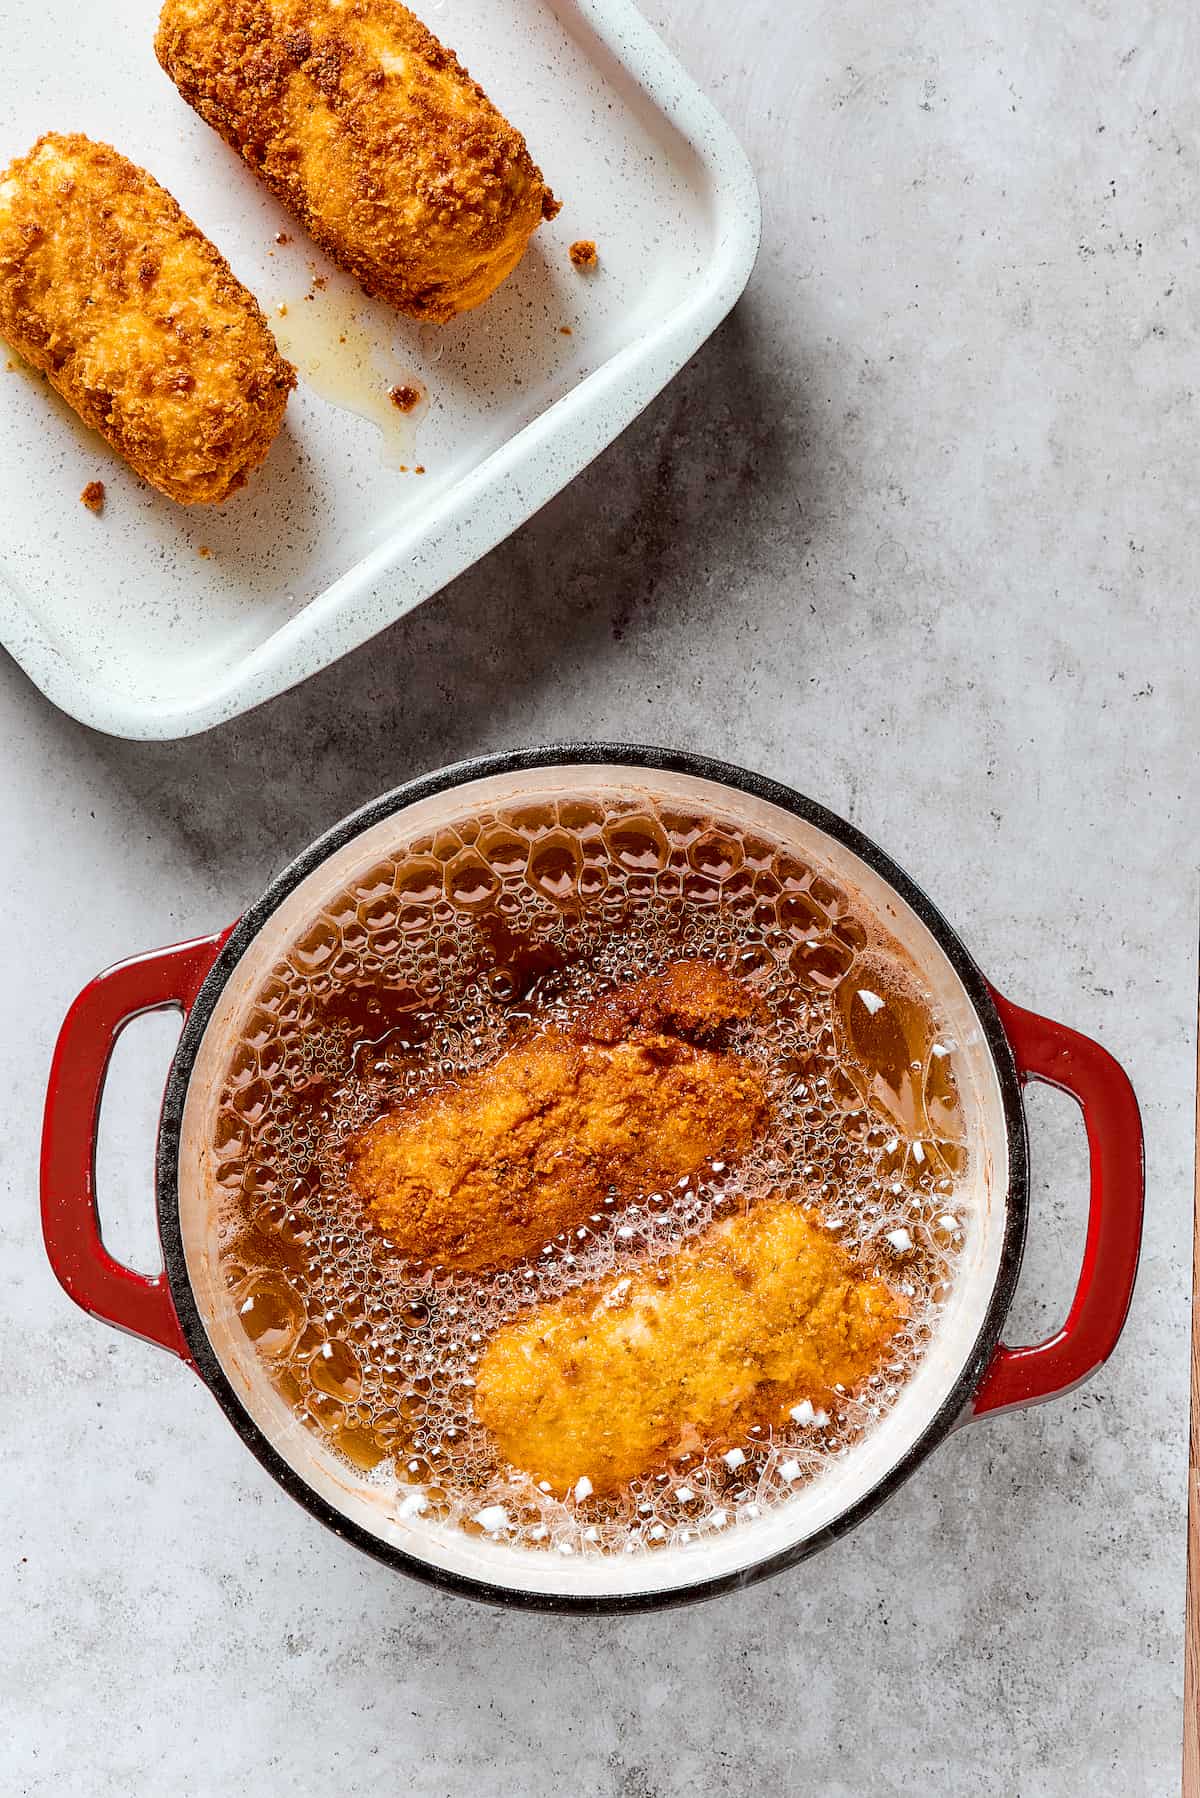
- Fry Until Golden: Carefully place one or two breaded chicken pieces into the hot oil, ensuring not to overcrowd the pan. Fry for 2 to 3 minutes per side, turning occasionally, until they are beautifully golden brown and crispy on all sides. The goal here is to achieve a crisp crust and partially cook the exterior, not to cook through.
- Bake to Perfection: Using tongs, carefully transfer the fried chicken pieces to a baking dish (a 9×13-inch casserole dish works well). Bake in the preheated oven for 15 to 20 minutes, or until the internal temperature of the chicken reaches 165°F (74°C) when measured with a meat thermometer. Cooking time will vary depending on the thickness of your chicken.
- Rest and Serve: Once baked, remove the chicken from the oven and transfer it to a plate or cutting board. Let it rest for 5 to 8 minutes before serving. This allows the juices to redistribute, ensuring a tender and flavorful chicken. Serve immediately and enjoy the glorious burst of herbed butter!
Tips for Success: Achieving Chicken Kiev Perfection
While the process of making Chicken Kiev is straightforward, a few key tips can ensure your dish is spectacular every time:
- No Butter Leaks: The biggest challenge in Chicken Kiev is often preventing the butter from leaking out during cooking. The secret lies in thorough sealing and proper chilling. Ensure the chicken breast completely covers the butter, creating a tight seal. Then, the crucial freezing step allows these “seams” to firm up and bind together, significantly reducing the chance of leakage. Don’t rush this chilling phase!
- Deep Frying Alternatives: Deep frying provides that signature golden, crispy crust, but it can be a bit messy. If you prefer to reduce the amount of oil, you can opt to shallow-fry the chicken Kiev pieces in a heavy skillet. Ensure you turn them frequently to brown evenly on all sides, then transfer to the oven to finish cooking. This method still yields a delicious result with less oil. An air fryer is another alternative, offering a healthier, less messy option for crisping the breading.
- Ensuring Doneness: Every oven is unique, with actual temperatures sometimes varying from the set temperature. To guarantee your chicken is cooked through and safe to eat without over-drying, always use a reliable meat thermometer. Insert the thermometer into the thickest part of the chicken (avoiding the butter pocket) until it registers 165°F (74°C). This ensures perfect doneness every time.
- Pounding Technique: When pounding the chicken, aim for an even thickness. This ensures uniform cooking and makes rolling easier. Use gentle, even strokes rather than aggressive pounding to avoid tearing the delicate chicken meat.
- Double Breading (Optional but Recommended): For an extra-crispy crust and added insurance against butter leakage, consider double-breading. After the first round of flour, egg, and breadcrumbs, dip the chicken again in the egg and then back into the breadcrumbs. This creates a thicker, more durable coating.
Serving Suggestions: What to Pair with Chicken Kiev
Chicken Kiev, with its rich, buttery filling, truly shines when paired with complementary side dishes. Since that glorious melted garlic butter will inevitably run onto your plate, make sure it has something delicious to mingle with!
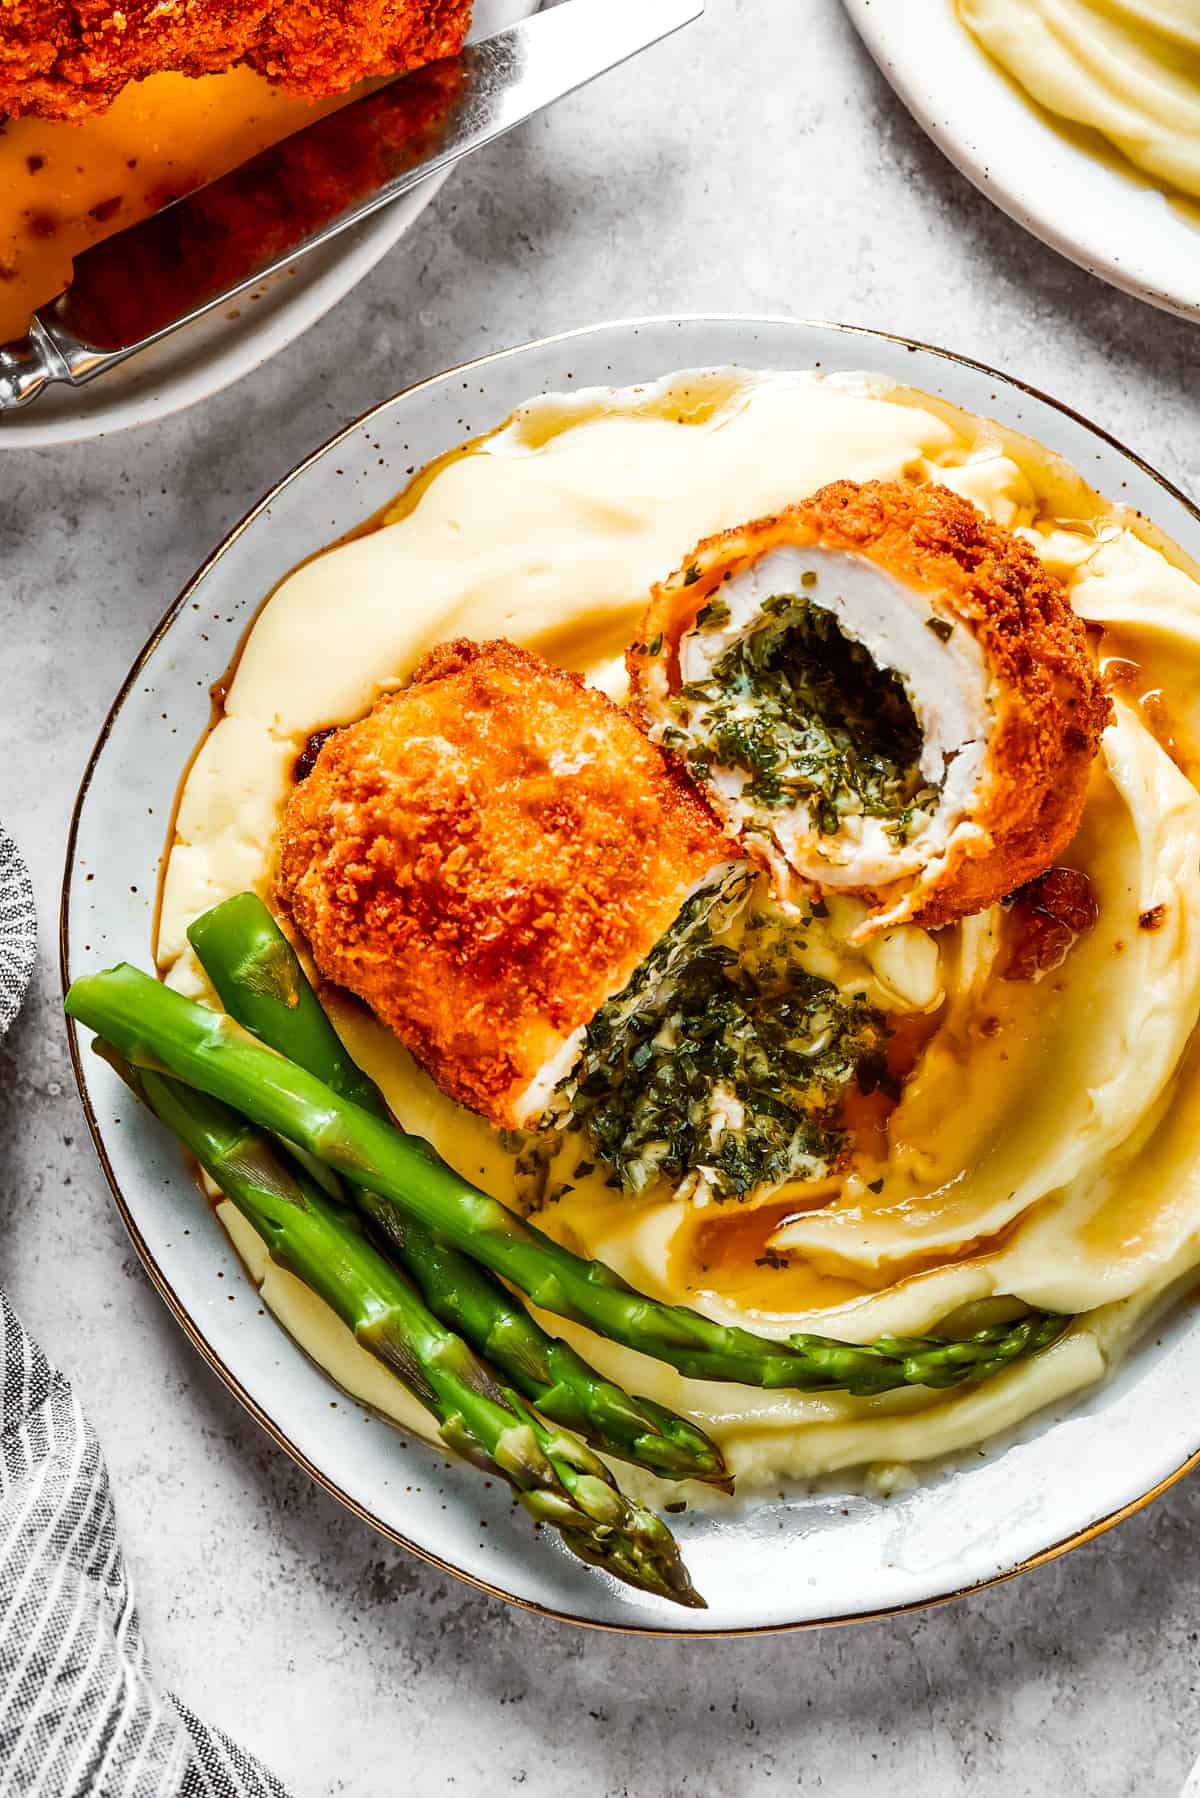
- Creamy Mashed Potatoes: The ultimate classic pairing. The buttery chicken and its savory juices are absolutely heavenly when absorbed by a bed of Classic Creamy Mashed Potatoes.
- Roasted Vegetables: To add a touch of freshness and balance the richness of the chicken, roasted vegetables are an excellent choice. My Easy Roasted Vegetables or Roasted Asparagus are simple to prepare and offer a delightful textural contrast.
- Light Salads: A refreshing salad can cut through the richness. Consider a simple green salad with a vinaigrette or try this Cucumber Salad with Sour Cream Dressing – its cool, tangy profile is a fabulous counterpoint to the warm, savory chicken.
- Rice Pilaf or Quinoa: For a lighter grain option, a fluffy rice pilaf or quinoa can also serve as a wonderful base for the flavorful butter.
How to Store and Reheat Chicken Kiev: Leftovers and Make-Ahead Options
Chicken Kiev is best enjoyed fresh, but leftovers can be stored and reheated. This dish also lends itself beautifully to make-ahead preparation, allowing you to enjoy a gourmet meal with minimal fuss on a busy day.
- Storing Cooked Leftovers: Any leftover cooked Chicken Kiev should be stored promptly in an airtight container in the refrigerator. It will keep well for about three to four days.
- Reheating Cooked Leftovers: To best preserve the crispiness, reheat leftover chicken Kiev in the oven. Place the chicken in an ovenproof dish and reheat at 350°F (175°C) for 10 to 12 minutes, or until thoroughly heated through and the crust has regained some of its crispness. Microwaving is not recommended as it can make the breading soggy.
- Make-Ahead & Freezing Uncooked Chicken Kiev: This is an excellent option for meal prepping! You can prepare the Chicken Kiev pieces up to the point of breading and freeze them uncooked. After forming and breading the chicken (step 6 in the instructions), place the individual pieces on a baking sheet and freeze until solid. Once firm, transfer the frozen pieces into airtight containers or freezer bags for long-term storage. They will keep well in the freezer for up to three months. When ready to cook, you can fry and bake them directly from frozen, adding about 5-10 minutes to the baking time, ensuring the internal temperature reaches 165°F. This allows for a freshly cooked, crispy meal without the full preparation on the day of serving.
More Crispy Chicken Recipes to Savor
If you love the satisfying crunch and succulent tenderness of crispy chicken, you’ll definitely want to explore these other fantastic recipes:
- Chicken Schnitzel Recipe
- Everything Bagel Chicken Tenders
- Air Fryer Chicken Tempura Recipe
Chicken Kiev Recipe
What could be better than tender, juicy chicken stuffed with melting herb butter? This easy Chicken Kiev recipe is crispy, flavorful, and fun.
Prep Time: 50 minutes
Cook Time: 25 minutes
Resting Time: 1 hour (for chilling butter and chicken)
Total Time: 2 hours 15 minutes
Servings: 4
Ingredients
For The Compound Butter:
- 6 tablespoons butter, softened
- 4 cloves garlic, minced
- 2 tablespoon chopped fresh parsley
- 1 tablespoon chopped fresh thyme
- Salt, to taste
For The Chicken:
- 4 boneless skinless chicken breasts
- 2 teaspoons salt
- ½ teaspoon fresh ground black pepper
For The Breading:
- 1 cup all-purpose flour
- ½ teaspoon salt
- 3 eggs, beaten
- 1½ cups plain breadcrumbs (Panko recommended for extra crispiness)
- 2 cups vegetable oil, or as needed, for frying
Instructions
For The Compound Butter:
- In a small bowl, combine the softened butter, minced garlic, chopped parsley, thyme, and salt to taste. Mix with a fork until well blended.
- Place the butter mixture onto a piece of plastic wrap and roll it into a log shape, approximately 4-5 inches long.
- Put it in the freezer for 30 to 40 minutes until firm and ready to slice.
For The Chicken:
- Place each chicken breast onto your work surface and slice it horizontally, without cutting all the way through. Open up the chicken breasts like a book and spread them out flat.
- Put each chicken breast between two pieces of parchment paper or plastic wrap, and pound with a meat mallet to flatten to about ¼ to ½ inch thickness.
- Season both sides of the pounded chicken with salt and pepper.
- Cut the frozen garlic butter log into four equal pieces.
- Place one piece of the frozen garlic butter in the center of each chicken breast. Fold the chicken over the butter, gathering the sides to form a round ball or a log, ensuring the butter is completely enclosed.
- Wrap each chicken piece tightly in plastic wrap and twist the ends securely.
- Place the wrapped chicken pieces in the freezer for about 1 hour, or until the seams have frozen and firmed up. This crucial step helps the chicken hold its shape and prevents butter leakage during cooking.
For The Breading and Cooking:
- Heat the vegetable oil in a large saucepan or Dutch oven to 350°F (175°C).
- Preheat your oven to 400°F (200°C).
- Set out three shallow bowls. Place the flour and ½ teaspoon salt in the first bowl, the beaten eggs in the second, and the breadcrumbs in the third bowl.
- Unwrap the frozen chicken breasts. Roll each chicken piece thoroughly in the seasoned flour, then dip in the beaten egg, and finally coat generously in breadcrumbs, pressing gently to ensure an even and firm coating.
- Carefully deep fry each breaded chicken piece for 2 to 3 minutes, turning occasionally, until golden brown and crispy on all sides. Do not overcrowd the pan.
- Transfer the fried chicken pieces into a baking dish, such as a 9×13-inch casserole dish.
- Bake the chicken in the preheated oven for 15 to 20 minutes, or until the internal temperature of the chicken registers at 165˚F (74°C) using a meat thermometer. Cooking time may vary based on chicken thickness.
- Remove chicken from the oven and transfer to a plate or cutting board; let rest for 5 to 8 minutes before serving.
- Serve hot and enjoy the melting herb butter!
Equipment
- Frying Pan or Dutch Oven
- Plastic Wrap or Parchment Paper
- Mixing Bowls (3 shallow for breading)
- Meat Mallet (optional, but helpful for pounding chicken)
- Instant Read Meat Thermometer
Notes
- Chicken Breasts: Ensure you use boneless, skinless chicken breasts. Larger, thicker breasts are easier to work with.
- Softened Butter: Allow butter to sit at room temperature for 20-30 minutes before mixing for a smoother compound butter.
- Breadcrumbs: While any plain breadcrumbs work, Panko crumbs offer a superior crispy texture.
- Leftovers: Store cooked Chicken Kiev in an airtight container in the fridge for 3-4 days. Reheat in an ovenproof dish at 350°F (175°C) for 10-12 minutes until hot to maintain crispiness.
- Make Ahead/Freezing: Prepare Chicken Kiev up to the breading stage. Freeze the formed, uncooked pieces on a baking sheet until firm, then transfer to airtight containers or freezer bags for up to three months. Cook from frozen, adjusting baking time as needed.
Nutrition (Estimate per serving)
Calories: 610kcal | Carbohydrates: 55g | Protein: 38g | Fat: 26g | Saturated Fat: 13g | Polyunsaturated Fat: 3g | Monounsaturated Fat: 7g | Trans Fat: 1g | Cholesterol: 240mg | Sodium: 2069mg | Potassium: 635mg | Fiber: 3g | Sugar: 3g | Vitamin A: 841IU | Vitamin C: 6mg | Calcium: 134mg | Iron: 5mg
Nutritional info is an estimate and provided as courtesy. Values may vary according to the ingredients and tools used. Please use your preferred nutritional calculator for more detailed info.