
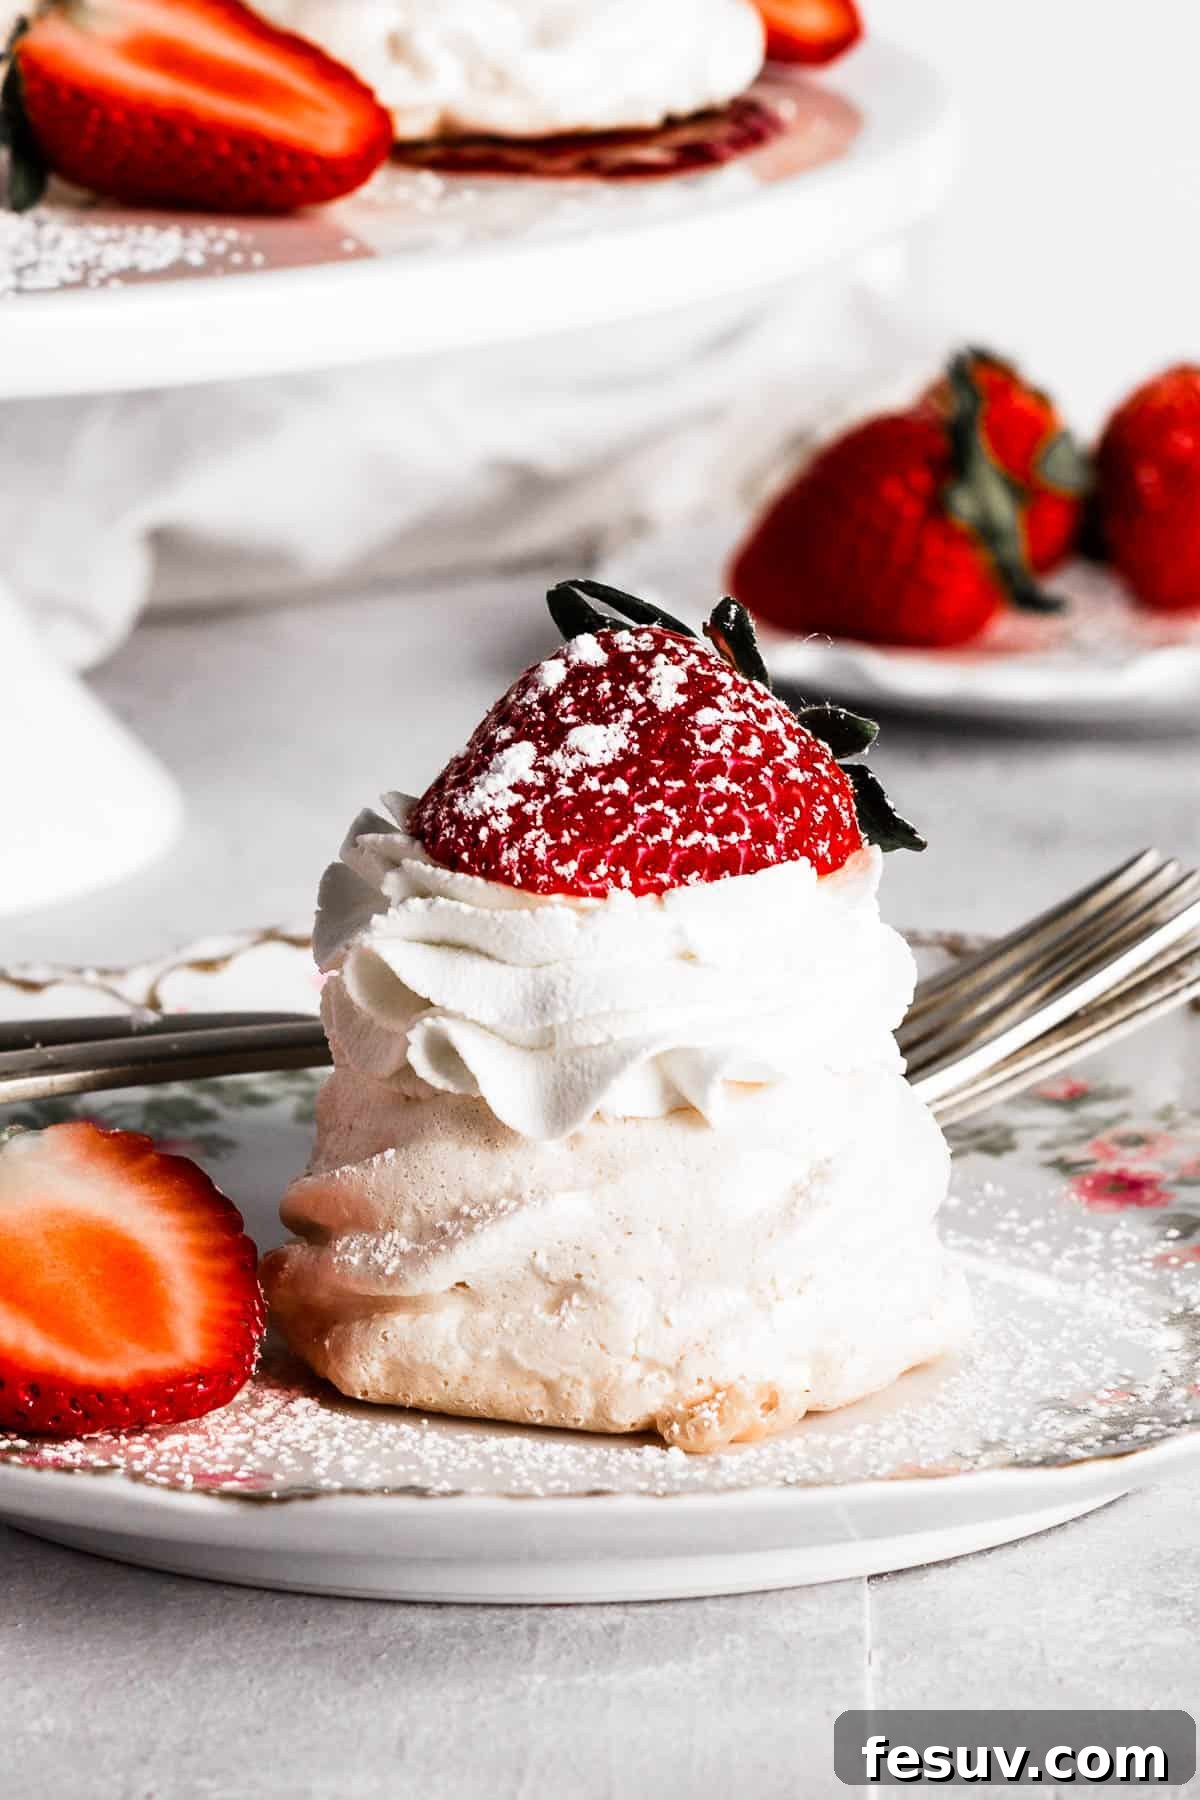
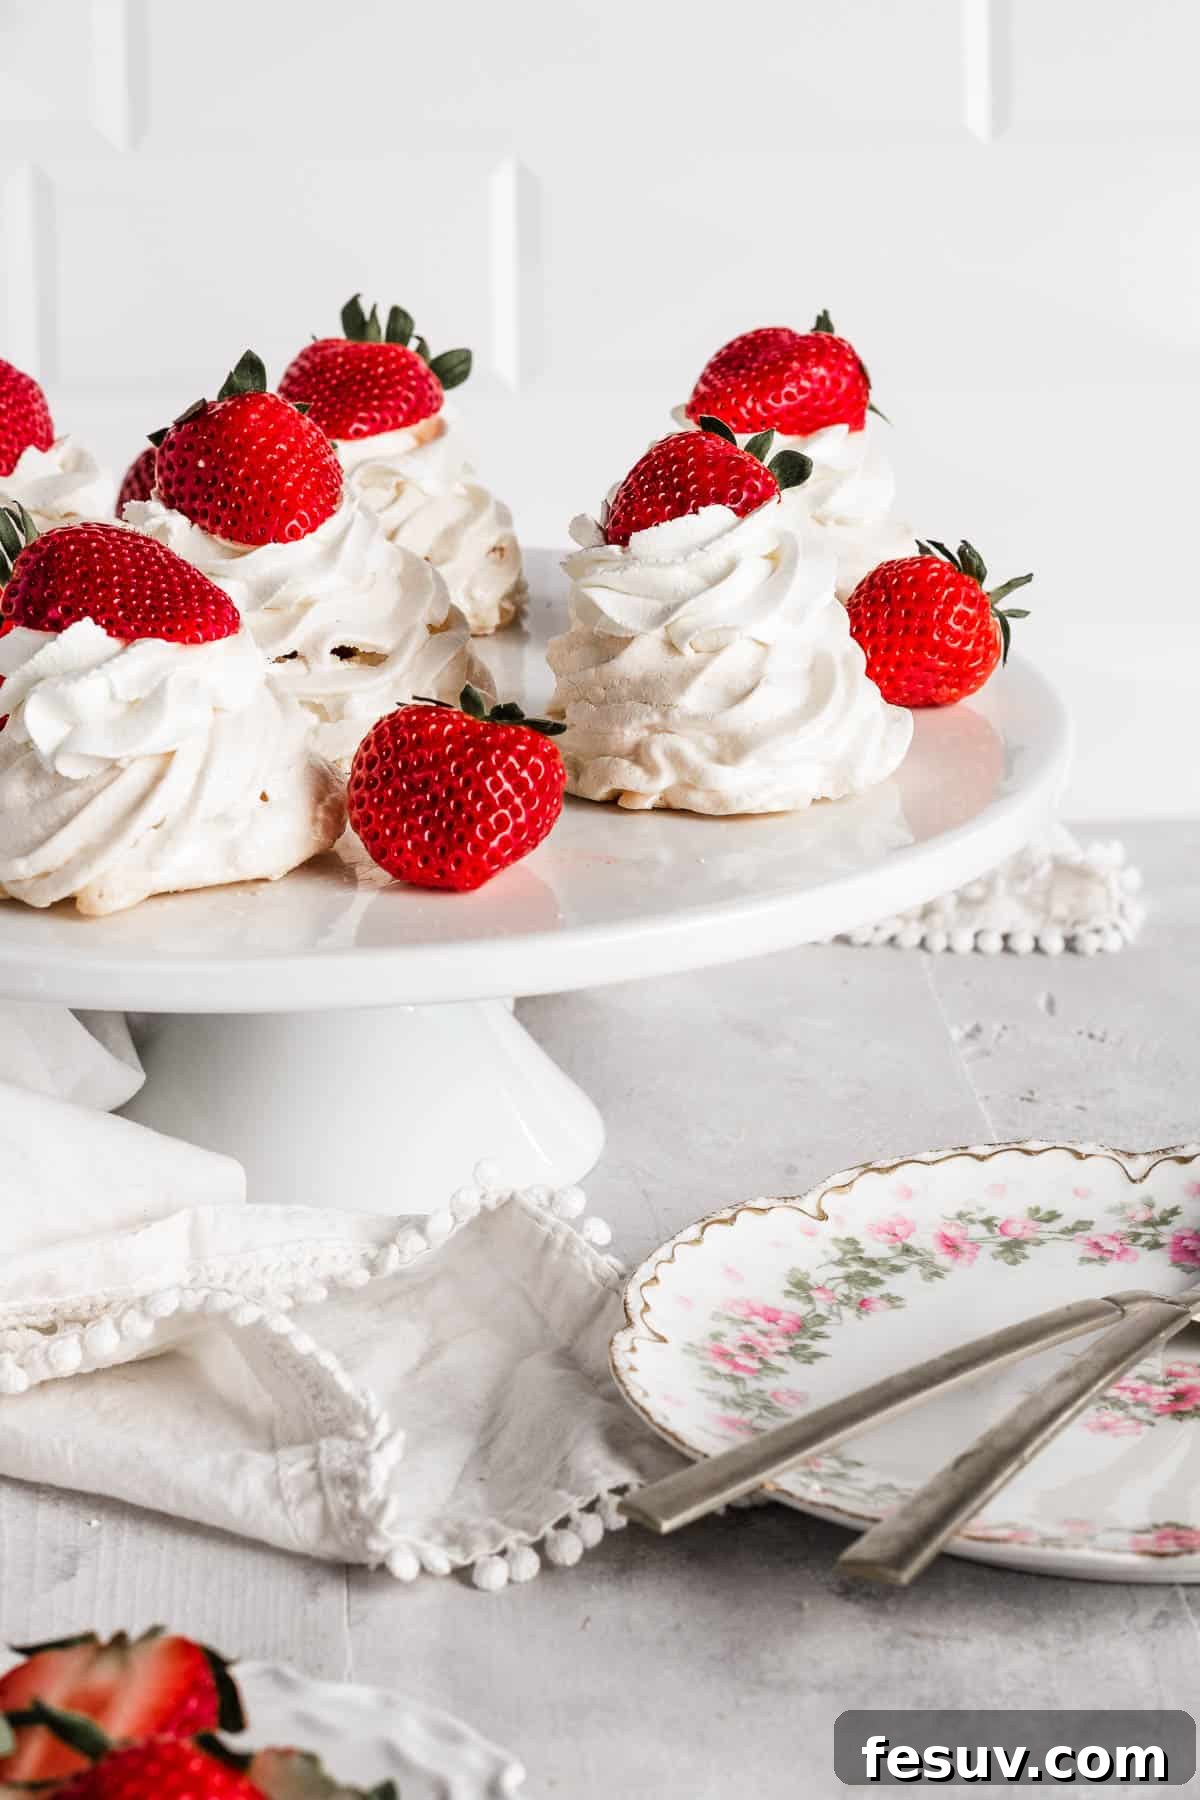
Welcome to the enchanting world of **Strawberry Pavlova Nests**, a truly exquisite and easy-to-make dessert that promises to delight your senses. These delicate mini meringues are a symphony of textures and flavors, featuring a crisp outer shell yielding to a wonderfully soft, marshmallow-like interior. Each ‘nest’ is generously filled with sweet strawberry jam, then crowned with fluffy fresh whipped cream and vibrant, juicy strawberries. It’s a show-stopping treat that’s not only beautiful to behold but also surprisingly simple to create, making it the perfect addition to any Spring celebration, from elegant Easter brunches to heartwarming Mother’s Day gatherings.
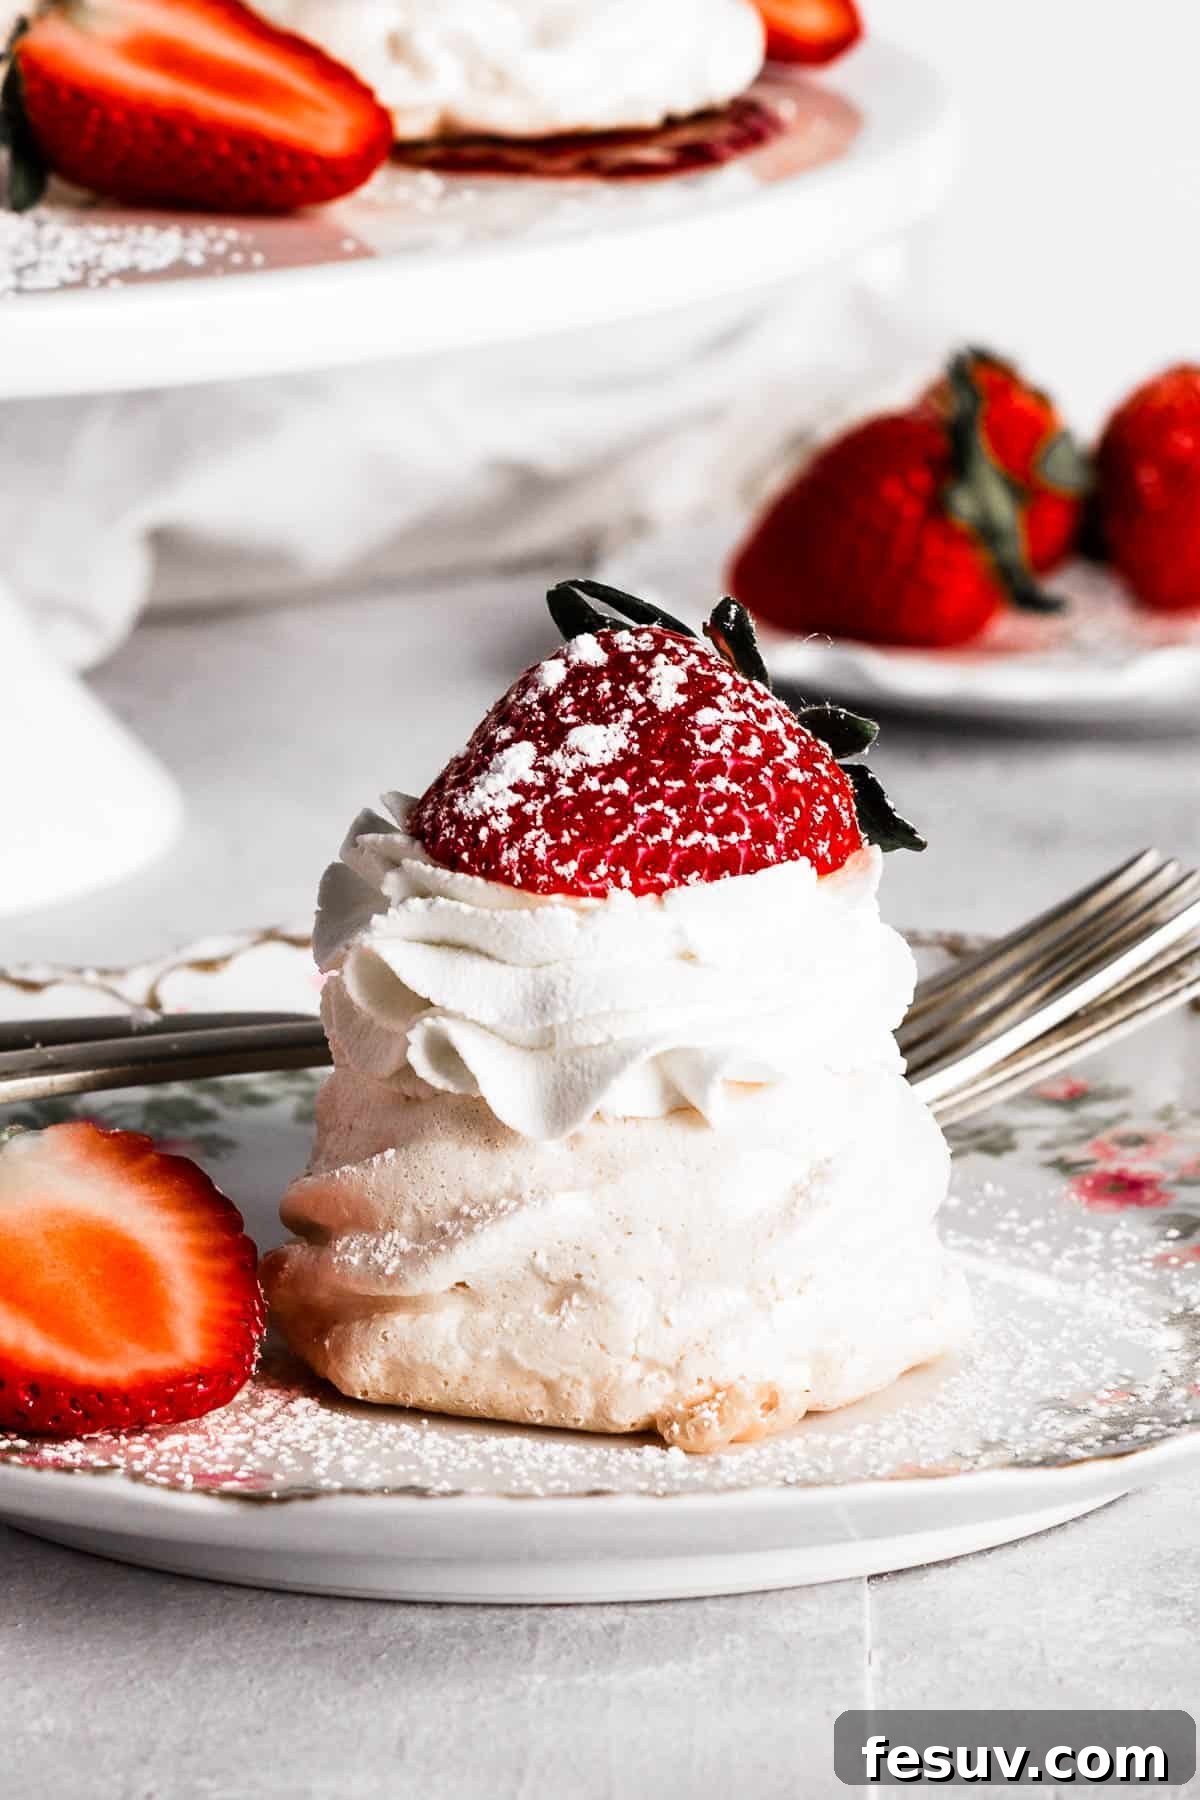
Irresistible Mini Strawberry Pavlova Nests
Pavlova holds a special place in the heart of many dessert enthusiasts, and it’s easy to see why. The ethereal sweetness and unique dual texture – a crisp exterior giving way to a soft, almost chewy center – are simply captivating. When paired with the fresh, vibrant flavors of seasonal fruit, particularly luscious strawberries as in this recipe, it transforms into an unforgettable culinary experience.
These adorable mini pavlova “nests” are designed for individual enjoyment, making them ideal for entertaining. They boast a double dose of strawberry goodness, with a dollop of sweet strawberry jam nestled inside, topped with fresh, ripe strawberries. This combination not only provides a burst of flavor but also creates stunning pops of color, instantly evoking the cheerful spirit of spring. While their appearance suggests a complex confection, you’ll be pleasantly surprised by how straightforward these strawberry pavlova nests are to prepare. They are truly an ideal dessert for celebrations like Easter, Mother’s Day, bridal showers, or any occasion where you want to impress with minimal fuss.
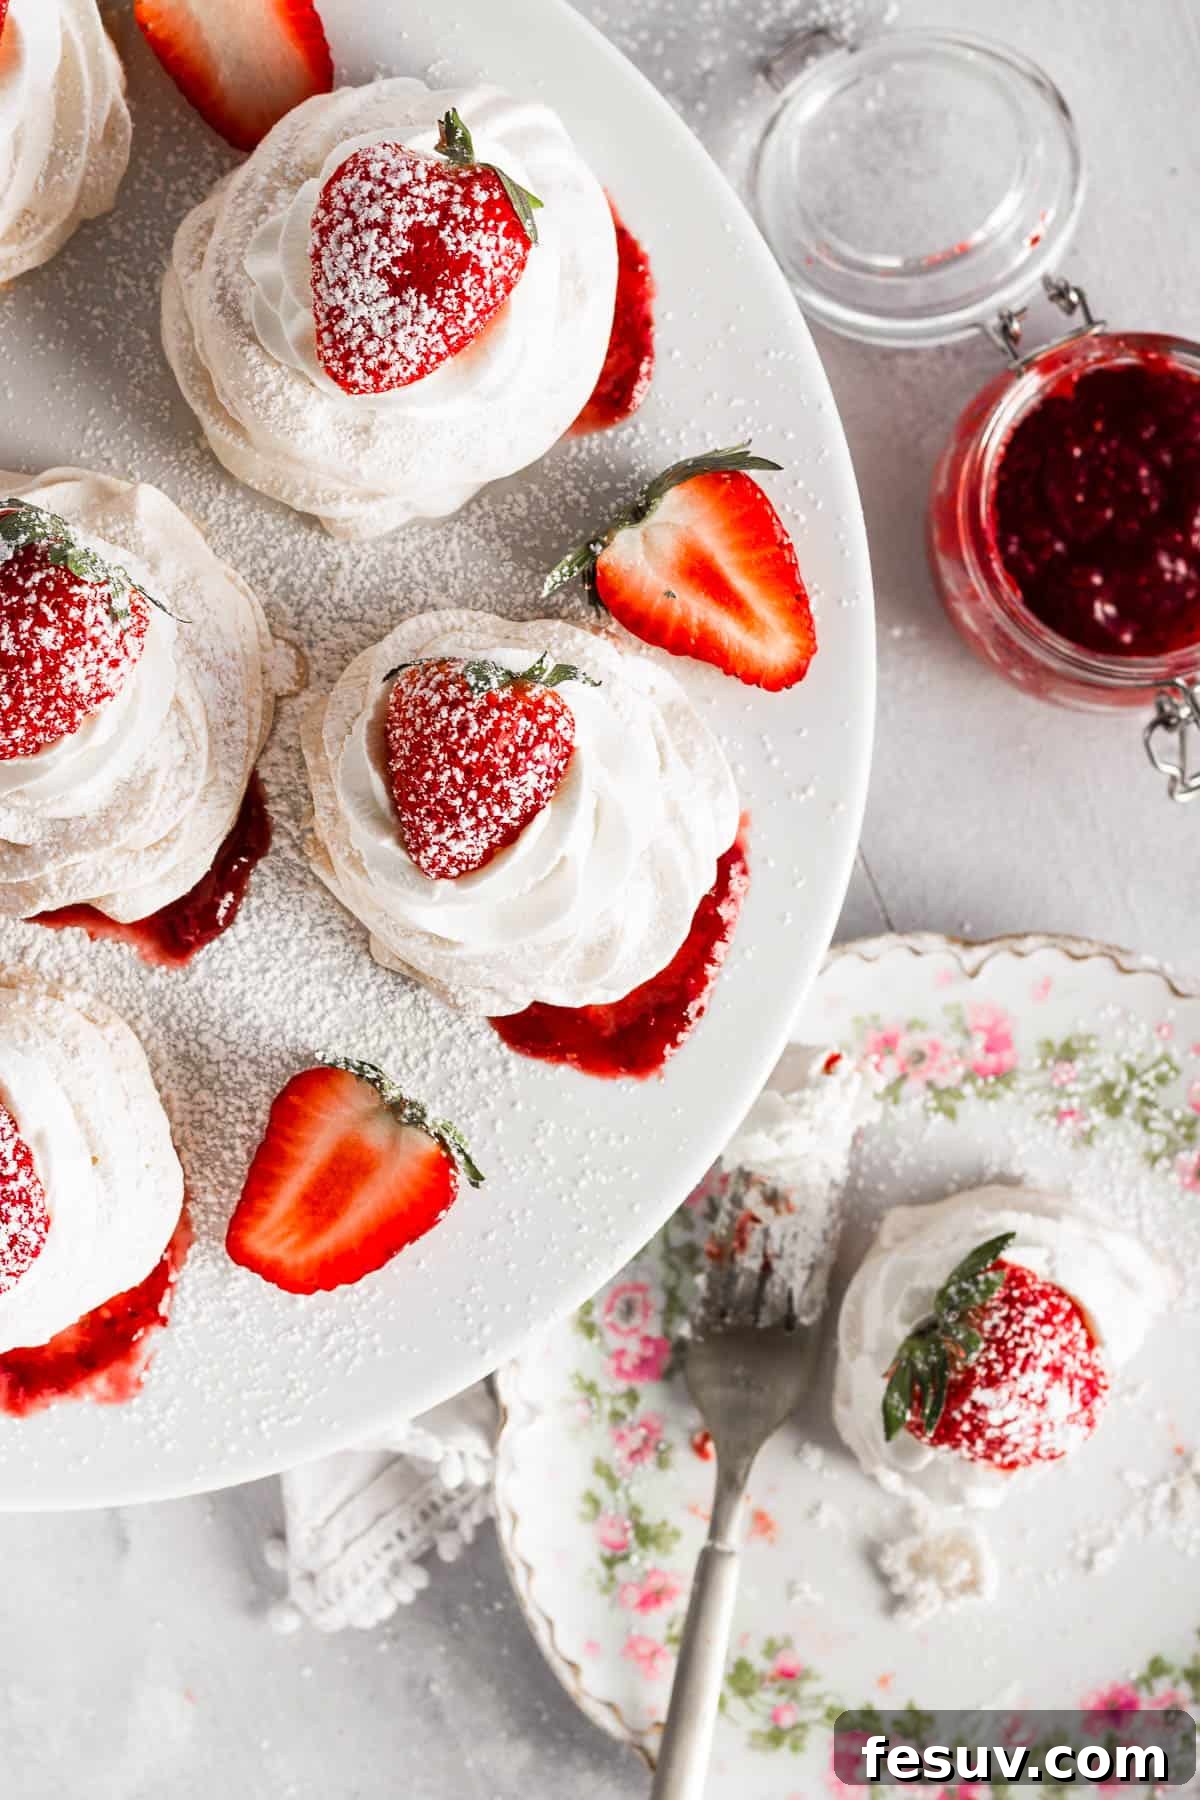
Unveiling the Magic: What Exactly is a Pavlova?
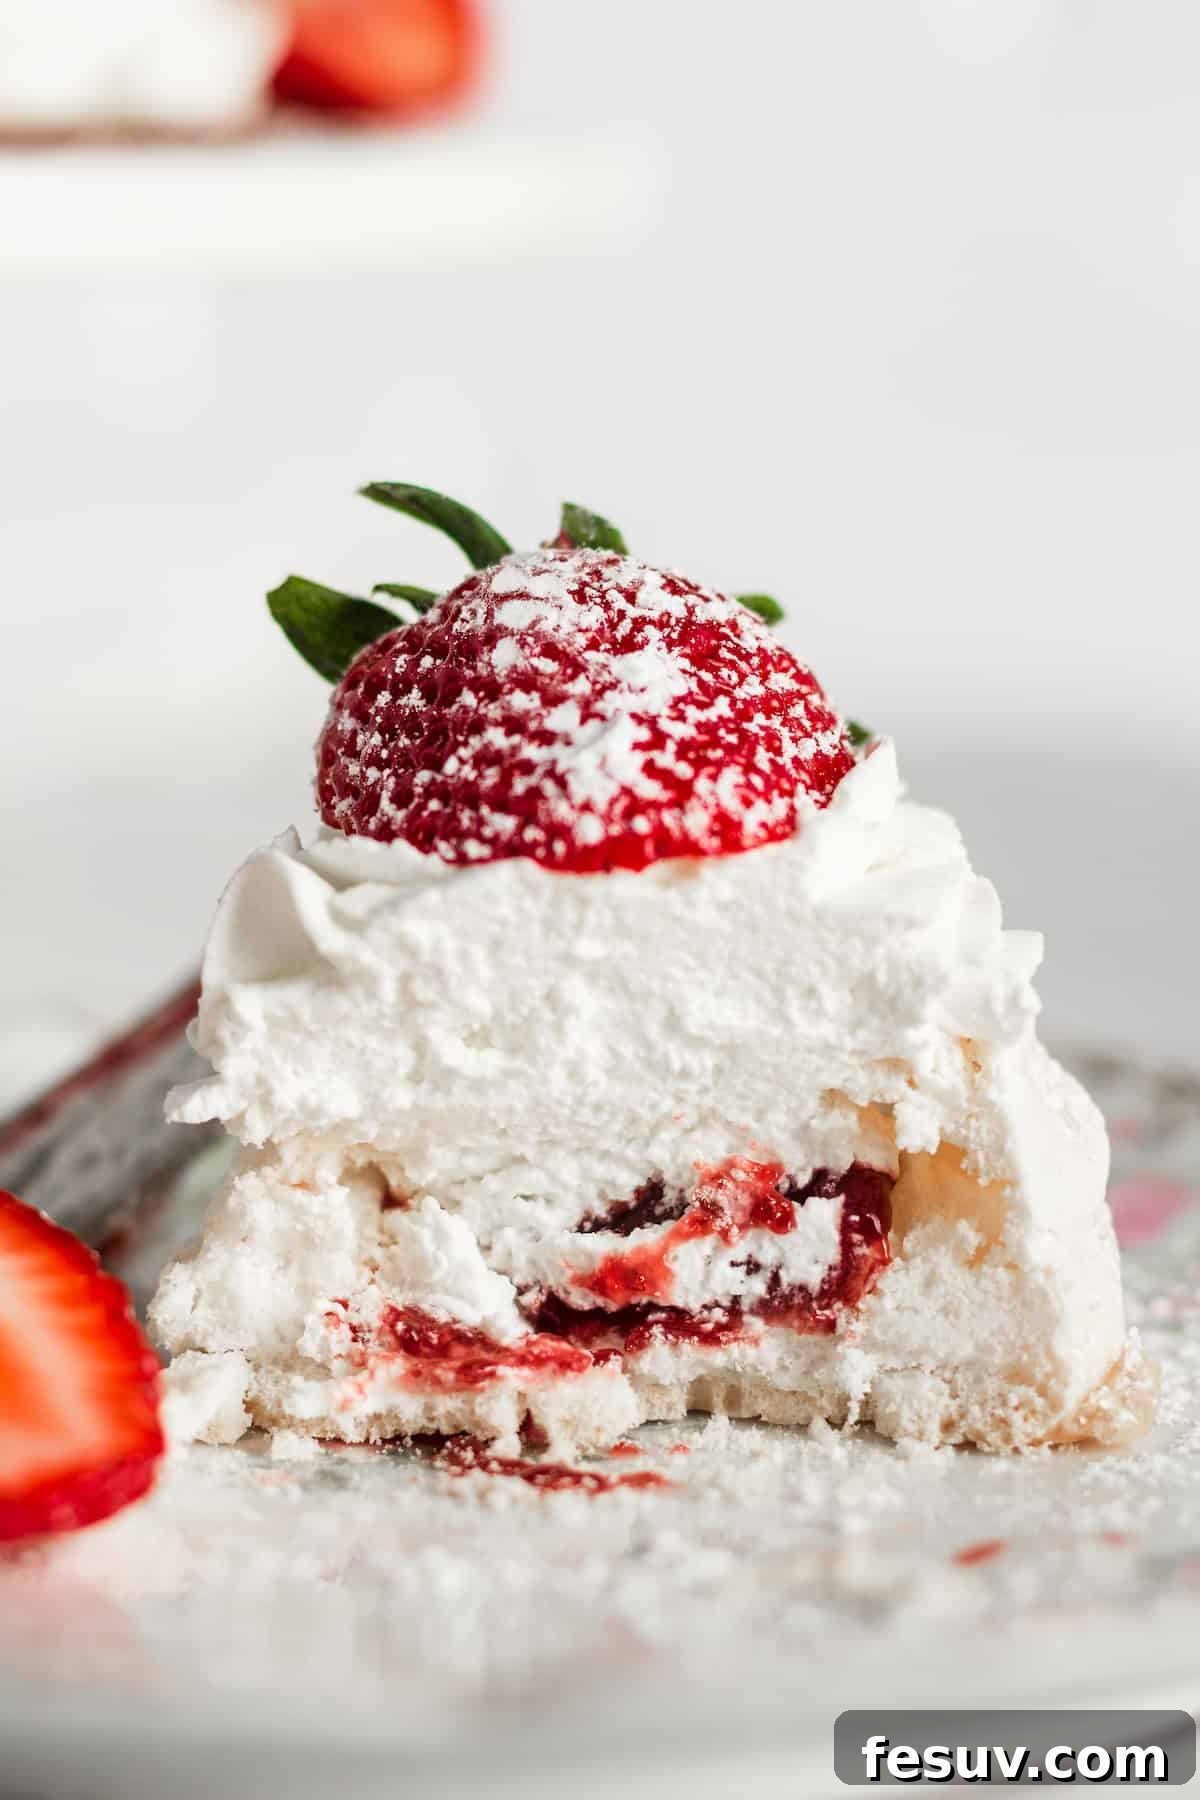
A pavlova is much more than just a dessert; it’s a masterpiece of culinary architecture. Often described as a light and airy “cake” or meringue, its primary components are whipped egg whites and sugar. What sets it apart from a traditional meringue is its distinctive texture: a perfectly crisp, delicate shell that shatters with the slightest touch, encasing a wonderfully soft, marshmallow-like interior. This delightful contrast is a hallmark of a well-made pavlova.
Historically, the pavlova is believed to have been created in the 1920s, named in homage to the renowned Russian ballerina Anna Pavlova during one of her tours to Australia and New Zealand. While the exact country of origin remains a friendly culinary debate between the two nations, its immense popularity in both the Southern Hemisphere and worldwide is undeniable. In places like Australia and New Zealand, pavlova is a cherished staple, especially during their summer Christmas celebrations. However, its light, airy nature and common use of fresh fruits and eggs have also made it a beloved Easter dessert, perfectly fitting the themes of renewal and spring. Crafting them as mini “nests” for this recipe adds an extra touch of seasonal charm, making them even more festive for your Easter table.
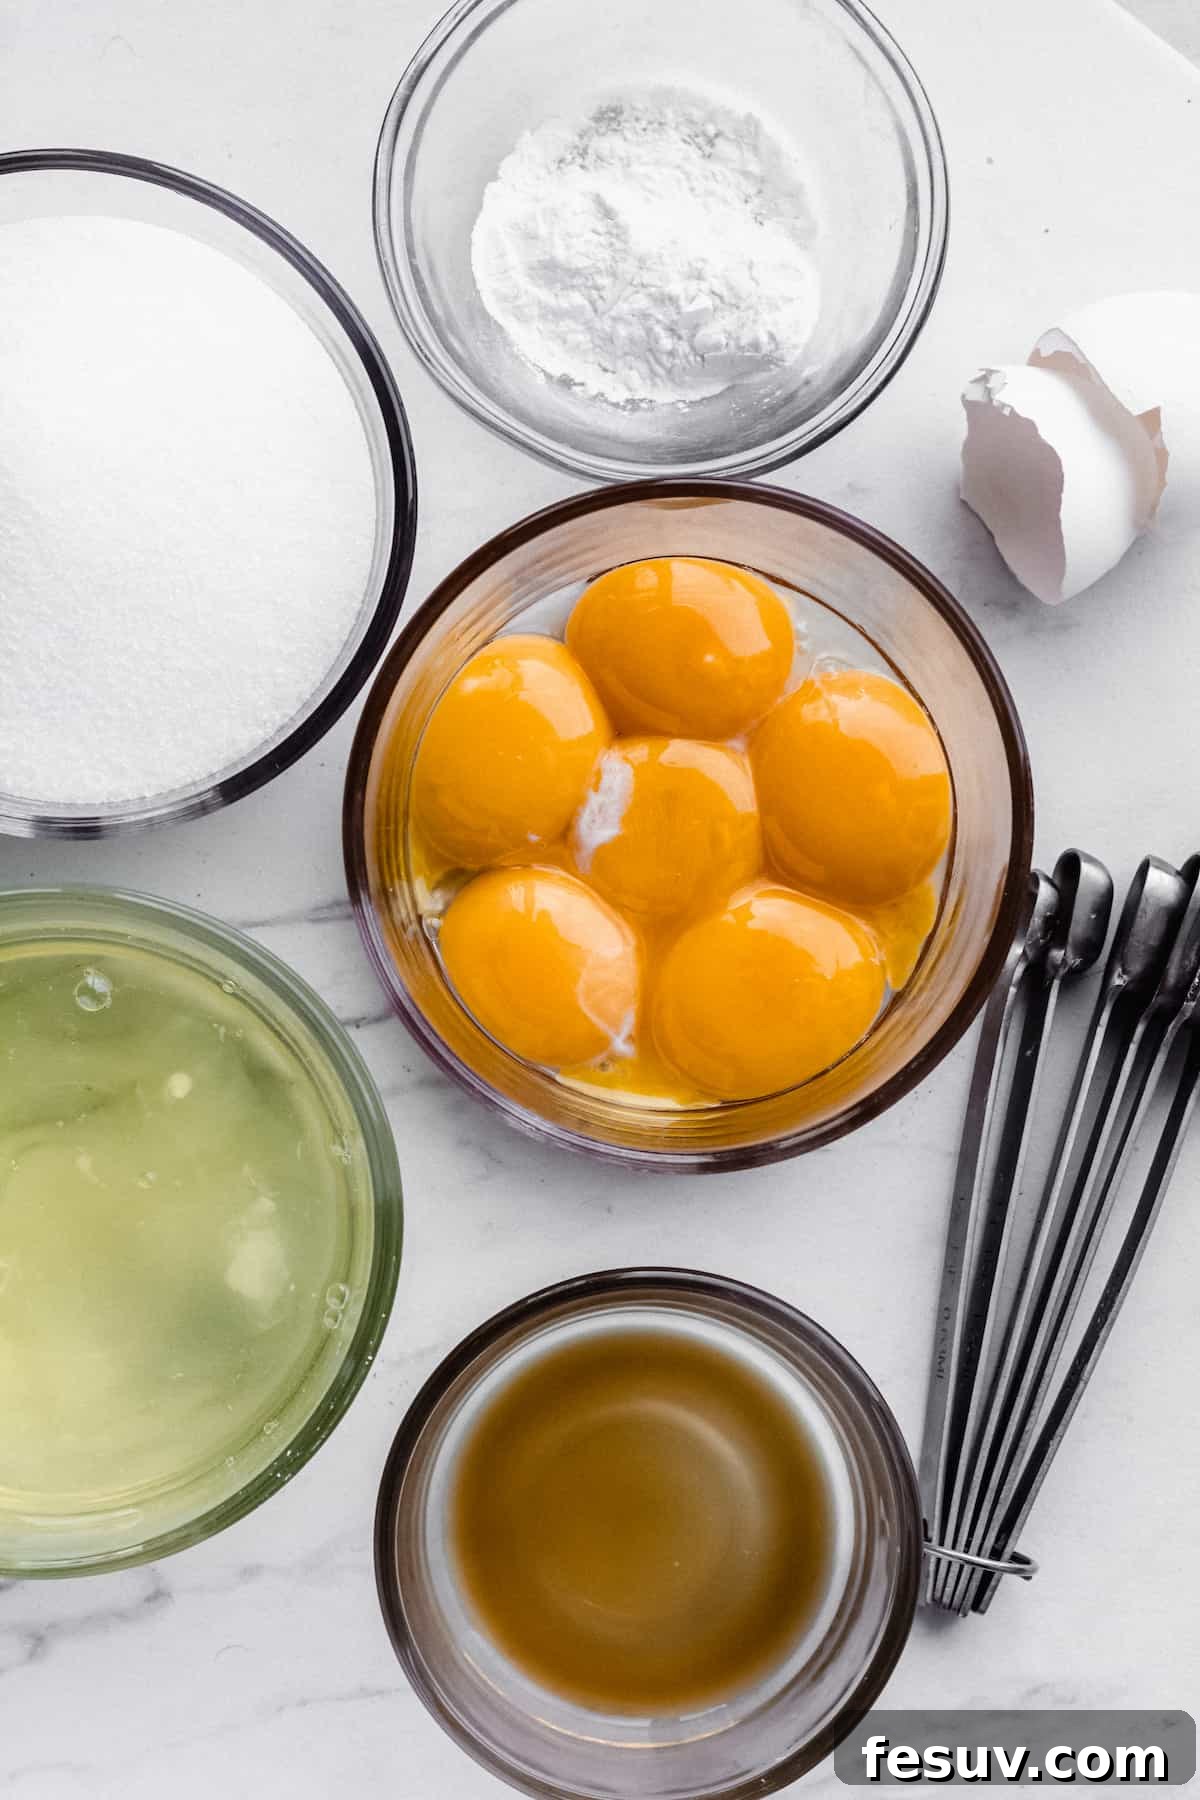
Gather Your Ingredients: Simple Staples for Stunning Pavlovas
Despite its elegant appearance, this strawberry pavlova recipe calls for a surprisingly short list of common pantry ingredients. You’ll be amazed at how such simple components can transform into such a visually stunning and incredibly delicious dessert.
For the Pavlova Base:
- Egg Whites: The foundation of any great pavlova! You’ll need 6 egg whites, ideally at room temperature, for one batch of approximately 14-15 mini pavlovas. Room temperature egg whites whip up more volume and create a more stable meringue.
- Granulated Sugar: Essential for both sweetness and structure. Two cups of granulated sugar will give your pavlovas their characteristic crispness and delightful sweetness.
- Cornstarch: A secret ingredient for that unique marshmallowy center. Two and a half teaspoons of cornstarch help stabilize the egg whites and contribute to the silky, soft texture inside. Arrowroot powder can be used as an alternative.
- Lemon Juice: Don’t skip this vital ingredient! Half a tablespoon of fresh lemon juice adds a subtle tang that balances the sweetness and helps in creating a beautifully structured, crisp pavlova.
- Vanilla Extract: One teaspoon of pure vanilla extract infuses a warm, aromatic note that complements the strawberry flavors perfectly.
For the Luscious Toppings:
- Heavy Whipping Cream: The base for our homemade whipped cream. Ensure you have 1 ½ cups of heavy whipping cream, well chilled, for optimal whipping results.
- Granulated Sugar: Just 2 tablespoons are needed to lightly sweeten the whipped cream, allowing the natural flavors to shine.
- Strawberry Jam or Preserves: The heart of your pavlova nests. One small jar (about ½ cup) of your favorite strawberry jam or preserves will provide a burst of sweet, fruity filling.
- Fresh Strawberries: For a vibrant and delicious garnish. Slice or halve about 8 fresh strawberries to adorn your pavlova nests.
- Powdered Sugar: An optional touch, a light dusting of powdered sugar adds a delicate finish and extra sweetness.
Crafting Perfection: Step-by-Step Guide to Making Strawberry Pavlova Nests
Making these mini pavlovas is a rewarding experience. While this recipe focuses on individual nests, the same principles can be applied to create one large, impressive pavlova adorned with jam and whipped cream.
- Prepare Your Egg Whites: Carefully separate 6 egg whites from their yolks, ensuring no trace of yolk mixes with the whites. Place the egg whites in a clean, small bowl and let them sit at room temperature for about 20-30 minutes. This allows them to whip up to their maximum volume.
- Preheat and Prep: Preheat your oven to a gentle 225°F (107°C). Line two large baking sheets with parchment paper. If you’re using a piping bag, fit it with a large star tip or a round tip and set it aside.
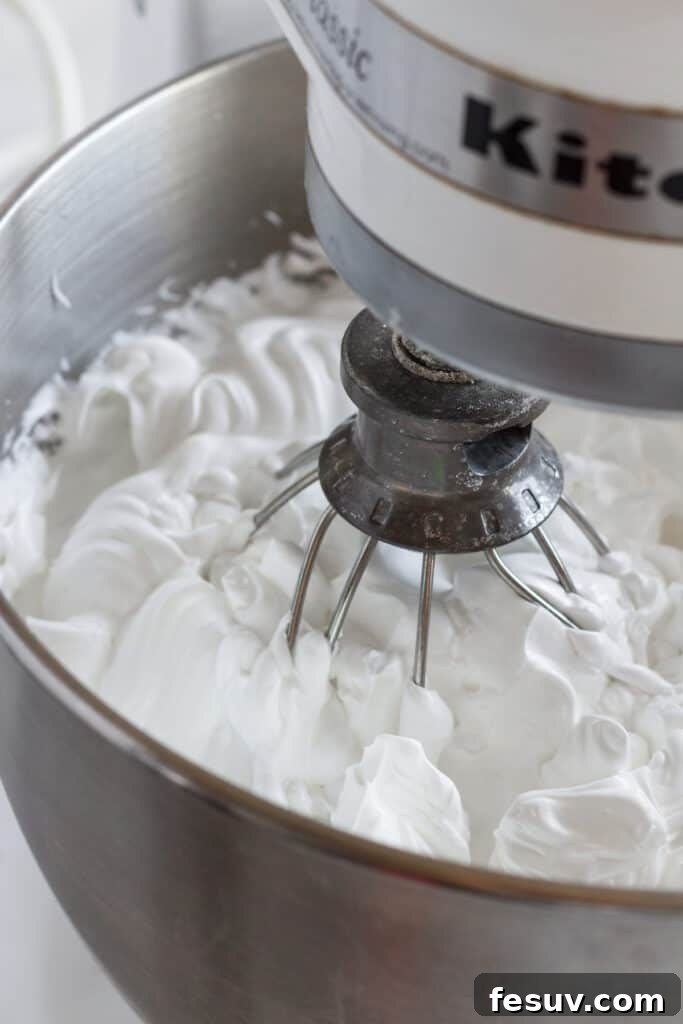
- Whip the Egg Whites: In a very clean and dry stand mixer bowl (or using a handheld electric mixer), beat the room-temperature egg whites on high speed for 1 to 2 minutes, until soft peaks begin to form.
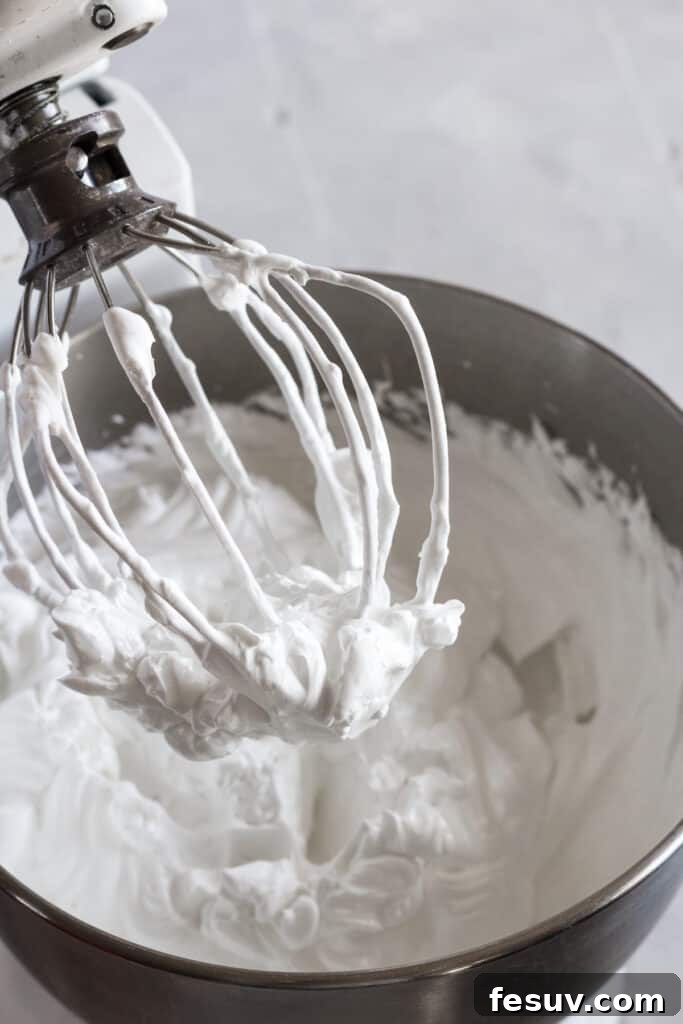
- Gradually Add Sugar: With the mixer still running on high, slowly add the granulated sugar, a tablespoon at a time. This gradual addition is crucial for the sugar to dissolve properly into the meringue. Continue beating for a full 6 to 8 minutes after all the sugar has been added, until the mixture is glossy, very thick, and holds stiff, firm peaks. When you lift the whisk, the meringue should stand up without drooping.
- Fold in Remaining Ingredients: Once stiff peaks are achieved, gently fold in the lemon juice, vanilla extract, and cornstarch. Be careful not to deflate the meringue. Once just combined, carefully spoon the pavlova mixture into your prepared piping bag.
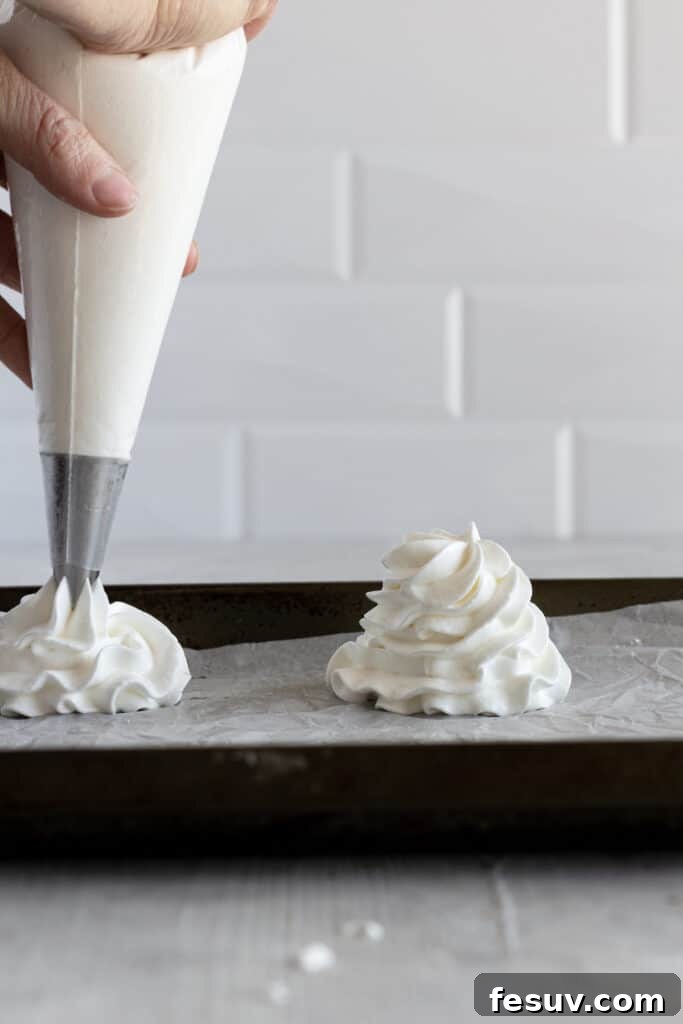
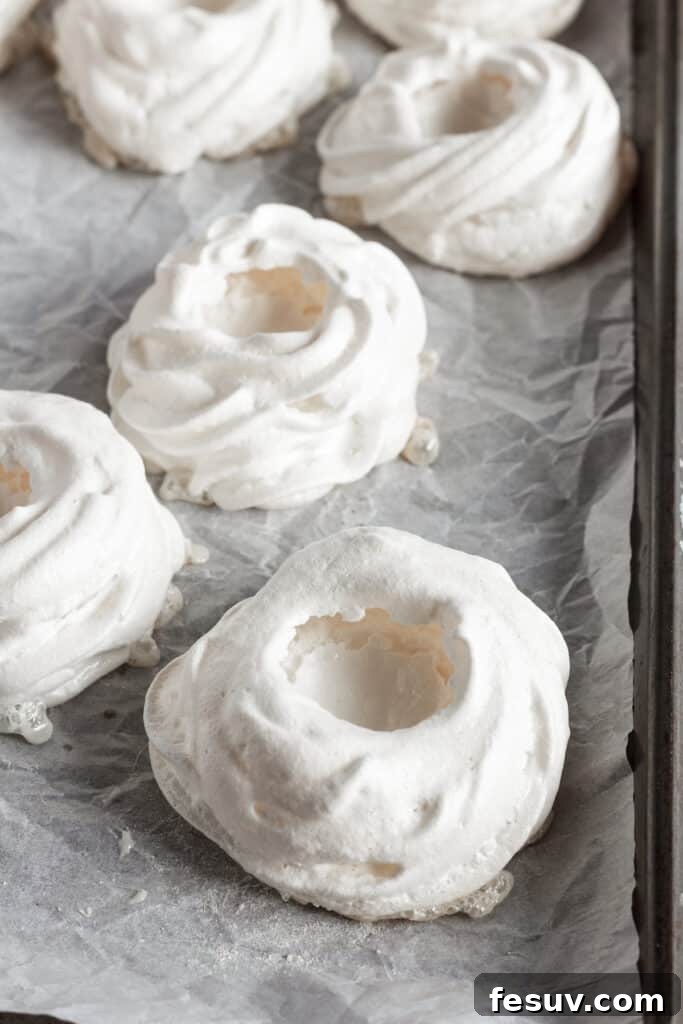
- Shape the Mini Pavlovas: On the parchment-lined baking sheets, pipe the meringue into roughly 3-inch wide nests. You can achieve this by piping a disc for the base, then piping a few concentric circles on top to build up the sides, leaving a well in the center. You should get between 12 to 15 nests. Gently use the back of a spoon to create a distinct indentation in the center of each nest, ready for your fillings.
- Bake and Cool: Bake the meringue nests for 1 hour at 225°F (107°C). After the hour, turn off the oven but keep the door closed. Allow the pavlovas to cool completely inside the oven for at least 30 minutes, or even longer (up to several hours or overnight). This slow cooling process is essential for preventing cracks and maintaining their crispness. Once fully cooled, transfer them to a wire rack.
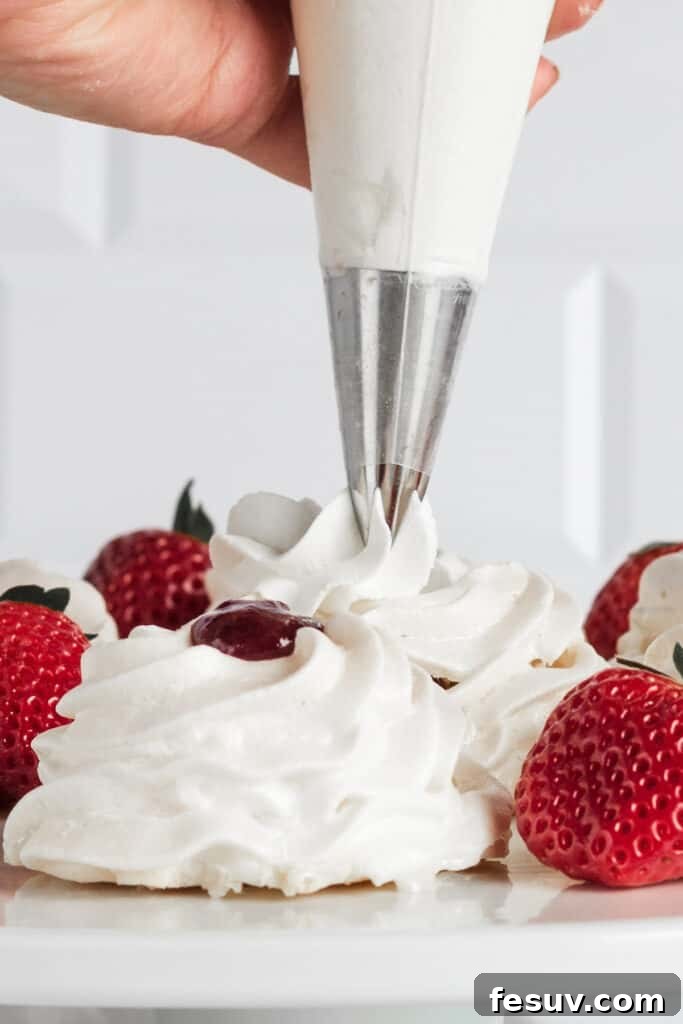
- Whip the Cream: Just before serving, prepare the fresh whipped cream. In a chilled mixing bowl, combine the cold heavy whipping cream and 2 tablespoons of sugar. Beat on high speed for 2 to 3 minutes, or until stiff peaks form. Be careful not to overbeat, as it can turn grainy.
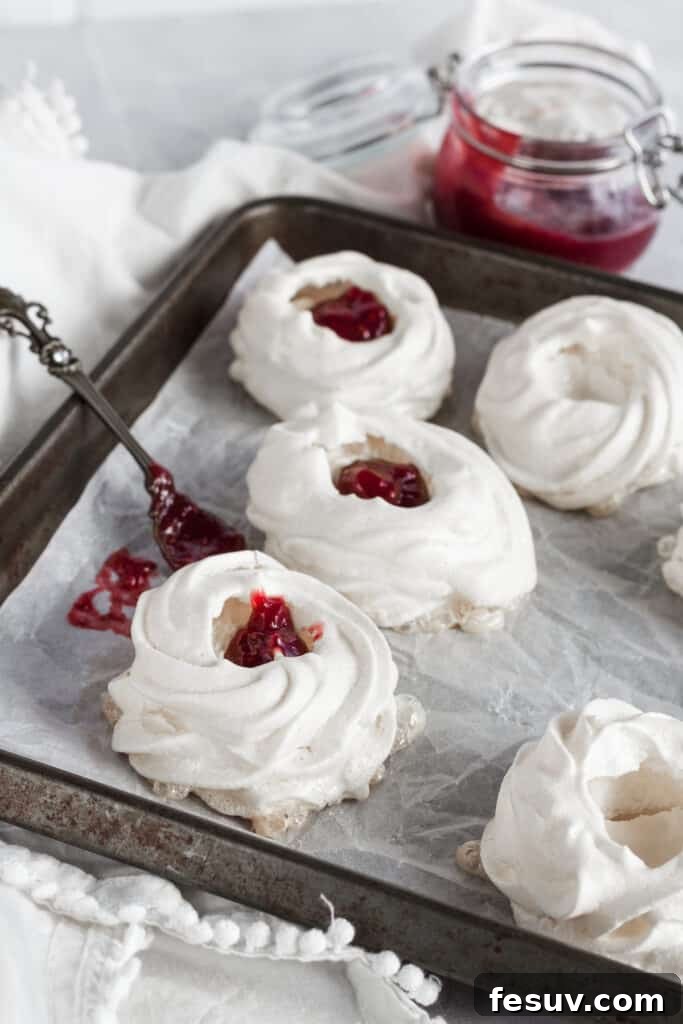
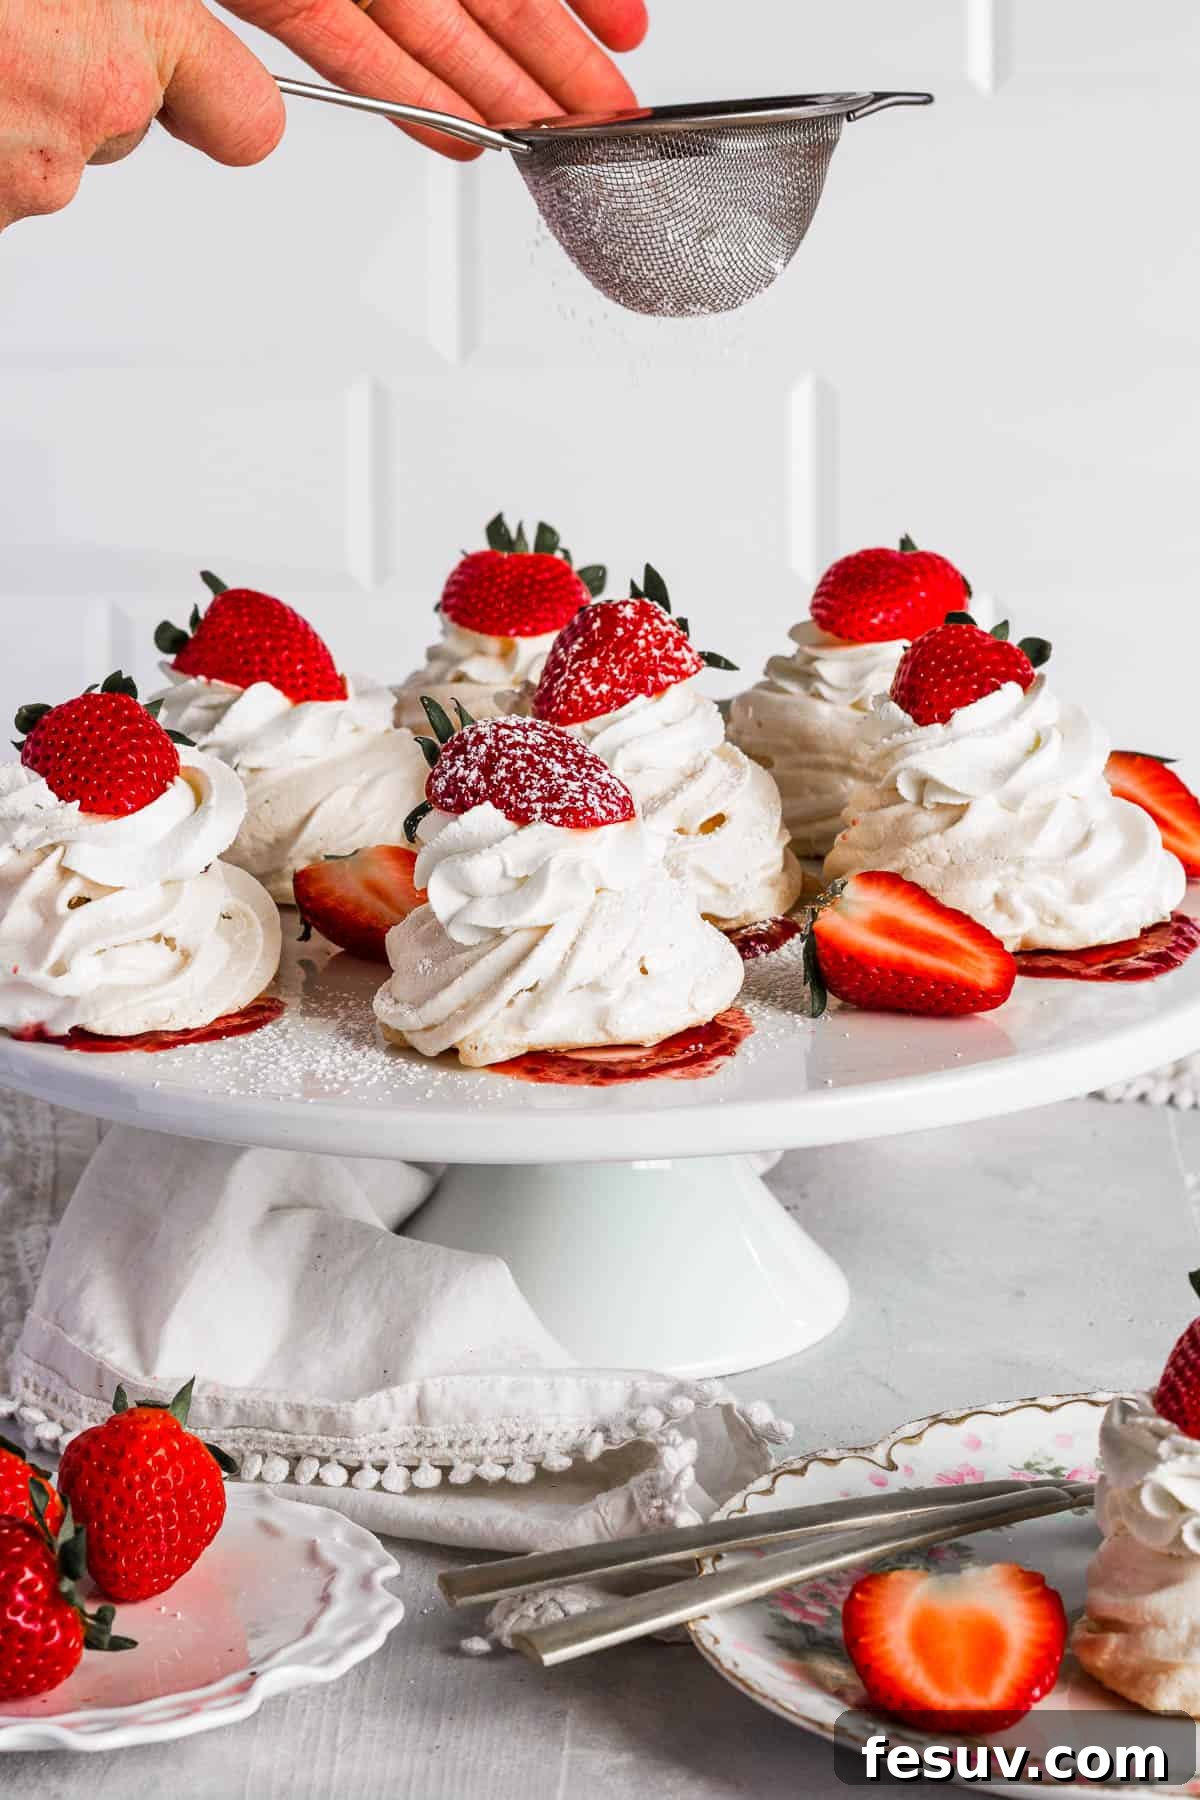
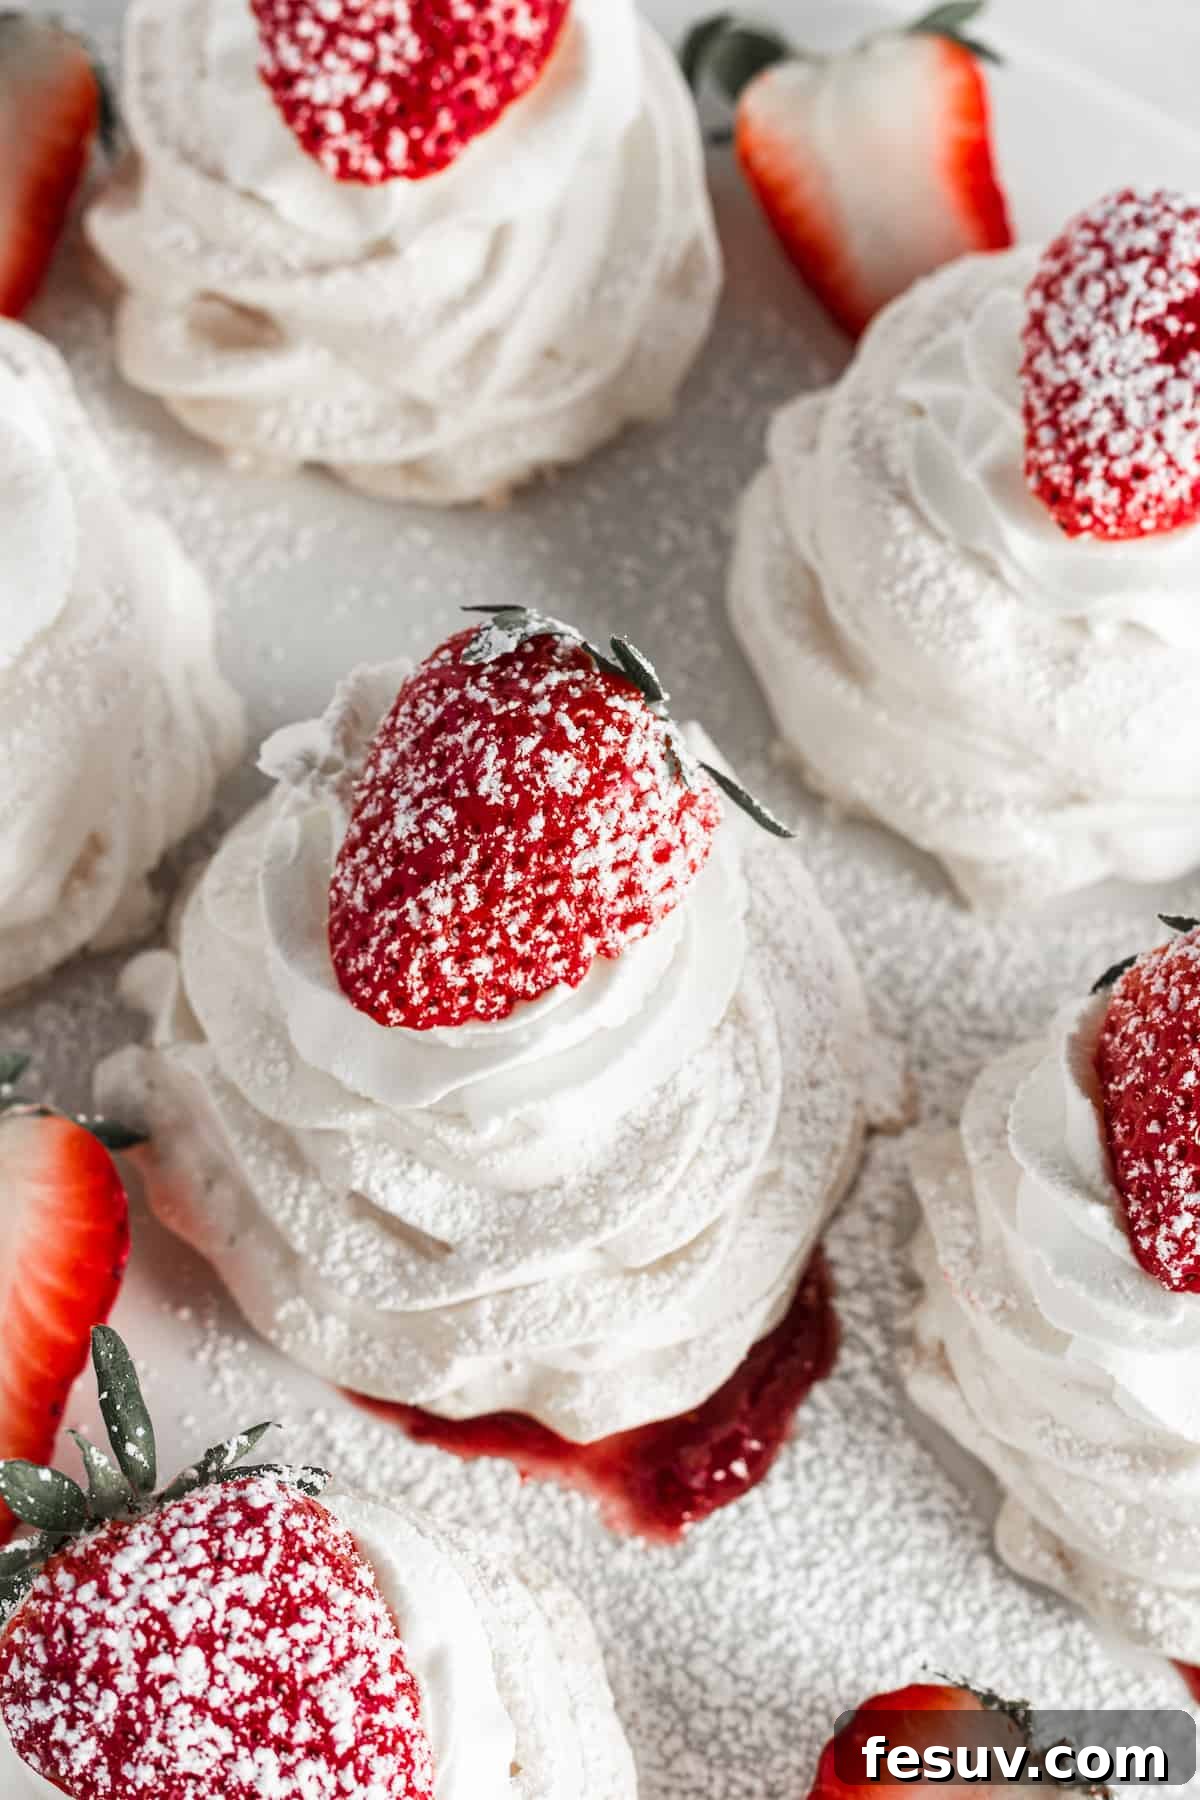
- Assemble and Serve: Spoon approximately 1 tablespoon of strawberry jam into the center of each cooled pavlova nest. Top with a generous dollop or pipe a swirl of the freshly whipped cream. Finally, garnish each with half of a fresh strawberry. A light dusting of powdered sugar can be added for extra visual appeal. Serve immediately and enjoy!
Creative Shaping for Your Pavlova Masterpiece
The beauty of mini pavlovas lies not only in their taste but also in their versatile presentation. For these particular strawberry pavlova nests, creating a small indentation for the jam and cream filling is key. You can achieve this by piping a base disc and then building up the sides with additional meringue, or by simply piping a disc and gently pressing the center with the back of a spoon to form a well. The choice of piping tip can also influence the texture and look of your nests – a star tip creates lovely ridges, while a round tip gives a smoother finish.
However, don’t feel limited to the “nest” shape. Pavlovas are incredibly adaptable! You could opt for simple, flat rounds that resemble small cakes, perfect for layering. Alternatively, small domes with flattened tops offer a charming, elegant look. Some even create larger, tray-like pavlovas with a raised rim, which allows for a generous amount of topping to be piled high. Experiment with different shapes to find what you enjoy most – each variation brings its own unique charm to this classic dessert.
The Perfect Pavlova: Knowing When It’s Done
Achieving that coveted crisp exterior and soft interior requires patience and precise baking. The pavlova needs to cook low and slow, followed by an equally important long, gentle cooling process within the oven. This method prevents the meringue from collapsing or cracking due to sudden temperature changes.
You can tell your pavlovas are perfectly done if their sides and top feel firm and dry to the touch. Another reliable indicator is how easily they peel away from the parchment paper. A fully baked pavlova will lift off cleanly without sticking. If it adheres to the parchment, it likely needs more time in the oven (even if the oven is off during the cooling phase) or a longer cooling period to fully set its structure. Trust the process, and you’ll be rewarded with perfectly tender-crisp pavlovas every time.
Beyond Strawberries: A World of Pavlova Topping Ideas
While strawberry is a classic and undeniably delicious choice, pavlovas are wonderfully versatile, inviting you to unleash your creativity with various toppings. The combination of airy meringue and rich whipped cream provides a perfect canvas for almost any fruit or flavor profile you can imagine. Here are some inspiring ideas to get you started, all beginning with a generous dollop of fresh whipped cream:
- Lemon-Berry Pavlova: Brighten your pavlova with a tangy lemon curd filling, then sprinkle generously with a medley of fresh berries – blueberries, blackberries, raspberries, or additional strawberries. The citrus and mixed berries create a harmonious, refreshing flavor.
- Baklava-Inspired Pavlova: For an exotic twist, drizzle your pavlova with golden honey and adorn it with finely chopped pistachios. You can even roughly chop store-bought baklava and scatter it over the top for an extra layer of texture and Middle Eastern-inspired flavor.
- Chocolate Cherry Delight: Indulge your sweet tooth by topping your pavlova with a rich chocolate ganache. Add slivered almonds for a nutty crunch and crown with glistening maraschino cherries (or fresh, pitted cherries when in season) for a classic pairing.
- Watermelon Peach Dream: A refreshing summer option. Cut slices of watermelon into playful shapes using small cookie cutters, and arrange fresh peach slices decoratively on top. If the fruit isn’t overly sweet, a light dusting of powdered sugar can enhance the flavors.
- Festive Peppermint Chocolate: Perfect for the holidays or a winter treat. Drizzle your pavlova with chocolate syrup and sprinkle with crushed peppermints or candy canes for a festive crunch and cooling sensation. For a classic mint-chocolate look, consider crushed spearmint candies.
Mastering Pavlova: Essential Tips for Consistent Success
While pavlovas are a joy to make, working with meringue can sometimes be a little finicky. To ensure your mini pavlova nests turn out beautifully crisp and marshmallowy every single time, keep these crucial tips in mind:
- Ensure Sugar Dissolves Completely: This is paramount for a stable and non-weeping meringue. When adding sugar to your whipped egg whites, do so very gradually, a tablespoon at a time, allowing each addition to fully dissolve before adding the next. Undissolved sugar can lead to a sticky, watery meringue and a less stable pavlova that might weep moisture during baking or cooling. You can test for dissolved sugar by rubbing a small amount of meringue between your fingers – it should feel completely smooth, not gritty.
- Avoid Overbeating Whipping Cream: Fresh whipped cream is the perfect companion to pavlova, but it requires a delicate touch. Beat the cream only until stiff peaks form. If you continue to beat beyond this point, the cream will start to break down, becoming grainy and eventually separating into butter and whey. Stop as soon as it’s firm and holds its shape.
- Humidity is the Enemy: Pavlovas are sensitive to moisture. For the best results, always make pavlova on a dry day. High humidity or rain can cause the meringue mixture to absorb moisture from the air, preventing it from drying out properly. This can result in a sticky, soft, and soggy pavlova instead of the desired crisp and airy texture. Store any leftover pavlovas in an airtight container at room temperature, but ideally, enjoy them fresh.
Troubleshooting: What Causes Pavlova to Crack?
It can be disheartening to find cracks marring your otherwise perfect pavlova. This common issue typically occurs because the soft, marshmallowy interior shrinks away from the crisp outer layer as it cools. There are several factors that can contribute to cracking:
- Improperly Beaten Meringue: The meringue mixture needs to be beaten to stiff, glossy peaks. It should be perfectly smooth, not grainy. If the meringue is under-beaten, it won’t have enough structure. If it’s over-beaten or if the sugar isn’t fully dissolved, it can become grainy and lead to instability. A grainy mixture is more prone to cracking and can even leak moisture during the baking process. Always aim for a smooth, stable, and shiny meringue.
- Sudden Temperature Changes: A rapid drop in temperature is a leading cause of pavlova cracking. That’s why the instruction to turn off the oven and let the pavlovas cool slowly inside is so crucial. Removing them too quickly from the warm oven into a cool environment can shock the delicate meringue, causing it to contract rapidly and crack.
- Overbaking: While pavlovas are meant to be dry on the outside, overbaking can make the outer shell too brittle, increasing its likelihood of cracking. Follow the baking times carefully and rely on the touch test for doneness.
Mini Strawberry Pavlova Nests
by Katerina | Easy Weeknight Recipes
A light and airy meringue dessert with a creamy center, topped with strawberry jam, whipped cream, and fresh strawberries.
Prep Time: 30 minutes
Cook Time: 1 hour
Resting Time: 30 minutes
Total Time: 2 hours
Servings: 14 mini pavlovas
Ingredients
For the Pavlova Base:
- 6 egg whites, at room temperature
- 2 cups granulated sugar
- 2 ½ teaspoons cornstarch or arrowroot powder
- ½ tablespoons lemon juice
- 1 teaspoon vanilla extract
For the Toppings:
- 1 ½ cups heavy whipping cream, chilled
- 2 tablespoons granulated sugar
- ½ cup strawberry jam or preserves
- 8 fresh sliced or halved strawberries, for garnish
- Powdered sugar, for garnish (optional)
Instructions
- Separate 6 egg whites from their yolks, being careful not to get any yolk in the whites. Place egg whites in a bowl and allow to sit on the counter to come to room temperature; about 20 minutes.
- Preheat the oven to 225°F (107°C). Line two baking sheet pans with parchment paper and set aside. If using, fit your piping bag with a large tip.
- In a stand mixer or mixing bowl with an electric hand mixer, beat the egg whites on HIGH for 1 to 2 minutes, or until soft peaks form. With the mixer still on, add the sugar a little bit at a time until dissolved. Once all the sugar is dissolved, continue beating for 6 to 8 minutes on HIGH speed, or until stiff peaks form and the meringue is glossy.
- Once stiff peaks form, gently fold in the lemon juice, vanilla extract, and cornstarch. Once combined, scoop the pavlova mixture into the prepared piping bag.
- On the parchment-lined baking sheet, pipe the meringue into roughly 3-inch nests. You should end up with about 12 to 15 nests, depending on your desired size. Gently press the back of a spoon into the top of each to create a small indent in the center.
- Bake the meringue nests for 1 hour at 225°F (107°C). After the first hour, turn the oven off and keep the door closed. Let the pavlovas cool completely in the oven for at least 30 minutes, or ideally several hours/overnight, before transferring them to a cooling rack.
- In the meantime (or just before serving), place the chilled heavy whipping cream and 2 tablespoons of sugar in a mixing bowl. Mix on HIGH for 2 to 3 minutes, or until stiff peaks form. Be careful not to overbeat.
- Place roughly 1 tablespoon of strawberry jam in the center of each cooled pavlova nest.
- Top with piped whipped cream and half of a fresh strawberry. Optionally, dust with powdered sugar. Enjoy immediately!
Nutrition
Calories: 250kcal | Carbohydrates: 40g | Protein: 2g | Fat: 9g | Saturated Fat: 6g | Cholesterol: 35mg | Sodium: 35mg | Potassium: 62mg | Fiber: 1g | Sugar: 37g | Vitamin A: 376IU | Vitamin C: 5mg | Calcium: 21mg | Iron: 1mg
Nutritional info is an estimate and provided as courtesy. Values may vary according to the ingredients and tools used. Please use your preferred nutritional calculator for more detailed info.
More Delightful Dessert Ideas to Explore
If you’ve enjoyed crafting these Strawberry Pavlova Nests, you might be keen to discover more delectable treats to add to your repertoire. Here are a few other dessert recipes that are sure to impress and satisfy any sweet craving:
- Red Velvet Crinkle Cookies: A festive and chewy cookie with a beautiful contrasting crackled surface, perfect for any occasion.
- Easy Tres Leches Cake: A wonderfully moist and rich sponge cake soaked in three kinds of milk, topped with fluffy whipped cream.
- Homemade Banana Pudding: A comforting classic, layered with fresh bananas, vanilla wafers, and creamy custard.