
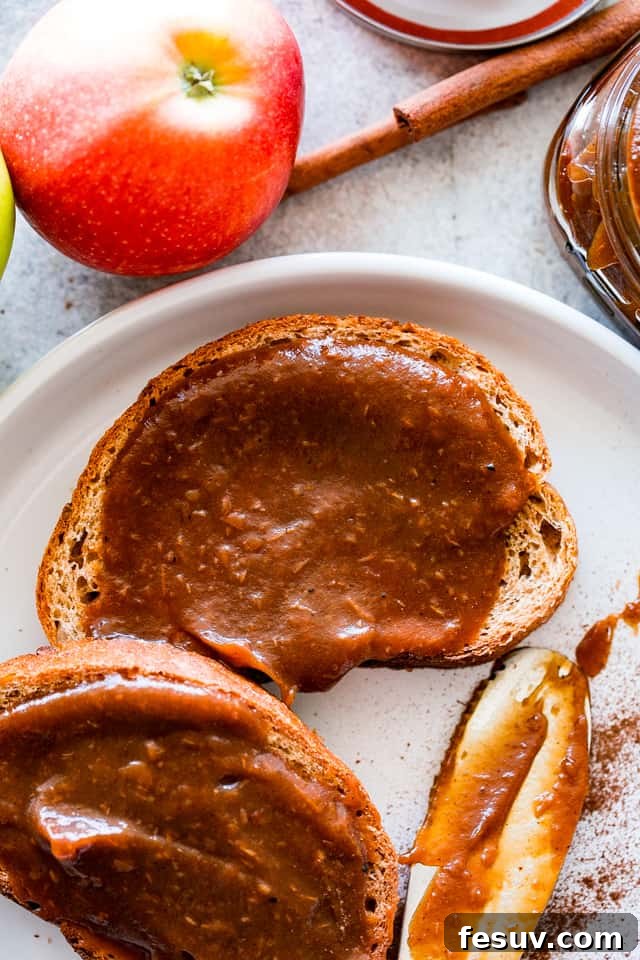
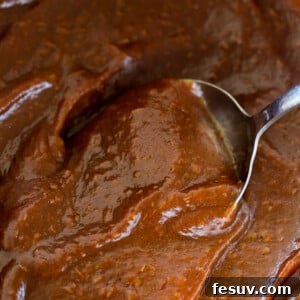
Sweet, delicious, gently caramelized, and flavored with warming spices, this Instant Pot Apple Butter is the taste of Autumn in a jar! It’s the perfect way to capture the essence of fall, transforming fresh apples into a velvety, deeply flavored spread that’s ready in a fraction of the time compared to traditional methods. Get ready to impress your family and friends with this homemade delight.
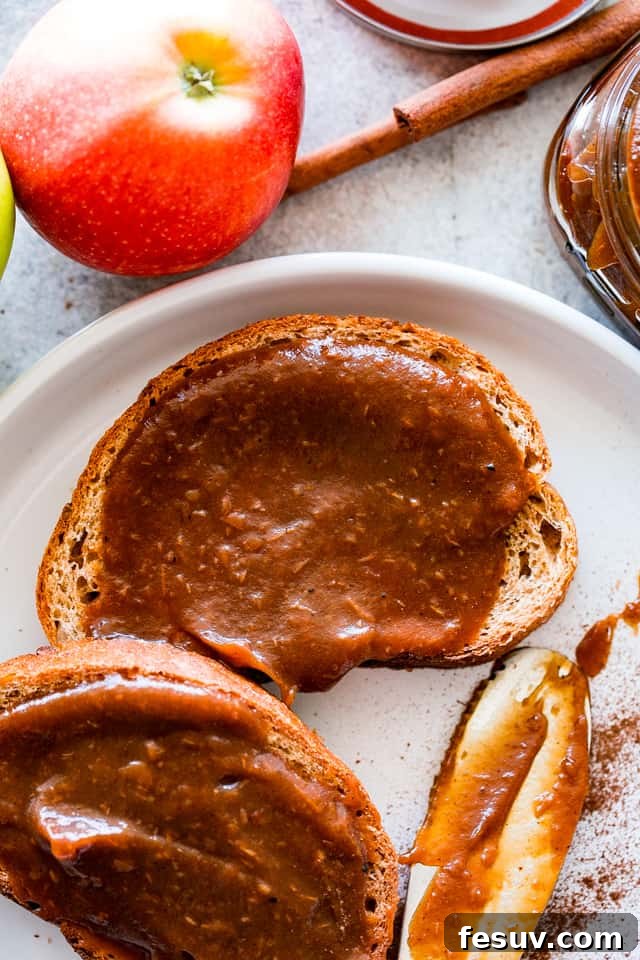
Discover the Magic of Easy Instant Pot Apple Butter
Traditional apple butter recipes are renowned for their rich, deep flavor, but often come with a significant time commitment, requiring hours of slow simmering to achieve that coveted caramelized texture. Imagine turning a pot of simple applesauce into a dark, luxurious spread, intensifying its sweetness and spice profile through a lengthy cooking process. However, thanks to the ingenious design of the Instant Pot, we can drastically reduce this extensive cooking time, bringing you homemade apple butter in under an hour!
This Instant Pot Apple Butter recipe offers a revolutionary approach to a classic autumn treat. It leverages the power of pressure cooking to tenderize apples quickly, then finishes with a brief sauté to achieve that signature thickness and caramelized depth. The result? A perfectly smooth, cinnamon-infused apple butter that tastes like it simmered all day, but is ready in about 60 minutes from start to finish. Not only is it quick to make, but it’s also incredibly versatile. Plus, it’s freezer-friendly, allowing you to savor the taste of fall for up to six months – a truly delicious and convenient investment for your pantry!
Whether you’re new to pressure cooking or a seasoned Instant Pot enthusiast, this recipe is incredibly straightforward, transforming a kitchen chore into a delightful culinary experience. Say goodbye to endless stirring and hello to a quicker, easier way to enjoy this beloved seasonal staple.
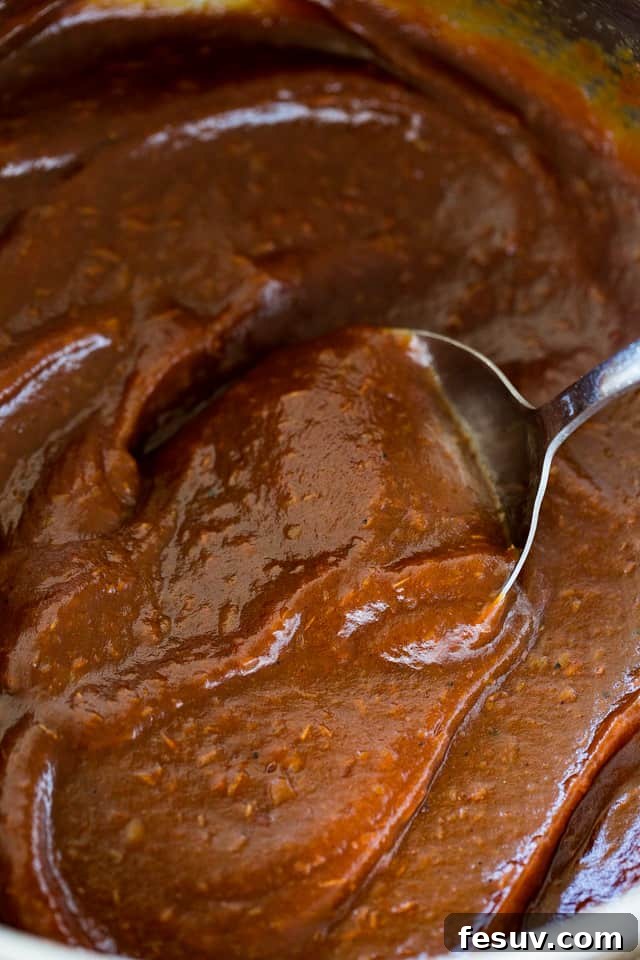
Why Make Your Own Homemade Apple Butter?
While store-bought apple butter is readily available, crafting your own Instant Pot Apple Butter at home offers a multitude of advantages that go beyond just saving a few dollars. It’s an experience that rewards you with superior flavor, control over ingredients, and a sense of accomplishment.
- Unmatched Freshness and Flavor: Nothing compares to the vibrant, deep flavor of homemade apple butter. When you make it yourself, you’re using fresh, seasonal apples at their peak, which translates to a more aromatic, nuanced, and truly delicious spread. The subtle notes of apple, complemented by freshly ground spices, create a taste profile that simply can’t be replicated by mass-produced versions.
- Control Over Ingredients: Making apple butter from scratch gives you complete control over what goes into your jar. You can choose organic apples, adjust the amount of sugar to suit your dietary preferences, and even customize the spice blend. This means no artificial preservatives, high-fructose corn syrup, or unwanted additives often found in commercial products. It’s a healthier, cleaner option for your family.
- Customizable Sweetness and Spice: Do you prefer a sweeter butter, or one with a pronounced tart kick? Love cinnamon, but want to add a touch more ginger or cloves? Homemade apple butter allows you to tailor the recipe precisely to your palate. Experiment with different apple varieties or vary the spice ratios to create your unique signature blend.
- Cost-Effective: When apples are in season, especially if you can get them at a local orchard or farmer’s market, making a large batch of apple butter can be significantly more economical than purchasing multiple jars from the store. It’s an efficient way to utilize an abundance of fresh fruit.
- Wonderful for Gifting: Homemade apple butter, beautifully packaged in decorative jars, makes an incredibly thoughtful and appreciated gift during the holiday season or for any occasion. It’s a personal touch that shows you’ve put time and love into creating something special.
- A Cozy Autumnal Experience: The aroma of apples and warming spices simmering in your kitchen is one of the most comforting smells of autumn. Making apple butter can be a delightful activity, filling your home with a cozy, inviting fragrance that truly captures the spirit of the season.
Embrace the joy of homemade and discover just how rewarding it is to create your own luscious Instant Pot Apple Butter.
Applesauce vs. Apple Butter: Understanding the Delicious Distinction
While both applesauce and apple butter celebrate the humble apple, they are distinct culinary creations with unique characteristics. The primary differentiator, and the secret behind apple butter’s irresistible appeal, lies in the process of **caramelization**. This is a cooking technique where the natural sugars within the apples are slowly cooked and concentrated, undergoing a chemical reaction that results in a beautiful brown color and a profound, complex sweetness, much like the process of making caramel itself.
Applesauce, on the other hand, is essentially cooked-down apples, typically pureed to a smooth or chunky consistency. It can be sweet or tart, and while it might be lightly spiced, it generally retains a brighter, fresher apple flavor and a lighter color. It’s a simpler preparation, often used as a side dish, a healthy snack, or an ingredient in baking.
Apple butter takes applesauce a significant step further. It begins with cooked and pureed apples, which are then cooked *again* for an extended period. This secondary cooking stage allows for deep caramelization to occur, transforming the apples into a much darker, thicker, and more intensely sweet spread. The moisture evaporates, concentrating the flavors and sugars, and resulting in that rich, spreadable “butter” consistency (though it contains no actual butter or dairy). Furthermore, while applesauce may or may not be spiced, apple butter is almost universally celebrated for its harmonious blend of warming spices, most notably cinnamon, often complemented by allspice, nutmeg, cloves, and sometimes ginger, which further enhance its comforting, autumnal profile.
Think of applesauce as the fresh, fruity base, and apple butter as its deeply aged, spiced, and caramelized cousin – both wonderful, but serving different taste experiences and culinary roles.
Peel or No Peel? Making the Choice for Your Apple Butter
One of the beauties of making Instant Pot Apple Butter is its flexibility, and that extends to whether or not you decide to peel your apples. For many, leaving the peel on is a fantastic shortcut, making the preparation of fresh apples incredibly easy and saving valuable time. This means less chopping and no tedious peeling step!
Beyond convenience, leaving the peels on offers several benefits. Apple peels are packed with fiber, vitamins, and antioxidants, adding a nutritional boost to your apple butter. They also contribute to a richer, deeper color in the final product. When blended, the peels become completely undetectable in the smooth texture of the apple butter, so you don’t have to worry about a gritty mouthfeel.
However, there are a couple of considerations. If you’re using conventional apples that have been waxed, you might want to either peel them or employ a wax-removal method, such as this one, to ensure no unwanted residue ends up in your spread. Alternatively, opting for organic or unwaxed apples eliminates this concern entirely. Regardless of whether you peel them or not, it’s absolutely crucial to wash all apples thoroughly before use to remove any dirt, pesticides, or surface contaminants. A good rinse under running water, possibly with a fruit and vegetable brush, is always recommended.
Ultimately, the choice is yours. For maximum ease and nutritional benefit, leave the peels on (especially for unwaxed apples). If you prefer absolute purity or are using waxed apples, a quick peel won’t hurt the final flavor, just add a few minutes to your prep time.
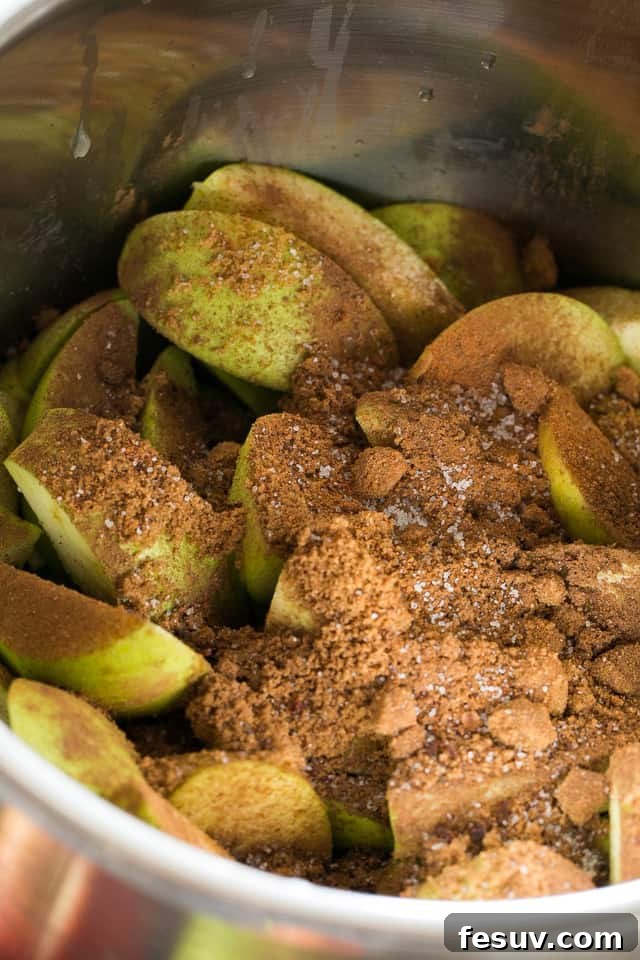
Essential Ingredients for Your Perfect Instant Pot Apple Butter
Crafting exceptional homemade apple butter requires a thoughtful selection of ingredients that harmonize to create that signature sweet, tangy, and spiced profile. Here’s a closer look at what you’ll need and why each component is crucial:
- Apples (5 pounds, cored and cut into wedges): The star of our show! While many apples work, sweet varieties are often preferred for apple butter as their natural sugars caramelize beautifully. My personal favorites include Granny Smith (for a touch of tartness to balance the sweetness), Pink Lady, Fuji, and Golden Delicious. Using a mix of sweet and tart apples can add depth and complexity to your final product. Ensure they are cored and cut into even wedges for consistent cooking. As discussed, the peel is optional, but leaving it on adds fiber and color.
- Lemon Juice (1 tablespoon, fresh): Don’t skip this! Fresh lemon juice is a vital ingredient that serves multiple purposes. Firstly, it brightens the flavor of the apples, preventing the apple butter from tasting overly flat or one-dimensional. Secondly, its acidity helps to balance the sweetness from the sugars and the inherent sweetness of the apples, creating a more well-rounded taste. Lastly, it acts as a natural preservative, helping to maintain the color and freshness of your apple butter.
- Brown Sugar (½ cup, packed): Brown sugar is key to achieving that signature caramelized flavor and rich, deep color in apple butter. Its molasses content contributes to a more complex sweetness than granulated sugar alone. When measuring brown sugar, always remember to pack it down firmly into the measuring cup for accurate results.
- Granulated Sugar (¼ cup): This provides additional sweetness and works in conjunction with the brown sugar to create the perfect balance. You have flexibility here; you may substitute raw sugar, coconut sugar, or other natural sweeteners for some or all of the granulated AND brown sugar in this recipe, adjusting to your preferred level of sweetness. Start with the recommended amount and adjust to taste after cooking, if desired.
- Apple Cider (¼ cup): This liquid is essential for creating the necessary steam and pressure for cooking in the Instant Pot, preventing scorching and ensuring the apples cook evenly. Beyond its functional role, apple cider (make sure it’s *not* apple cider vinegar) adds an extra layer of apple flavor, enhancing the overall fruitiness of the butter. If apple cider isn’t readily available, pure apple juice can be used as a suitable substitute.
- Warming Spices: Cinnamon (1 teaspoon), Allspice (½ teaspoon), and Nutmeg (½ teaspoon): This aromatic trio is what gives apple butter its cozy, comforting, and quintessentially autumnal character. Cinnamon is the dominant spice, providing warmth and sweetness. Allspice offers a blend of cinnamon, nutmeg, and cloves, adding complexity, while nutmeg contributes a subtle, earthy, and sweet note. For the freshest and most vibrant flavor, I recommend using freshly ground nutmeg if possible. You can also experiment with a pinch of ground cloves or ginger for additional spice variations.
- Vanilla (1 tablespoon, pure vanilla extract): Pure vanilla extract is the finishing touch that elevates the flavor profile of this apple butter. It adds a subtle floral and creamy note that beautifully complements the apples and spices, enhancing their warmth and sweetness. Always opt for pure vanilla extract over imitation vanilla for the best possible taste.
Gathering these ingredients ensures you’re well on your way to a truly exceptional batch of homemade Instant Pot Apple Butter!
Tips for Achieving the Best Instant Pot Apple Butter
While this Instant Pot Apple Butter recipe is incredibly straightforward, a few expert tips can help you achieve an even more delicious and perfect batch every time:
- Choose the Right Apples: As mentioned, a mix of sweet and slightly tart apples often yields the most balanced flavor. Sweet apples (Fuji, Gala, Golden Delicious) bring depth and caramelization, while tart apples (Granny Smith) add brightness and prevent the butter from being overly sweet. Don’t be afraid to experiment with different combinations!
- Don’t Skimp on Fresh Lemon Juice: The lemon juice is critical not only for flavor balance but also for brightness and as a natural preservative. Freshly squeezed is always best.
- Pack Brown Sugar Firmly: For accurate measurement and the best caramel flavor, ensure you firmly pack the brown sugar into your measuring cup.
- Stir Well Before Pressure Cooking: Make sure all the apples are coated with the sugars and spices before you seal the Instant Pot. This helps distribute flavors evenly and prevents any dry spots.
- Embrace the Natural Pressure Release: The 15-minute natural pressure release (NPR) is not just about safety; it’s a crucial part of the cooking process. It allows the pressure to drop slowly, preventing foamy overflow and continuing to tenderize the apples, resulting in a more uniform texture and better flavor integration.
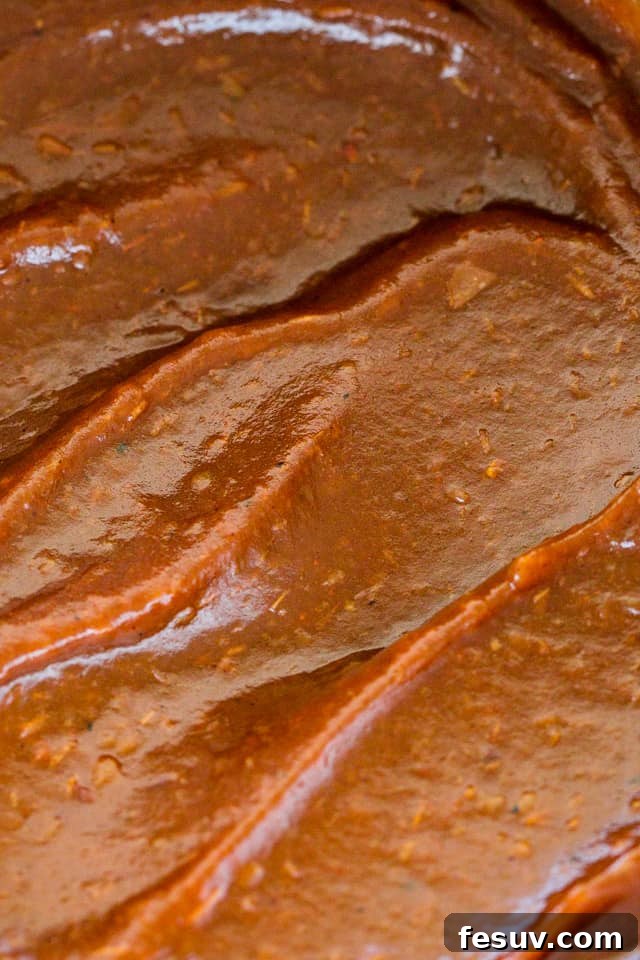
- Blend Until Perfectly Smooth: For true “butter” consistency, use an immersion blender right in the pot or transfer in batches to a regular blender/food processor. Ensure there are no lumps for that velvety mouthfeel.
- Monitor During the Sauté Stage: The final sautéing step is where the magic of caramelization happens. Keep an eye on your apple butter and stir frequently to prevent it from sticking to the bottom of the pot. This also ensures even thickening and darkening. The “LESS” setting on sauté mode is perfect for this gentle simmering.
- Taste and Adjust Sweetness/Spice: Once the apple butter has thickened, taste it! This is your chance to adjust the sweetness or add more spices if desired. Remember that flavors will intensify slightly as it cools.
- Consider Cooling in the Pot: Allowing the apple butter to cool completely in the Instant Pot continues the flavor development and allows it to thicken further. Patience here pays off!
- Sterilize Jars for Canning: If you plan to can your apple butter for long-term storage, always follow proper sterilization and canning procedures to ensure food safety. Refer to trusted canning guides.
By following these tips, your homemade Instant Pot Apple Butter will be a seasonal triumph, perfect for spreading, baking, or gifting!
Step-by-Step Guide: Crafting Your Instant Pot Apple Butter
Making apple butter in your Instant Pot is surprisingly simple, transforming a traditionally time-consuming process into an effortless culinary adventure. Follow these clear steps to achieve a perfectly spiced and caramelized spread:
- Prepare and Pressure Cook the Apples: Begin by placing your prepared apples (cored and cut into wedges, peels on or off, as per your preference) directly into the inner pot of your Instant Pot. Add the fresh lemon juice, both brown and granulated sugars, apple cider, and all the warming spices (cinnamon, allspice, and nutmeg), along with the pure vanilla extract. Stir everything gently to ensure the apples are well coated with the sugars and spices. Secure the lid on your Instant Pot, ensuring the sealing ring is properly in place, and turn the steam release valve to the “Sealing” position. Select the “Pressure Cook” (or “Manual”) setting and set the cooking time to HIGH pressure for 8 minutes.
- Natural Pressure Release and Initial Blend: Once the 8-minute high-pressure cooking cycle is complete, the Instant Pot will beep. Do not immediately release the pressure. Instead, allow the pressure to release naturally for 15 minutes. This natural release process is crucial as it helps the flavors meld and the apples to become even more tender. After 15 minutes, carefully move the steam release valve to the “Venting” position to release any remaining pressure. Once the floating valve drops, it’s safe to remove the lid. The apples will be incredibly soft and fragrant.
- Achieve Smoothness with Blending: With the lid removed, it’s time to transform the cooked apples into a smooth puree. The easiest method is to use an immersion blender directly in the Instant Pot. Blend until the mixture is completely smooth, working carefully to avoid splattering. If you don’t have an immersion blender, you can transfer the cooked apples in batches to a food processor or a high-powered blender. Be cautious when blending hot liquids; fill the blender no more than halfway, secure the lid, and blend in short bursts, using a kitchen towel over the lid for safety. Once pureed, return all the smooth apple mixture to the Instant Pot.
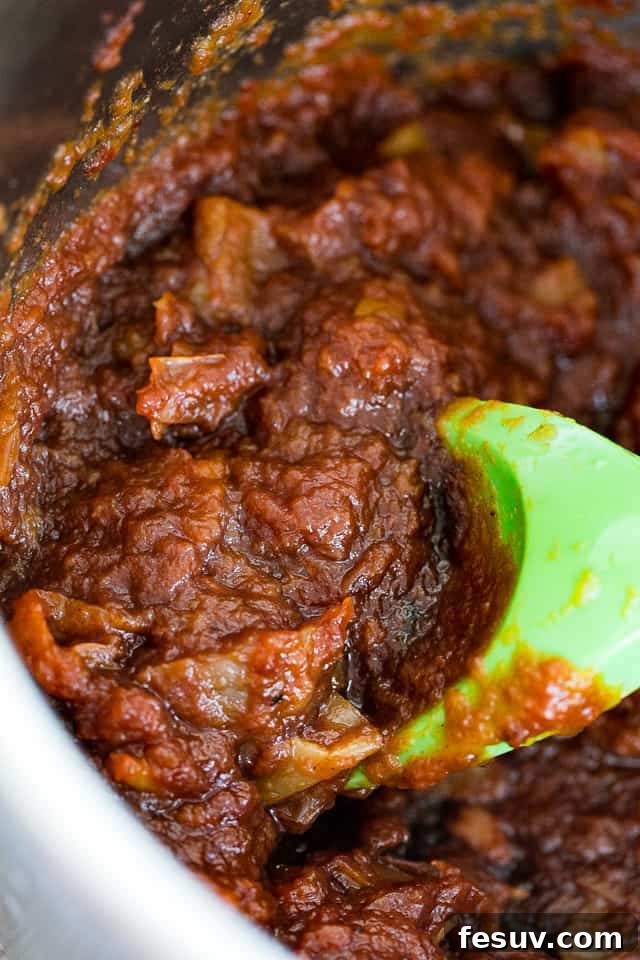
- Simmer to Perfection and Caramelize: Now, we’ll achieve that signature “butter” consistency and rich color. Turn your Instant Pot to the “Sauté” setting and press the “MINUS” button to adjust the heat level to “LESS.” Bring the apple puree to a gentle simmer, stirring frequently to prevent sticking to the bottom. Continue to cook for 12 to 15 minutes, or until the apple butter has thickened to a spreadable consistency and deepened in color to a beautiful dark golden brown. This simmering stage allows for the final caramelization, further concentrating the flavors and reducing excess moisture.
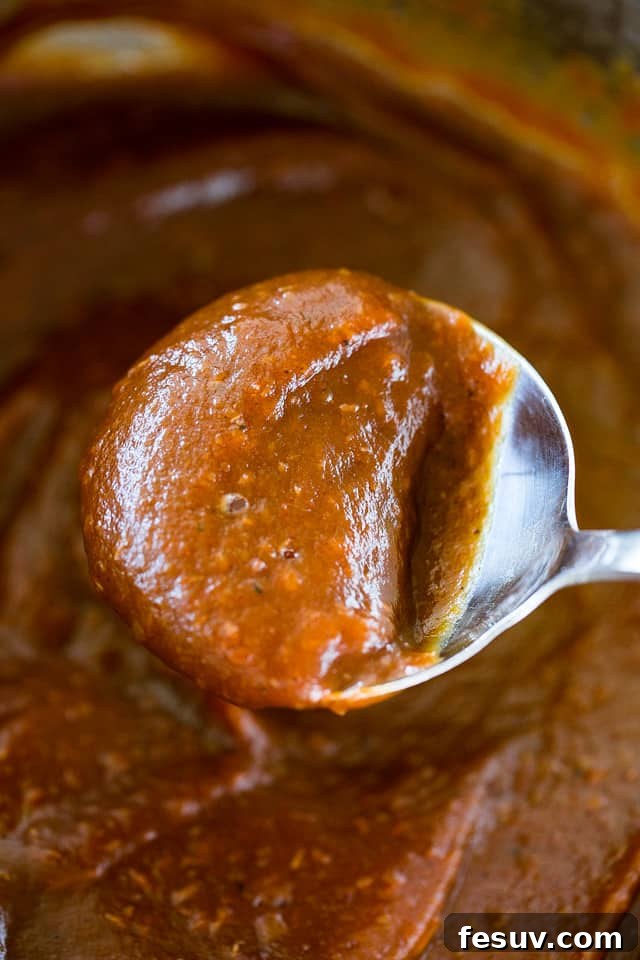
- Cool, Serve, and Store: Once your apple butter has reached its desired thickness and color, turn off the Instant Pot. Allow the apple butter to cool completely inside the pot. As it cools, it will thicken even more. Once cooled, it’s ready to be transferred to airtight containers, jars, or freezer bags for storage. Enjoy the fruits of your labor!
Creative Ways to Enjoy Your Homemade Instant Pot Apple Butter
Once you’ve made a batch of this luscious Instant Pot Apple Butter, you’ll find it to be an incredibly versatile ingredient, perfect for enhancing both sweet and savory dishes. Its rich, spiced, and caramelized flavor profile makes it much more than just a breakfast spread. Here are some delightful ways to incorporate apple butter into your culinary repertoire:
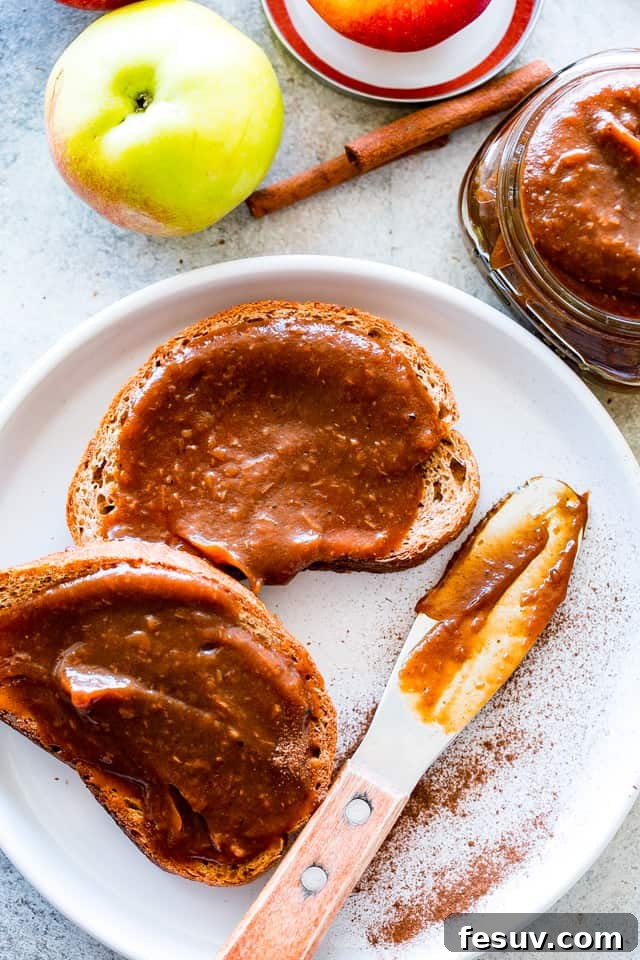
- Breakfast & Brunch Delights: This is arguably apple butter’s most classic application. Spread it generously on warm toast, fluffy biscuits, delicate scones, classic English muffins, or crisp bagels. For an extra special breakfast, try slathering it over fluffy pancakes, waffles, or French toast. It’s also fantastic stirred into oatmeal or yogurt for a comforting morning meal.
- Elevated Charcuterie & Cheese Boards: With its complex flavors and sweet, fruity mellowness, apple butter makes a sophisticated addition to any cheese board or charcuterie spread. Its natural sweetness and spice pair exceptionally well with a variety of cheeses, especially tangy goat cheese, sharp cheddar, or creamy brie. Serve it alongside crackers, crusty bread, cured meats like prosciutto, and a handful of nuts for an impressive appetizer.
- Baking & Dessert Enhancements: Apple butter can be a secret weapon in your baking!
- Moisture and Flavor: Use it as a substitute for some of the fat or sugar in recipes for muffins, quick breads, cakes, or cookies. It adds incredible moisture and a distinct autumnal flavor.
- Fillings and Toppings: Swirl it into cheesecakes, use it as a filling for tarts or hand pies, or spread it thinly between cake layers. It also makes a wonderful topping for ice cream or a warm apple crisp.
- Glazes: Whisk apple butter with a touch of powdered sugar and milk for a simple yet flavorful glaze for pastries or roasted chicken.
- Savory Culinary Creations: Don’t limit apple butter to just sweet applications! Its sweet and tangy notes make it a surprising complement to savory dishes:
- Sauces and Marinades: Substitute apple butter where you might normally use applesauce in barbecue sauces or marinades for pork, chicken, or even turkey. Its caramelization adds an extra layer of depth.
- Accompaniment to Meats: Serve a dollop alongside roasted pork loin, grilled chicken, or even duck. The sweetness cuts through the richness of the meat beautifully.
- Sandwich Spreads: Mix it with a little mustard for a unique sandwich spread, especially good with ham or turkey.
- Healthy Snacking: Enjoy it simply by the spoonful, or dollop it onto apple slices, pear slices, or crackers for a quick and wholesome snack.
From breakfast staples to gourmet appetizers and main courses, your homemade Instant Pot Apple Butter is sure to become a beloved ingredient in your kitchen!
Selecting the Perfect Apples for Your Apple Butter
The type of apple you choose can significantly influence the flavor, sweetness, and texture of your finished Instant Pot Apple Butter. While almost any apple will yield a decent result, selecting the right varieties will elevate your apple butter from good to absolutely exceptional. Generally, for baking and cooking, tart and firm apples are often recommended. However, for apple butter, many cooks prefer a sweeter, more mellow apple, or a combination of both, for a truly balanced and complex flavor.
Here’s a guide to help you choose:
- Sweet Apples (Ideal for Caramelization): These apples contain higher levels of natural sugars that caramelize beautifully during the cooking process, contributing to the rich, deep color and intense sweetness characteristic of apple butter.
- Fuji: Known for its crispness and honey-like sweetness, Fuji apples provide a wonderful base flavor.
- Gala: Sweet, mild, and aromatic, Gala apples are excellent for a mellow, naturally sweet apple butter.
- Golden Delicious: These apples soften well and have a lovely sweet flavor that lends itself perfectly to apple butter.
- Pink Lady (Cripps Pink): Offering a delightful balance of sweet and tart with a crisp texture, Pink Lady apples contribute a vibrant flavor.
- Honeycrisp: While often pricier, Honeycrisp apples are incredibly sweet and juicy, yielding a very flavorful apple butter.
- Tart Apples (For Balance and Brightness): Including some tart apples helps to cut through the richness and sweetness, adding a pleasant tang that prevents the apple butter from becoming cloyingly sweet.
- Granny Smith: The classic tart apple, Granny Smith is excellent for providing that essential tangy note and helps the flavors pop. It also holds its shape well initially before breaking down.
- Braeburn: These offer a good balance of sweet and tart, with a firm texture that breaks down nicely.
- Recommended Combination: For the most nuanced flavor, consider using a blend of apples. A popular choice is to combine about 70-80% sweet apples with 20-30% tart apples. For instance, a mix of Fuji and Granny Smith, or Golden Delicious and Braeburn, will give you a well-rounded apple butter with depth, sweetness, and a hint of zing.
No matter your choice, ensure your apples are fresh and firm. Experiment with different varieties to find your favorite combination for the ultimate homemade apple butter experience!
Storing Your Delicious Instant Pot Apple Butter for Lasting Enjoyment
One of the many advantages of making homemade apple butter is its excellent shelf life, allowing you to enjoy the flavors of autumn long after the season has passed. Proper storage is key to maintaining its freshness, flavor, and safety.
- Refrigeration: For immediate enjoyment and short-term storage, transfer your cooled apple butter into clean, airtight containers. Glass jars with tight-fitting lids are ideal, but any food-grade container will work. Stored in the refrigerator, homemade apple butter will remain fresh and delicious for up to 3 weeks. Always ensure the containers are thoroughly clean to prevent any contamination.
- Freezing for Extended Freshness: If you’ve made a large batch or want to enjoy your apple butter for several months, freezing is an excellent option. Spoon the cooled apple butter into freezer-safe containers, leaving about half an inch of headspace to allow for expansion. Alternatively, you can use heavy-duty freezer bags; simply lay them flat to freeze, which saves space. Well-sealed and properly stored, apple butter can be kept in the freezer for up to 6 months without significant loss of quality or flavor. Thaw overnight in the refrigerator before using.
- Canning for Long-Term Preservation: For those looking to preserve their apple butter for an even longer duration at room temperature, traditional canning is the way to go. Apple butter is a fantastic candidate for water bath canning due to its high acidity. If you would like to can apple butter, it works really well and ensures a stable pantry staple for up to a year or more. It’s crucial to follow tested and approved canning guidelines to ensure food safety. We highly recommend consulting reputable resources like Ball’s Canning Guides for step-by-step directions, precise processing times, and safety protocols tailored for fruit butters. Always sterilize your jars and lids properly and follow instructions meticulously.
With these storage methods, you can ensure that your delightful Instant Pot Apple Butter is always on hand, ready to brighten up your meals and snacks!
Frequently Asked Questions About Instant Pot Apple Butter
Got questions about making or using your delicious Instant Pot Apple Butter? Here are answers to some common inquiries:
- Can I use different sweeteners?
Absolutely! While this recipe uses a blend of brown and granulated sugar for ideal caramelization and flavor, you can experiment. You can substitute some or all of the sugar with maple syrup, honey, coconut sugar, or even a sugar substitute like erythritol for a lower-sugar option. Keep in mind that different sweeteners may slightly alter the flavor, color, and thickness of your apple butter.
- What if my apple butter isn’t thick enough?
Don’t worry! The final simmering on the “Sauté – LESS” setting is key for thickening. If it’s still too thin after the recommended time, simply continue to simmer, stirring frequently, until it reaches your desired spreadable consistency. Remember it will also thicken further as it cools.
- Can I make this recipe without an Instant Pot?
Yes, you can, but it will take considerably longer. For a stovetop version, you would simmer the apples with the other ingredients in a large pot for 1-2 hours until very soft, then blend, and finally simmer again for another 1-2 hours (or more) until thickened and caramelized. A slow cooker can also be used, typically cooking on low for 8-10 hours or high for 4-5 hours. The Instant Pot significantly speeds up the initial cooking and subsequent reduction.
- Can I add other spices?
Of course! This recipe provides a classic spice blend, but feel free to customize. A pinch of ground cloves, ginger, or even a tiny bit of cardamom can add wonderful depth. Pumpkin pie spice mix is also a great shortcut if you prefer. Start with small amounts and add more to taste.
- How long does homemade apple butter last?
In the refrigerator, it lasts up to 3 weeks in an airtight container. Frozen, it can last for up to 6 months. If properly water-bath canned according to tested guidelines, it can last for a year or more in a cool, dark pantry.
- Is apple butter healthy?
Compared to many high-fat spreads, apple butter can be a relatively healthier option. It’s fat-free and primarily made of fruit, though it does contain added sugars. Making it at home allows you to control the sugar content, making it a better choice than some store-bought versions that can be loaded with sweeteners. It also contains fiber and vitamins from the apples, especially if you leave the peels on.
We hope these FAQs help you on your apple butter making journey!
ENJOY!
Instant Pot Apple Butter
Ingredients
- 5 pounds apples,, cored, and cut into wedges (peel is optional)
- 1 tablespoon fresh lemon juice
- ½ cup brown sugar
- ¼ cup granulated sugar
- ¼ cup apple cider,, (NOT apple cider vinegar, but you can use pure apple juice if you don’t have apple cider)
- 1 teaspoon ground cinnamon
- ½ teaspoon ground allspice
- ½ teaspoon ground nutmeg
- 1 tablespoon pure vanilla extract
(Email form functionality removed for SEO-optimized HTML output. Please implement this with your preferred backend solution.)
Instructions
-
Place the apples in the Instant Pot and stir in the lemon juice.
-
To the apples, add sugars, apple cider, cinnamon, allspice, nutmeg, and vanilla; stir around until well combined.
-
Secure the lid. Set the valve to sealing. Set to Pressure Cook on HIGH for 8 minutes.
-
When cooking time is up, allow Natural Pressure Release for 15 minutes. Remove the lid.
-
Using an immersion blender, blend the apple mixture until smooth. You can also use a high-powered blender or a food processor to blend the apples, but do it in batches and return the blended apples back to the IP.
-
Turn the Instant Pot to Saute and press the MINUS button to set it to LESS.
-
Bring the mixture to a simmer and continue to cook for 12 to 15 minutes or until thickened to desired consistency.
-
Turn OFF the IP, but let the apple butter completely cool inside the IP.
-
Once cooled, spoon the apple butter into an airtight container and keep refrigerated for 3 weeks. You can also freeze it for up to 6 months.
-
If you want to preserve the Apple Butter in jars, use Ball’s Canning Guides for step-by-step directions.
Nutrition
Nutritional info is an estimate and provided as courtesy. Values may vary according to the ingredients and tools used. Please use your preferred nutritional calculator for more detailed info.
Did you make a recipe? Leave a rating