
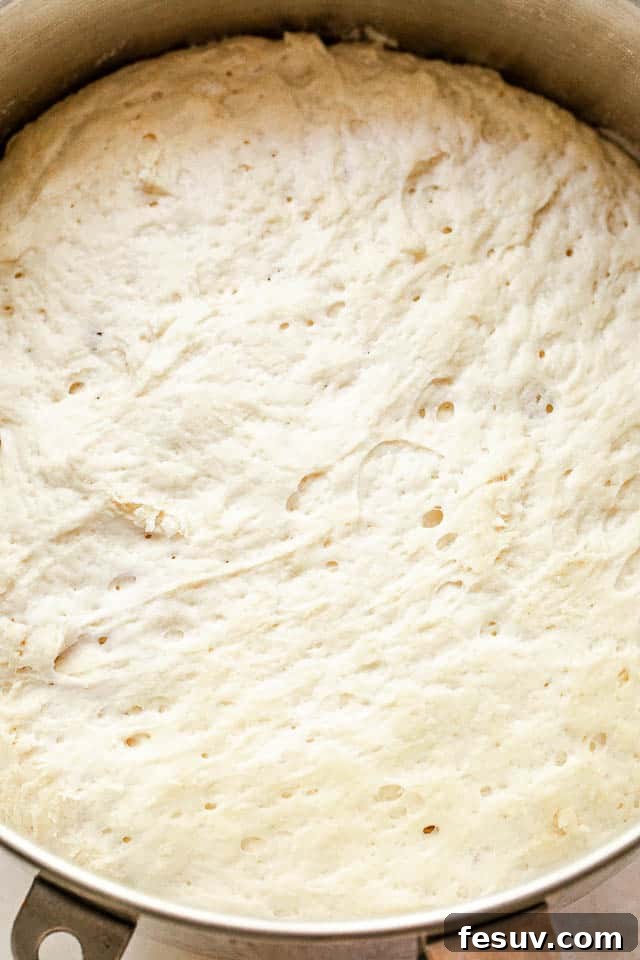
Imagine the aroma of freshly baked bread filling your kitchen – warm dinner rolls, a crusty rustic loaf, or perhaps a cheesy skillet bread, all without the endless kneading! This incredibly versatile No-Knead Dough recipe is your secret weapon, simplifying homemade bread to an art form anyone can master.
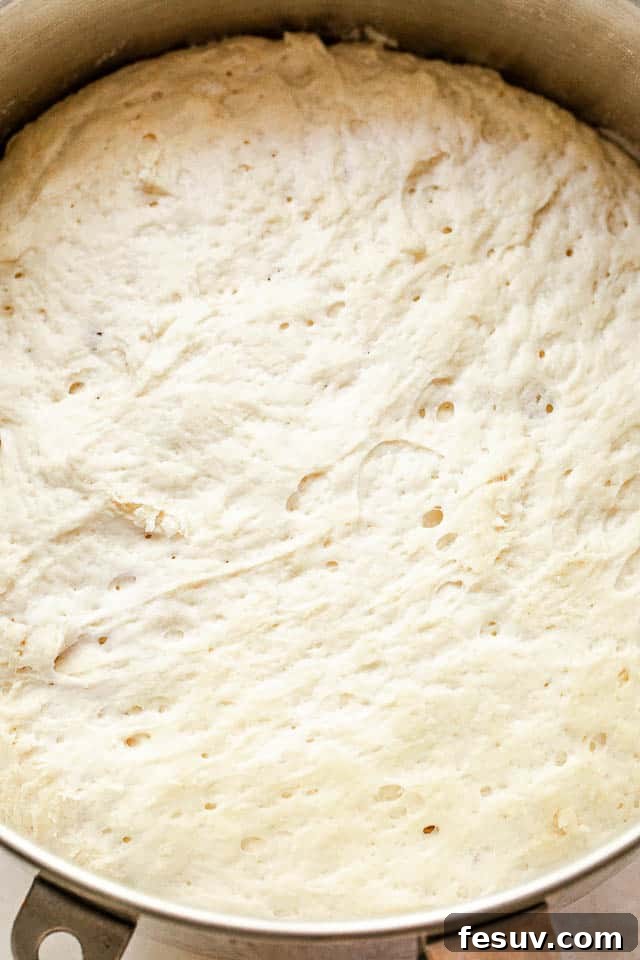
Unlock the Magic of Effortless Baking: Your Ultimate No-Knead Dough Guide
In our increasingly busy lives, finding moments to create wholesome, homemade food can feel like a luxurious impossibility. We’re constantly juggling schedules, responsibilities, and the myriad demands of modern living. That’s precisely why I’ve come to rely on a select few culinary “life hacks” that not only save precious time but also help manage our budgets and, crucially, our sanity. This no-knead dough recipe stands out as one of my absolute favorites, a true kitchen hero that consistently delivers exceptional results with minimal fuss.
What makes this recipe a game-changer? Its ingenious design allows you to mix a large batch of dough in mere minutes, then store it in your refrigerator for up to two weeks. This incredible flexibility means you can simply pull off a portion whenever inspiration strikes, whether you’re craving a fresh loaf for dinner, a batch of soft rolls, or a quick cheesy bread for an unexpected snack. The simplicity of preparation, coupled with the freedom to bake on demand, transforms homemade bread from an ambitious weekend project into an accessible everyday pleasure.
The concept of no-knead bread was popularized by baking pioneers Zoë François and Jeff Hertzberg, whose method revolutionized home baking. Their approach demystifies bread making, proving that you don’t need specialized equipment or advanced skills to produce artisanal quality bread. This basic no-knead dough recipe, adapted from their brilliant technique, promises deliciousness and ease, becoming a staple in your kitchen once you experience its magic.
The Simple Science Behind No-Knead Success
You might wonder how bread can possibly turn out perfectly without the traditional, often laborious, kneading process. The secret lies in a concept called “long fermentation” and “high hydration.” Unlike conventional bread making, where vigorous kneading develops gluten—the protein network that gives bread its structure and chewiness—this no-knead method relies on time and water.
By using a relatively wet dough (high hydration) and allowing it to ferment slowly over several hours, or even days in the refrigerator, the gluten strands naturally develop and align themselves. The yeast works its magic gradually, producing flavorful compounds and creating a complex, airy crumb that’s often superior to quickly kneaded loaves. This hands-off approach truly allows the ingredients to do the work, resulting in a rich flavor profile and a beautifully textured bread with minimal effort from the baker.
Essential Ingredients for Your Perfect No-Knead Dough
Creating this remarkable dough requires just four basic ingredients, each playing a crucial role in its success. Quality matters here, so let’s delve into what you’ll need and why:
- Water: The recipe calls for approximately 3 cups of lukewarm water, ideally around 105-115°F (40-46°C). This temperature is critical because it activates the yeast without killing it. Water also provides the necessary hydration for gluten development and contributes to the dough’s overall texture.
- Yeast: You’ll need 1 tablespoon of instant or active dry yeast. Both types work well in this recipe. Instant yeast can be added directly to the dry ingredients, while active dry yeast traditionally requires “proofing” in warm water first. However, with the long fermentation period of this no-knead recipe, both can often be combined directly with the water and salt, simplifying the process even further. Ensure your yeast is fresh and not expired for optimal rising power.
- Salt: I recommend using 1 tablespoon of kosher salt. Salt isn’t just for flavor; it also plays a vital role in controlling yeast activity, strengthening the gluten structure, and enhancing the bread’s crust and texture.
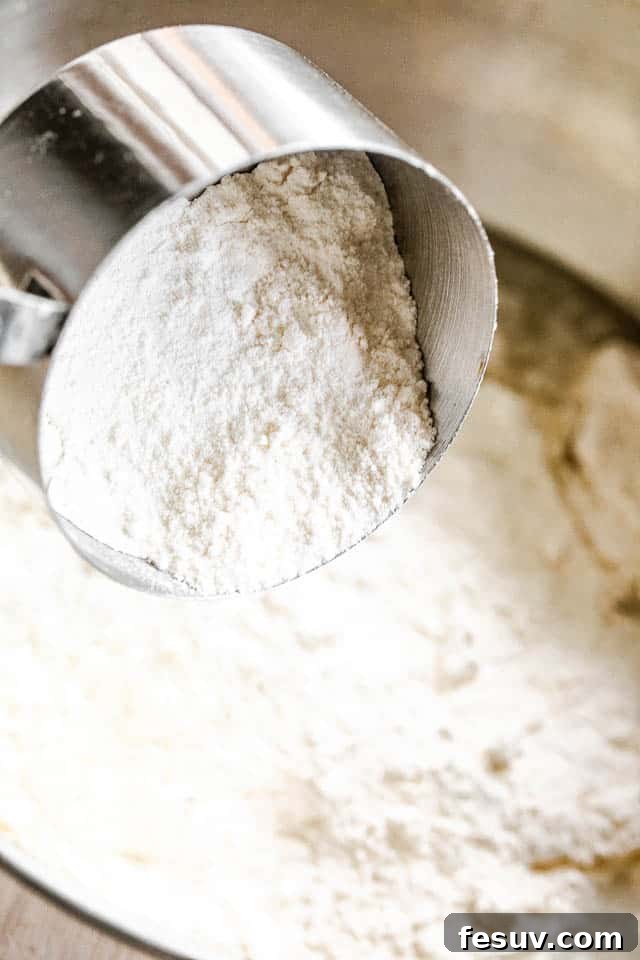
- Flour: Six and a half cups of all-purpose flour is the backbone of this recipe. While all-purpose flour is readily available and yields fantastic results, you can experiment with bread flour for a chewier texture or even incorporate a portion of whole wheat flour for added nutrition and a nutty flavor. Just remember that whole wheat flour absorbs more liquid, so minor adjustments might be needed.
How to Make Your No-Knead Dough: Step-by-Step
The beauty of this dough lies in its incredibly straightforward preparation. No fancy equipment, no complex techniques – just a few simple steps stand between you and homemade bread bliss.
- Prepare Your Mixing Bowl: Start with a large, spacious mixing bowl, ideally a 5-quart capacity or larger. This provides ample room for the dough to rise without overflowing.
- Dissolve the Yeast: In your mixing bowl, combine the lukewarm water, yeast, and salt. Stir gently with a spoon or spatula until the yeast granules are fully dissolved into the water. This ensures even distribution and proper activation.
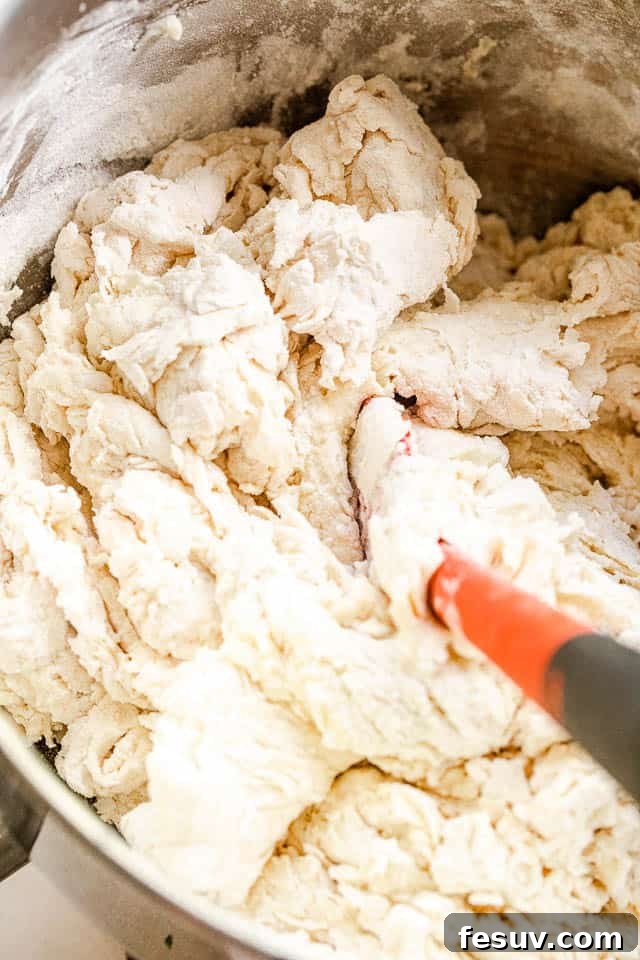
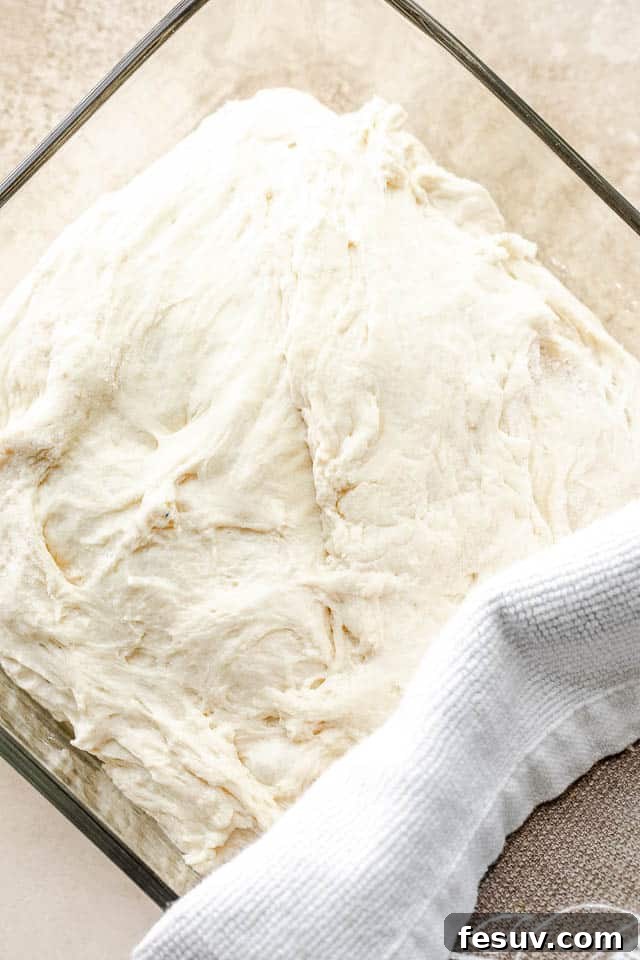
- Add the Flour: Next, add all 6 ½ cups of all-purpose flour to the yeast mixture. Using a sturdy wooden spoon or a Danish dough whisk, stir slowly until all the flour is just incorporated and no dry spots remain. The dough will be shaggy and quite wet – resist the urge to knead it or overmix. The less you handle it at this stage, the better.
- Initiate the First Rise (Bulk Fermentation): Loosely cover the bowl with a clean kitchen towel. Allow the dough to rest and rise at room temperature for a minimum of two hours. During this period, the yeast will begin its work, creating tiny air bubbles and developing the gluten structure. You’ll notice the dough becoming slightly bubbly and increasing in volume, though it might not dramatically double in size like traditional doughs.
- Store the Dough (or Bake Now!): If you’re not ready to bake immediately after the initial rise, transfer the risen dough to a lidded container. This could be a large plastic food storage container or even a clean bucket with a tight-fitting lid. Refrigerate the dough. It will keep beautifully for up to 14 days, improving in flavor as it ages.
Expert Tips for a Perfect No-Knead Bread Dough Every Time
While this recipe is incredibly forgiving, a few pointers can elevate your baking experience and ensure consistent success:
- Hands-OFF Approach is Key: Unlike traditional bread recipes that demand extensive kneading, this no-knead dough thrives on minimal handling. Do not overmix the dough beyond just incorporating the flour. The less you work it, the better the gluten will develop on its own during the long fermentation. This hands-off method is what makes it so simple and rewarding.
- Fresh Yeast is Non-Negotiable: The success of any yeasted dough hinges on active, viable yeast. Always double-check the expiration date on your yeast package. If you’re unsure, a quick proofing test (mixing a pinch of yeast with warm water and a tiny bit of sugar; it should foam within 5-10 minutes) can confirm its potency.
- Temperature Control for Water: Yeast is sensitive to temperature. Water that’s too hot will kill it, and water that’s too cold won’t activate it effectively. Aim for lukewarm water, ideally between 105-115°F (40-46°C). If possible, use a food thermometer to ensure accuracy.
- Don’t Panic About the Rise: If your dough doesn’t double in size dramatically during its initial two-hour rise, don’t worry! No-knead doughs often have a more subtle rise compared to their kneaded counterparts. As long as your yeast was fresh and the water temperature was correct, the dough is likely developing perfectly well internally. The real magic happens during the extended refrigeration and subsequent shaping.
- Embrace the Stickiness: This is a high-hydration dough, which means it will be quite sticky. This stickiness is essential for the airy, open crumb structure. Resist the urge to add more flour during the initial mixing or when handling chilled dough, unless specifically instructed for shaping. A light dusting of flour on your work surface is usually sufficient.
Storage Solutions and Preparation for Baking
One of the most remarkable features of this no-knead dough is its incredible storage capacity. It’s truly a make-ahead baker’s dream:
- Refrigerator Life: Once your dough has completed its initial rise, transfer it to a lidded container and store it in the refrigerator for up to 14 days. The cold temperature slows down the yeast activity, allowing for a longer, slower fermentation that actually enhances the dough’s flavor and texture over time. This means you can have fresh bread whenever you want it, without starting from scratch every time.
- Using Chilled Dough: When you’re ready to bake, simply take out the portion of dough you need from the refrigerated container. Allow this portion to stand at room temperature for at least 30 minutes (or up to an hour for larger pieces) before shaping and baking. This step is crucial. Bringing the dough to room temperature relaxes the gluten, making it easier to handle and shape, and ensures a better final rise and crust.
Endless Culinary Creativity: What Can You Make with this Versatile Dough?
The adaptability of this no-knead dough is truly its superpower. It forms the perfect base for an astonishing array of baked goods, allowing you to unleash your inner baker and experiment with different shapes and flavors. Here are just a few ideas to get you started:
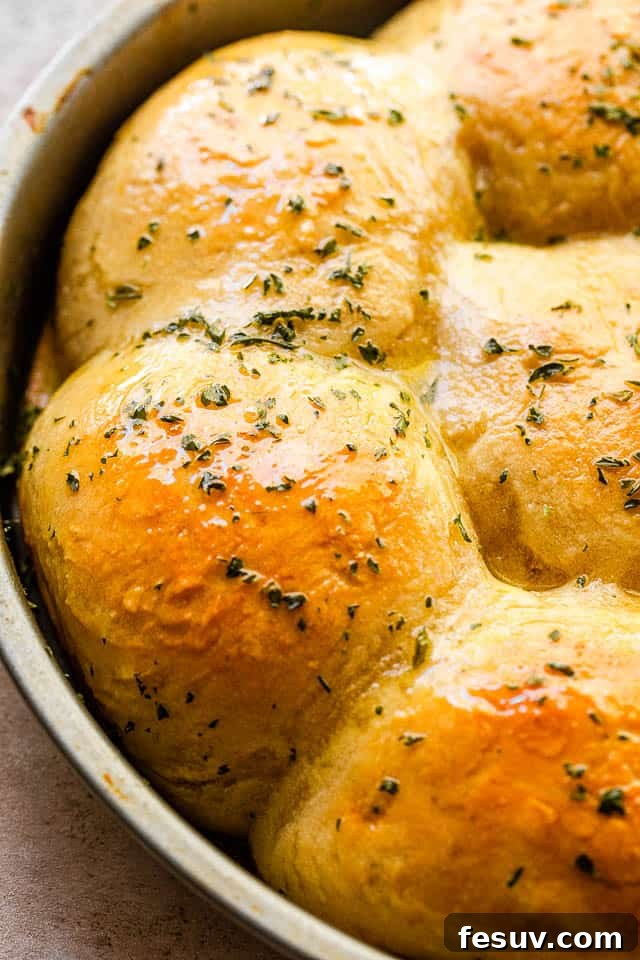
- Classic Dinner Rolls: Shape small portions into round rolls for a soft, fluffy accompaniment to any meal. Brush with melted butter and a sprinkle of flaky salt right after baking for an irresistible finish. Try adding garlic powder and dried herbs to the dough for an herbed version, or a sprinkle of cheddar cheese for savory rolls.
- Rustic Artisan Loaf: This dough is perfect for creating a beautiful, crusty loaf. Bake it in a Dutch oven to trap steam, which helps achieve that coveted crisp crust and tender interior. Score the top before baking for a professional touch.
- Cheesy Skillet Bread: Press the dough into a cast-iron skillet, top with your favorite cheeses (mozzarella, cheddar, parmesan), and maybe some garlic and herbs, then bake until golden and bubbly. It’s perfect for dipping in soups or serving alongside pasta dishes. You can find my specific No-Knead Skillet Cheese Bread recipe for inspiration!
- Quick Pizza Dough: Roll out a portion of the dough into a thin circle or rectangle, add your favorite sauce, cheese, and toppings, and bake at a high temperature for a speedy homemade pizza. The long fermentation gives the crust an incredible flavor.
- Flavorful Focaccia: Press the dough into a baking sheet, dimple it with your fingertips, drizzle generously with olive oil, and sprinkle with flaky sea salt and fresh rosemary. Add olives, cherry tomatoes, or caramelized onions for extra layers of flavor.
- Calzones or Strombolis: Fill rolled-out dough with ricotta, mozzarella, and your favorite pizza fillings, then fold, seal, and bake until golden brown. Serve with marinara sauce for dipping.
- Garlic Knots: Roll small strips of dough, tie them into knots, brush with garlic butter, and bake for a delightful appetizer or side dish.
- Sweet Rolls: Believe it or not, this base dough can also be adapted for sweeter treats. Roll it out, spread with butter, cinnamon, and sugar, then roll up, slice, and bake for simple cinnamon rolls (though you might want to add a touch more sugar to the dough itself for a truly sweet base).
No-Knead Dough: The Ultimate Versatile Recipe
Katerina | Easy Weeknight Recipes
10 minutes
2 hours
2 hours 10 minutes
24 servings (approx. 1.5 lbs of dough per loaf, adjust as needed)
Ingredients
- 3 cups lukewarm water, about 115°F (46°C)
- 1 tablespoon instant or active dry yeast
- 1 tablespoon kosher salt
- 6 ½ cups all-purpose flour
Instructions
-
In a large 5-quart mixing bowl or container, thoroughly mix together the lukewarm water, yeast, and 1 tablespoon of salt until the yeast is dissolved.
-
To the yeast mixture, add all of the flour. Stir with a sturdy wooden spoon or rubber spatula until all the flour is incorporated and no dry streaks remain. The dough will be shaggy and quite sticky – do not overmix.
-
Loosely cover the bowl with a clean kitchen towel and let the dough rise at room temperature for 2 hours. The dough should become noticeably bubbly and increase slightly in volume.
-
If you are not using the dough immediately, transfer it to an airtight container with a lid.
-
Cover and refrigerate the dough for up to 14 days. The flavor will deepen with longer refrigeration.
-
When ready to use, remove the desired portion of dough from the container. Allow the dough to stand at room temperature for 30 minutes (or up to 1 hour for larger pieces) before shaping and baking according to your chosen recipe (e.g., for dinner rolls, a loaf of bread, skillet bread, etc.).
Nutrition (per serving, estimated)
Calories: 124kcal
|
Carbohydrates: 26g
|
Protein: 4g
|
Fat: 1g
|
Saturated Fat: 1g
|
Sodium: 291mg
|
Potassium: 38mg
|
Fiber: 1g
|
Sugar: 1g
|
Calcium: 5mg
|
Iron: 2mg
Nutritional information is an estimate and provided as a courtesy. Values may vary according to specific ingredients, brands, and tools used. Please consult your preferred nutritional calculator for more detailed and precise information.
With this incredible no-knead dough in your repertoire, the joy of fresh, homemade bread is always within reach. It’s a simple, versatile, and rewarding recipe that truly empowers you to bake delicious creations with minimal effort. So go ahead, mix up a batch, and let the aroma of baking fill your home. ENJOY the delicious results!