
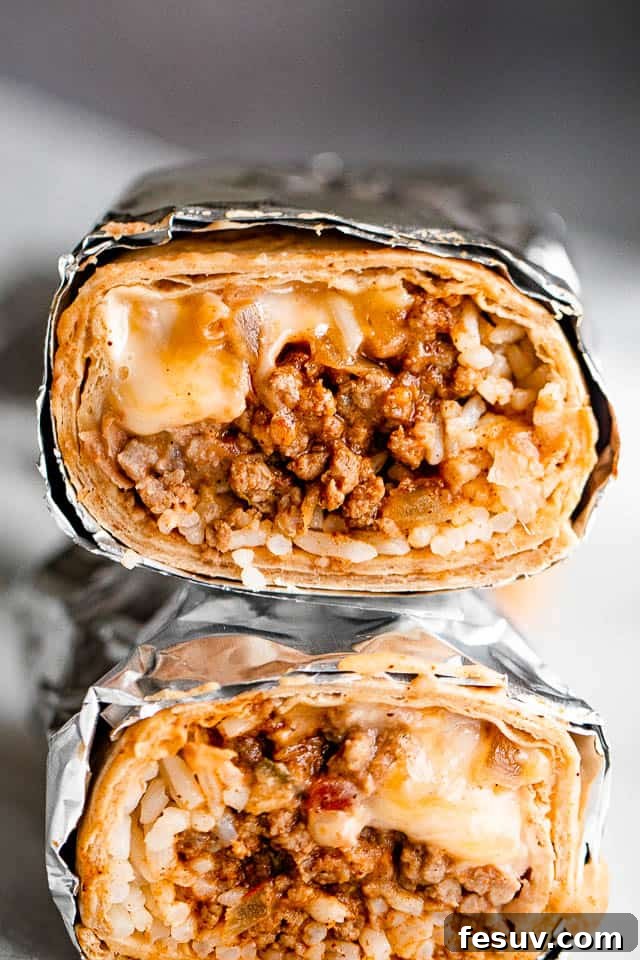
Delicious & Easy Beef and Bean Freezer Burritos: Your Ultimate Make-Ahead Meal Solution
Say goodbye to last-minute dinner stress with these incredibly flavorful **Beef and Bean Freezer Burritos**! Packed with savory ground beef, hearty pinto beans, vibrant salsa, and melty cheddar cheese, these burritos are designed for convenience without compromising on taste. An easy make-ahead dinner idea that the entire family will absolutely love, they’re perfect for busy weeknights, quick lunches, or even satisfying after-school snacks. Prepare a batch, freeze them, and enjoy delicious, homemade burritos whenever hunger strikes!
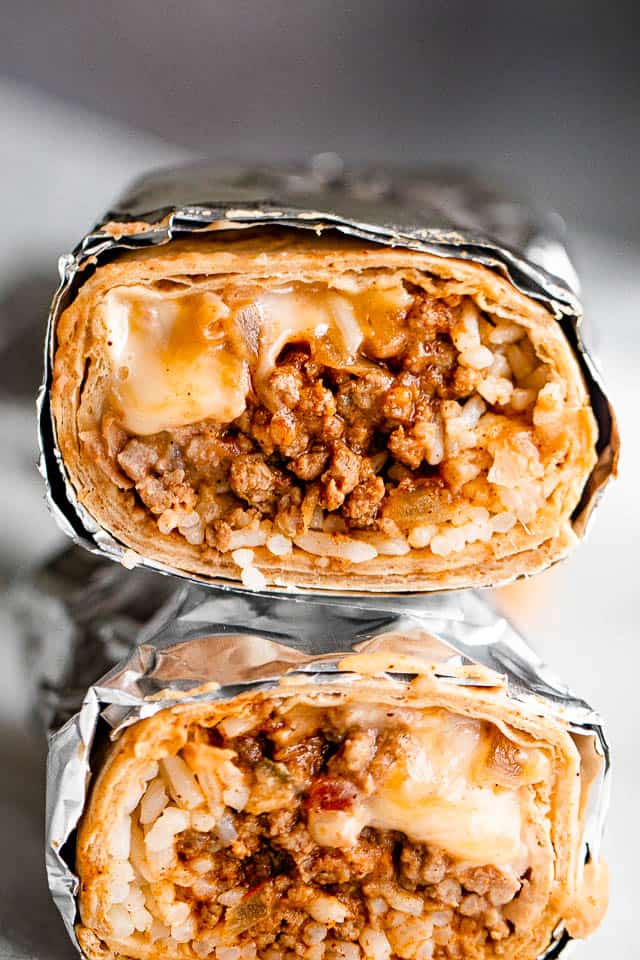
The Secret to Stress-Free Dinners: An Easy Make-Ahead Burrito Recipe
In today’s fast-paced world, having a stash of delicious, ready-to-eat meals in your freezer is a game-changer. These homemade freezer burritos are a true meal prep treasure, offering unparalleled convenience and flavor. With just a little bit of planning and a short cooking session, you can stock your freezer with wholesome, satisfying meals that are ready in minutes. Imagine coming home after a long day and knowing that a tasty, warm burrito is just a microwave or oven away!
Beyond being a lifesaver for quick weeknight dinners, these burritos are also fantastic for packing lunches. For older kids and teenagers, they’re an ideal grab-and-go option for afternoon snacks or a quick lunch between activities. The beauty of these burritos lies in their versatility and the peace of mind they bring, knowing you always have a healthy, homemade option at hand.
Essential Ingredients for Your Perfect Freezer Burritos
Crafting the perfect beef and bean burrito starts with fresh, quality ingredients. Here’s what you’ll need, along with some helpful notes on substitutions and tips for selection:
- Olive Oil: You’ll need 1 tablespoon of light olive oil for sautéeing. Extra virgin olive oil can also be used, but a lighter oil is often preferred for high-heat cooking.
- Ground Beef: We recommend lean ground beef, such as round or sirloin, for a less greasy filling. However, fattier options like ground chuck or standard market blends also work wonderfully, just be sure to drain any excess fat after cooking.
- Grated or Finely Diced Onion: ¼ cup of grated yellow onion adds a subtle sweetness and depth of flavor. White or red onions can be substituted if you prefer a sharper or milder taste. Finely dicing works just as well if grating isn’t your preference.
- Garlic: Freshly minced garlic is key for aromatic depth. Roughly 3 cloves should be enough, but feel free to adjust to your taste.
- Salsa: This recipe uses one cup of your favorite tomato salsa. Whether you prefer mild, medium, or spicy, chunky or smooth, choose a salsa that complements your palate. It adds moisture, flavor, and a touch of tang.
- Taco Seasoning: Homemade or commercial seasoning blends are both excellent choices. If making your own, a blend of chili powder, cumin, paprika, oregano, garlic powder, and onion powder works beautifully. A standard 1-ounce store-bought pouch is typically enough for this recipe.
- Pinto Beans: You’ll need 2 cans (15 ounces each) of pinto beans, thoroughly rinsed and drained. Rinsing helps remove excess sodium and improves texture. If you prefer, you can also substitute cooked dried beans for a more wholesome, from-scratch approach.
- Beef Broth: We use ½ cup of low-sodium beef broth or water to help blend the beans into a smooth, creamy consistency. Homemade broth is always a fantastic option, and chicken or vegetable broth can be used as alternatives.
- Shredded Cheddar Cheese: Two cups of shredded cheddar cheese will add a rich, gooey texture and savory flavor to your burritos. Don’t hesitate to substitute other shredded cheeses like Monterey Jack, a Mexican blend, or even a spicy pepper jack for an extra kick.
- Flour Tortillas: Large (10-inch) flour tortillas are ideal for wrapping a generous amount of filling without tearing. Ensure they are fresh and pliable for easy folding.
- Cooked Rice: About 2 cups of cooked white or brown rice is an optional but highly recommended addition. It helps absorb moisture, adds body to the filling, and makes the burritos even more satisfying.
Step-by-Step Guide: How to Make Your Own Freezer Burritos
Making these delicious beef and bean burritos is surprisingly fast and easy! The process primarily involves cooking up the savory filling, pureeing the beans for a creamy texture, and then expertly folding them into perfect parcels.
Preparing the Flavorful Burrito Filling
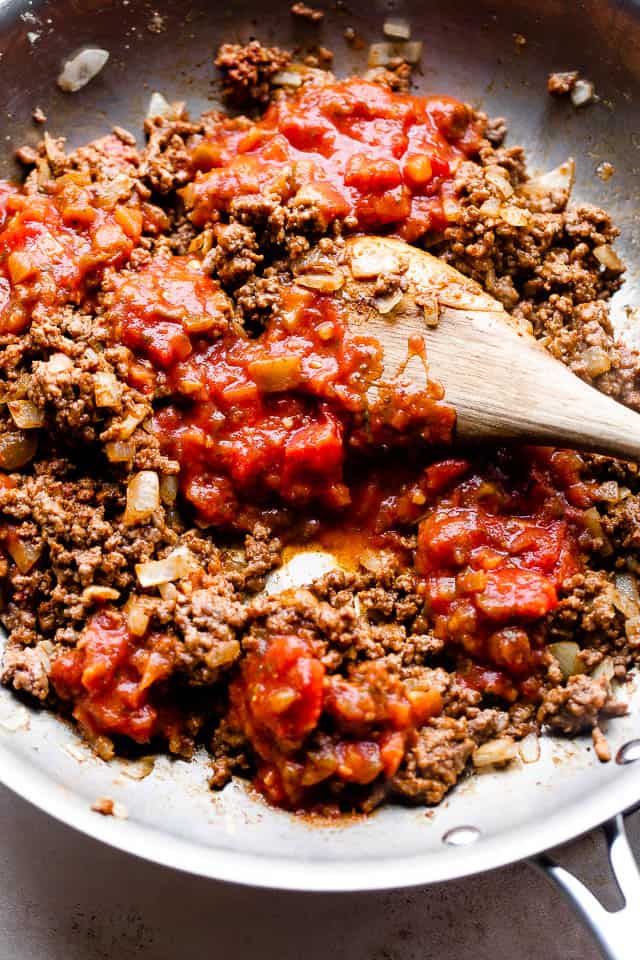
- Sauté the Aromatics and Brown the Beef: Heat 1 tablespoon of olive oil in a large skillet over medium heat. Add the grated or finely diced onions and cook for about 2 minutes, until they soften and become translucent. Stir in the minced garlic and cook for an additional 20 seconds until fragrant, being careful not to burn it. Next, add the ground beef to the skillet. Cook, breaking up the beef with a wooden spoon, until it is fully browned and no pink remains, typically around 8 minutes. Drain any excess fat for a lighter filling.
- Infuse with Salsa and Seasoning: Once the beef is browned, stir in the taco seasoning, ensuring it’s evenly distributed throughout the meat. Then, pour in the tomato salsa. Bring the mixture to a boil, then reduce the heat to a gentle simmer. Continue to cook for 2 minutes, allowing the flavors to meld and the mixture to thicken slightly. Remove the skillet from the heat and set the filling aside to cool slightly.
- Create Creamy Pinto Beans: In a blender or food processor, combine the rinsed and drained pinto beans with ½ cup of water or low-sodium beef broth. Process until the mixture is completely smooth and creamy. This bean paste adds a wonderful texture and helps bind the burrito filling.
- Combine the Filling Ingredients: Add the pureed bean mixture to the cooked beef mixture in the skillet. Stir well until all ingredients are thoroughly combined. Next, stir in the 2 cups of shredded cheddar cheese. Mixing it all together at this stage speeds up the assembly process, but you can also layer the components if you prefer (see tips below).
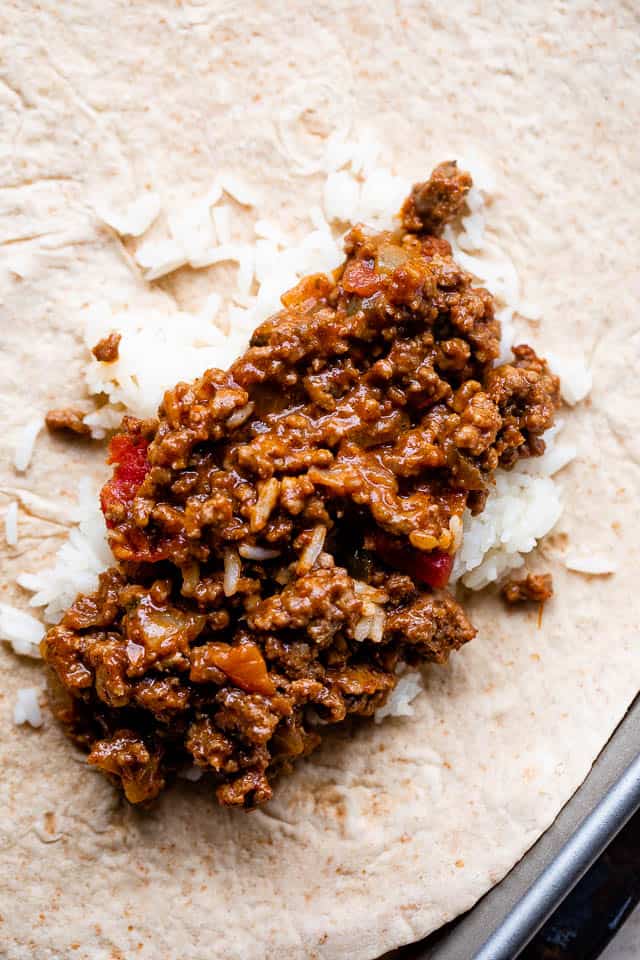
- Assemble Your Burritos: Lay out a 10-inch flour tortilla on a clean surface. If using, add about two tablespoons of cooked rice down the center of each tortilla. Then, add approximately ½ cup of the beef and bean mixture over the rice. Be mindful not to overfill, as this makes wrapping difficult. To seal, fold the short ends of the tortilla inwards over the filling, then fold one of the long sides over the filling and roll tightly to form a secure burrito. Repeat with the remaining tortillas and filling.
Freezing Your Homemade Burritos for Later Enjoyment
Properly freezing your burritos is essential to prevent freezer burn and maintain their delicious flavor and texture:
- Wrap Individually: For best results, wrap each assembled burrito tightly in wax paper first. This layer helps prevent sticking and makes it easier to unwrap later.
- Double Wrap for Protection: After the wax paper, wrap each burrito securely in aluminum foil. This double layer of protection is crucial for shielding the burritos from air, which causes freezer burn.
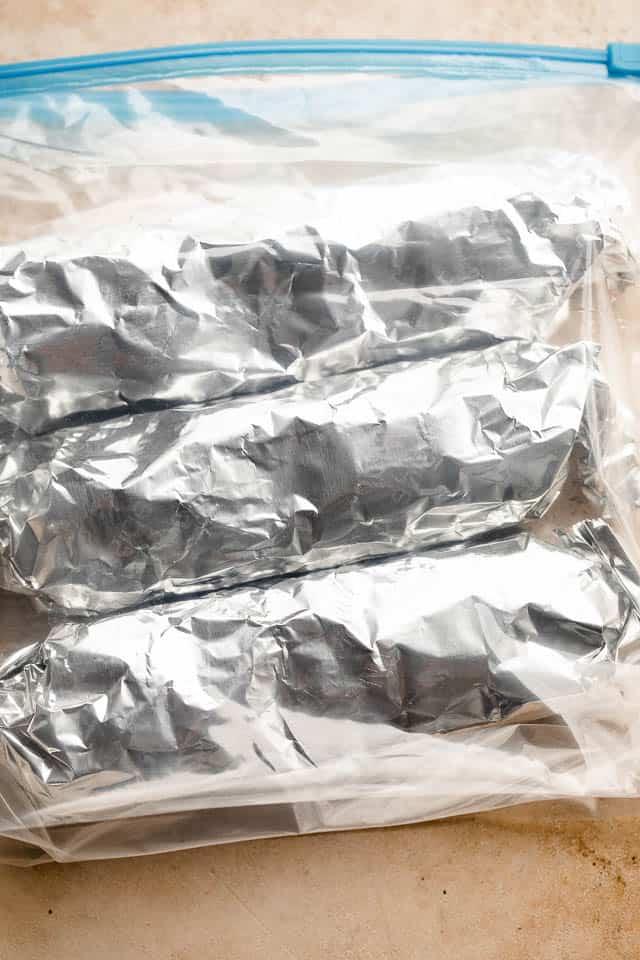
- Store in Freezer Bags: Once individually wrapped, stack the burritos inside a gallon-sized freezer-safe ziploc bag or an airtight container. Arrange them flat in a single layer if possible, then stack to save space.
- Label and Date: Always label the bag or container with the date they were made. This helps you keep track of their freshness.
- Freeze: Place the labeled bag or container in the freezer. Homemade frozen burritos will keep beautifully for up to 2 months, though they are often still good for longer if properly wrapped.
Expert Tips for Crafting the Best Freezer Burritos
Follow these simple tips to ensure your homemade freezer burritos are nothing short of perfect every time:
- Layering vs. Combining: While the recipe suggests combining the beef, beans, and cheese for simplicity, you don’t have to! For a different texture profile, you can layer the ingredients. Start with rice (if using), then the beef mixture, followed by the creamy beans, and finally, a sprinkle of cheese before rolling. Experiment to see which method your family prefers!
- Prevent Overfilling: This is perhaps the most crucial tip. When it comes to filling tortillas, remember that less is often more! Too much filling will make the burritos incredibly difficult to wrap tightly, leading to tears and messy leaks. Aim for about ½ cup of filling per 10-inch tortilla.
- Cool the Filling Completely: Never try to fill tortillas with hot or even warm filling. The steam will make your tortillas soggy and difficult to handle, and it will also create condensation once the burritos are wrapped and frozen, leading to ice crystals and potential freezer burn. Allow your filling to cool down to room temperature before assembly. You can even refrigerate it for a bit to speed up the cooling process.
- Warm Your Tortillas: If your tortillas seem stiff or prone to tearing, gently warm them in the microwave for 15-20 seconds or briefly on a dry skillet. This makes them much more pliable and easier to roll without cracking.
- Seal Tightly: After wrapping in wax paper and foil, ensure there are no air gaps. Press out as much air as possible from the foil wrap before sealing. This is your best defense against dreaded freezer burn.
Tasty Variation Ideas to Customize Your Burritos
The beauty of homemade freezer burritos is how easily you can customize them to suit different tastes and dietary preferences. Get creative with these delicious variations:
- Chicken Verde: For a lighter, zestier option, substitute the ground beef with ground chicken or turkey. Swap the pinto beans for canned white beans (like cannellini or great northern) and use a vibrant salsa verde instead of tomato salsa. This combination offers a fresh, tangy flavor profile.
- Vegetarian Delight: Create a hearty meat-free version by using canned black beans, cooked brown rice, corn, bell peppers, and your favorite tomato salsa. Add extra veggies like sautéed zucchini or spinach. For added protein, consider incorporating crumbled tofu or a plant-based ground meat alternative.
- Breakfast Burritos: Start your day deliciously! Substitute scrambled eggs and crumbled cooked sausage or bacon for the beef mixture. Add some diced potatoes, sautéed peppers, and onions, then fill with your favorite cheese. These are fantastic for a quick breakfast on busy mornings.
- Spicy Chorizo & Potato: For those who love a kick, replace ground beef with spicy ground chorizo. Add cooked, diced potatoes and a touch of smoked paprika for a robust, satisfying filling.
Delicious Serving Suggestions for Your Burritos
While freezer burritos are fantastic on their own, pairing them with fresh sides and dips can elevate your meal into a full Tex-Mex feast:
- Dips and Toppings Extravaganza: Offer a selection of yummy dip options! Classic choices include creamy sour cream, rich guacamole, or a vibrant, chunky Avocado Salsa. Don’t forget a warm, gooey queso for dipping! A sprinkle of fresh cilantro, diced tomatoes, or sliced jalapeños can add a lovely fresh finish.
- Refreshing Fruit Salad: Counterbalance the savory burritos with a light and refreshing fruit side. Our Easy Fruit Salad with Honey Lime Dressing is a perfect complement, offering a burst of sweet and tangy flavors that cleanse the palate.
- Cool & Creamy Frozen Yogurt: For a delightful dessert that contrasts beautifully with the Tex-Mex flavors, try this sumptuous Mango Strawberry Frozen Yogurt. It’s incredibly easy to make with just a blender and your freezer – no ice cream maker needed! The fresh, creamy, and slightly tart yogurt provides a wonderful cool finish to your meal.
- Crisp Green Salad: A simple side salad with a light vinaigrette is always a good choice to add some freshness and greens to your meal.
How Long Can You Freeze Homemade Burritos?
When properly prepared and stored, homemade burritos generally maintain their best quality for approximately 2 months in the freezer. The key to maximizing their freezer life and preventing freezer burn is proper wrapping – individual wax paper followed by a tight foil wrap, and then storing in an airtight freezer bag or container. Always remember to check your ingredients’ freezer life and label your frozen items with the date of preparation for safety and freshness.
Effortless Reheating: How to Bring Your Freezer Burritos Back to Life
Reheating your frozen burritos is quick and easy, making them the ultimate convenience food. Always ensure the internal temperature reaches 165˚F for food safety.
- Microwave Method (Fastest): Unwrap one burrito from both the foil and wax paper. Place the unwrapped burrito on a microwave-safe plate. Microwave on HIGH for 2 to 2½ minutes, or until the internal temperature of the burrito registers at 165˚F. If reheating multiple burritos, increase the time accordingly and rotate them during cooking.
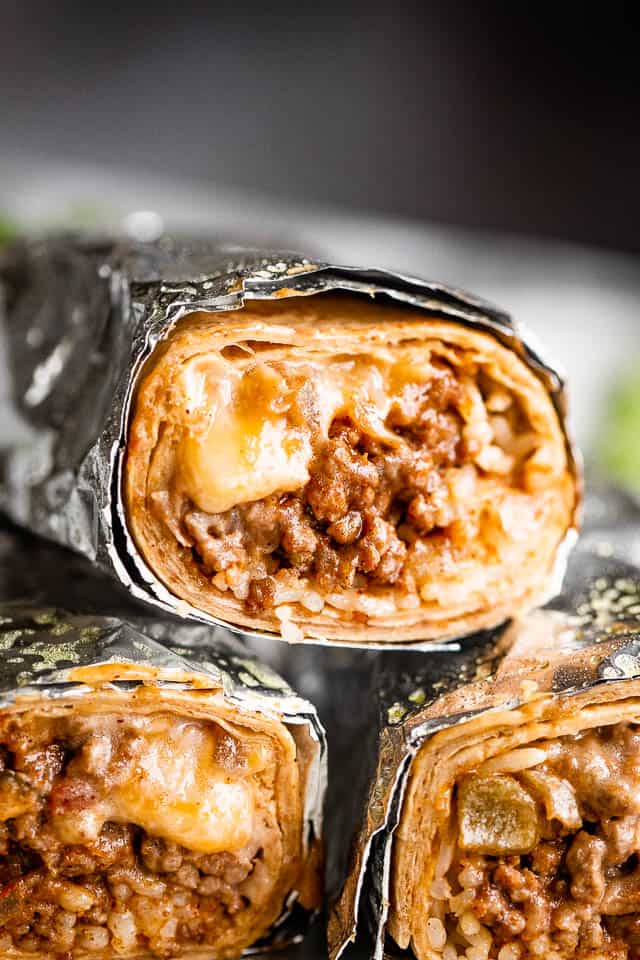
- Oven Method (For a Crispier Tortilla): Preheat your oven to 350˚F (175˚C). Place the frozen burritos, still wrapped in their foil (remove wax paper if desired), on a baking sheet. Bake for 20 to 30 minutes, or until heated through and the internal temperature reaches 165˚F. The foil helps steam the burrito, keeping it moist, while the oven heat warms it evenly and gives the tortilla a slight crisp.
- Air Fryer Method (Super Crispy): Preheat your air fryer to 350˚F (175˚C). Remove all wrapping from the frozen burrito. Place the burrito directly in the air fryer basket. Cook for 15-20 minutes, flipping halfway through, until thoroughly heated and golden brown, checking for an internal temperature of 165˚F. This method yields a wonderfully crispy exterior!
Freezer Burritos
Katerina | Easy Weeknight Recipes
10 minutes
20 minutes
30 minutes
10 burritos
Ingredients
- 1 tablespoon olive oil
- ¼ cup grated yellow onion or finely diced onion
- 3 cloves garlic, finely minced
- 1 pound ground beef
- 2 tablespoons taco seasoning (homemade or 1-ounce store-bought pouch)
- 1 cup tomato salsa
- 2 cans (15-ounces each) pinto beans, rinsed and drained
- ½ cup water OR low sodium beef broth
- 2 cups shredded cheddar cheese
- 10 (10-inch) flour tortillas
- cookedwhite or brown rice, optional
Instructions
- Heat olive oil in a large skillet set over medium heat.
- Add onions and cook for 2 minutes; stir in garlic and cook for 20 seconds.
- Stir in the ground beef; cook until meat is browned, about 8 minutes, mixing and breaking up the beef with a wooden spoon.
- Stir in the taco seasoning; then stir in the tomato salsa.
- Reduce heat to a simmer and continue to cook for 2 minutes, or until mixture is heated through and a bit thickened.
- Remove from heat and set aside to cool completely.
- Combine pinto beans and water (or beef broth) in a blender or a food processor; process for about a minute, or until mixture is smooth.
- Add the bean mixture to the beef mixture and stir until combined.
- Stir in the cheese.
- Add two tablespoons of cooked rice, if using, to the center of each tortilla.
- Add 1/2 cup of the beef mixture over the rice.
- Fold the ends and sides over the filling and roll up tightly.
- Wrap each burrito in wax paper; then wrap securely in foil.
- Place burritos inside a gallon-sized ziploc freezer bag; label the bag with the date you made them.
- Freeze burritos for up to 2 months.
Notes
- You don’t have to mix the beans and beef together. You can combine the cooked beef mixture with the cheese, add it down the center of the tortilla, then spread some of the bean mixture over the beef, and roll up the tortillas.
- When ready to serve frozen burritos; unwrap and place a burrito on a microwave-safe plate and microwave on HIGH for 2 to 2½ minutes, or until internal temperature of the burrito registers at 165˚F.
- You can also heat them up in the oven. Preheat oven to 350˚F (175˚C). Place frozen burritos on a baking sheet – do not remove the foil – and bake for 20 to 30 minutes, or until heated through to 165˚F.
- For a crispy exterior, reheat in an air fryer at 350˚F (175˚C) for 15-20 minutes, flipping halfway.
Nutrition (Estimate per burrito)
Carbohydrates: 16g |
Protein: 18g |
Fat: 19g |
Saturated Fat: 9g |
Cholesterol: 56mg |
Sodium: 652mg |
Potassium: 487mg |
Fiber: 5g |
Sugar: 2g |
Vitamin A: 398IU |
Vitamin C: 2mg |
Calcium: 222mg |
Iron: 2mg
Nutritional info is an estimate and provided as courtesy. Values may vary according to the ingredients and tools used. Please use your preferred nutritional calculator for more detailed info.
Why Homemade Freezer Burritos are a Game Changer
In a world where convenience often comes at the cost of quality, homemade freezer burritos offer the best of both worlds. They are not only incredibly easy to prepare in advance but also allow you full control over the ingredients, ensuring a healthier and more flavorful meal for your family. Skip the preservatives and high sodium found in store-bought options, and instead, enjoy the fresh, hearty goodness of burritos made with love in your own kitchen. Whether you’re a busy parent, a student, or simply someone who appreciates having delicious food ready when you are, these beef and bean freezer burritos are an invaluable addition to your meal rotation.
So, clear some space in your freezer, gather your ingredients, and get ready to transform your mealtime routine. These burritos are more than just a meal; they’re a smart, tasty solution to the age-old question of “What’s for dinner?” Enjoy the ease, the flavor, and the satisfaction of always having a delicious, homemade option within reach!