
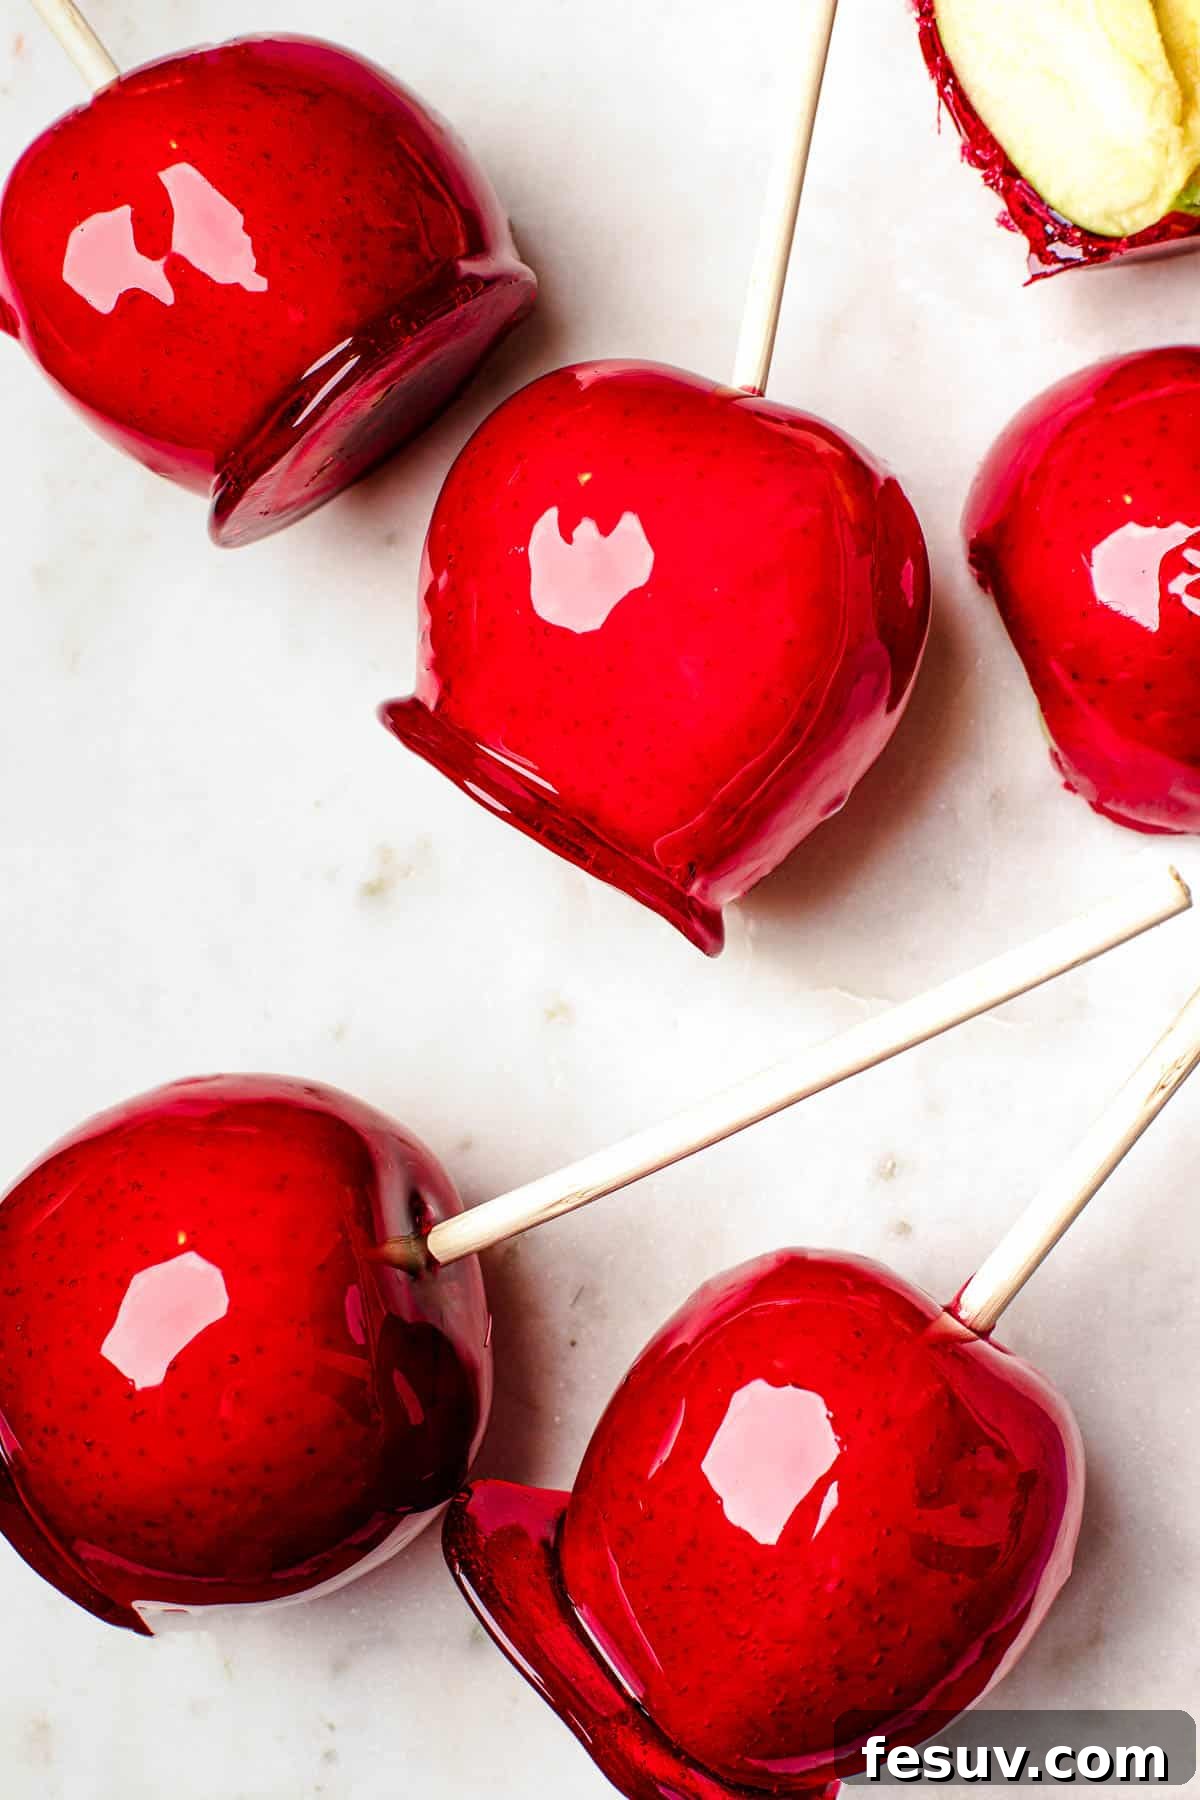
Homemade Candy Apples: A Timeless Treat for Every Season
Dive into the enchanting world of homemade candy apples, a quintessential classic that brings joy with its vibrant color and satisfying crunch. These ruby-red delights, featuring crisp, tart Granny Smith apples enveloped in a thin, gleaming layer of homemade sugar candy, are not just a simple treat—they’re an experience. Perfect for autumn festivals, festive holiday gatherings, or simply a fun family night, candy apples offer a delightful blend of sweet and tangy flavors. Forget the often-disappointing store-bought versions; crafting these old-fashioned treats at home allows for ultimate freshness, control over ingredients, and an unforgettable taste that will transport you back to childhood carnivals and local fairs.
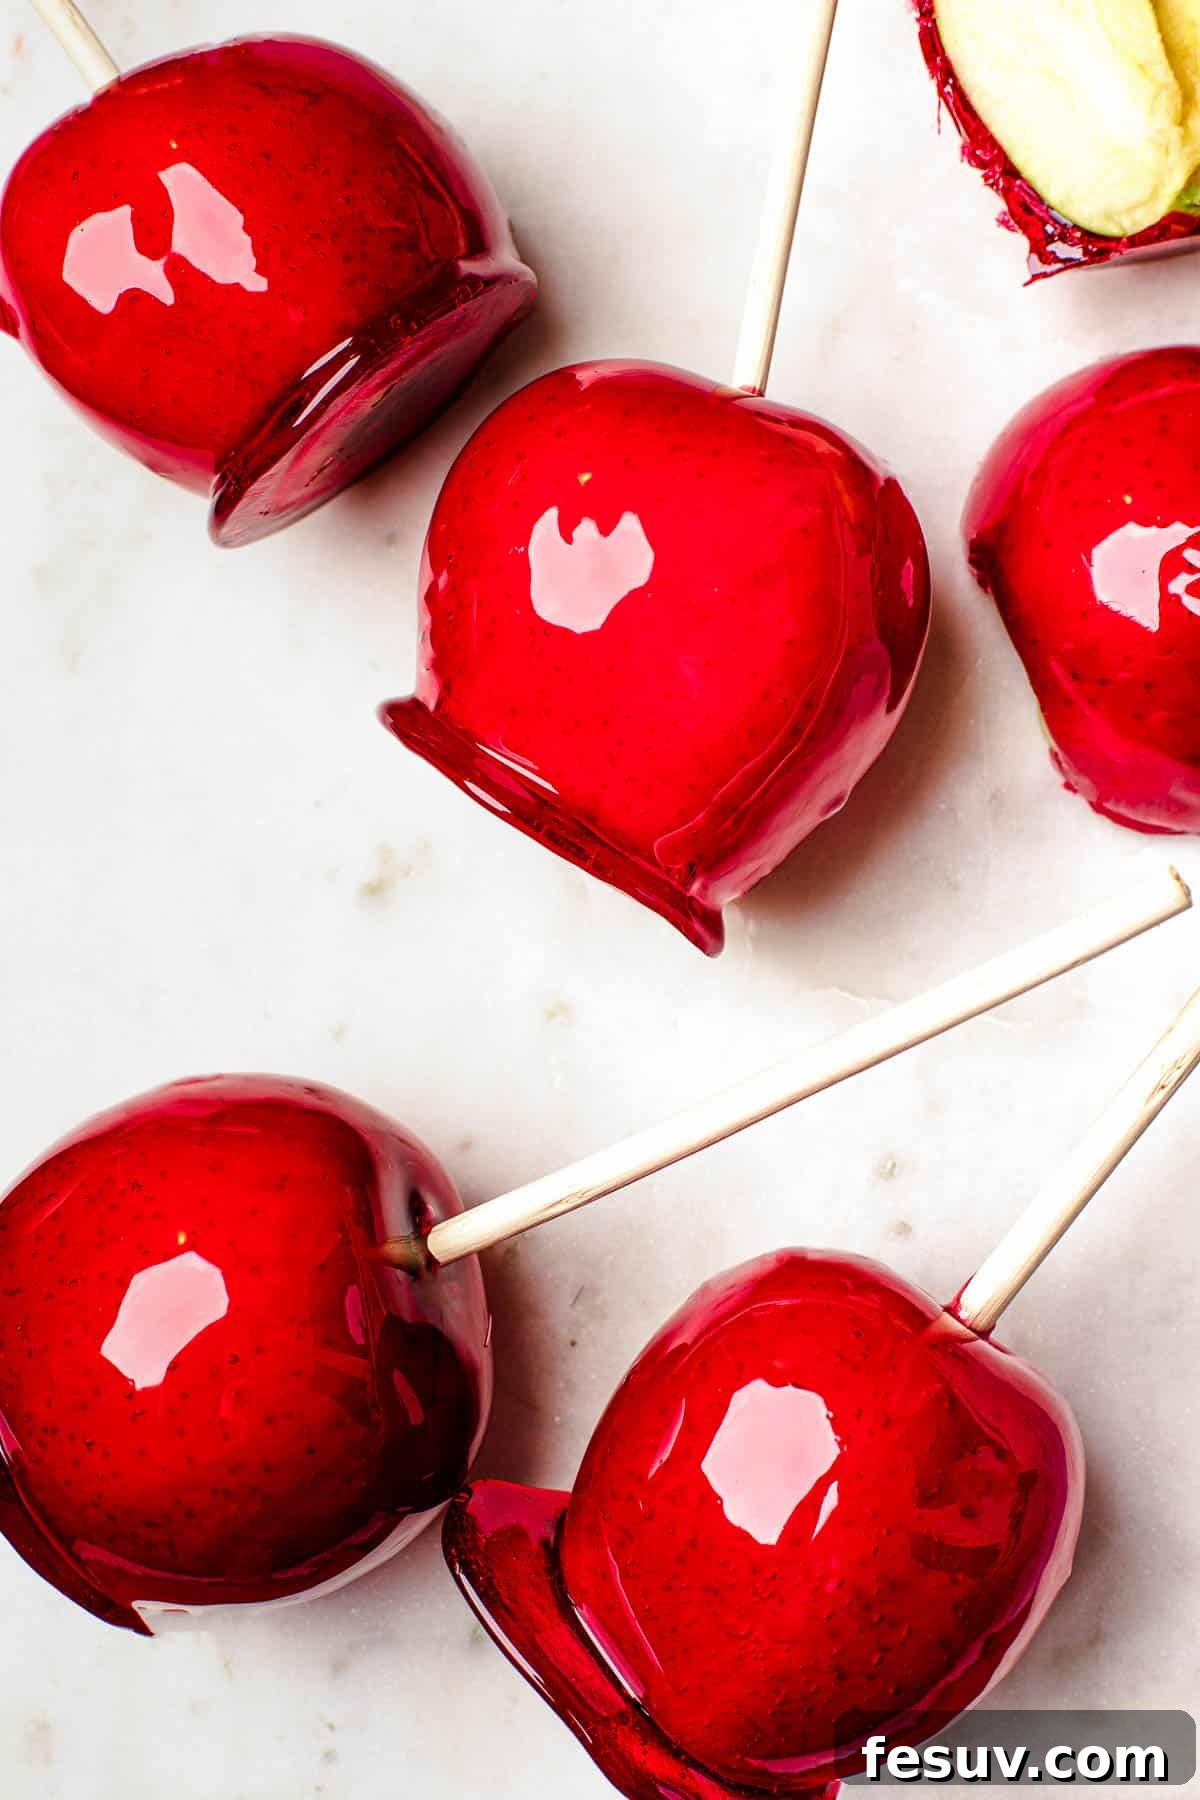
The Irresistible Charm of Crisp and Crunchy Red Candy Apples
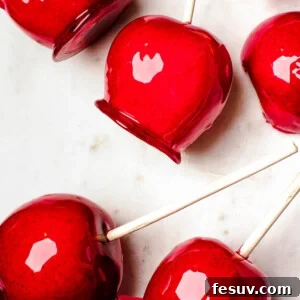
Candy apples hold a special place in the hearts of many, symbolizing festive occasions, nostalgic childhood memories, and simpler times. Imagine biting into a perfectly ripe, tangy apple, immediately met by the shatteringly crisp, sweet sugar coating. Each bite is a symphony of textures and flavors, making them far more exciting than a regular apple and a delightful step above a basic lollipop. Their iconic shiny, ruby-red hue makes them particularly striking, fitting seamlessly into the aesthetic of Christmas celebrations, Halloween parties, and even Valentine’s Day. Often resembling supersized lollipops with a real fruit center, they bring a touch of carnival magic directly to your home.
While universally loved, especially by children, the process of making them involves extremely hot sugar, which can be dangerous if not handled properly. Therefore, adult supervision and paramount caution are essential to ensure safety during preparation. Always prioritize safety, especially when little ones are around!

Essential Ingredients for Perfect Homemade Candy Apples
Crafting these dazzling candy apples at home requires only a handful of readily available, simple ingredients, transforming humble produce into a dazzling confection. The key to success lies not only in the quality of your components but also in precise execution and understanding how each ingredient contributes to the final result. Here’s a detailed look at what you’ll need to gather:
- Apples: The very heart of our treat! While Granny Smith apples are my top recommendation for their ideal tartness and firm texture, don’t feel limited. The contrast between the sweet candy and a tart apple is truly what makes candy apples so special.
- Granulated Sugar: This is the primary component of the candy coating. Standard white granulated sugar is perfect, creating that clear, crystalline, hard shell we all love. For a slightly different flavor profile or a more rustic look, you could experiment by substituting a small portion of the granulated sugar with brown sugar, though it might alter the color and clarity of the coating, making it less transparent.
- Water: Essential for dissolving the sugar and honey into a smooth syrup before it’s boiled down to the desired candy consistency. It acts as the vehicle for the sugar to reach its transformation point.
- Honey: This crucial ingredient does more than just add a touch of natural sweetness and flavor; honey plays a vital role in preventing the sugar from crystallizing too quickly, ensuring a smooth, glossy, and beautifully glassy candy coating. You’ll need about half a cup of your favorite liquid honey for this recipe.
- Red Food Coloring: To achieve that classic, vibrant ruby-red finish that makes candy apples so visually appealing and instantly recognizable. A small amount of gel or liquid red food coloring goes a long way to achieve that iconic hue.
What Kind of Apples Are Best for Candy Apples?
The type of apple you select significantly impacts the final taste and texture of your candy apples. The ideal apple should possess specific characteristics to ensure a delightful culinary experience:
- Tartness: A tart apple is paramount. Its refreshing acidity perfectly cuts through and balances the intense sweetness of the sugar candy coating, preventing the treat from being overwhelmingly sugary.
- Firmness: A firm, crisp apple is crucial. It holds up exceptionally well to the heat of the molten candy mixture without becoming mushy. Softer apple varieties can easily turn mealy or lose their pleasant texture under the hot syrup, which diminishes the overall enjoyment.
- Flavor: Choose apples known for their distinct and enjoyable flavor. The apple is still a significant component, and its taste should complement the candy, not be overshadowed or bland.
Granny Smith apples are the gold standard for these reasons. Their invigorating crisp texture and bracing tartness cut through the richness of the candy beautifully, creating a perfect harmony. However, many other varieties also shine when candied. Consider exploring these excellent alternatives:
- Lady Alice: Known for its exceptional crispness and a delightful sweet-tart flavor profile.
- Pink Lady (Cripps Pink): Offers a superb balance of sweet and tart, combined with a wonderfully firm bite that holds up well.
- Honeycrisp: An exceptionally crisp and juicy apple, boasting a sweet flavor that still has a good acidic backbone, making it a favorite for many.
- Braeburn: A firm, aromatic apple with a tangy-sweet taste that adds complexity to the candy apple.
- Jonathan: A classic American apple, tart with a spicy undertone, making it perfect for both baking and, of course, candying.
Ultimately, the best apple for candying is one you genuinely enjoy eating fresh, ensuring you’ll love it even more dressed in its dazzling sugary coat!
Essential Tools for Candy Apple Perfection and Safety
Beyond the simple ingredients, having the right equipment is absolutely key to a smooth, successful, and safe candy apple making process. These tools ensure accuracy in preparation and provide critical protection, especially when working with high temperatures:
- Candy Thermometer: Absolutely non-negotiable and arguably the most crucial tool in this recipe! The success of your candy apples hinges on the sugar syrup reaching precise temperatures. Without an accurate candy thermometer, your candy may not harden properly, resulting in a sticky, gummy mess, or it might overcook and become brittle, burnt, or difficult to work with.
- Heavy-Bottomed Saucepan: A sturdy, heavy-bottomed pot ensures even heat distribution, which is vital for preventing the sugar from scorching or crystallizing at the bottom. A lid for the saucepan is also incredibly helpful for the initial boiling phase, as it traps steam that washes down any sugar crystals forming on the sides of the pan.
- Popsicle Sticks or Lollipop Sticks: These are essential for easy handling and convenient eating of your candy apples. Ensure they are food-grade and robust enough to securely support the weight of a whole apple.
- Parchment Paper or Silicone Baking Mat: Absolutely necessary for lining your baking sheet. This creates a completely non-stick surface, preventing the freshly dipped candy apples from adhering to the tray as they cool and set, making them easy to remove without breakage.
- Heatproof Gloves: An invaluable safety item! Handling extremely hot molten sugar is inherently dangerous and can cause severe, painful burns if it comes into contact with skin. Heatproof gloves provide a critical layer of protection for your hands during the dipping process. Do not skip this safety precaution.
- Large Baking Sheet: You’ll need this to hold all your candy apples as they cool and harden after dipping. Ensure it’s large enough to accommodate all eight apples without them touching each other.
Step-by-Step Guide to Making Homemade Candy Apples
Creating beautiful, crisp candy apples at home is a wonderfully rewarding experience, but it requires careful attention to detail and, most importantly, a strong emphasis on safety. Remember, molten sugar is incredibly hot and can cause severe, painful burns. Always proceed with extreme caution and wear heatproof gloves throughout the dipping process. Ensure children and pets are kept well away from the stovetop and the hot sugar mixture at all times.
- Prepare Your Workspace and Apples: Before you even begin heating sugar, set yourself up for success. Start by lining a large baking tray with either parchment paper or a silicone baking mat. This provides an essential non-stick surface for your cooling apples. Next, thoroughly wash each apple under hot running water. This step is crucial for removing any invisible waxy coating often found on store-bought apples, which can act as a barrier and prevent the candy from adhering properly. After washing, dry each apple meticulously with paper towels or a clean tea towel; any residual moisture can interfere with the candy setting correctly. Twist off the natural stems, then set the clean, dry apples in the refrigerator. Chilling the apples helps the hot candy set faster and more evenly upon contact, resulting in a superior, crisp coating.
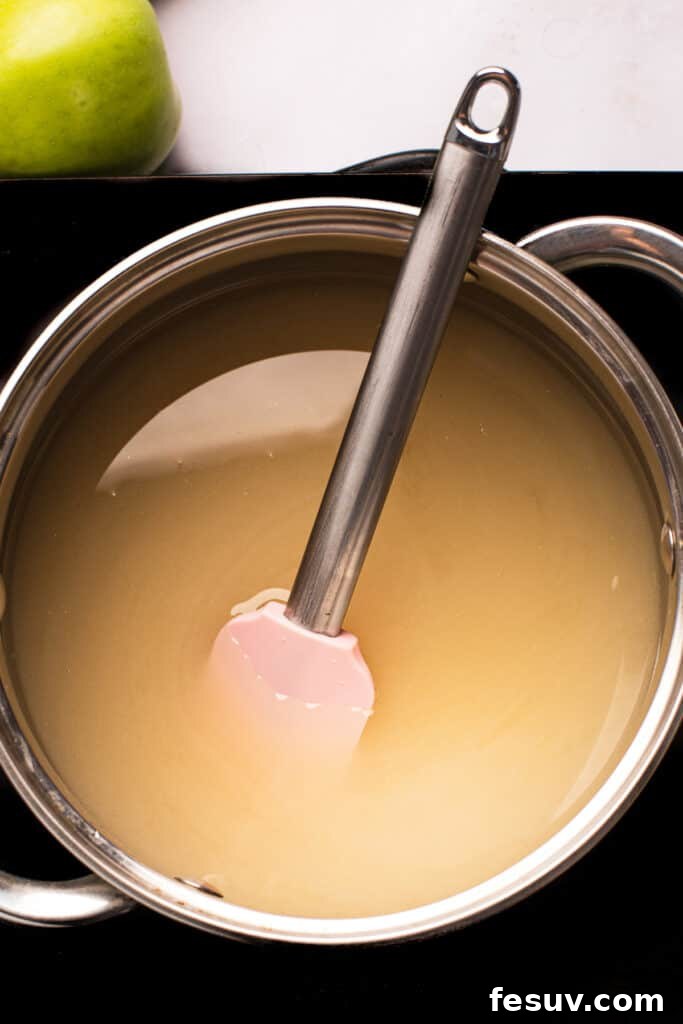
- Craft the Sugar Candy Syrup: In a sturdy, heavy-bottomed saucepan (preferably one with a lid, which you’ll need shortly), combine the precise measurements of granulated sugar, honey, and water. Stir or whisk these ingredients together until they are well combined and the sugar appears mostly dissolved. Cover the saucepan with its lid. This initial covering helps to trap steam, which, in turn, washes down any sugar crystals that might form on the sides of the pan. This technique is vital for preventing graininess and ensuring a perfectly smooth, clear candy. Bring the mixture to a vigorous boil over medium-high heat. Once it’s boiling well and visibly bubbly (after about 3-5 minutes), remove the lid.
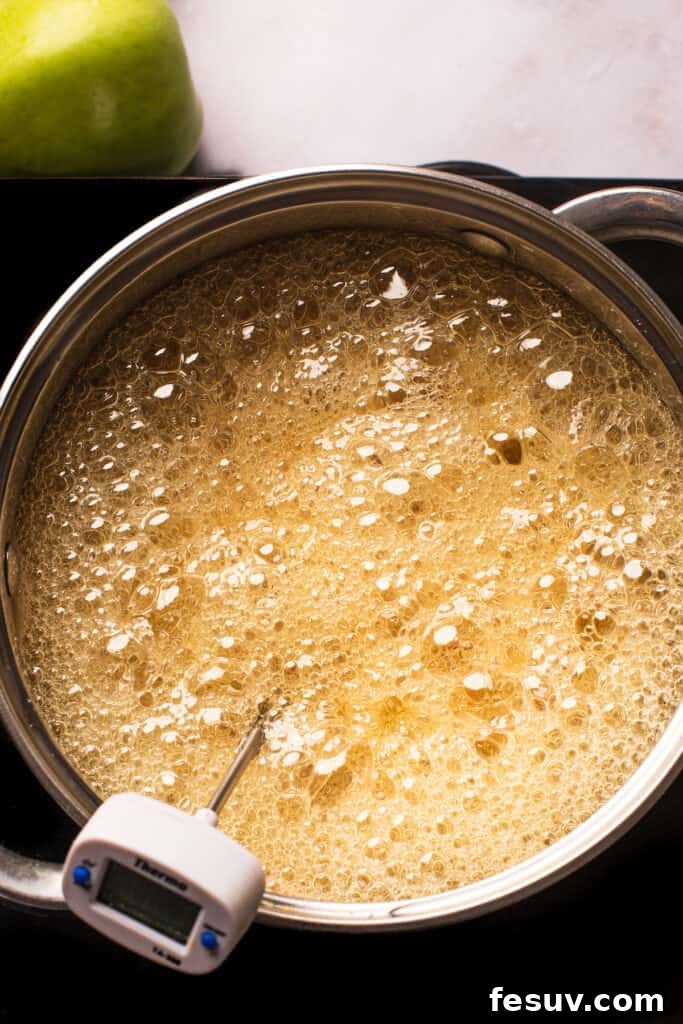
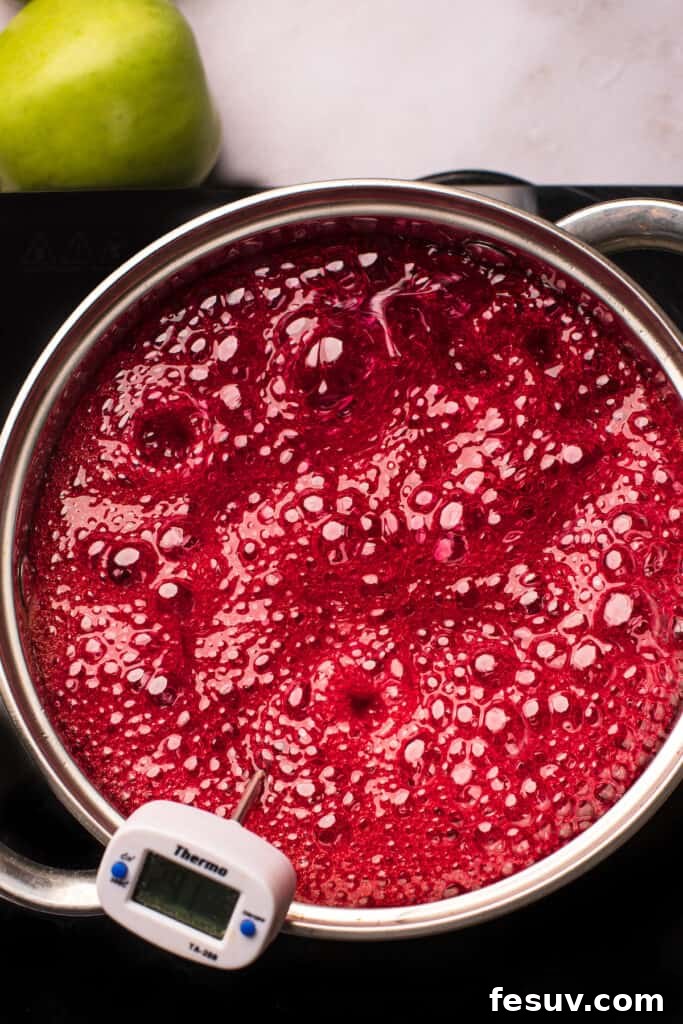
- Boil to 290°F (Hard Crack Stage Prep): Carefully attach a reliable candy thermometer to the side of the saucepan. Ensure the tip of the thermometer is submerged in the syrup but does not touch the bottom of the pot. Allow the candy mixture to continue boiling steadily, undisturbed, until it reaches precisely 290°F (143°C). At this critical point, most of the water will have evaporated, and the sugar molecules will be concentrating rapidly. This stage is absolutely essential for achieving a firm, crunchy candy coating. This process typically takes between twenty and thirty minutes, depending on your stovetop’s heat and the type of pot. Once the candy registers 290°F, carefully add the red food coloring. Be prepared, as the introduction of the liquid coloring might cause the mixture to bubble even more vigorously for a moment. Stir very gently to incorporate the color evenly throughout the syrup.
- Continue to 300°F and Cool Slightly: Allow the vibrant red candy to continue boiling until it reaches 300°F (149°C), also universally known as the “hard crack” stage. This temperature is paramount for achieving a candy shell that is perfectly firm, beautifully glassy, and easy to bite through, rather than being soft, sticky, or chewy. As soon as the thermometer hits 300°F, immediately and very carefully remove the saucepan from the heat. Gently stir the candy mixture once more, then let it cool for just one or two minutes. This slight cooling helps the candy to thicken marginally, preventing it from being too thin or dripping excessively when you begin to dip the apples, ensuring a better coating.
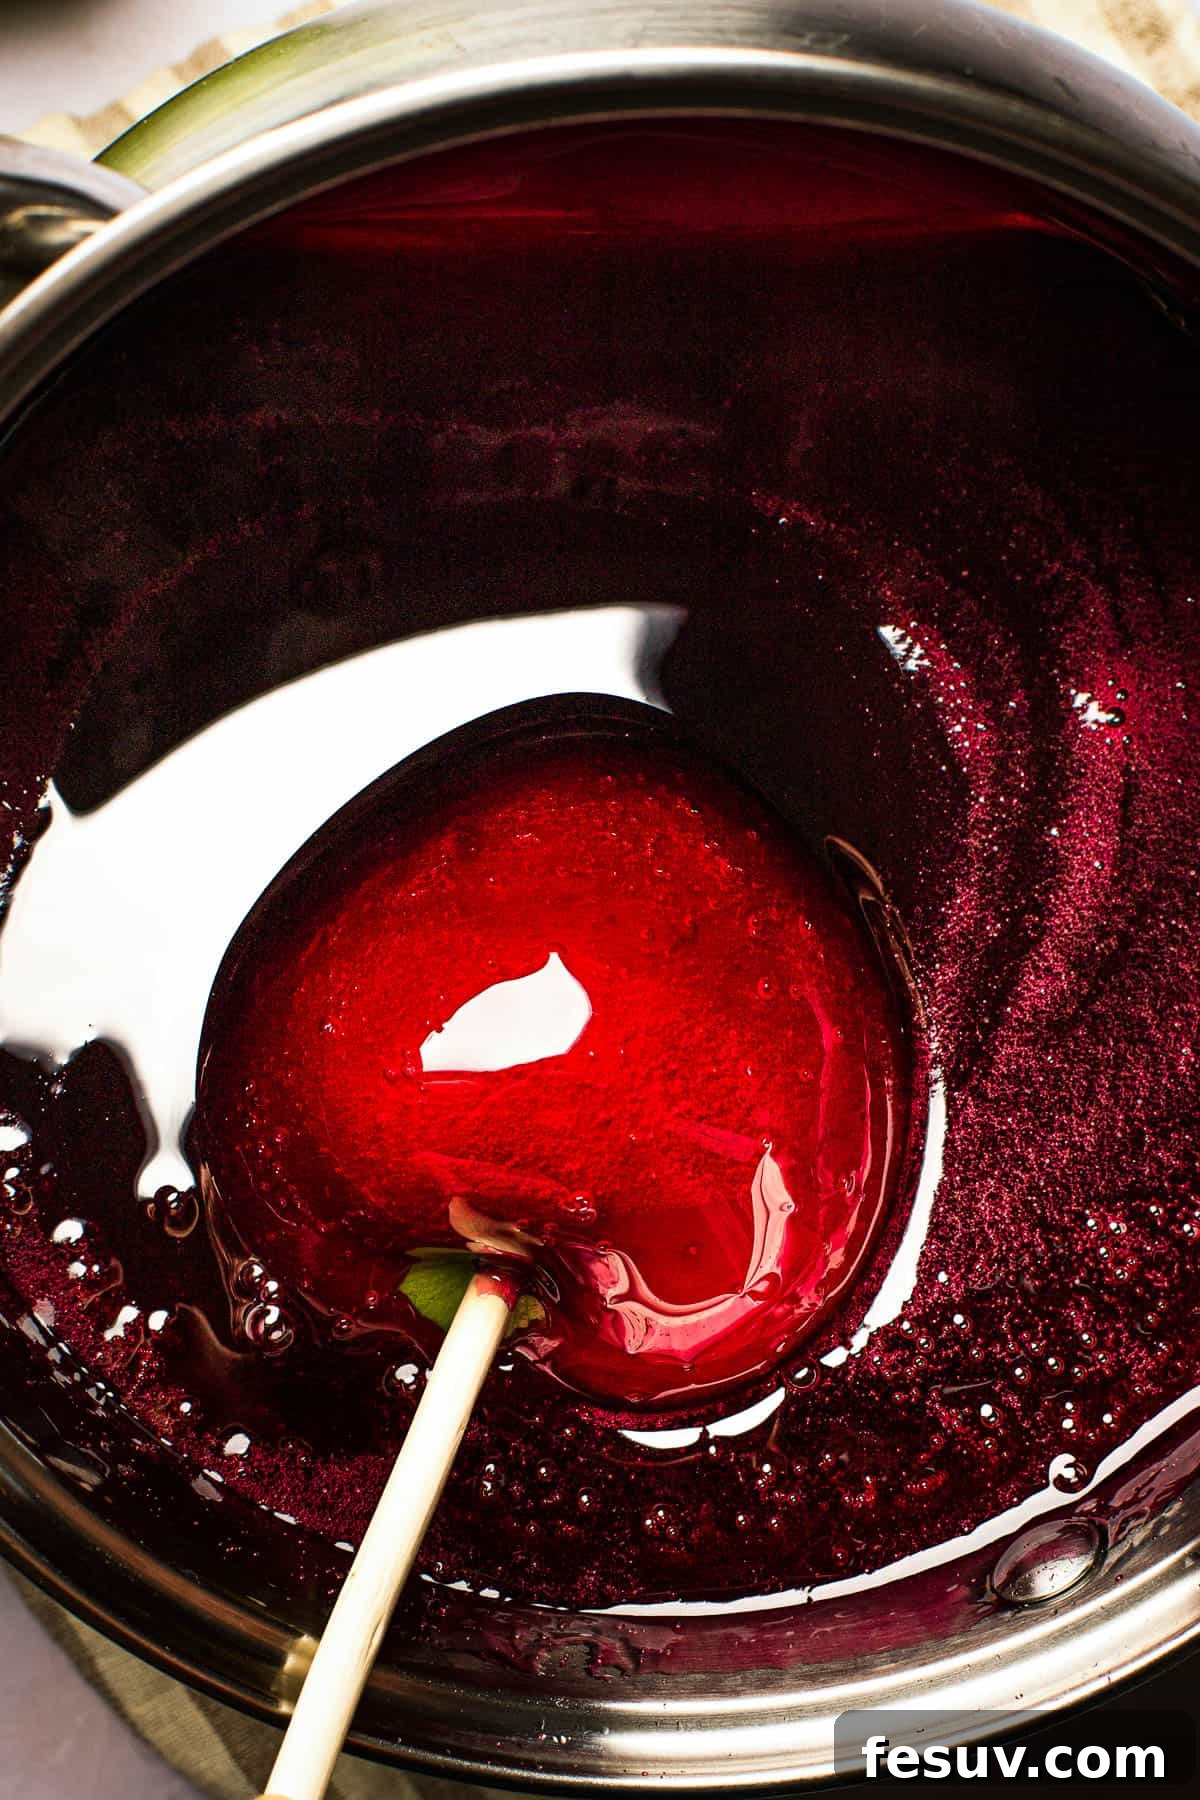
- Add the Sticks and Dip the Apples: Retrieve your chilled apples from the refrigerator. Firmly push your popsicle sticks or sturdy lollipop sticks into the core of the stem end of each apple. Now for the crucial dipping step! Put on your heavy-duty heatproof gloves. Carefully tilt the saucepan slightly to create a deeper pool of hot candy. Dip an apple into the hot syrup, rotating it smoothly and quickly to ensure it’s fully coated all the way up to where the stick enters the apple. Lift the apple, allowing any excess candy mixture to drip back into the saucepan. You are aiming for a thin, even coating, not a thick, unwieldy one. Place each coated apple onto your prepared, parchment-lined tray to cool and set. Work efficiently, as the candy will begin to thicken as it cools, making subsequent dips harder.
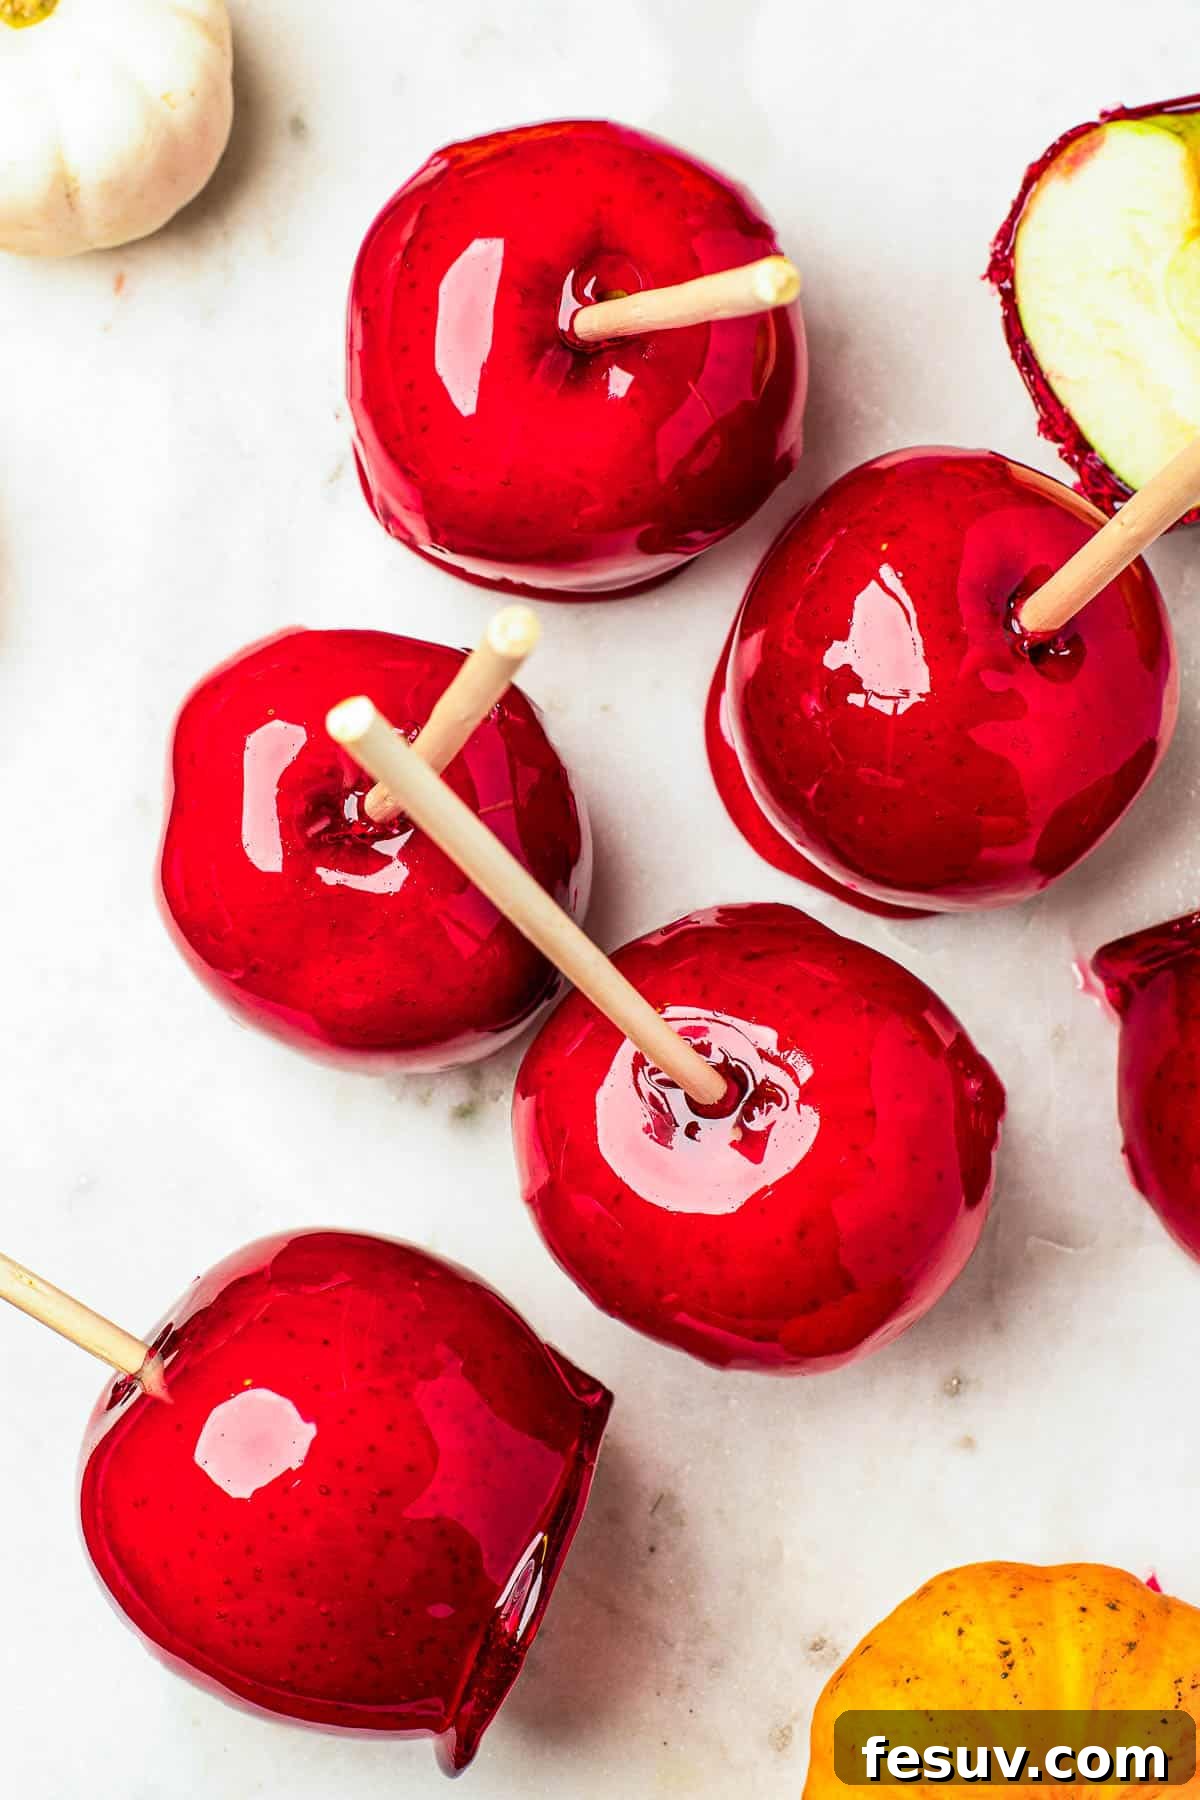
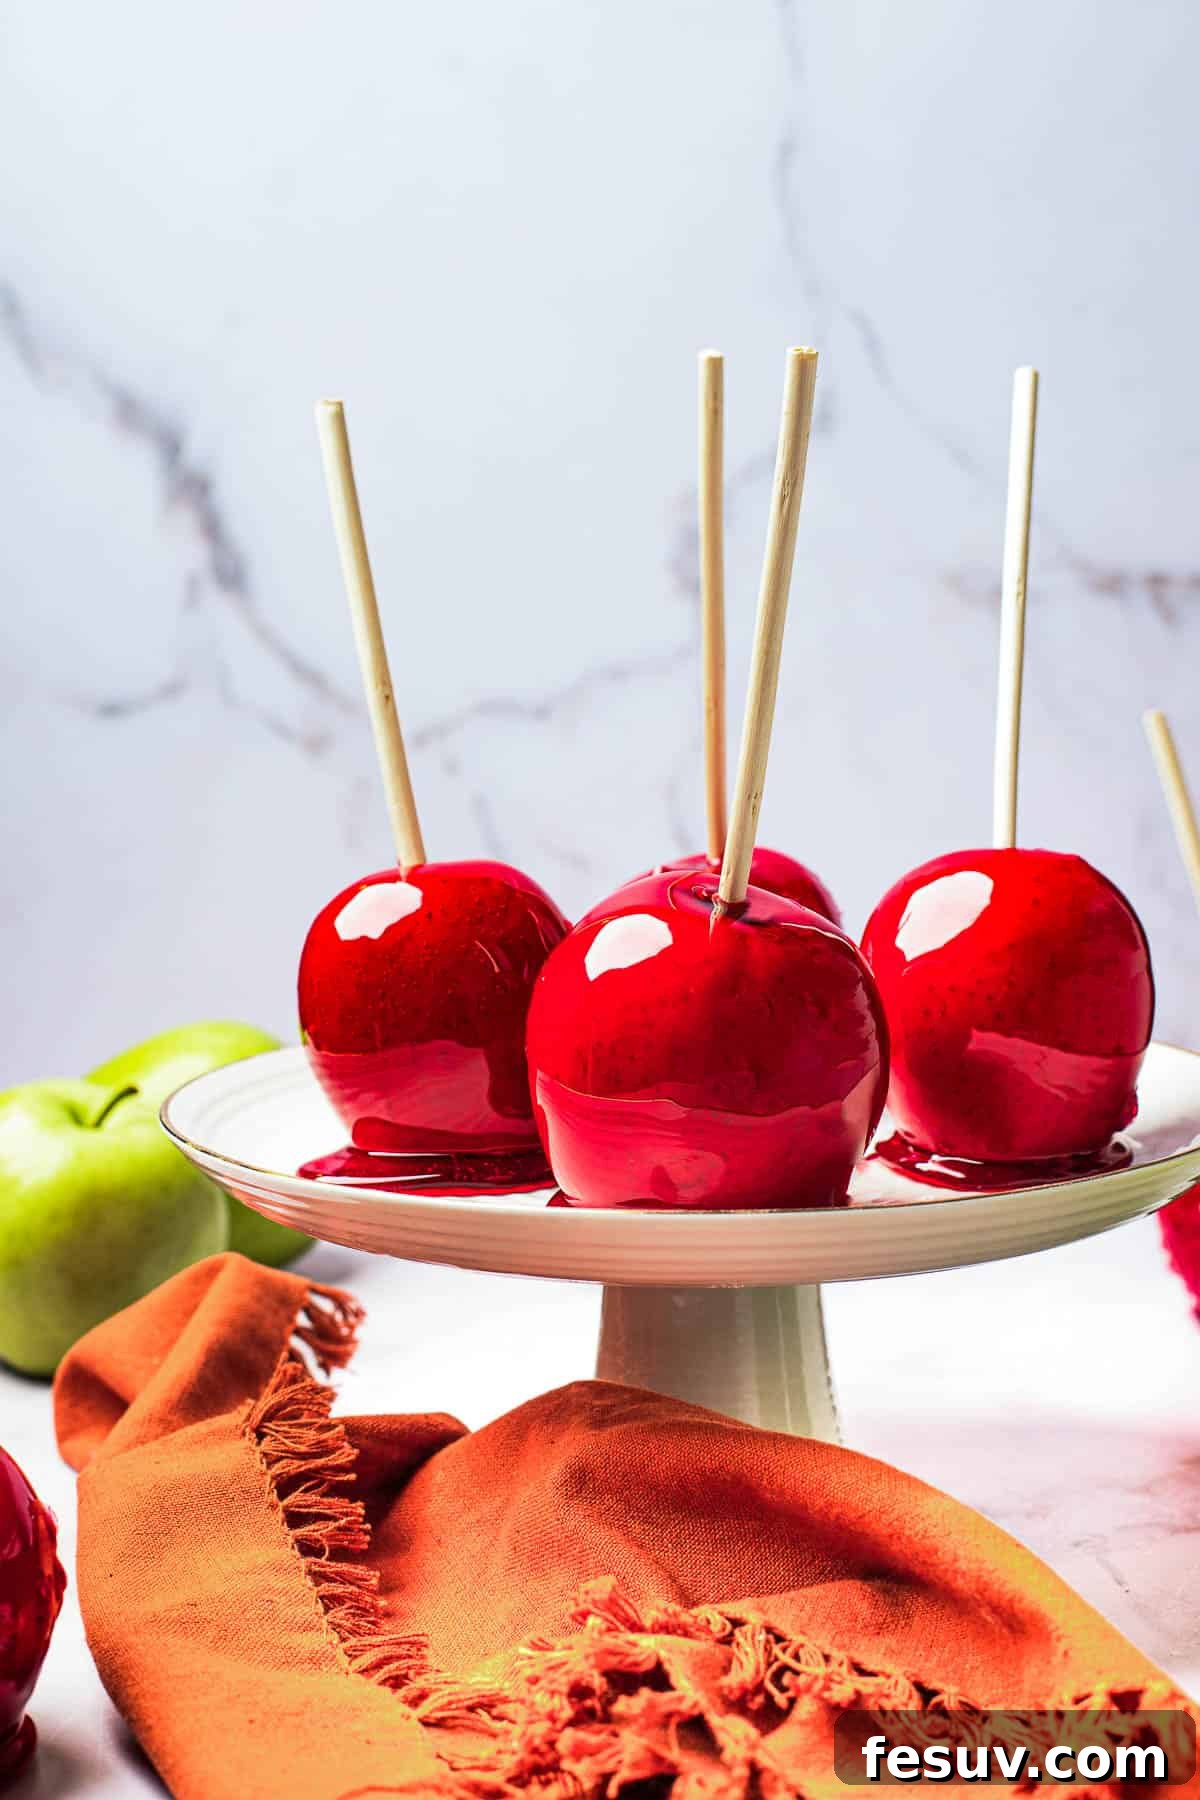
- Cool Completely and Enjoy!: Allow the freshly coated candy apples to cool completely and harden on the lined baking tray. This process can take anywhere from 30 minutes to a full hour, depending on your room temperature and the actual thickness of your candy coating. Once fully cooled and firm to the touch, your homemade candy apples are ready to be devoured! The waiting is the hardest part, but it’s essential for that perfect crunch.
Expert Tips for Candy Apple Success and Delicious Variations
Making candy apples is a delightful culinary art, and a few insider tips can truly elevate your homemade treats from merely good to absolutely spectacular. These pieces of advice will help you achieve that perfect, non-sticky, delicious candy shell every time, along with ideas to customize your creations:
- Spice It Up with Seasonal Flavors: For a delightful seasonal twist, consider adding about ½ teaspoon of ground cinnamon, a pinch of nutmeg, or even a few drops of food-grade cinnamon oil (be cautious with essential oils, ensure they are safe for consumption!) to your candy syrup along with the red food coloring. This infuses the coating with a warm, aromatic flair that’s especially wonderful for fall and winter celebrations like Thanksgiving or Christmas.
- Customize the Color for Any Occasion: Don’t feel strictly bound by tradition! While ruby-red is undoubtedly classic, you can easily customize the color of your candy apples to match any theme, holiday, or personal preference. Use purple or black food coloring for spooky Halloween treats, bright green for St. Patrick’s Day, or even blue for a whimsical, fantastical touch. Remember that the natural color of the apple itself will subtly show through, especially if the candy coating is very thin, adding an extra layer of visual interest. Gel food colorings typically provide more vibrant and intense hues than liquid ones.
- Aim for a Thin, Elegant Coating: The ideal candy apple boasts a thin, brittle, and easily crackable candy shell that shatters delightfully with each bite. A thick, cumbersome coating can be incredibly difficult to bite through, making the treat less enjoyable and potentially challenging for some. As you lift each apple from the hot syrup, allow ample time for the excess candy mixture to drip off back into the saucepan. A quick swirl and a gentle tap against the rim of the pot can help achieve that elegant, thin shell that’s both beautiful and pleasant to eat.
- Serve in Slices for Easier Enjoyment: While whole candy apples are iconic and visually stunning, they can sometimes be a challenge to eat, especially for young children or individuals with dental sensitivities. Once your candied apples are completely cooled and the candy has fully hardened, you can use a large, very sharp knife to carefully cut them into slices or wedges. Be aware that the hard candy coating will likely shatter and crumble a bit around the edges – this is perfectly normal and actually adds to the rustic, homemade charm! Sliced candy apples are much easier to manage and still offer that delightful sweet-tart crunch and vibrant appeal.
- Maintain Vigilance with Hot Sugar: This critical safety warning bears repeating: liquid sugar at high temperatures is extremely dangerous and can cause severe, painful burns if it drips or splashes onto skin. Always wear heatproof gloves when actively handling the hot candy mixture and dipping the apples. Ensure children and pets are kept a safe distance away from the kitchen workspace and the stovetop during this entire process. Safety first, always!
- Humidity is Your Candy Apple’s Enemy: Sugar is hygroscopic, meaning it readily absorbs moisture from the air. If you live in a humid environment or it’s a particularly damp day, your candy apples are prone to becoming sticky and tacky. To combat this, consider making candy apples on a dry day, or work quickly and move them to a cool, extremely dry place immediately after they’ve set to prevent them from becoming sticky.
How to Store Homemade Candy Apples
Proper storage is absolutely essential to maintain the crispness, gloss, and overall integrity of your homemade candy apples. A sticky, gooey, or dull candy apple is far less appealing than a firm, crunchy, and beautifully glossy one. Follow these guidelines to keep your delightful treats at their very best for as long as possible:
- Airtight Container is Key: Store your completely cooled candy apples in a tall, airtight container. This crucial step protects them from both environmental humidity and airborne particles, which can quickly degrade the candy coating. If possible, arrange the apples so they don’t touch each other inside the container, to prevent any potential sticking and damage to the delicate candy shell.
- Seek a Cool, Dry Environment: The primary enemy of a perfectly crisp candy apple is humidity and heat. These elements will cause the sugar candy layer to attract moisture from the air, breaking down its structure and making it become sticky, gummy, and ultimately, unpleasantly messy to eat. Always store candy apples in a cool, dry place, far away from direct sunlight, open windows, or any heat-emitting appliances. A pantry, a cool corner of your kitchen, or even a cool, dry basement is often suitable. Avoid refrigerating them if possible, as the cold temperature and subsequent condensation when brought to room temperature can also lead to unwanted stickiness.
- Optimal Shelf Life: When stored meticulously and correctly, homemade candy apples are best enjoyed within 2 to 3 days of preparation. Beyond this timeframe, the apple itself may begin to soften, losing its desirable crispness, and the candy coating might start to degrade, even under ideal storage conditions. For the absolute best taste, texture, and visual appeal, aim to serve them relatively fresh.
Homemade Candy Apples Recipe
Rated 5 stars from 6 votes
Homemade Candy Apples
by Katerina | Easy Weeknight Recipes
Ruby-red candy apples are made with a sweet sugar candy coating and crisp, tart Granny Smith apples. They are a classic treat that’s perfect for fall, winter, and any festive occasion!
Prep Time: 15 minutes
Cook Time: 30 minutes
Total Time: 45 minutes
Servings: 8
Ingredients
- 8 Granny Smith apples, or any preferred tart and firm apples
- 3 cups granulated sugar
- 1 ½ cups water
- ½ cup honey
- ¼ teaspoon red food coloring
Instructions
- Wash the apples thoroughly under hot water to remove any waxy coating from the apple skin. Dry the apples completely with paper towels, remove the stems, and place them in the refrigerator to chill while you prepare the candy mixture.
- In a heavy-bottomed saucepan, combine the granulated sugar, honey, and water. Stir these ingredients well to ensure they are fully combined.
- Cover the saucepan with a lid and bring the mixture to a rolling boil over medium-high heat. Once the candy mixture is boiling vigorously and very bubbly, remove the lid.
- Carefully attach a candy thermometer to the side of the saucepan, ensuring the tip is submerged but not touching the bottom. Allow the candy to continue boiling until it reaches 290°F (143°C), at which point much of the water will have evaporated. This process should typically take between 20 and 30 minutes.
- When the candy has reached precisely 290°F, carefully add the red food coloring. Be mindful that this addition may cause the mixture to bubble even harder for a moment. Stir gently to incorporate the color.
- Continue boiling the mixture until it reaches 300°F (149°C). As soon as it hits this temperature, immediately and carefully remove the saucepan from the heat. Stir the candy mixture gently and allow it to cool slightly for 1-2 minutes to achieve a slightly thicker consistency.
- Take the chilled apples out of the refrigerator. Firmly push your popsicle sticks or sturdy lollipop sticks into the stem ends of each apple.
- Wearing heatproof gloves for protection, tilt the saucepan up at an angle to create a deeper pool of candy. Dip each apple one by one, rolling the apple smoothly in the hot candy until it is coated all the way up to the stick.
- Lift the apple and allow any excess candy to drip off back into the saucepan, creating a thin, even candy shell. Place the coated apples one by one onto your prepared tray lined with parchment paper or a silicone baking mat.
- Allow the candy apples to cool completely and harden before serving. This may take 30-60 minutes.
Nutrition Information (Estimated)
Nutritional information provided is an estimate and offered as a courtesy. Values may vary significantly based on the specific ingredients used, apple size, and preparation methods. Please utilize your preferred nutritional calculator for more detailed and accurate information.
- Serving Size: 1 candied apple
- Calories: 449 kcal
- Carbohydrates: 118g
- Protein: 1g
- Fat: 1g
- Saturated Fat: 1g
- Polyunsaturated Fat: 1g
- Monounsaturated Fat: 1g
- Sodium: 6mg
- Potassium: 207mg
- Fiber: 4g
- Sugar: 111g
- Vitamin A: 98 IU
- Vitamin C: 8mg
- Calcium: 14mg
- Iron: 1mg
Did you make this recipe? We’d love to hear your thoughts! Leave a rating and review!
Frequently Asked Questions About Homemade Candy Apples
- Why are my candy apples sticky or gooey?
- Stickiness is most commonly caused by two factors: too much humidity in the air, or the candy syrup not reaching a sufficiently high temperature. Ensure you’re making them on a dry day, and double-check your candy thermometer for accuracy, making sure the syrup consistently reaches the full 300°F (hard crack stage). Storing them immediately in an airtight container in a cool, dry place after they’ve set will also significantly help prevent stickiness.
- Can I use other types of sugar besides granulated sugar?
- Granulated white sugar is highly recommended for candy apples because it yields a clear, hard, and crisp coating. While you could technically use brown sugar for a portion of the sugar, it will result in a chewier, darker coating and might not set as hard or be as visually appealing. Powdered sugar (confectioners’ sugar) is not suitable for this recipe, as it contains cornstarch that will prevent proper candy formation.
- How do I prevent sugar crystallization in the syrup?
- Preventing crystallization is crucial for a smooth candy coating. The honey in this recipe acts as an excellent anti-crystallization agent. Additionally, covering the pot during the initial boiling phase helps to trap steam, which washes down any sugar crystals that might form on the sides of the pan. Once boiling, try to avoid stirring the syrup, as this can introduce crystals. If you notice crystals forming on the sides, you can carefully brush them down with a clean pastry brush dipped in water.
- Can I add toppings to my candy apples?
- Absolutely! Adding toppings is a fantastic way to customize your candy apples. After dipping and while the candy coating is still slightly warm and tacky (but not fully hardened or wet), you can roll them in various delicious additions. Popular choices include sprinkles, finely chopped nuts (such as peanuts, pecans, or almonds), shredded coconut, or even mini chocolate chips. Make sure to apply toppings before the candy completely sets for best adhesion.
- Are candy apples safe for young children?
- While candy apples are a beloved treat for children, whole candy apples with their hard, brittle coating and a stick can pose a choking hazard, especially for very young children. For younger kids, it is significantly safer to cut the cooled and hardened candy apples into manageable wedges or slices. This ensures easier and safer consumption, allowing them to enjoy the treat without undue risk.
More Delightful Holiday and Seasonal Treats
If you’re looking for more fun, festive, and utterly delicious treats to make at home, explore these wonderful options that are perfect for sharing with family and friends during holidays and special occasions:
- Homemade Churros with Rich Chocolate Dipping Sauce
- Festive Candy Cane Cookies: A Holiday Baking Favorite
- Delicious Pumpkin Cheesecake Crescent Rolls for Fall