
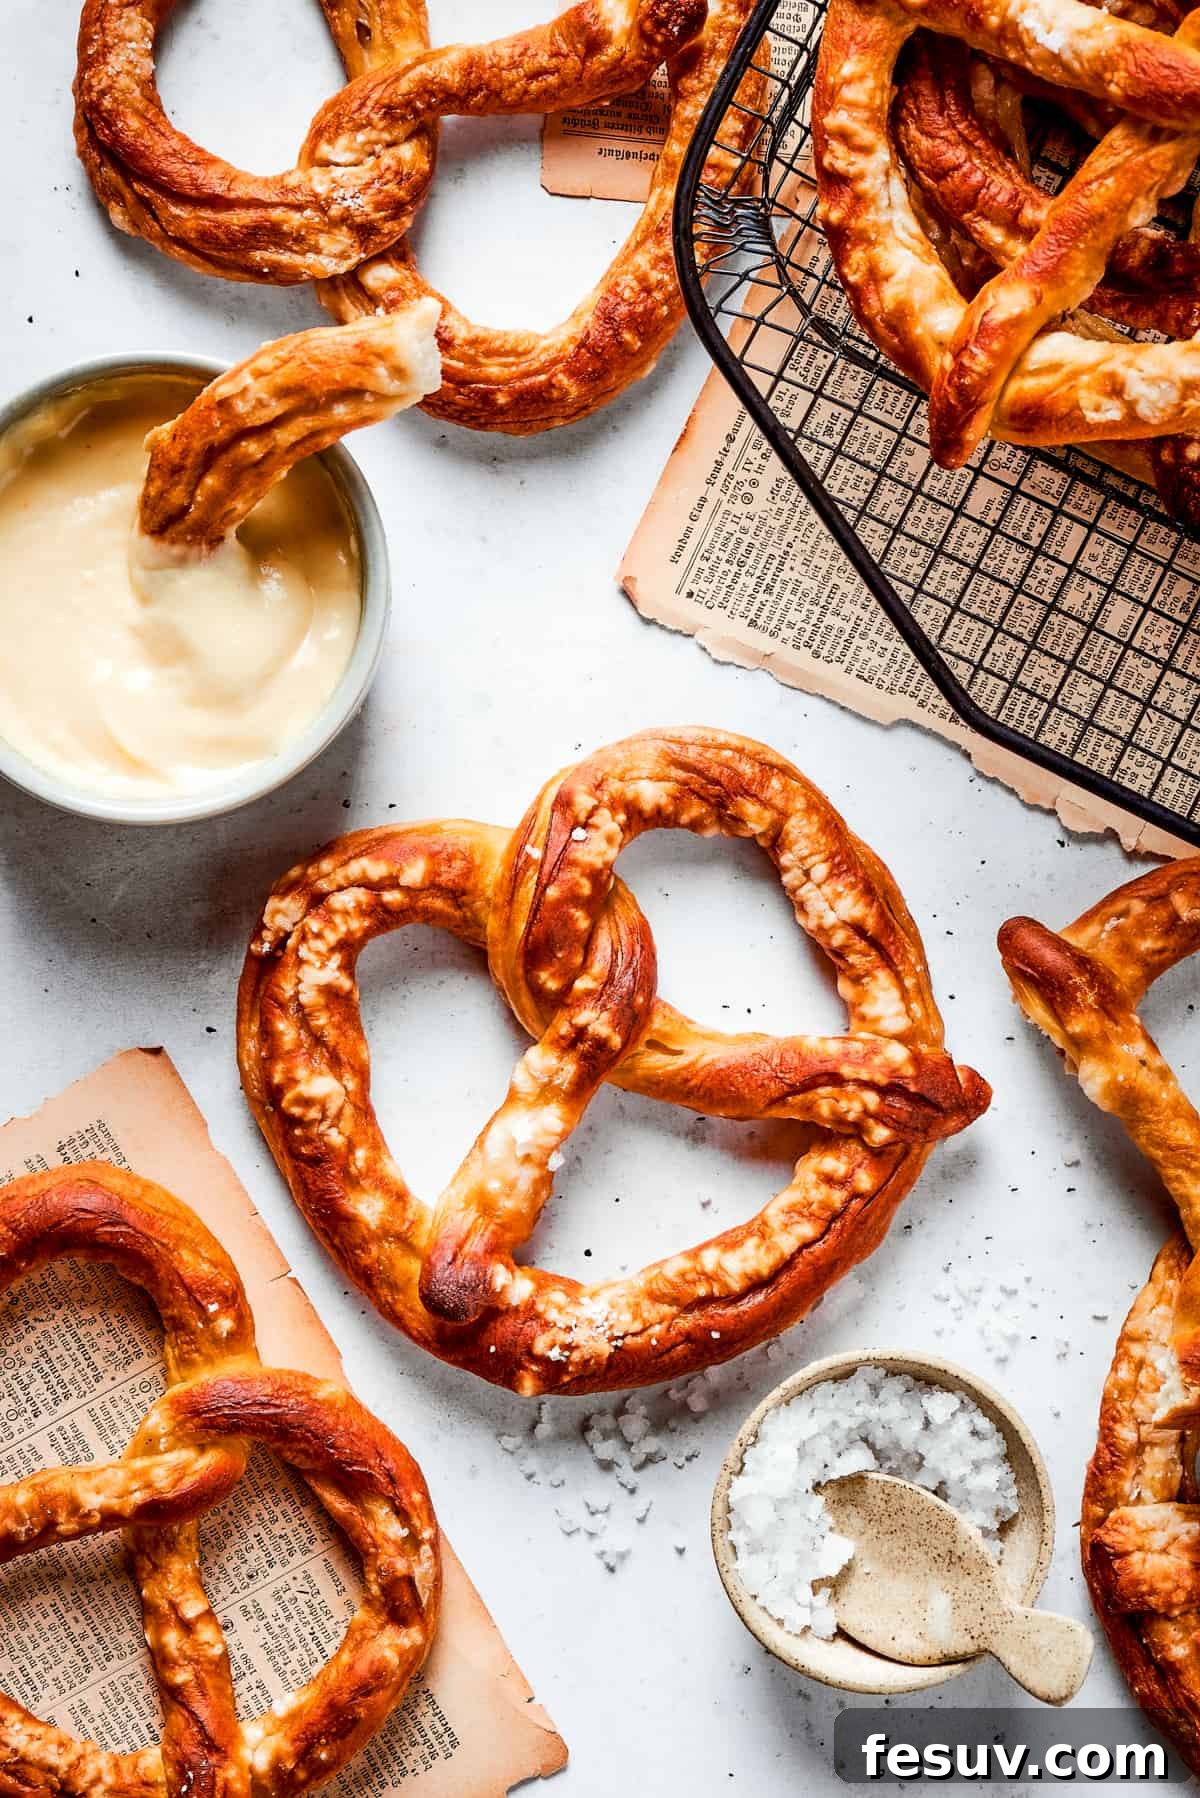
Indulge in the warm, comforting embrace of freshly baked, chewy homemade Soft Pretzels. This ultimate recipe guides you through creating perfectly golden-brown pretzels, boasting that signature tangy bite and irresistibly soft interior. The magic doesn’t stop there; we’re pairing these delectable pretzels with a creamy, mustard-spiked cheese sauce that transforms a simple snack into an extraordinary culinary experience. Get ready to impress your family and friends with this surprisingly easy-to-make treat, perfect for any afternoon gathering or cozy night in.
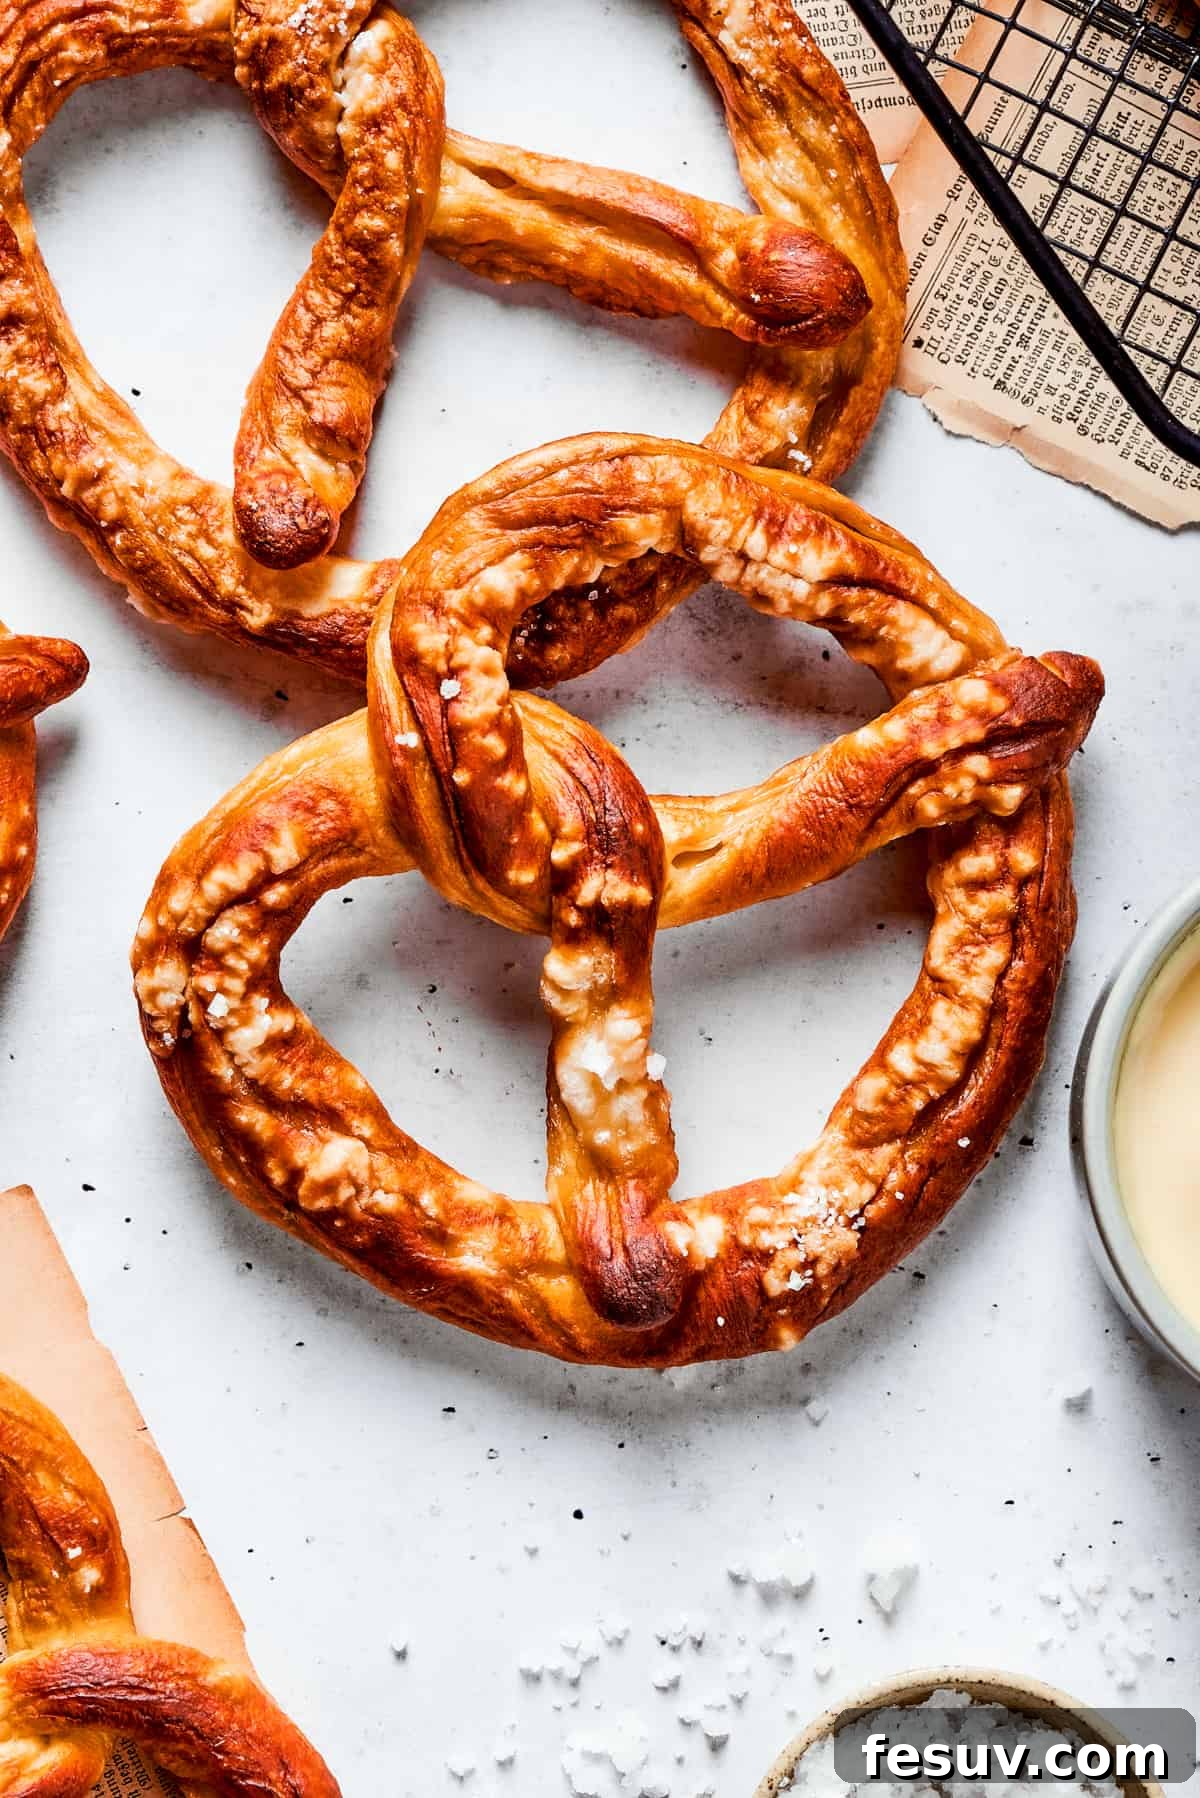
There’s something uniquely satisfying about homemade soft pretzels that store-bought versions just can’t replicate. The aroma filling your kitchen, the satisfying chew, and the versatility of sweet or savory toppings make them an instant hit. This recipe has become a beloved staple in my household, cherished by everyone for its simple process and incredible results.
Why This Homemade Soft Pretzel Recipe Will Become Your Favorite
Preparing homemade soft pretzels might sound intimidating, but I promise you, this recipe simplifies the process without compromising on authentic flavor or texture. Here’s why you’ll fall in love with making these pretzels at home:
- Effortless Preparation: Forget complicated techniques. With just about 20 minutes of active prep time for the dough, you’ll be working with everyday pantry staples like flour, yeast, milk, and olive oil. The steps are straightforward, making this a perfect baking project for beginners and seasoned bakers alike. You’ll be amazed at how quickly you can transform basic ingredients into these beloved snacks.
- Authentic Texture and Flavor: The secret to that iconic pretzel chewiness and distinctive taste lies in a crucial step: the baking soda bath. A quick dip in this alkaline solution before baking is what gives your homemade soft pretzels their deep golden crust, irresistible texture, and signature “pretzel” flavor that you crave. It’s a game-changer that truly elevates them beyond a simple breadstick.
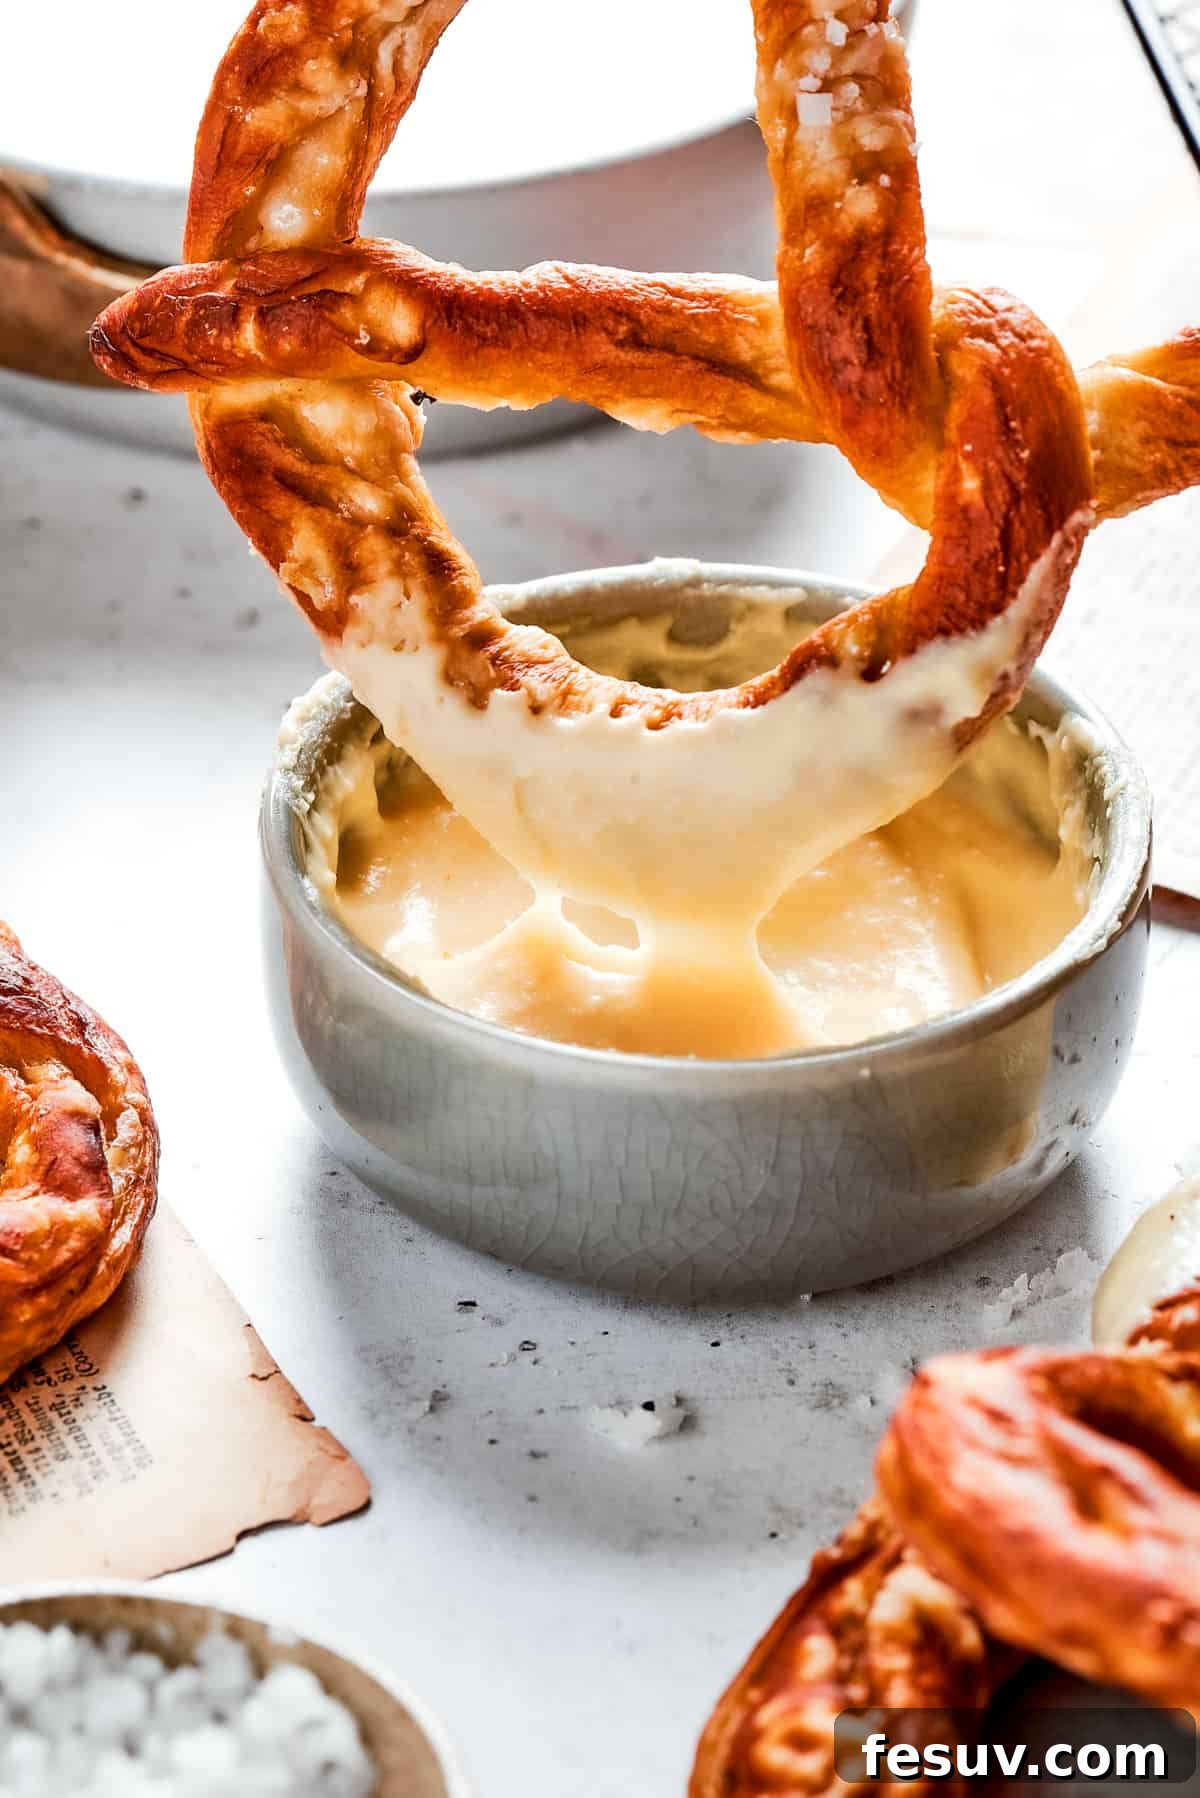
- The Star of the Show: Our Signature Pretzel Dip: While the pretzels themselves are fantastic, the creamy, homemade cheese dip truly makes this recipe legendary. We’re talking about a rich blend of sharp Cheddar and nutty Gouda cheeses, perfectly seasoned with a hint of cayenne pepper and a touch of Dijon mustard. This velvety sauce adds a sophisticated depth of flavor that complements the pretzels beautifully, creating an appetizer or snack that’s utterly irresistible.
- Perfect for Any Occasion: Whether you’re hosting a game day, looking for a unique party appetizer, or simply want a comforting snack for movie night, these soft pretzels fit the bill. Their shareable nature and universal appeal make them a crowd-pleaser every time.
- Customizable Fun: This recipe offers a fantastic base for customization. While we adore the savory cheese dip, you can explore sweet toppings, different salts, or even additional spices to tailor them to your preference. It’s a versatile canvas for your culinary creativity.
Gather Your Ingredients: Essential Components for Perfect Pretzels & Dip
Crafting the perfect homemade soft pretzels and their accompanying cheese dip requires a few key ingredients. Most are likely already in your pantry, making this a convenient recipe to whip up whenever a craving strikes. Let’s ensure you have everything on hand for both the delectable pretzels and their creamy, flavorful companion.
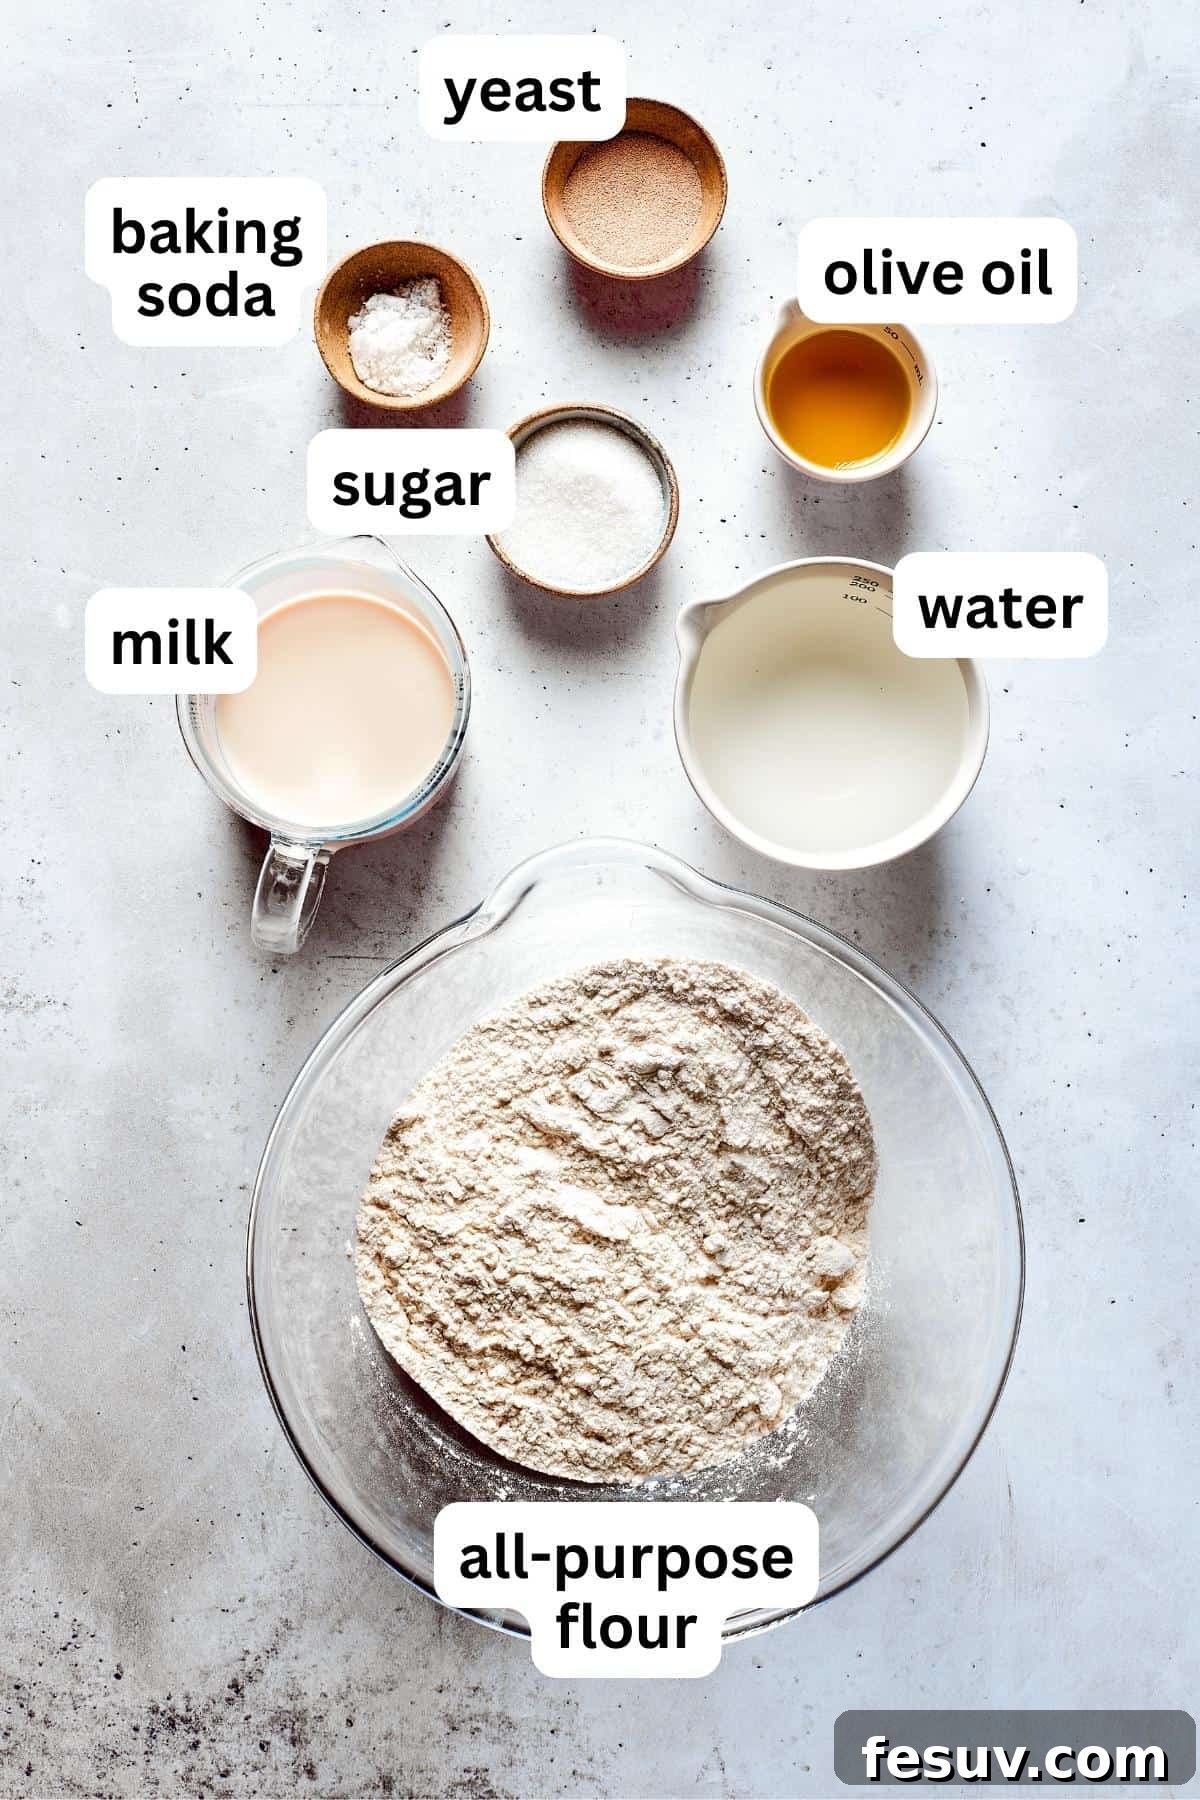
Ingredients For Soft Pretzels
- All-Purpose Flour: The foundation of our dough. While some recipes suggest bread flour for extra chewiness, all-purpose flour works wonderfully and is more readily available. Ensure it’s fresh for the best results.
- Active Dry Yeast: This is our leavening agent, responsible for the dough’s rise and airy texture. It’s crucial to use *active dry yeast*, not instant yeast, as the activation process is slightly different for this recipe. Make sure your yeast is fresh and active for a successful rise.
- Granulated Sugar: A touch of sugar helps activate the yeast and adds a subtle sweetness to the pretzel dough, balancing the savory notes. It also aids in browning the pretzels to a beautiful golden hue.
- Milk: Using whole or 2% milk adds richness and softness to the dough, contributing to a tender crumb. Warm milk also helps activate the yeast more effectively than cold liquids.
- Water: Combined with milk, water helps achieve the perfect dough consistency. Ensure it’s also lukewarm for yeast activation.
- Olive Oil: Extra virgin olive oil adds moisture and elasticity to the dough, making it easier to handle and contributing to the pretzels’ delightful texture. It also prevents the dough from sticking excessively.
- Baking Soda for the Bath: This alkaline bath is non-negotiable for authentic soft pretzels. It’s what gives them their unique chewy exterior, deep brown color, and characteristic flavor. You’ll need about ½ cup of baking soda mixed with a gallon of water.
- Coarse Kosher or Sea Salt for Topping: The iconic finish for soft pretzels! The large crystals provide bursts of salty flavor and a satisfying crunch that complements the pretzel’s chewiness. Don’t use fine table salt here, as it will dissolve too quickly and can make the pretzels overly salty.
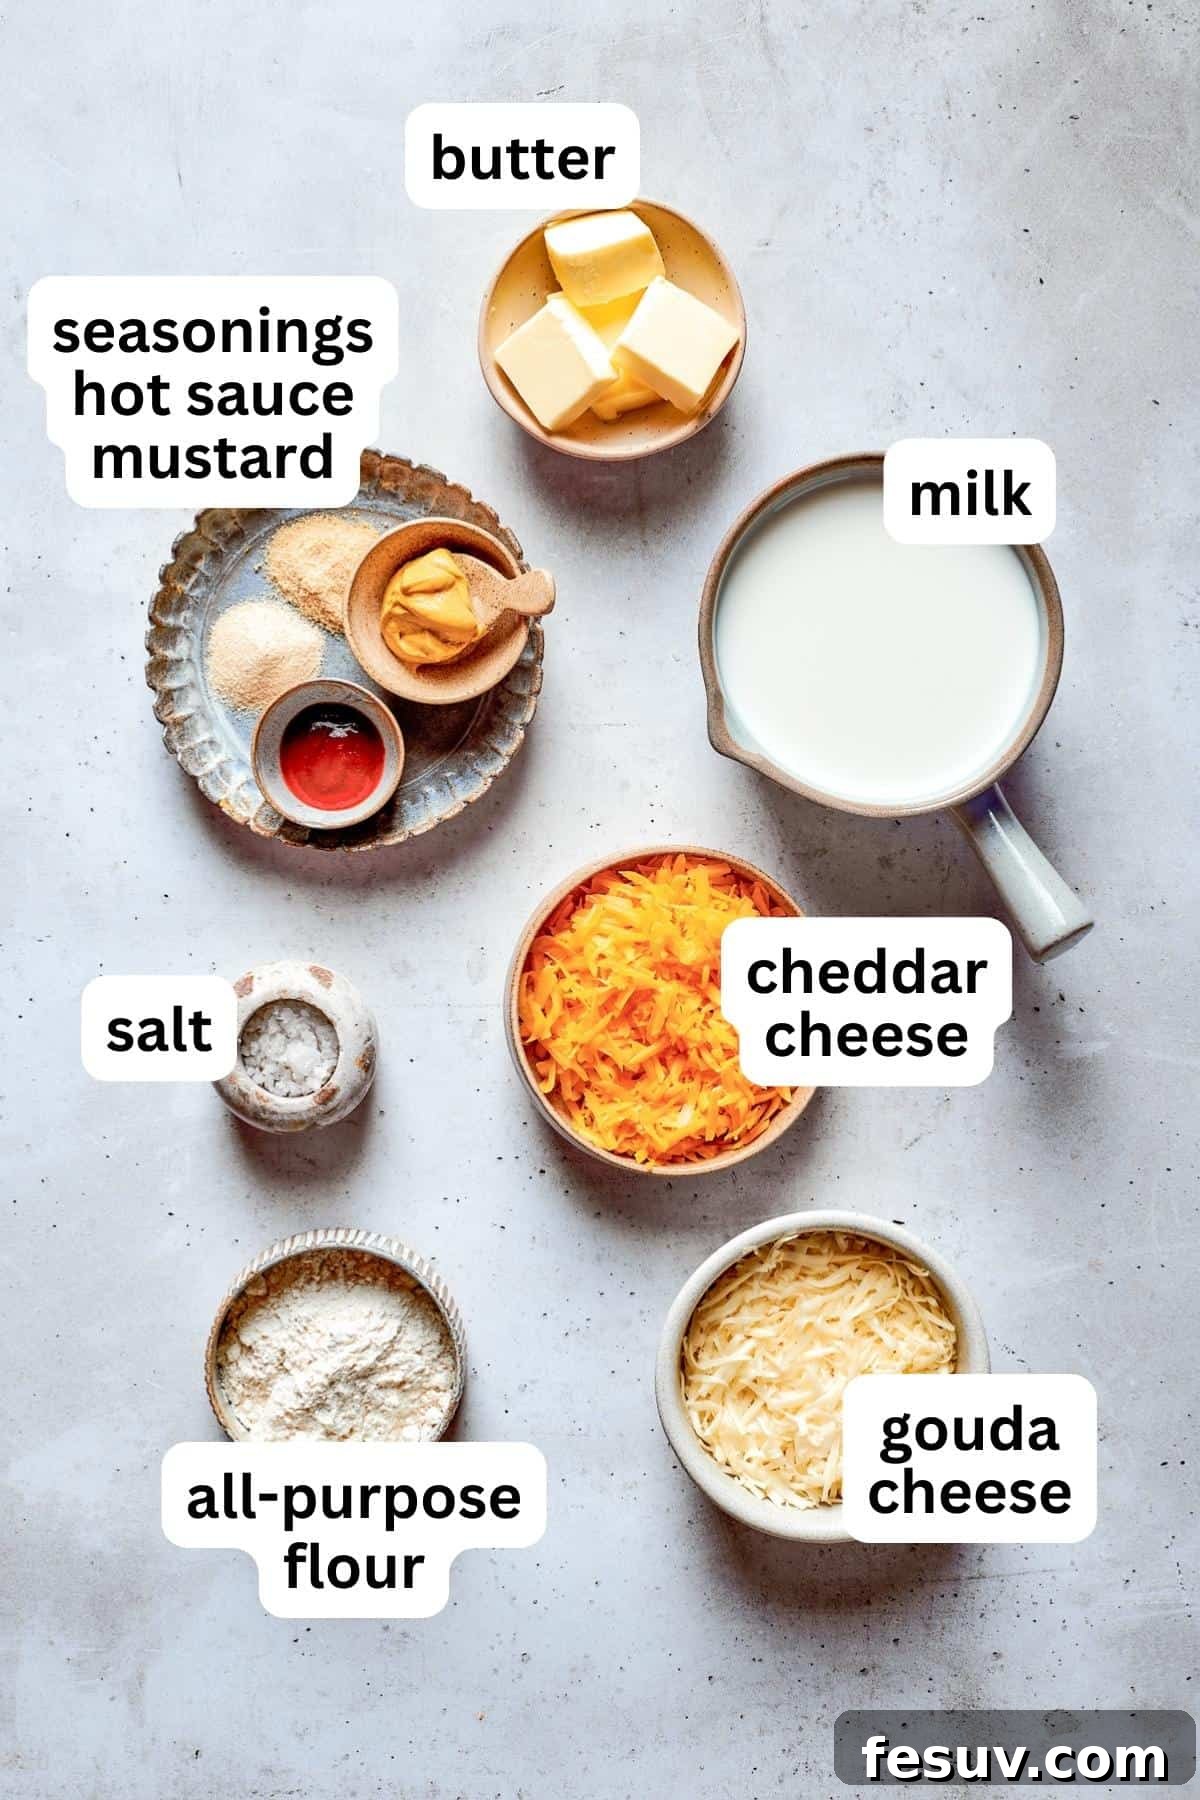
Ingredients For The Irresistible Pretzel Dip
- Unsalted Butter: The base for our roux, providing richness and flavor. Using unsalted butter allows you to control the overall saltiness of the dip.
- All-Purpose Flour: Combined with butter, it forms a roux, thickening the dip to a luxurious, creamy consistency.
- Salt: Essential for seasoning the dip, enhancing the flavors of the cheese and spices.
- Whole Milk: For a truly rich and decadent cheese sauce, whole milk is recommended. Its higher fat content creates a smoother, more luscious texture.
- Sharp Cheddar Cheese: Provides a robust, tangy flavor that is classic in cheese sauces. Shredding your own cheese from a block will always yield better melting and flavor than pre-shredded varieties, which often contain anti-caking agents.
- Gouda Cheese: Adds a beautiful, slightly sweet, and nutty undertone to the dip, complementing the sharp cheddar and contributing to its creamy texture. Its excellent melting properties ensure a silky-smooth sauce.
- Dried Garlic and Onion Powders: These pantry staples add a foundational layer of savory aromatic flavor to the cheese dip, making it more complex and appealing.
- Dijon Mustard: A secret ingredient that doesn’t make the dip taste like mustard, but rather enhances the cheese flavor and adds a subtle tang, cutting through the richness.
- Hot Sauce (Optional): A dash of hot sauce (like a classic cayenne pepper sauce) introduces a welcome kick and depth. Feel free to adjust the amount to your spice preference, or omit it entirely if you prefer a milder dip.
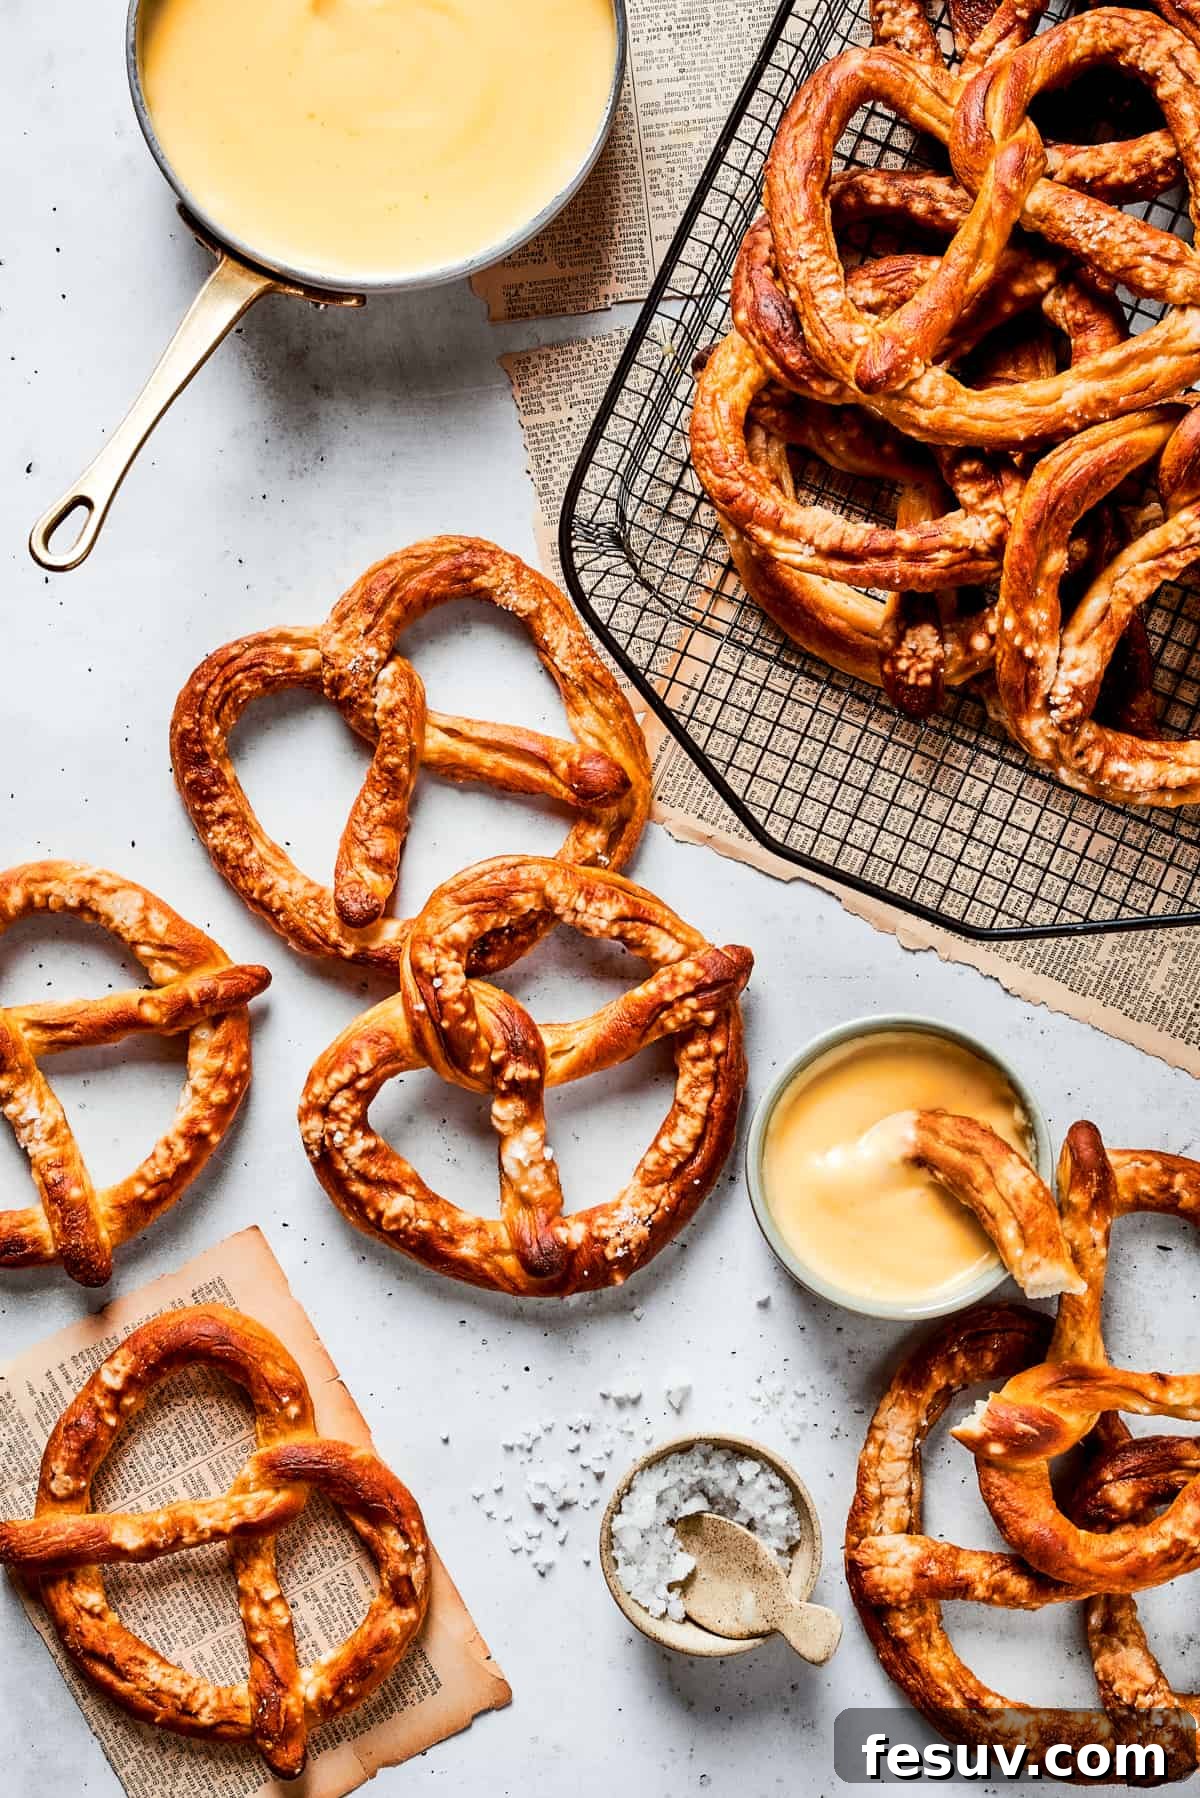
Mastering Homemade Soft Pretzels with Our Signature Cheese Dip: A Step-by-Step Guide
Embark on a delightful culinary journey to create the perfect batch of homemade soft pretzels, complete with our signature cheese dip. This comprehensive guide breaks down each step, ensuring a smooth and enjoyable baking experience from start to finish.
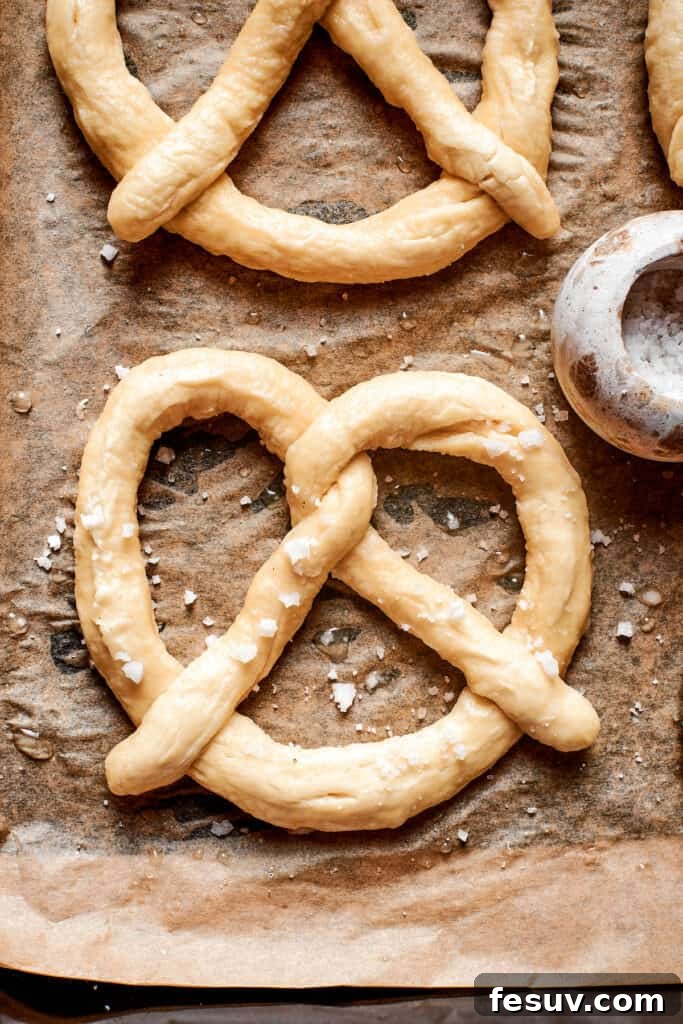
Soft Pretzels
- Activate the Yeast (Proofing): In a small saucepan, gently warm the milk and water over low heat until the mixture reaches an ideal temperature of 105-115°F (40-46°C). It’s crucial not to overheat it, as temperatures above 130°F (54°C) will kill the yeast, preventing your dough from rising. Remove the saucepan from the heat once the desired temperature is reached.
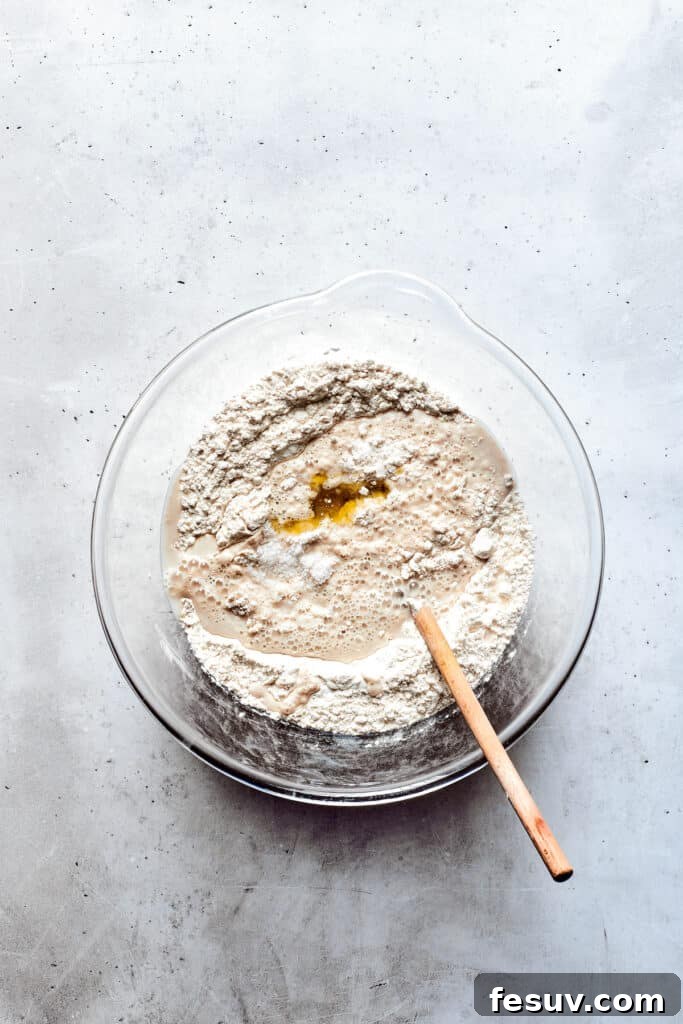
- Combine Dry Ingredients: In a large mixing bowl, thoroughly combine the active dry yeast, granulated sugar, and all-purpose flour. Make a well in the center of the dry ingredients.
- Form the Dough: Pour the warm milk and water mixture into the well, followed by the olive oil. Using a wooden spoon or your hands, stir the ingredients together until a shaggy dough begins to form. Continue mixing until all the flour is incorporated and a cohesive ball of dough forms.
- Knead for Elasticity: Transfer the dough to a lightly floured surface. Knead the dough vigorously for approximately 8-10 minutes. The dough should transform from sticky and rough to smooth, elastic, and springy. A well-kneaded dough is essential for achieving the characteristic chewy texture of soft pretzels.
- First Rise (Proofing): Lightly grease a clean large bowl with a little olive oil. Place the kneaded dough in the bowl, turning it once to coat all sides. Cover the bowl tightly with plastic wrap or a clean kitchen towel. Let the dough rise in a warm, draft-free place for about 1 hour, or until it has noticeably doubled in size. This step allows the yeast to work its magic, developing flavor and texture.
- Prepare for Baking: While the dough is rising, preheat your oven to a robust 450°F (230°C). Line two large baking sheets with parchment paper or silicone baking mats to prevent sticking.
- Prepare the Baking Soda Bath: In a large, wide pot (preferably a Dutch oven), bring 1 gallon of water to a rolling boil. Carefully add ½ cup of baking soda to the boiling water. Be cautious, as the mixture will foam up vigorously. Reduce the heat slightly to maintain a gentle simmer.
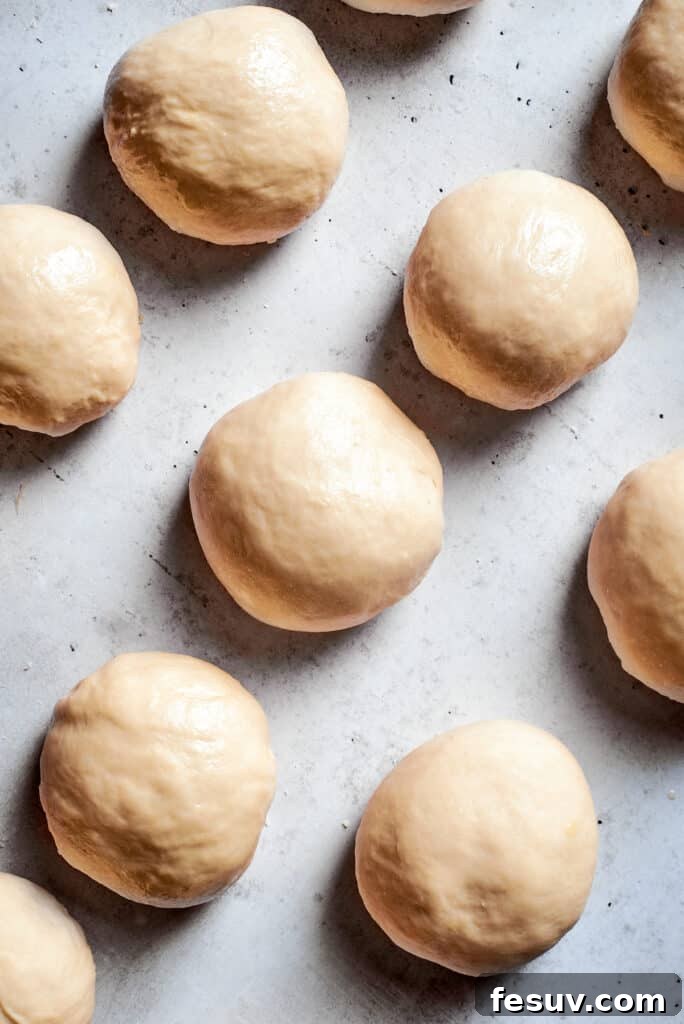
- Divide and Shape: Once the dough has risen, gently punch it down to release the air. Transfer the dough to a lightly floured surface and divide it into 12 equal portions. Roll each portion into a long rope, about 18-20 inches long, tapering the ends slightly. Refer to the “How to Shape Pretzels” section below for detailed instructions on forming the classic pretzel shape.
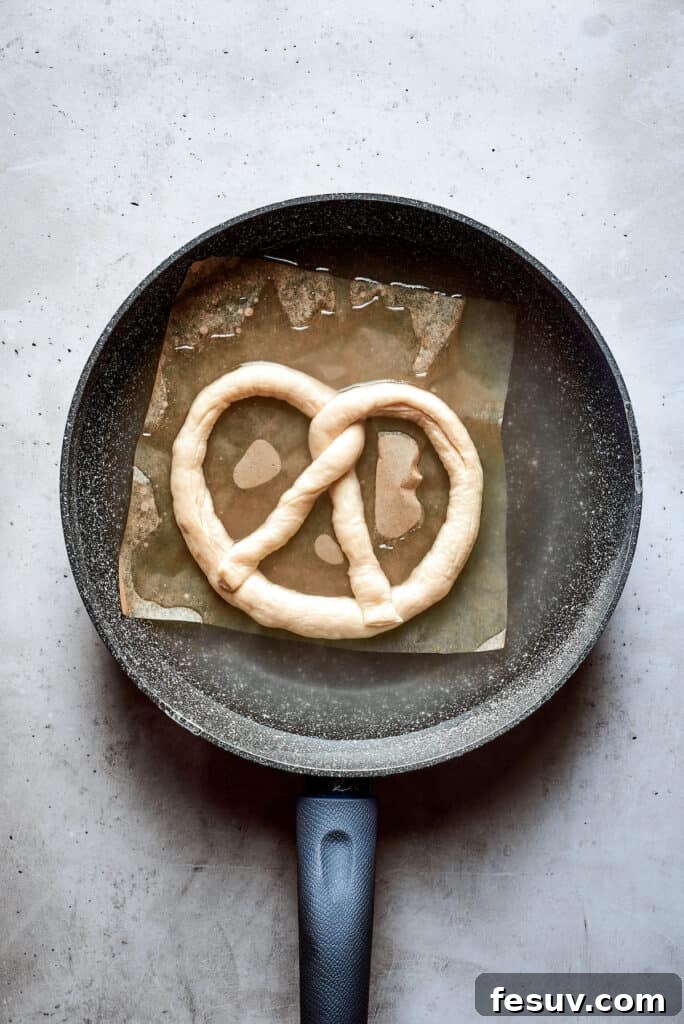
- The Baking Soda Bath Immersion: Working with one pretzel at a time, carefully immerse each shaped pretzel into the simmering baking soda bath using a slotted spoon or spatula. Let it boil for about 30 seconds per side (or 60 seconds total). The pretzel will puff up slightly. Remove the pretzel from the bath, allowing excess water to drip off, and place it onto the prepared baking sheet. Repeat this process for all remaining pretzels, working in batches to avoid overcrowding the pot.
- Season and Bake: Immediately after bathing, generously sprinkle coarse kosher or sea salt over the top of each pretzel. Transfer the baking sheets to the preheated oven. Bake for 12-15 minutes, or until the pretzels are a rich, golden brown color and have puffed up beautifully.
- Cool Slightly: Once baked, transfer the soft pretzels to a wire cooling rack to cool slightly before serving. While they are best enjoyed warm, allowing them to cool for a few minutes improves their texture.
Pretzel Dip
While your pretzels are baking or cooling, quickly whip up this incredibly addictive cheese dip:
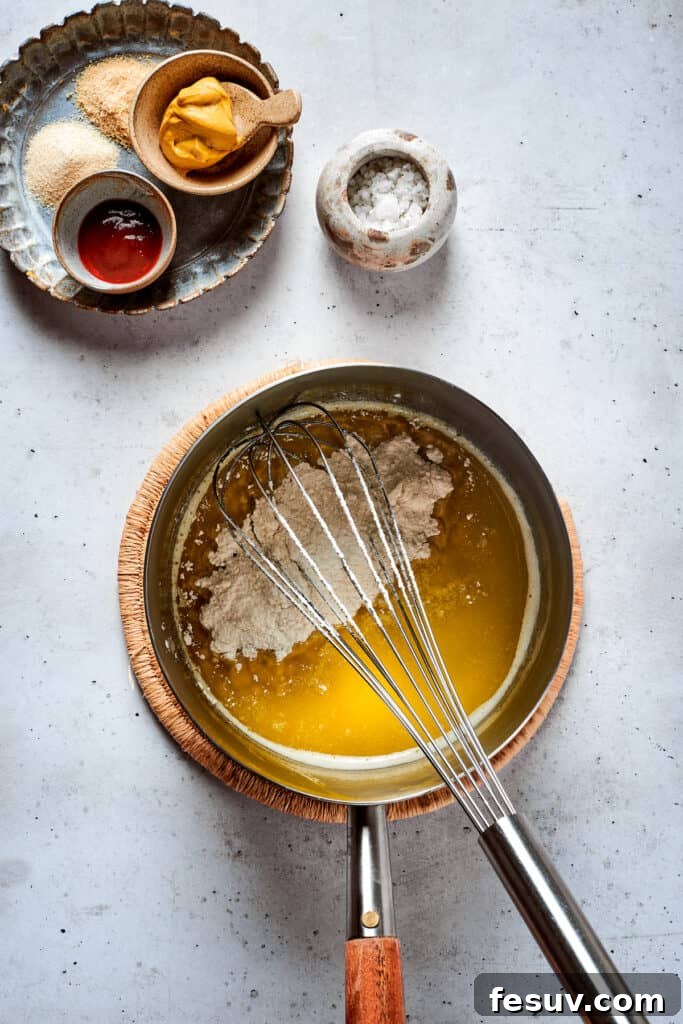
- Make the Roux: In a medium saucepan, melt the unsalted butter over medium heat. Once melted, add the all-purpose flour and whisk constantly for 1-2 minutes until a smooth paste (roux) forms and cooks off the raw flour taste. It should be light golden in color.
- Gradually Add Milk: Slowly pour in the whole milk, whisking continuously to prevent lumps. Continue to cook over medium heat, whisking frequently, until the mixture thickens to your desired consistency, usually about 4-5 minutes. It should be thick enough to coat the back of a spoon.
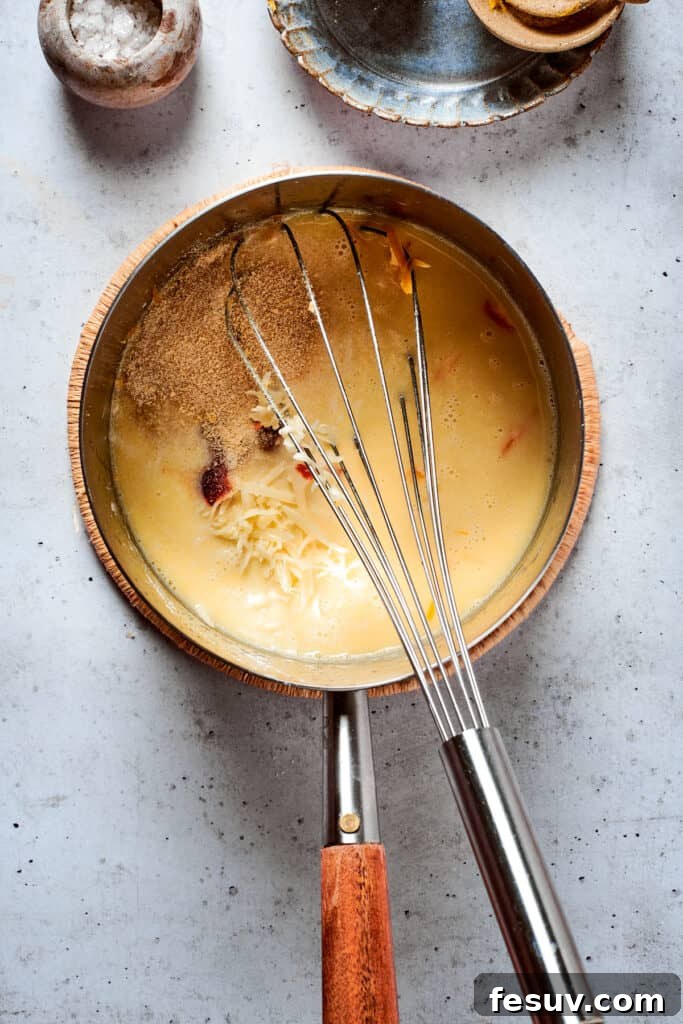
- Melt the Cheese: Reduce the heat to low. Stir in the shredded sharp Cheddar and Gouda cheeses, along with the salt, garlic powder, and onion powder. Continue stirring until the cheeses are completely melted and the sauce is smooth and creamy. Do not let the sauce boil once the cheese is added, as this can cause it to separate.
- Finish with Flavor: Remove the saucepan from the heat. Stir in the Dijon mustard and hot sauce (if using). Taste and adjust seasoning as needed.
- Serve Warm: Serve the luscious pretzel dip warm alongside your freshly baked soft pretzels. Enjoy dipping!
The Art of Shaping Perfect Soft Pretzels
Shaping pretzels is easier than it looks and becomes second nature after a few tries. Don’t worry if your first few aren’t perfect; they’ll still taste amazing! Here’s a detailed guide to forming that classic pretzel knot:
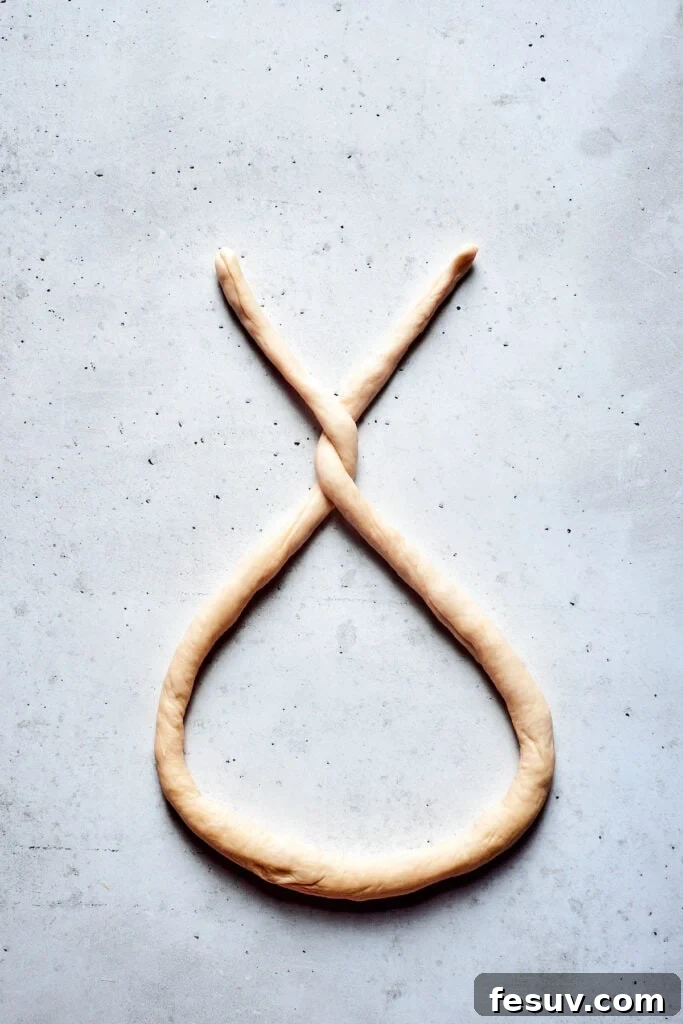
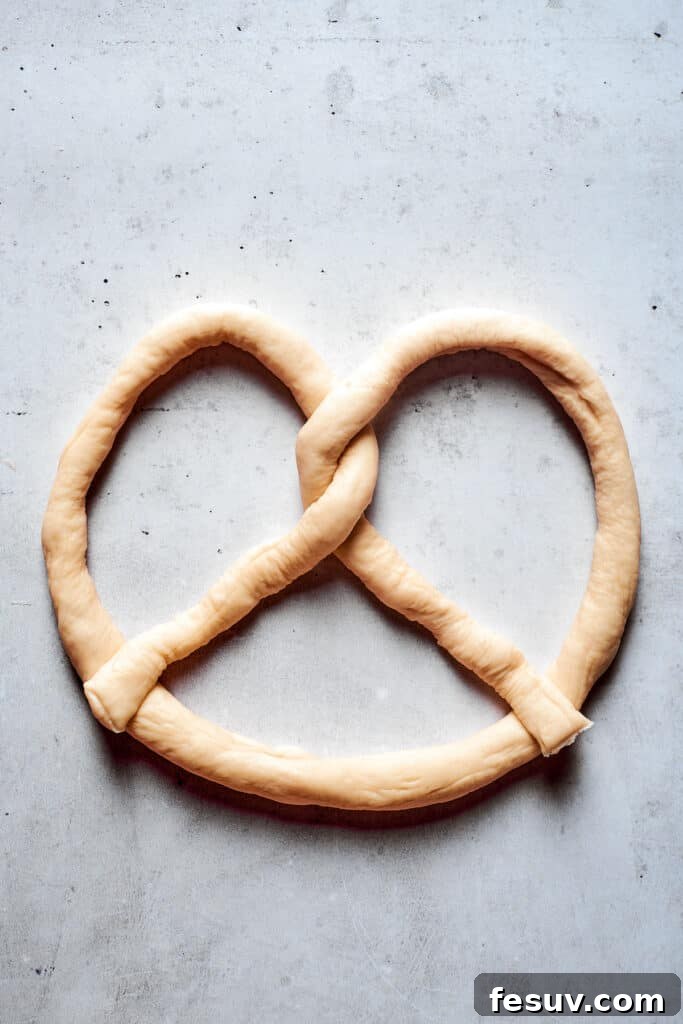
- Prepare the Dough Ropes: After dividing your dough into 12 equal portions, take one portion and roll it out on a lightly floured surface. Aim for a long, thin rope, approximately 18-20 inches (45-50 cm) in length, ensuring the ends are slightly tapered. The longer the rope, the more defined your pretzel shape will be.
- Form a “U” Shape: Hold the ends of the dough rope, one in each hand, and bring them together to form a “U” or horseshoe shape on your work surface.
- Twist the Ends: Cross the two ends of the “U” over each other, about 2-3 inches from the tips. Then, twist them around each other one more time. This creates the classic knot in the middle of the pretzel.
- Secure the Ends: Gently bring the twisted ends down and press them firmly onto the bottom curve of the “U” shape. This secures the pretzel shape. Ensure they are well-pressed to prevent them from unraveling during the baking soda bath and baking process.
- Repeat and Arrange: Repeat this process for the remaining dough portions. As you shape each pretzel, carefully place it on a prepared baking sheet.
Practice makes perfect! Even if your pretzels aren’t perfectly symmetrical at first, they will still taste incredibly delicious. Focus on getting a nice, even thickness for the ropes to ensure uniform baking.
Pro Tips and Creative Variations for Your Homemade Pretzels
To ensure your homemade soft pretzels turn out perfectly every time, and to inspire some creative twists, here are some invaluable tips and variations:
- Ensure Proper Dough Rise: The first rise (proofing) is critical for the dough’s texture and flavor development. Your dough should roughly double in size, indicating that the yeast is active and thriving. If your kitchen is cool, finding a warm spot can be tricky. A great trick is to preheat your oven to its lowest setting (around 110°F or 43°C) for a few minutes, then turn it off. Place the covered bowl of dough inside the slightly warm oven to proof. This creates a cozy, draft-free environment ideal for rising. Don’t rush this step; a slow, steady rise yields the best flavor and texture.
- Prepare Ahead for Convenience: This recipe is fantastic for making ahead, especially if you’re planning for a party or want fresh pretzels without all the immediate work. Prepare the dough as instructed, complete the first rise, then punch it down and place it in an airtight container. Store it in the refrigerator for up to 24 hours. When you’re ready to bake, you can shape the soft pretzels directly from the chilled dough. However, it’s best to let the shaped pretzels sit at room temperature for about 30-60 minutes to warm up slightly before they go into the baking soda bath. This allows the dough to relax and ensures a better texture.
- Explore Sweet Pretzel Variations: While the savory, salty classic with cheese dip is undeniably delicious, soft pretzels can also be a delightful sweet treat! Instead of coarse salt, consider combining cinnamon and granulated sugar for a warm, fragrant topping. Simply sprinkle this mixture over the bathed pretzels before baking. Alternatively, for a truly decadent experience, drizzle a little melted butter and then a generous amount of honey or a simple vanilla glaze over the baked pretzels. This opens up a world of dessert pretzel possibilities!
- The Importance of the Baking Soda Bath (and an Alternative): The baking soda bath is what truly transforms ordinary bread dough into an authentic soft pretzel, giving it that characteristic dark, crispy exterior and chewy interior. It’s highly recommended for the best results. However, if you are pressed for time or prefer a slightly less intense pretzel flavor, you can technically skip this step. If you choose to do so, brush the tops of the unbaked pretzels with a beaten egg wash (one egg whisked with a tablespoon of water) before placing them in the oven. This will still give them a nice golden color and a slightly softer crust, though it won’t replicate the distinct taste and chew of a true lye-bathed or baking soda-bathed pretzel.
- Don’t Overcrowd Your Baking Sheets: When placing pretzels on your baking sheets after the soda bath, ensure there is ample space between each one. Overcrowding can lead to uneven baking and prevent the pretzels from developing that beautiful all-around golden crust. Work in batches if necessary.
- Use Quality Ingredients: As with any recipe, the quality of your ingredients makes a difference. Fresh yeast, good quality flour, and flavorful cheeses for the dip will elevate your homemade soft pretzels to gourmet status.
Delightful Pairings: What to Serve with Homemade Soft Pretzels
While our homemade soft pretzels are undoubtedly fantastic on their own, especially when dipped into the creamy cheese sauce, their versatility means they pair beautifully with a variety of other dishes. Beyond being a standalone snack or appetizer, they can elevate a meal or round out a spread. Here are some delightful suggestions:
- Soups and Stews: The hearty, chewy nature of soft pretzels makes them an excellent accompaniment to warm, comforting bowls of soup. Imagine dunking them into a rich Loaded Baked Potato Soup, a classic French Onion Soup, or a fresh Roasted Tomato Basil Soup. They act as a perfect textural contrast and a delicious vessel for soaking up flavorful broths.
- Heartier Main Courses: For a more substantial meal, pretzels can be served alongside savory main dishes. They are a wonderful addition to robust chili, like our Chili Con Carne, offering a soft, salty counterpoint. Consider them a unique bread option with Grilled Chicken Shawarma Skewers, adding a delicious carbohydrate to balance the protein.
- Salads with a Twist: Introduce a delightful surprise by serving pretzels with your favorite salads. A fresh, crisp Asian Cabbage Slaw or a vibrant Big Mac Salad can benefit from the chewy texture and savory notes of a soft pretzel on the side, turning a light meal into something more satisfying.
- Other Appetizers & Finger Foods: Expand your snack spread by pairing pretzels with other crowd-pleasing bites. They complement mini appetizers beautifully, such as cheesy Mac and Cheese Bites or crispy Parmesan Crusted Potatoes. The combination offers a delightful variety of textures and flavors for any gathering.
- Beer Cheese Pairing: For adults, soft pretzels are famously delicious with a good craft beer. The robust flavors of a stout or a lager often find a perfect partner in the salty, chewy pretzel.
Ultimately, the best way to serve homemade soft pretzels is warm, straight from the oven, with a generous helping of that mustard-spiked cheese dip!
Storing and Reheating Your Delicious Soft Pretzels
While freshly baked soft pretzels are undoubtedly at their peak, you can absolutely enjoy leftovers or prepare a batch for future indulgence. Proper storage and reheating techniques will help maintain their deliciousness.
- Countertop Storage: For enjoyment within a few days, allow your baked and cooled soft pretzels to come to room temperature completely. Place them in an airtight container or a large zip-top bag. They will stay fresh and delicious on your kitchen counter for up to 3 days. While they might lose a little of their initial crispness, a quick reheat can revive them.
- Reheating from Refrigeration: If stored on the countertop, reheating is a breeze. For individual pretzels, a microwave can warm them up quickly: heat for 10-20 seconds, or until warm to the touch. Be careful not to overheat, as they can become tough. For multiple pretzels, place them on a baking sheet and reheat in a preheated oven at 350°F (175°C) for about 5-7 minutes, or until warmed through and slightly crisp on the outside.
- Freezing for Longer Freshness: Soft pretzels freeze exceptionally well, making them ideal for meal prep or having a quick snack on hand. Once baked and completely cooled, arrange the pretzels in a single layer on a baking sheet and freeze until solid (this prevents them from sticking together). Then, transfer the frozen pretzels to a heavy-duty freezer-safe bag or container, placing a piece of parchment paper between each pretzel to prevent them from adhering. They can be stored in the freezer for up to 3 months.
- Reheating from Frozen: No need to thaw! You can reheat frozen soft pretzels directly from the freezer. Place the frozen pretzels on a baking sheet and bake in a preheated oven at 350°F (175°C) for approximately 15-20 minutes, or until they are thoroughly heated and lightly crisped. Alternatively, you can microwave frozen pretzels in 30-second intervals until warm, though oven reheating generally yields a better texture.
The cheese dip can also be stored in an airtight container in the refrigerator for up to 3-4 days. Reheat gently on the stovetop over low heat, stirring frequently, or in the microwave in short bursts, stirring between each to prevent separation.
More Easy Snack Recipes to Savor
If you’ve enjoyed making these delightful soft pretzels, you’re in for a treat with more of our simple and satisfying snack recipes:
- Homemade Bagel Chips: Crispy, flavorful, and perfect for dipping or snacking on their own.
- Chili Cheese Fries: The ultimate comfort food, loaded with savory chili and melted cheese.
- Fruit Sando: A light, elegant, and refreshing Japanese fruit sandwich, perfect for a sweet treat.
- Garlic Fries: A fragrant and addictive side dish that’s impossible to resist.
Print Recipe
Soft Pretzels with Pretzel Dip
Katerina | Easy Weeknight Recipes
25 minutes
30 minutes
1 hour
2 hours
12
Ingredients
For the Soft Pretzels
- 4½ cups all-purpose flour
- 2¼ teaspoons active dry yeast
- 3 tablespoons granulated sugar
- 1½ cups milk (whole or 2%)
- ½ cup water
- 2 tablespoons olive oil (extra virgin recommended)
For the Baking Soda Bath
- 1 gallon water
- ½ cup baking soda
For the Topping
- Coarse kosher or sea salt for topping
For the Pretzel Dip
- 3 tablespoons unsalted butter
- 3 tablespoons all-purpose flour
- 1 teaspoon salt
- 2 cups whole milk
- 1 cup sharp cheddar cheese, shredded
- 1 cup Gouda cheese, shredded
- ½ teaspoon garlic powder
- ½ teaspoon onion powder
- 1 teaspoon Dijon mustard
- 1 teaspoon hot sauce (optional)
Instructions
Soft Pretzels
-
In a small saucepan, warm the milk and water over low heat until it reaches around 105-115°F (40-46°C). Use a thermometer to ensure it’s not too hot, as it can kill the yeast. Remove from heat.
-
In a large mixing bowl, combine the active dry yeast, granulated sugar, and all-purpose flour. Pour the warm milk and water mixture over it, add olive oil and stir until a shaggy dough forms, then combine until cohesive.
-
Knead the dough on a lightly floured surface for about 8-10 minutes until it becomes smooth and elastic.
-
Place the dough in a greased bowl, cover it with a clean kitchen towel or plastic wrap, and let it rise in a warm, draft-free place for about 1 hour or until it has doubled in size.
-
Preheat your oven to 450°F (230°C). Line two large baking sheets with parchment paper or silicone baking mats.
-
In a large pot, bring 1 gallon of water to a rolling boil, then carefully add ½ cup of baking soda. Reduce heat to a simmer.
-
Gently punch down the risen dough and divide it into 12 equal portions. Roll each portion into a long rope (18-20 inches) and shape it into a pretzel (see “How to Shape Pretzels” section).
-
Working in batches, carefully dip each pretzel into the simmering baking soda water for about 30 seconds per side (60 seconds total). Remove with a slotted spoon, allowing excess water to drain, and place onto the prepared baking sheet.
-
Generously sprinkle coarse kosher or sea salt on top of each bathed pretzel.
-
Bake the pretzels in the preheated oven for 12-15 minutes or until they are a deep golden brown. Transfer to a wire rack to cool slightly.
Pretzel Dip
-
In a medium saucepan over medium heat, melt the unsalted butter. Add the all-purpose flour and cook, stirring constantly, for 1-2 minutes to make a roux.
-
Gradually whisk in the whole milk. Continue to cook and whisk until the mixture thickens, about 4-5 minutes.
-
Reduce heat to low. Stir in the shredded Cheddar and Gouda cheeses, salt, garlic powder, and onion powder until the cheeses are fully melted and the sauce is smooth and creamy. Do not boil.
-
Remove the saucepan from the heat and stir in the Dijon mustard and hot sauce (if using). Taste and adjust seasoning.
-
Serve the pretzel dip warm with the freshly baked soft pretzels.
Equipment
-
Measuring Cups and Spoons
-
Saucepan
-
Mixing Bowls
-
Baking Sheets
-
Large Pot or Dutch Oven
-
Slotted Spoon or Spatula
-
Wire Cooling Rack
Notes
- Shaping Perfection: To achieve the classic soft pretzel shape, roll each dough portion into a long, thin rope (about 18-20 inches). Form a “U” shape, twist the ends over each other twice, then firmly press the twisted ends onto the bottom curve of the “U”. Don’t worry if they aren’t perfect; practice makes perfect, and they’ll taste delicious regardless!
- Optimal Dough Rise: The dough needs to roughly double in size during its first rise. If your kitchen is cool, you can create a warm environment by preheating your oven to 110°F (43°C), then turning it off and placing the covered bowl of dough inside. This helps the yeast activate properly.
- Make-Ahead Dough: For convenience, prepare the dough up to the end of the first rise, then punch it down and place it in an airtight container in the fridge for up to 24 hours. When ready to use, shape the cold dough and then let the shaped pretzels rest at room temperature for about 30-60 minutes to warm up before the baking soda bath.
- Sweet or Savory: While typically salty, these pretzels can easily go sweet! Instead of coarse salt, sprinkle a mixture of cinnamon and sugar on the pretzels before baking. You could also drizzle them with honey or a simple icing after baking for a dessert pretzel.
- Baking Soda Bath Alternatives: The baking soda bath is highly recommended for that signature chewy pretzel texture and deep brown crust. If you’re very short on time, you can skip this step. However, for a golden finish, brush the un-bathed pretzels with a beaten egg (egg wash) before baking. Note that the texture will be less authentic without the bath.
- Storage & Reheating: Store cooled, baked pretzels in an airtight container at room temperature for up to 3 days. Reheat in the microwave for a few seconds or in an oven at 350°F (175°C) for 5-7 minutes. For longer storage, freeze cooled pretzels for up to 3 months, separating them with parchment paper. Reheat frozen pretzels in the oven at 350°F (175°C) for 15-20 minutes, or in short bursts in the microwave.
Nutrition Facts (per serving)
Carbohydrates: 45g
Protein: 15g
Fat: 17g
Saturated Fat: 9g
Polyunsaturated Fat: 1g
Monounsaturated Fat: 5g
Trans Fat: 0.1g
Cholesterol: 48mg
Sodium: 1843mg
Potassium: 200mg
Fiber: 2g
Sugar: 7g
Vitamin A: 409IU
Vitamin C: 0.3mg
Calcium: 311mg
Iron: 2mg
Nutritional info is an estimate and provided as courtesy. Values may vary according to the ingredients and tools used. Please use your preferred nutritional calculator for more detailed info.
Did you make a recipe? Leave a rating