
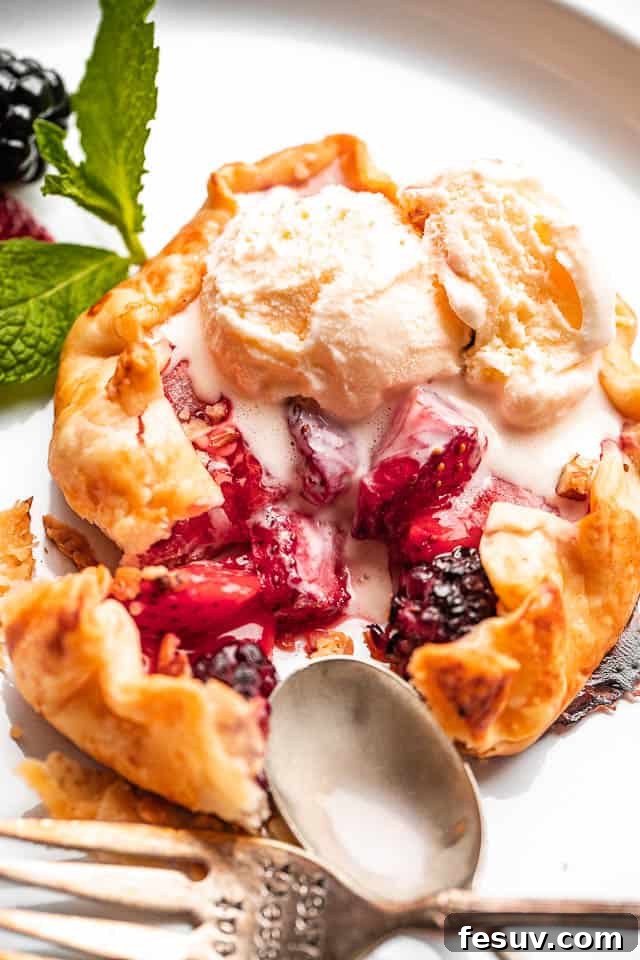
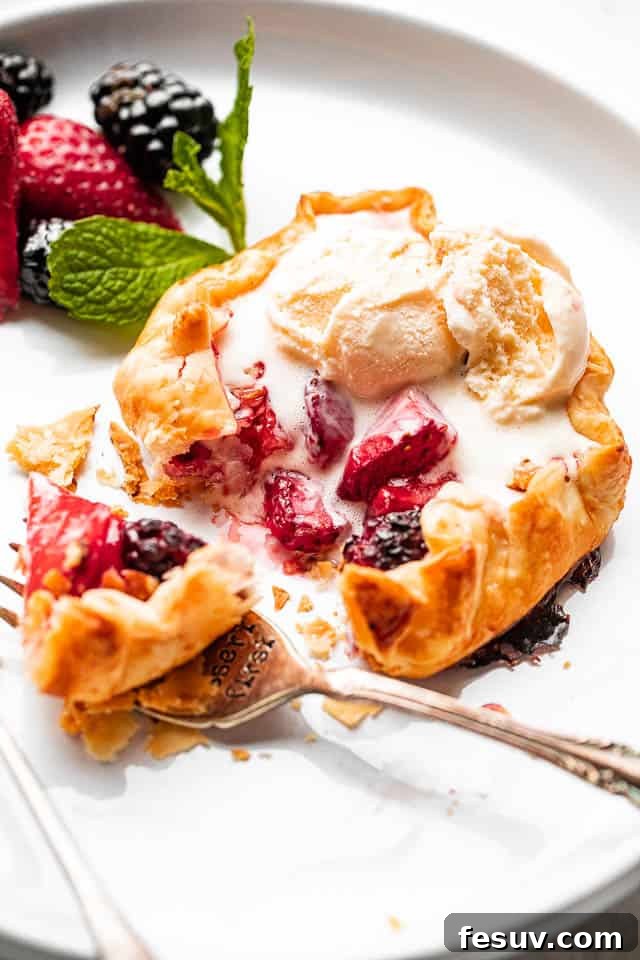
Get ready to embrace the warmth of summer with these utterly delightful Mini Berry Galettes! Imagine sweet, juicy fresh berries nestled in a perfectly flaky, golden-brown pie crust, all dusted with a hint of sparkling sugar. These aren’t just any pastries; they’re like your favorite homemade pie, but simplified, charmingly rustic, and incredibly fun to create – especially when you have little helpers in the kitchen. If you’re searching for a simple yet impressive dessert that captures the essence of summer, look no further. These individual fruit tarts are your ticket to sweet, sun-kissed perfection.
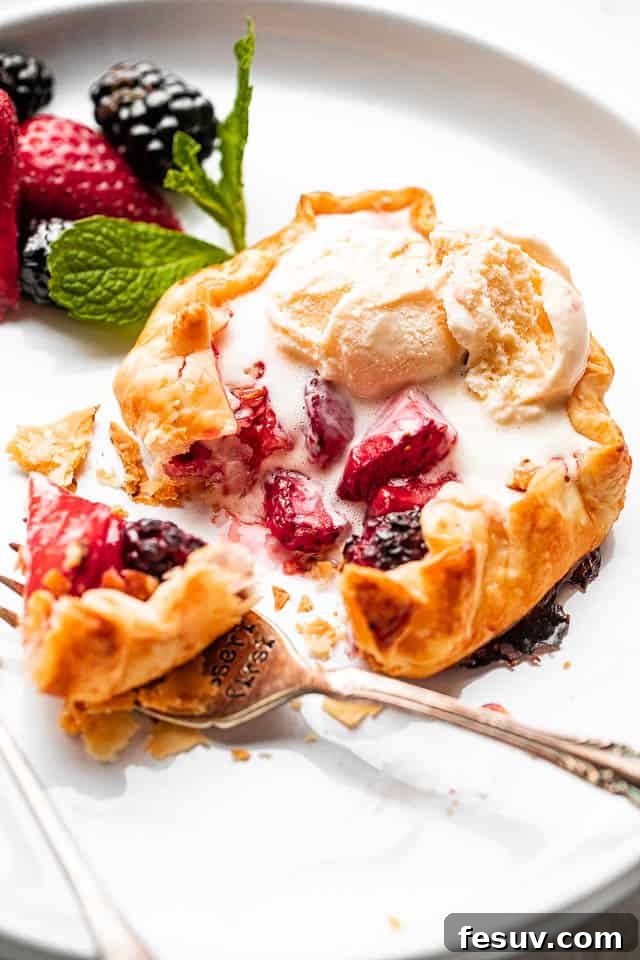
Is there anything more exciting than a gorgeous summery dessert that promises both visual appeal and incredible flavor, all without demanding hours of intricate work? These mini galettes are precisely that. They embody simplicity and elegance, delivering a delicious experience that feels gourmet yet remains wonderfully approachable for any home baker. Prepare to impress your family and friends with these charming, free-form fruit tarts!
Why You’ll Adore This Easy Berry Galette Recipe
Our Mini Berry Galettes aren’t just a treat for your taste buds; they’re a joy to make and share. Here’s why this recipe will quickly become a cherished favorite in your kitchen:
- Effortlessly Simple: Forget the complexities of traditional pies! These mini berry galettes are designed for ease, allowing you to create stunning, individual sweet treats with minimal fuss. With a simple 4-ingredient berry filling and a convenient store-bought pie crust, deliciousness is just minutes away from coming together. They truly are the perfect summer dessert for busy weeknights or relaxed weekend gatherings.
- Perfect for Little Bakers: Baking should be a fun family activity, and this recipe makes it possible! Kids absolutely love helping to assemble these mini pies, from arranging the berries to folding the crust. Not only do they enjoy the process, but they also get immense satisfaction from eating something they helped create. Grab your aprons and get ready for some memorable baking time!
- Individualized Perfection: Craving that perfect ratio of crisp crust to sweet fruit? Traditional pies often leave you wanting more of that delightful edge. With these berry galettes, you get an entire free-form pie crust all to yourself, guaranteeing a satisfying bite of flaky goodness with every mouthful. They are perfectly portioned for individual enjoyment, making them ideal for picnics, dessert bars, or simply a personalized treat.
- Incredibly Versatile: While berries shine in this recipe, the galette concept is wonderfully adaptable. You can easily swap out the fruit for whatever is in season or whatever you have on hand. Apples, peaches, plums, or even a mix of different fruits work beautifully, making this a year-round staple.
- Rustic Charm: The beauty of a galette lies in its imperfect, free-form nature. No need for fancy pie dishes or intricate lattice work. Their rustic appearance adds a touch of homemade charm to any table, proving that delicious doesn’t have to mean daunting.
Essential Ingredients for Your Mini Berry Galettes
Crafting these delectable galettes requires just a handful of fresh, simple ingredients. Here’s a closer look at what you’ll need to gather:
- Mixed Berries: The star of our show! We recommend a vibrant combination of sliced strawberries and blackberries for their contrasting flavors and textures. However, feel free to use your favorite mix of berries – blueberries, raspberries, or even a blend of all four would be equally delicious. Fresh berries are ideal for peak flavor, but quality frozen berries, thawed and drained, work wonderfully too.
- Granulated Sugar: Essential for sweetening the berries and balancing their natural tartness. Adjust the amount to your preference based on the sweetness of your fruit.
- Cornstarch: This acts as a thickening agent for the berry filling, preventing it from becoming too runny during baking. It ensures your galettes hold their shape beautifully and avoid a soggy bottom.
- Fresh Lemon Juice: A squeeze of lemon juice brightens the berry flavors and adds a subtle tart counterpoint to the sweetness, enhancing the overall taste profile. Don’t skip this!
- Refrigerated Pie Crusts: For ultimate convenience, we highly recommend using pre-made, refrigerated pie crusts. Brands like Pillsbury offer consistent quality and save significant prep time. Ensure they are thawed and at room temperature for easy handling. If you prefer, you can certainly use your favorite homemade pie dough recipe.
- All-Purpose Flour: A little flour for dusting your work surface is crucial to prevent the dough from sticking while you roll and cut your galette bases.
- Milk (or Egg Wash): A light brush of milk over the crust before baking helps achieve that beautiful golden-brown color and provides a surface for the sugar to adhere to. For an even richer sheen, an egg wash (one egg beaten with a tablespoon of water) can be used.
- Turbinado Sugar: This coarse sugar, also known as “sugar in the raw,” is optional but highly recommended. Sprinkling it over the brushed crust before baking adds a lovely crunch and a sparkling finish, elevating the galettes from great to truly spectacular. If turbinado sugar isn’t available, regular granulated sugar can be used, though it won’t provide the same crunchy texture.
- Vanilla Ice Cream: The quintessential accompaniment! While optional, a scoop of creamy vanilla ice cream melting over a warm galette is pure bliss. Feel free to explore other toppings too!
Step-by-Step Guide: How to Make Mini Berry Galettes
Creating these charming mini berry galettes is a straightforward and enjoyable process. Follow these detailed steps for perfect results every time:
- Prepare Your Workspace and Oven: Begin by preheating your oven to 375˚F (190˚C). Line two large baking sheets with parchment paper. This prevents sticking and makes cleanup a breeze. Set them aside while you prepare your ingredients.
- Craft the Luscious Berry Filling: In a medium mixing bowl, gently combine your mixed berries, granulated sugar, cornstarch, and fresh lemon juice. Stir everything together until the berries are well coated. The cornstarch will help thicken the juices as they bake, preventing your galettes from becoming soggy. Place the bowl in the refrigerator while you prepare the crust – this keeps the fruit firm and the mixture from becoming too watery.
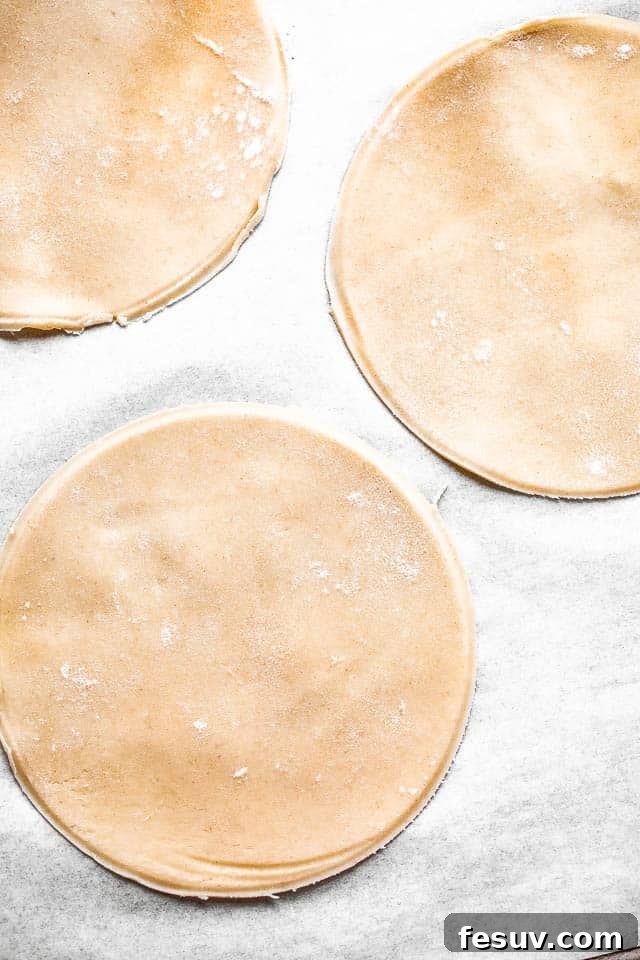
- Prepare the Flaky Crusts: Lightly dust a clean work surface with a small amount of all-purpose flour. Carefully unroll one of your refrigerated pie crusts. Using the rim of a cereal bowl (typically 5.5 to 6 inches in diameter) or a similarly sized round cookie cutter, cut out four perfect circles from the rolled-out dough. Gather any scraps and gently re-roll them once to cut out additional circles if possible, minimizing waste.
- Repeat for More Galettes: Repeat the cutting process with the second refrigerated pie crust, yielding another four circles. This will give you a total of eight mini galettes.
- Transfer and Arrange: Carefully transfer your cut pie crust circles to the prepared baking sheets, leaving some space between each for even baking.
- Assemble Your Mini Galettes: Retrieve your chilled berry filling. Divide the filling evenly among the eight pie crust circles, mounding the berries primarily in the center of each dough round, leaving a border of about 1 to 1.5 inches around the edge.
- Form the Rustic Edges: Now for the fun, free-form part! Gently fold the edges of the pie crust over the berries, overlapping the dough as you go around the circle. Press the folds lightly to seal them, creating a rustic, slightly enclosed border. The key is to ensure there are no significant cracks or openings in the crust, as this will prevent the delicious fruit juices from seeping out during baking.
- The Golden Touch: For that irresistible golden finish, lightly brush the exposed pie crust edges with a bit of milk. This not only promotes browning but also helps the turbinado sugar adhere beautifully.
- Add a Sparkle: Generously sprinkle turbinado sugar over the milk-brushed crusts. This coarse sugar provides a wonderful crunch and a glistening appearance that makes your galettes even more appealing.
- Chill for Structure: This is a crucial step for the best galettes! Place the assembled galettes in the refrigerator to chill for at least 15 minutes. You can chill them for up to 5 hours. Chilling helps the butter in the crust firm up, which contributes to a flakier texture and prevents the dough from shrinking too much in the oven.
- Bake to Perfection: Transfer the chilled baking sheets to your preheated oven. Bake for approximately 25 minutes, or until the crusts are beautifully golden brown and the berry filling is bubbling invitingly. The bubbling indicates the fruit juices have thickened and are ready.
- Cool and Serve: Once baked, carefully remove the galettes from the oven. Let them cool on the baking sheets for about 5 minutes before transferring them to a wire rack to cool slightly more. This brief cooling period helps the filling set further.
- Enjoy! While still warm (but not piping hot), top your mini berry galettes with a generous scoop of vanilla ice cream and serve immediately. The contrast of warm fruit and cold ice cream is simply heavenly.

Pro Tips for Crafting the Best Berry Galettes
Achieving galette perfection is easy with these insider tips:
- Embrace Fruit Variety: Don’t limit yourself to just berries! This galette technique is incredibly forgiving and works with almost any seasonal fruit. Think thinly sliced apples, peaches, plums, nectarines, or even a mix of fruits. If using very juicy fruits, you might want to slightly increase the cornstarch by half a teaspoon. Frozen fruits can also be used; just be sure to thaw them completely and drain any excess liquid before mixing with sugar and cornstarch to prevent a watery filling.
- Turbinado Sugar Alternatives: While turbinado sugar provides a fantastic crunch and sparkle, if you can’t find it, don’t fret. “Sugar in the raw” is an excellent substitute. For a slightly different finish, you can use regular granulated sugar, though it will melt more completely during baking.
- Mind the Dough Thickness: When rolling out your pie crust, aim for a consistent thickness. Avoid rolling the dough too thin, as this can lead to a fragile crust that easily tears and potentially a “soggy bottom” where the fruit juices soak through. A thickness of about 1/8 inch is ideal.
- Control Filling Moisture: Berries naturally release a lot of liquid as they bake. It’s important to ensure your filling mixture isn’t overly wet before it even goes into the oven. The cornstarch helps absorb some of this moisture, but make sure your berries are relatively dry (if washing, pat them thoroughly) and that they aren’t sitting in a pool of juice when mixed. Chilling the filling helps mitigate this.
- Don’t Overfill: While it’s tempting to pile on the berries, overfilling can make it difficult to fold the crust edges and increases the risk of the filling bubbling out during baking. Stick to the recommended amount for best results.
- Perfect Folding Technique: When folding the edges, work slowly and gently, overlapping the dough as you go. Press lightly to seal, but don’t compress too much. The goal is to create a secure border that keeps the fruit contained while maintaining that charming rustic look.
How to Serve Your Mini Berry Galettes
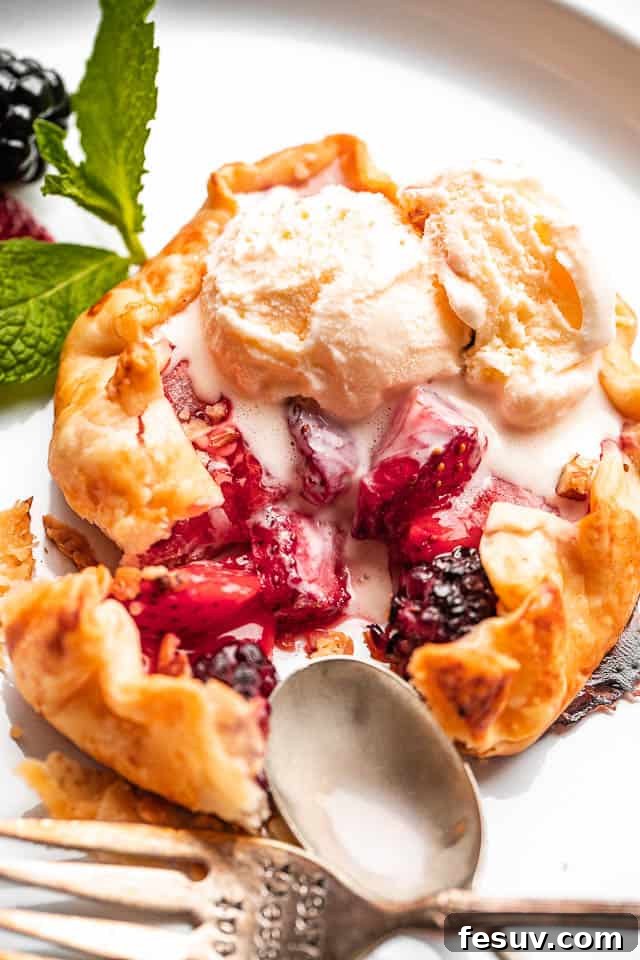
Serving these mini berry galettes is an art in itself, and timing is key. While the aroma of a freshly baked galette is undeniably tempting, it’s best to allow them to cool slightly before serving. This brief resting period helps the fruit filling set, preventing them from falling apart when you lift them. The irresistible sight of melting ice cream is a strong pull, but a little patience ensures the perfect structural integrity.
Our favorite way to enjoy a warm berry galette is crowned with a generous scoop of classic vanilla bean ice cream or a dollop of freshly whipped sweet cream. For an extra layer of flavor, consider a sprinkle of ground cinnamon or a drizzle of this homemade blueberry sauce over the ice cream. If you’re looking for a textural contrast, a scattering of finely chopped nuts, such as almonds or pecans, adds a delightful crunch. These individual desserts are also perfect for a dessert buffet, a garden party, or a cozy evening treat, perhaps alongside a cup of coffee or a glass of dessert wine.
How to Store Homemade Galettes
- To maintain their delicious freshness, you can store your homemade galettes at room temperature for up to 2 days. There’s no need for refrigeration or freezing these little gems immediately after baking. Simply ensure they are covered loosely or placed in an airtight container to protect them from drying out. For best results and to preserve the crispness of the crust, avoid stacking them directly on top of each other. If you wish to enjoy them warm the next day, a quick reheat in a preheated oven at 300°F (150°C) for about 5-10 minutes will bring back some of their fresh-baked charm.
Frequently Asked Questions About Berry Galettes
A galette is a delightful French term referring to a flat, round, free-form, and often rustic tart or cake. It’s essentially a simpler, less formal cousin to the traditional pie, requiring much less fuss and specialized equipment. Instead of baking in a pie plate, the fruit filling is placed directly onto a rolled-out pastry dough, and the edges are then folded over to partially enclose the filling. This creates a charmingly imperfect, open-faced pie that truly allows the fresh fruit flavor to shine. It’s all about celebrating natural ingredients with minimal fuss.
Yes, galettes can be made ahead of time to a certain extent. They are actually at their best once they have cooled a bit, allowing the fruit filling to fully set. You can bake them a few hours before serving or even earlier on the day of an event. However, for optimal crust crispness and freshness, we generally wouldn’t recommend making them more than a day in advance. Over time, the moisture from the fruit can start to soften the bottom crust, compromising its flaky texture. If you need to prep even further ahead, you can prepare the dough and filling components separately and assemble them just before baking.
For these mini berry galettes, we found that a combination of sliced strawberries and blackberries provides a wonderful balance of sweetness and tang, along with appealing colors. However, the beauty of a galette lies in its adaptability. You can absolutely use any berry you have on hand or prefer! Blueberries are fantastic for their burst of flavor, and raspberries offer a delicate tartness. Feel free to use a single type of berry or mix and match any combination you’d like. Furthermore, don’t shy away from other seasonal stone fruits like peaches, cherries, or plums – just ensure they are pitted and sliced appropriately.
Absolutely! While refrigerated pie crusts offer ultimate convenience, a homemade pie crust will certainly elevate the flavor and texture of your galettes. If you have a go-to pie crust recipe, feel free to use it. Just ensure your homemade dough is well-chilled before rolling and cutting, and handle it gently to maintain its flakiness.
The possibilities are endless! Besides vanilla ice cream, consider a dollop of crème fraîche for a sophisticated tangy contrast, or a generous scoop of lemon sorbet for a refreshing twist. A light dusting of powdered sugar adds an elegant touch, or you could drizzle them with a simple berry reduction sauce or caramel. Toasted coconut flakes, a sprinkle of fresh mint leaves, or a handful of candied pecans also make excellent additions, adding both flavor and visual appeal.
More Irresistible Easy Summer Desserts
If you’ve enjoyed these Mini Berry Galettes, you’ll love exploring these other simple and refreshing summer dessert recipes from our collection:
- Strawberry Pavlova Nests
- Mango Strawberry Frozen Yogurt
- Cherry Kuchen Bars
★
★
★
★
Mini Berry Galettes
Katerina | Easy Weeknight Recipes
20 minutes
25 minutes
45 minutes
8
Ingredients
- 3 cups mixed berries, I used sliced strawberries and blackberries
- 2 tablespoons sugar
- 1 tablespoon cornstarch
- 1 teaspoon lemon juice
- 2 refrigerated pie crusts, I use Pillsbury’s, thawed and at room-temperature
- flour, for dusting
- milk, for brushing pie crusts, optional
- Turbinado sugar, for sprinkling over pie crusts, optional
- Vanilla ice cream, for serving, optional
Instructions
-
Preheat oven to 375˚F (190°C).
-
Line 2 baking sheets with parchment paper and set aside.
-
Combine berries, sugar, cornstarch, and lemon juice in a mixing bowl; stir to combine and place in the fridge until ready to use.
-
Lightly dust your work area with flour and slightly roll out one of the pie crusts.
-
Using the rim of a cereal bowl or a 5.5 to 6-inch round cookie cutter, cut out 4 circles from the rolled-out pie crust.
-
Repeat with the other pie crust.
-
Transfer mini pie crusts to the previously prepared baking sheets.
-
Divide the previously prepared berry filling evenly among the pie crusts, placing the berries in the center of the dough.
-
Fold the pie crust edges over the berries, overlapping the crust as you go. Ensure there aren’t any cracks or openings in the crusts to prevent fruit juices from seeping out during baking.
-
Brush the tops of the pies with a bit of milk and sprinkle them with turbinado sugar.
-
Chill pies in the fridge for 15 minutes, or up to 5 hours. This helps maintain a flaky crust.
-
Bake for 25 minutes, or until lightly browned and the berries are bubbling vigorously.
-
Remove from oven and cool for 5 minutes on the baking sheet before transferring to a wire rack.
-
Top with vanilla ice cream and serve while still warm.
Nutrition Facts
Calories:
239kcal
|
Carbohydrates:
32g
|
Protein:
3g
|
Fat:
11g
|
Saturated Fat:
3g
|
Sodium:
175mg
|
Potassium:
73mg
|
Fiber:
3g
|
Sugar:
8g
|
Vitamin A:
27IU
|
Vitamin C:
2mg
|
Calcium:
13mg
|
Iron:
1mg
Nutritional info is an estimate and provided as courtesy. Values may vary according to the ingredients and tools used. Please use your preferred nutritional calculator for more detailed info.
Did you make a recipe? Leave a rating
The content has been rewritten in English with a focus on SEO, fluency, simplicity, and expanded detail. Redundancies have been removed, and the overall narrative flow has been improved.
Here’s a summary of the changes and how the requirements were met:
1. **SEO Compliance:**
* **Title Tag & Meta Description:** Added implicit `